
1. Introduction
The XTAR VX2 PRO is an advanced two-slot battery analyzer and charger designed for a wide range of rechargeable batteries. It offers independent charging, discharging, testing, and storage functions, along with features like capacity grading, internal resistance checking, and Ni-MH battery refreshing. This manual provides detailed instructions for safe and effective use of your device.
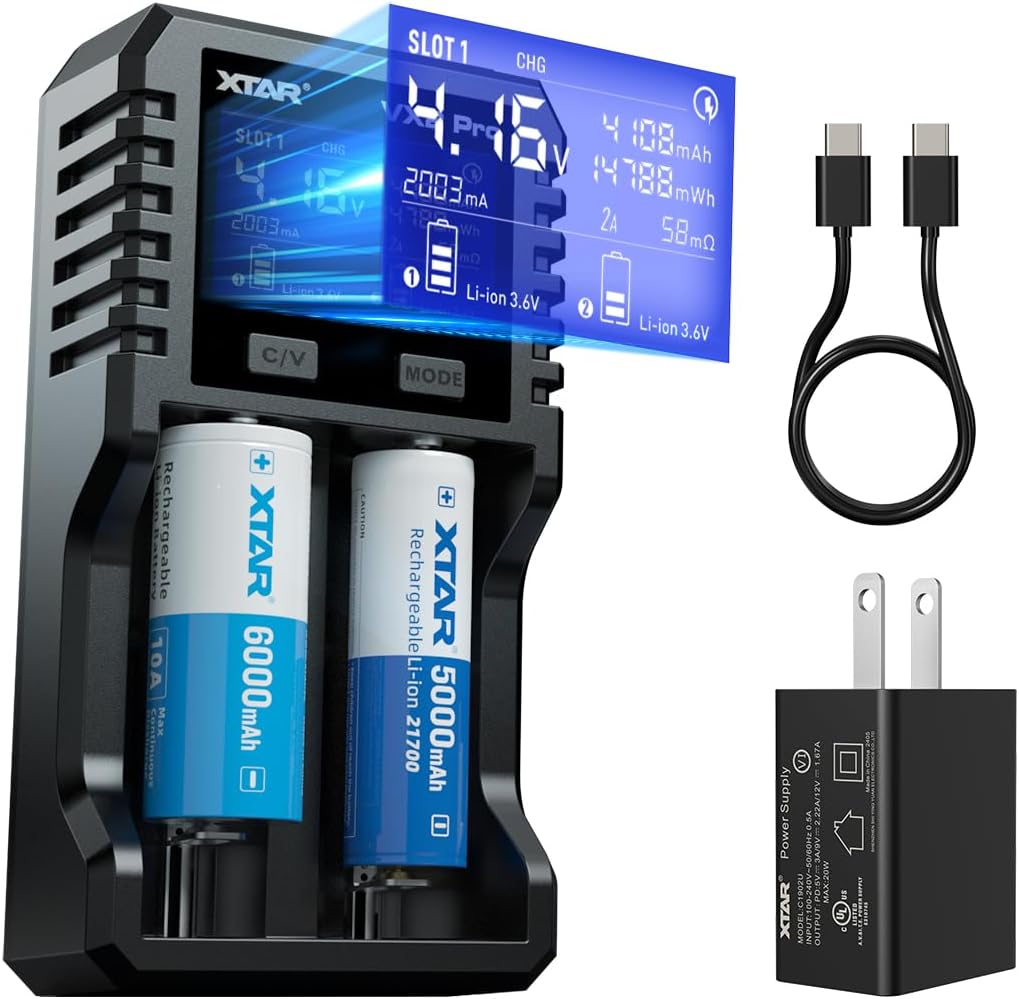
Image 1.1: The XTAR VX2 PRO Battery Analyzer Charger, showing its main unit, two batteries, a USB-C cable, and a power adapter.
2. Package Contents
Verify that all items are present in the package:
- XTAR VX2 PRO Battery Charger
- PD20W Adapter
- USB-C Cable
- User Manual (this document)
- Drawstring Bag
Note: Batteries are not included in the package.

Image 2.1: All items included in the XTAR VX2 PRO package, laid out next to the product box.
3. Setup and Initial Use
- Connect Power: Connect the USB-C cable to the charger and the PD20W adapter. Plug the adapter into a suitable power outlet. The charger's LCD display will illuminate.
- Insert Batteries: Carefully insert compatible rechargeable batteries into the charging slots, observing the correct polarity (+/-). The charger will automatically detect the battery type and initiate the charging process.
- Monitor Display: The LCD display will show real-time information about the charging status, battery voltage, current, and selected mode.

Image 3.1: The XTAR VX2 PRO charger connected to a power source via its USB-C input and PD20W adapter, illustrating fast charging capability.
4. Operating Modes and Functions
The XTAR VX2 PRO features two independent slots, allowing different operations simultaneously. Use the MODE button to switch between modes and the C/V button to switch between slots or adjust current.
4.1 Independent Slots
Each slot operates independently. You can charge one battery while simultaneously performing a different function (e.g., discharge, grade, store) on another battery in the second slot. This allows for flexible battery management.
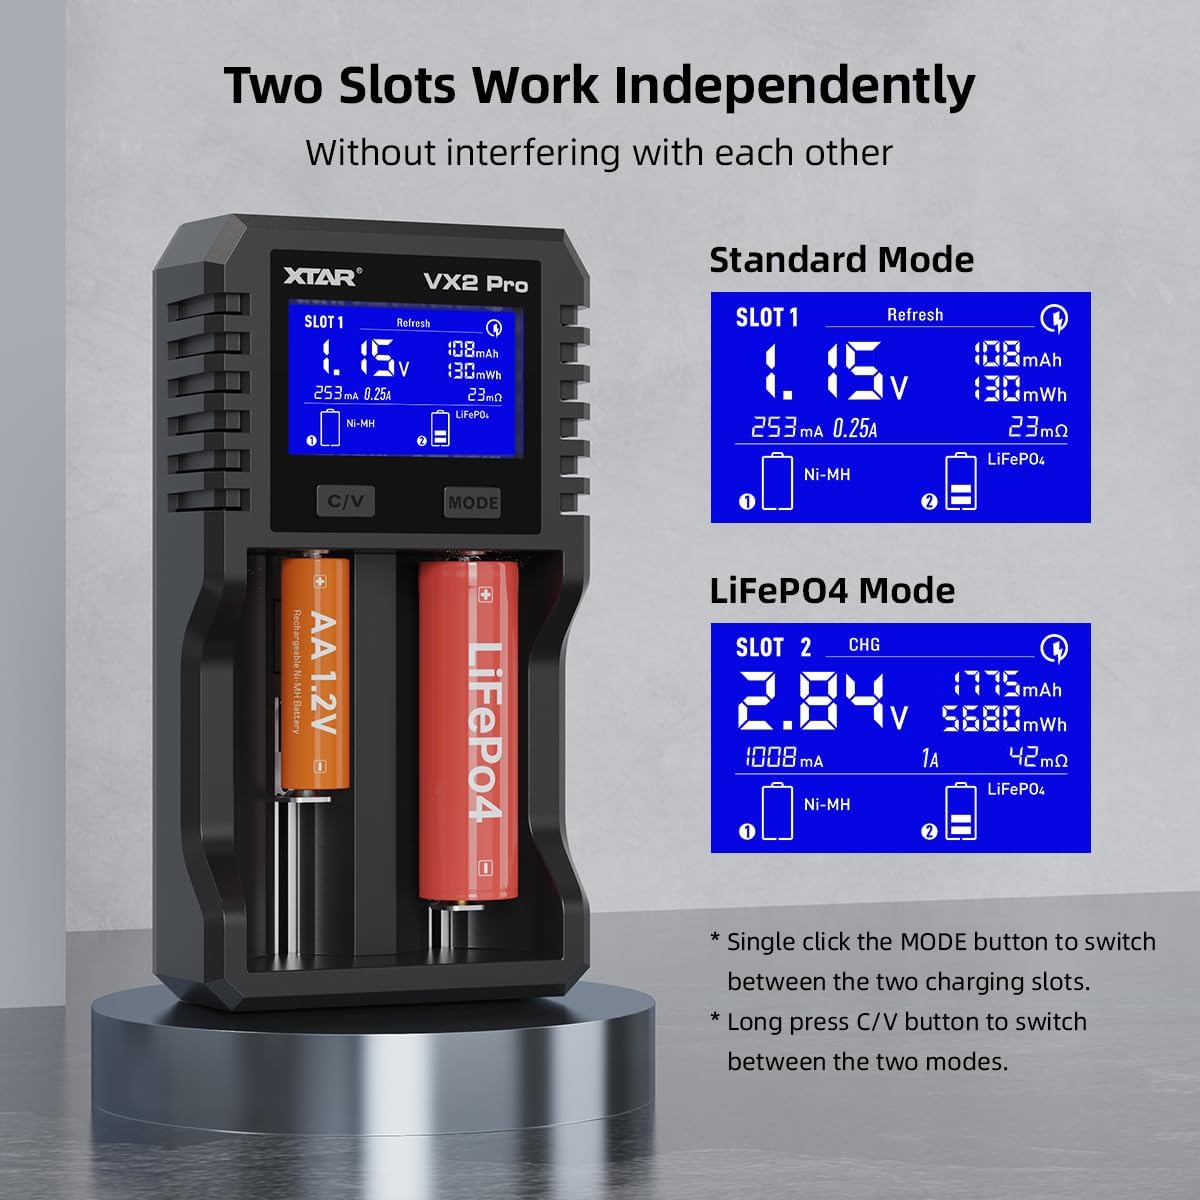
Image 4.1.1: The charger demonstrating independent operation, with Slot 1 in Refresh mode (Ni-MH) and Slot 2 in Charge mode (LiFePO4).
4.2 Charging Mode (CHG)
The default mode for charging batteries. The charger automatically detects the battery type (Li-ion/Ni-MH/LiFePO4) and applies the optimal charging method. For Li-ion batteries, it uses a 3-stage TC-CC-CV method. For Ni-MH, XTAR's CVSA technology ensures accurate full-charge detection.

Image 4.2.1: Visual representation of the charging process for Li-ion (TC/CC/CV) and Ni-MH (CVSA) batteries.
4.3 Discharge Mode (DisCHG)
This mode allows you to discharge batteries to a specific voltage. It is useful for preparing batteries for storage or for capacity testing.

Image 4.3.1: A graphical representation of the discharging cycle, indicating voltage reduction.
4.4 Grade Mode (Grad)
Use Grade Mode to determine the true capacity (mAh) of your batteries. This involves a full discharge and then a full charge cycle to accurately measure the battery's capacity. This is ideal for matching cells or verifying battery health.

Image 4.4.1: A visual guide to the capacity testing process, showing a battery undergoing full charge, full discharge, and then another full charge to determine its true capacity.
4.5 Storage Mode (Store)
This mode adjusts the battery voltage to an optimal level for long-term storage (3.7V-3.8V for Li-ion, 1.35V for Ni-MH). Storing batteries at this voltage helps reduce self-discharge and prolongs their lifespan.

Image 4.5.1: An illustration depicting the process of adjusting a battery's charge level for optimal long-term storage.
4.6 Refresh Mode (Refresh)
Specifically for Ni-MH batteries, Refresh Mode performs customized discharge-charge cycles to restore fading batteries to their maximum potential capacity. This can extend the life of older Ni-MH cells.

Image 4.6.1: A visual representation of the Refresh mode, indicating the revitalization of Ni-MH batteries through cycling.
4.7 Internal Resistance Check (IR Check)
This function displays the internal resistance (IR) for each cell. A higher internal resistance can indicate an aging or damaged battery. This provides valuable insight into battery health beyond just voltage.

Image 4.7.1: The charger's display indicating the internal resistance (IR) measurement for a battery.
4.8 Current Selection
The charger automatically adjusts the current based on the power adapter and battery status. For advanced users, you can manually select charging currents (0.25A, 0.5A, 1A, 2A, 3A) by single-clicking the C/V button. Note that charging current for Ni-MH and 1.5V Li-ion batteries is fixed at 0.5A.

Image 4.8.1: The charger's interface highlighting the selectable current levels for charging.
5. Compatible Battery Types
The XTAR VX2 PRO supports a wide range of battery chemistries and sizes:
- 3.6V/3.7V Li-ion / 3.2V LiFePO4: 10440, 14500, 14650, 16340, 17500, 17650, 18350, 18490, 18500, 18650, 20700, 21700, 22650, 25500, 26650, 32650
- 1.5V Li-ion: AA, AAA
- 1.2V Ni-MH: AA, AAA, SC, C, D

Image 5.1: The XTAR VX2 PRO charger alongside a selection of compatible battery types and sizes it supports.
6. LCD Display Information
The clear LCD display provides comprehensive real-time information:
- Working Mode: Indicates the current operation (Charge, Discharge, Grade, Store, Refresh).
- Battery Voltage: Current voltage of the inserted battery.
- Real-Time Current: The current flowing into or out of the battery.
- Charging Slot: Indicates which slot is active.
- Battery Capacity: Measured or accumulated capacity (mAh).
- Battery Energy: Measured or accumulated energy (mWh).
- Battery IR: Internal Resistance of the battery (mΩ).
- Battery Type: Automatically detected battery chemistry (Li-ion, Ni-MH, LiFePO4).
- Selectable Current Level: Indicates the chosen charging current.
- Fast Charging Indicator: A lightning bolt icon appears when fast charging is active.

Image 6.1: An annotated diagram of the XTAR VX2 PRO's LCD display, explaining each piece of information shown.
7. Safety Features and Protection
The XTAR VX2 PRO incorporates multiple protection functions to ensure safe operation and extend battery life:
- Intelligent Detection: Automatically identifies battery type and selects optimal charging parameters.
- Timely Stop: Automatically stops charging when batteries are full.
- Over-Current Protection: Prevents damage from excessive current.
- Over-Charge Protection: Safeguards against overcharging.
- Over-Voltage Protection: Protects against voltage surges.
- Short Circuit Protection: Prevents damage from short circuits.
- Reverse Polarity Protection: Protects against incorrect battery insertion.
- Soft Start: Gradually increases charging current to protect batteries.
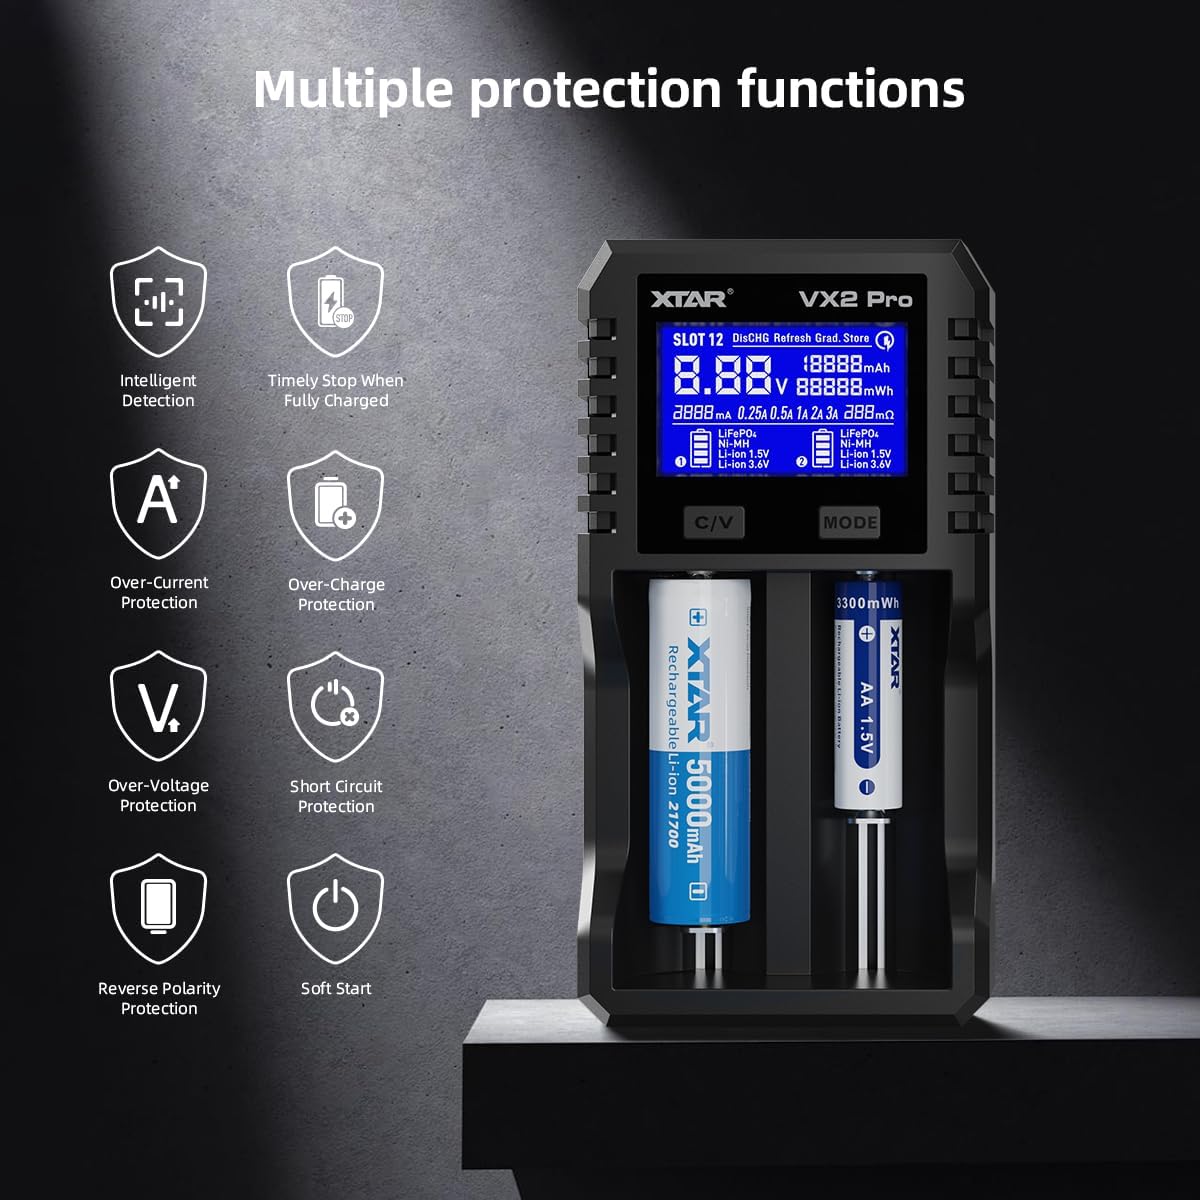
Image 7.1: A visual summary of the various safety and protection features integrated into the XTAR VX2 PRO charger.
8. Specifications
| Feature | Specification |
|---|---|
| Model | VX2 PRO |
| Input | PD20W (12V 1.67A Recommended), QC3.0 (9V 2A), 5V 2A (Limited power, emergency use only) |
| Constant Charge Current | 3AX1/2AX2/1AX2/0.5AX2/0.25AX2 |
| Charge Cutoff Voltage (3.6/3.7V Li-ion) | 4.20±0.05V |
| Charge Cutoff Voltage (1.5V Li-ion) | N/A |
| Charge Cutoff Voltage (3.2V LiFePO4) | 3.65±0.05V |
| Charge Cutoff Voltage (1.2V Ni-MH) | 1.45±0.1V |
| Charge Cutoff Current (3.6/3.7V Li-ion) | ≤150mA |
| Charge Cutoff Current (1.5V Li-ion) | ≤100mA |
| Charge Cutoff Current (3.2V LiFePO4) | ≤150mA |
| Charge Cutoff Current (1.2V Ni-MH) | N/A |
| Operating Temperature | 0-40°C |
| Dimensions (L×W×H) | 166mm × 88mm × 41mm (6.54" × 3.46" × 1.61") |
| Net Weight | 204g (7.2 ounces) |
| Certifications | CE, FCC, RoHS |
9. Troubleshooting
If you encounter issues with your XTAR VX2 PRO, refer to the following common problems and solutions:
- Charger not powering on:
- Ensure the USB-C cable is securely connected to both the charger and the PD20W adapter.
- Verify the power adapter is plugged into a functional wall outlet.
- Try a different USB-C cable or power adapter if available.
- Battery not detected or charging:
- Check that the battery is inserted with correct polarity (+/-).
- Ensure the battery is a compatible type and size (refer to Section 5).
- Clean the battery contacts and charger contacts with a dry cloth.
- The battery might be over-discharged. The charger has a low voltage recovery function, but severely over-discharged batteries may not be recoverable.
- Display shows error message:
- Refer to the specific error code or message on the display. Common errors relate to short circuits or reverse polarity.
- Remove and re-insert the battery.
- If the error persists, the battery may be faulty.
- Charger or batteries getting hot:
- Some warmth during charging is normal. Excessive heat may indicate a faulty battery or improper charging current.
- Ensure adequate ventilation around the charger.
- Reduce the charging current if manually selected.
- Discontinue use of any battery that becomes excessively hot.
10. Maintenance
Proper maintenance ensures the longevity and optimal performance of your XTAR VX2 PRO charger:
- Cleaning: Use a soft, dry cloth to clean the charger's exterior. Do not use abrasive cleaners or solvents. Keep the charging contacts clean and free of debris.
- Storage: Store the charger in a cool, dry place away from direct sunlight and extreme temperatures when not in use.
- Avoid Moisture: Do not expose the charger to water or high humidity.
- Handle with Care: Avoid dropping the charger or subjecting it to strong impacts.
11. Warranty and Support
For warranty information, technical support, or service inquiries, please refer to the official XTAR website or contact their customer service directly. Keep your purchase receipt as proof of purchase.
Official XTAR Website: www.xtar.cc


