
1. Introduction
Welcome to your SEAFLO Solar Powered Ventilator Fan. This manual provides essential information for the safe and efficient operation of your model SFSPV-02. This ventilator is designed to provide continuous, maintenance-free airflow for enclosed marine and RV spaces, helping to maintain cooler and more comfortable interior conditions.
2. Included Components
The following components are included with your SEAFLO SFSPV-02 Solar Powered Ventilator Fan:
- Ventilator assembly
- Interchangeable intake blade
- Interchangeable exhaust blade
- Installation instructions
3. Specifications
| Feature | Specification |
|---|---|
| Model | SFSPV-02 |
| Ventilation Capacity | 900 cubic ft/h |
| Solar Panel Power | 1.2W |
| Cutout Diameter | 4-3/4 inches (120 mm) |
| Housing Material | Stainless Steel |
| Overall Dimensions (D x W x H) | 8.53" x 8.53" x 3.24" |
| Waterproof Design | Yes |
| Noise Level | 45 dB |
| Power Source | Solar Powered |
| Motor Type | Brushless |
| Installation Type | Cutout Mount |
| Item Weight | 1.2 pounds |
4. Setup (Installation)
This section outlines the steps for installing your SEAFLO Solar Powered Ventilator Fan. Ensure you have read and understood all instructions before beginning installation.
4.1 Tools Required
- Drill
- Hole Saw (4-3/4 inches or 120 mm)
- Screwdriver
- Marine-grade sealant
4.2 Installation Steps
- Select Location: Choose a flat, unobstructed surface on the roof or wall of your boat, RV, or trailer that receives direct sunlight. Ensure sufficient clearance for the fan body and solar panel.
- Mark Cutout: Using the provided template or the fan's base as a guide, mark a 4-3/4 inch (120 mm) diameter circle for the cutout.
- Create Cutout: Carefully drill a pilot hole, then use a hole saw to create the marked cutout. Deburr any rough edges.
- Prepare Mounting Surface: Clean the area around the cutout thoroughly. Apply a bead of marine-grade sealant around the edge of the cutout to ensure a watertight seal.
- Position Ventilator: Place the ventilator assembly into the cutout, ensuring the solar panel faces upwards and is oriented for maximum sun exposure.
- Secure Ventilator: Align the mounting holes. Secure the ventilator using appropriate fasteners (not included). Do not overtighten.
- Blade Installation: Determine whether intake (bringing fresh air in) or exhaust (venting warm air out) ventilation is desired. Install the corresponding blade. Refer to the included installation instructions for specific blade attachment details.
- Final Seal: Apply additional sealant around the base of the ventilator where it meets the mounting surface to prevent water intrusion.

Figure 1: Dimensional diagram of the ventilator, illustrating the 8.53-inch diameter and 4-3/4 inch cutout requirement.
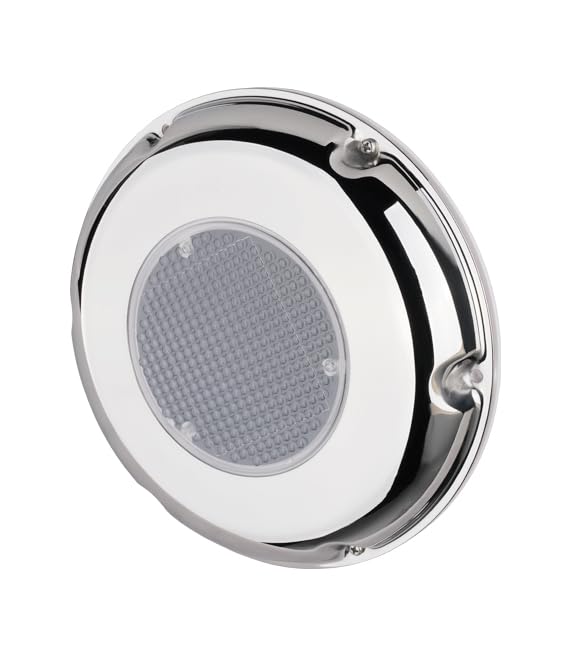
Figure 2: Top view of the SEAFLO SFSPV-02 Solar Powered Ventilator Fan, showcasing its stainless steel housing and solar panel.
5. Operating Instructions
The SEAFLO SFSPV-02 is a solar-powered ventilator designed for continuous operation during daylight hours.
5.1 Solar Operation
This model operates solely on solar power. When the solar panel receives sufficient direct sunlight, the fan will automatically begin to circulate air. There is no internal battery storage or on/off switch for this specific model; operation is entirely dependent on solar energy.
5.2 Changing Airflow Direction (Intake/Exhaust)
The ventilator comes with interchangeable blades to switch between intake (bringing fresh air in) and exhaust (venting warm air out). To change the airflow direction:
- Ensure the fan is not operating. This can be done by covering the solar panel or performing the change at night.
- Carefully remove the fan cover.
- Detach the currently installed blade.
- Install the desired intake or exhaust blade. Ensure it is securely fastened according to the included instructions.
- Replace the fan cover, ensuring it is properly seated and secured.
Refer to the included installation instructions for detailed steps on blade replacement.
6. Maintenance
Regular maintenance ensures optimal performance and longevity of your ventilator.
- Cleaning Solar Panel: Periodically clean the solar panel surface with a soft, damp cloth to remove dust, dirt, and debris. A clean panel ensures maximum power generation. Avoid abrasive cleaners.
- Cleaning Fan Blades: If airflow appears reduced, carefully remove the fan cover and clean the fan blades. Remove any accumulated dust, insects, or foreign objects.
- Inspect for Obstructions: Ensure no objects are blocking the fan's intake or exhaust vents. Clear any obstructions immediately.
- Check Seals: Annually inspect the sealant around the base of the ventilator for cracks or deterioration. Reapply marine-grade sealant as necessary to maintain a watertight seal.
- Fastener Check: Periodically check that all mounting fasteners are secure. Tighten if necessary.
7. Troubleshooting
| Problem | Possible Cause | Solution |
|---|---|---|
| Fan not operating | Insufficient sunlight | Ensure the solar panel is exposed to direct sunlight. Clean the solar panel if dirty. |
| Obstruction in fan blades | Inspect and clear any debris from the fan blades. | |
| Low airflow | Dirty solar panel | Clean the solar panel surface. |
| Dirty or obstructed fan blades | Clean the fan blades and remove any obstructions. | |
| Incorrect blade installed for desired function | Verify the correct intake or exhaust blade is installed. | |
| Water leakage around ventilator | Deteriorated or improperly applied sealant | Inspect and reapply marine-grade sealant around the ventilator base. |
| Loose mounting fasteners | Tighten mounting fasteners. |
8. Warranty and Support
This SEAFLO Solar Powered Ventilator Fan (Model SFSPV-02) is backed by a 4-year limited warranty. This warranty covers defects in materials and workmanship under normal use.
For warranty claims, technical assistance, or replacement parts, please contact SEAFLO customer support. Keep your purchase receipt as proof of purchase.
For further assistance, please visit the official SEAFLO website or contact their customer service department directly. Contact information can typically be found on the product packaging or the SEAFLO official website.
