1. Introduction
Thank you for choosing the B2 Audio Rampage Series 10-inch Dual 2-Ohm Subwoofer. This high-performance subwoofer is engineered for powerful and accurate bass reproduction in car audio systems. To ensure optimal performance and longevity, please read this manual thoroughly before installation and operation. This guide provides essential information on setup, wiring, operation, and maintenance.
2. Safety Information
WARNING: Failure to follow these safety instructions may result in serious injury or property damage.
- Always disconnect the vehicle's battery before performing any electrical work.
- Ensure all wiring is properly insulated to prevent short circuits.
- Use appropriate gauge wiring for power, ground, and speaker connections to handle the subwoofer's power requirements.
- Install the subwoofer securely in a suitable enclosure to prevent movement during vehicle operation.
- Avoid prolonged exposure to extremely high sound pressure levels, which can cause permanent hearing damage.
- Do not expose the subwoofer to moisture or extreme temperatures.
- If you are unsure about any installation steps, consult a professional car audio installer.
3. Package Contents
Please check the package for the following items:
- B2 Audio Rampage Series 10-inch Dual 2-Ohm Subwoofer (Model: B2-RAMPAGE10-D2)
- Instruction Manual (this document)
If any items are missing or damaged, please contact your authorized B2 Audio dealer or B2 Audio USA customer support immediately.
4. Specifications
Key specifications for the B2 Audio Rampage Series 10-inch Dual 2-Ohm Subwoofer:
| Feature | Specification |
|---|---|
| Model Number | B2-RAMPAGE10-D2 |
| Size | 10 inches |
| Voice Coil Configuration | Dual 2-Ohm |
| Voice Coil Size | 3 inches |
| RMS Power Handling | 3000 Watts |
| Brand | B2 Audio |
| UPC | 850066670330 |
5. Setup and Installation
Proper installation is crucial for the performance and safety of your subwoofer. If you are not experienced with car audio installations, it is highly recommended to seek professional assistance.
5.1 Enclosure Requirements
The B2 Audio Rampage 10-inch subwoofer requires a robust, sealed or ported enclosure designed to its specific Thiele-Small parameters. Consult B2 Audio's official website or your dealer for recommended enclosure volumes and port tuning frequencies. An improperly sized or constructed enclosure will severely limit performance and may damage the subwoofer.
5.2 Mounting the Subwoofer
Securely mount the subwoofer into the enclosure using appropriate screws. Ensure a tight seal between the subwoofer frame and the enclosure baffle to prevent air leaks, which can degrade sound quality.

Image: Top view of the B2 Audio Rampage 10-inch subwoofer, highlighting the cone and surround. The B2 Audio logo is visible on the dust cap.

Image: Angled side view of the B2 Audio Rampage 10-inch subwoofer, showcasing the robust white cast aluminum basket and the large magnet assembly.
5.3 Wiring Configurations (Dual 2-Ohm Voice Coils)
The B2 Audio Rampage 10-inch subwoofer features dual 2-ohm voice coils, offering flexibility in wiring to achieve different impedance loads for your amplifier. Always ensure your amplifier is stable at the chosen impedance.
5.3.1 1-Ohm Parallel Wiring
For a 1-ohm final impedance, connect the positive terminal of Voice Coil 1 to the positive terminal of Voice Coil 2. Then, connect the negative terminal of Voice Coil 1 to the negative terminal of Voice Coil 2. Finally, connect the combined positive terminals to the amplifier's positive output and the combined negative terminals to the amplifier's negative output.
- VC1+ to VC2+
- VC1- to VC2-
- Combined + to Amplifier +
- Combined - to Amplifier -
- Resulting Impedance: 1 Ohm
5.3.2 4-Ohm Series Wiring
For a 4-ohm final impedance, connect the positive terminal of Voice Coil 1 to the amplifier's positive output. Connect the negative terminal of Voice Coil 1 to the positive terminal of Voice Coil 2. Finally, connect the negative terminal of Voice Coil 2 to the amplifier's negative output.
- VC1+ to Amplifier +
- VC1- to VC2+
- VC2- to Amplifier -
- Resulting Impedance: 4 Ohms
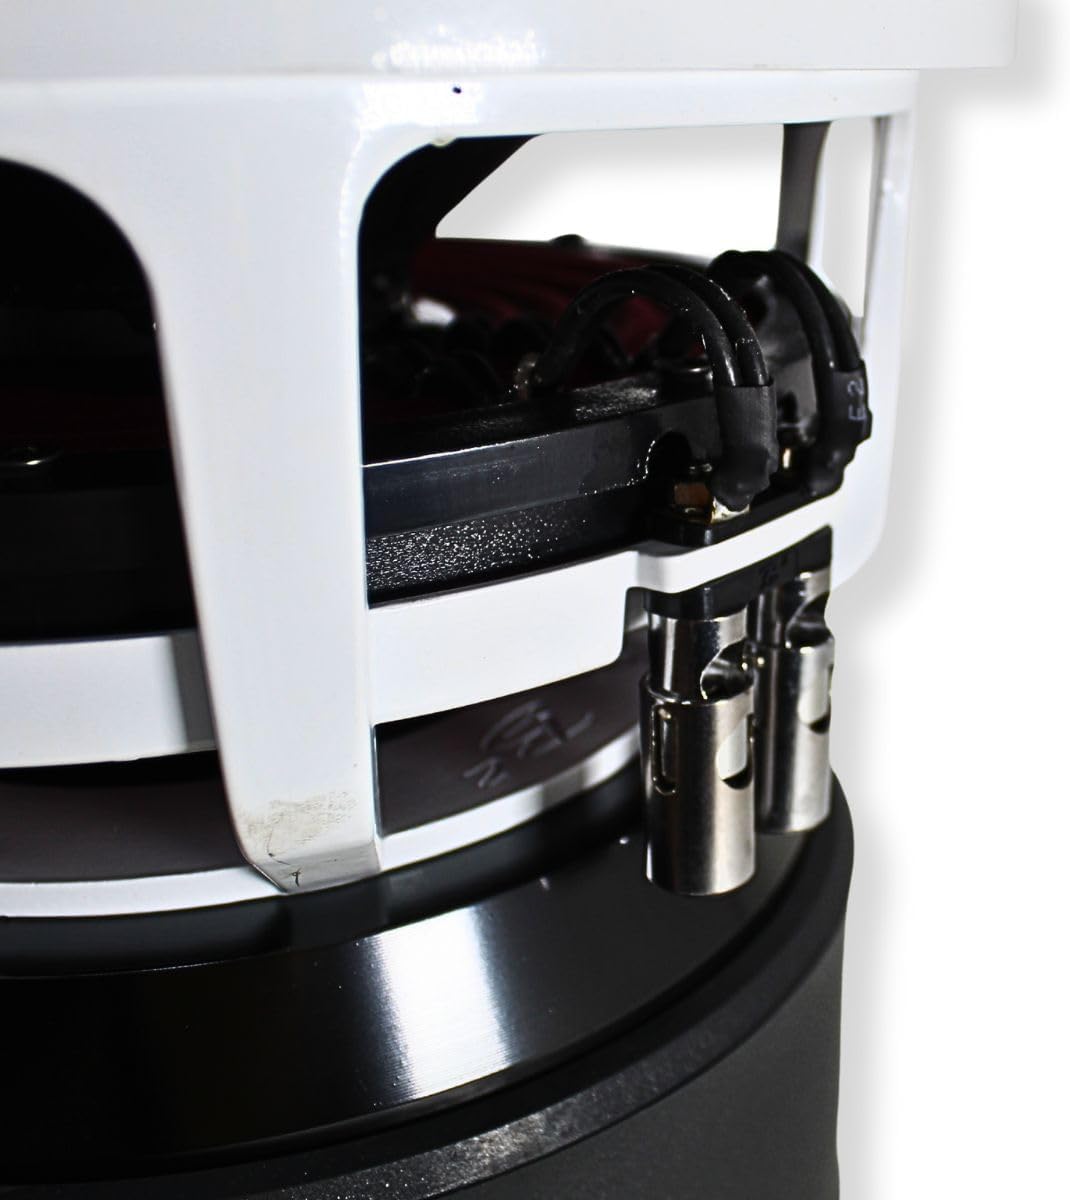
Image: Close-up view of the subwoofer's push-terminal connections, showing the robust design for secure wiring.
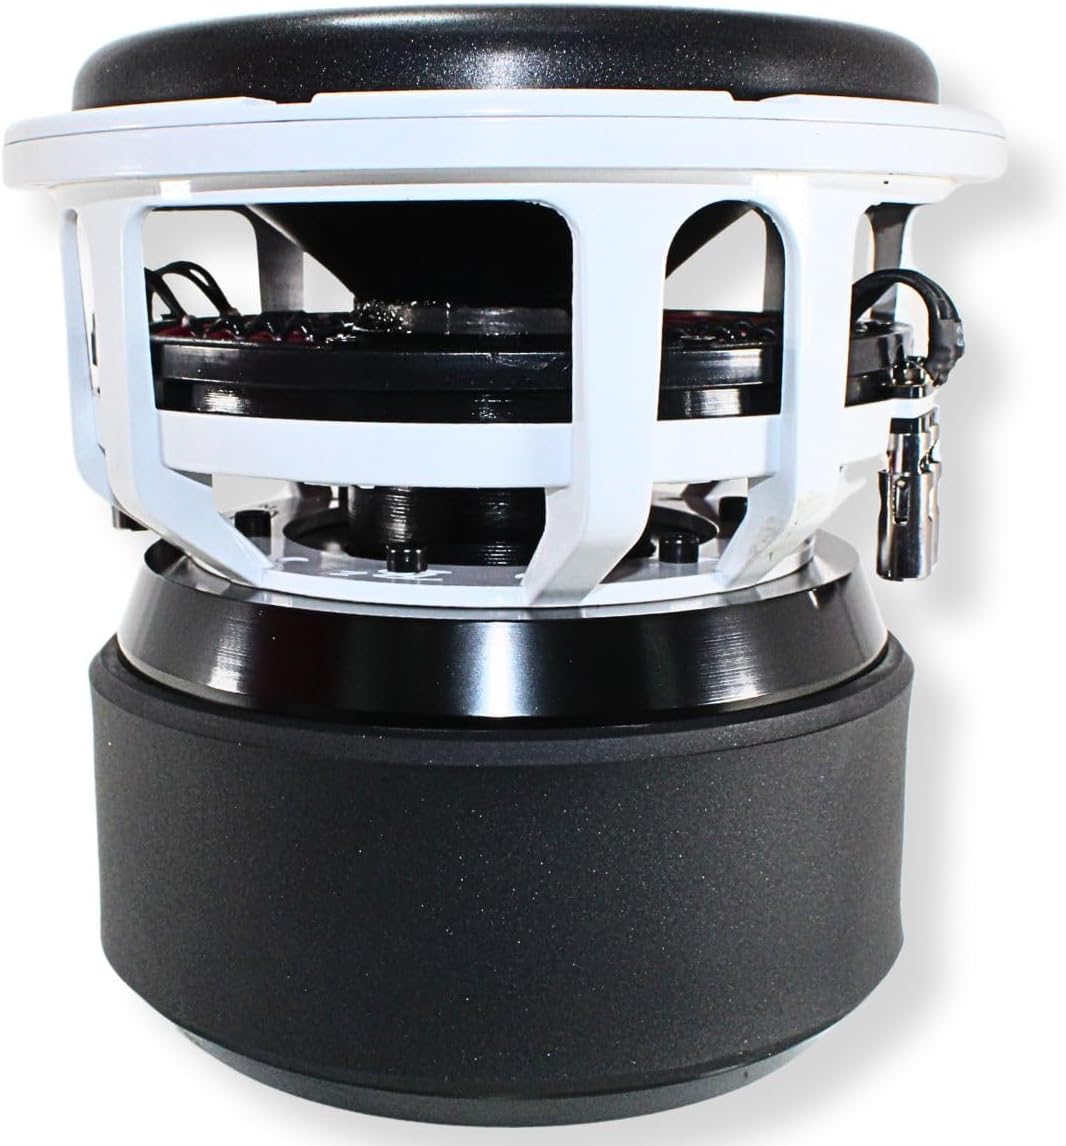
Image: Side profile of the B2 Audio Rampage 10-inch subwoofer, illustrating its deep magnet structure and overall build quality.
5.4 Amplifier Selection and Settings
Select an amplifier capable of delivering 3000 Watts RMS at the chosen impedance (1-ohm or 4-ohm). Ensure the amplifier is stable at the impedance you select. Incorrect amplifier matching or operation at an unstable impedance can lead to amplifier shutdown or damage to both the amplifier and the subwoofer.
- Gain Setting: Set the amplifier gain carefully. Use a multimeter or oscilloscope to set the gain to match the amplifier's output to the subwoofer's RMS power handling without clipping.
- Low-Pass Filter (LPF): Set the LPF on your amplifier or head unit to filter out frequencies above the desired bass range, typically between 60Hz and 100Hz.
- Subsonic Filter (HPF): For ported enclosures, use a subsonic filter (high-pass filter) set slightly below the enclosure's tuning frequency to protect the subwoofer from over-excursion at very low frequencies.
- Bass Boost: Use bass boost sparingly, if at all. Excessive bass boost can cause clipping and damage the subwoofer.
6. Operating Instructions
6.1 Initial Power-Up and Break-in
After installation, perform an initial power-up at low volume. Gradually increase the volume and check for any abnormal noises or distortion. Your subwoofer requires a break-in period to allow the suspension components (surround and spider) to loosen up and reach their optimal compliance.
- Play music with a wide range of frequencies at moderate volume for approximately 20-30 hours.
- Avoid playing at maximum volume or with excessive bass boost during the break-in period.
- After break-in, the subwoofer will perform at its full potential.
6.2 Normal Operation
Operate the subwoofer within its rated power handling. Listen for signs of distortion, which indicate that the subwoofer or amplifier is being overdriven. Reduce the volume or adjust settings immediately if distortion is heard.

Image: Bottom view of the B2 Audio Rampage 10-inch subwoofer, revealing the robust magnet assembly and ventilation for thermal management.
7. Maintenance
The B2 Audio Rampage subwoofer is designed for durability and requires minimal maintenance.
- Cleaning: Use a soft, dry cloth to wipe down the subwoofer cone and surround. Avoid using harsh chemicals or excessive moisture.
- Inspection: Periodically inspect the subwoofer for any signs of damage, such as tears in the surround or cone, loose connections, or rattling noises.
- Environment: Ensure the subwoofer is kept in a dry environment, free from extreme temperatures and direct sunlight, which can degrade materials over time.
8. Troubleshooting
If you experience issues with your subwoofer, refer to the following common problems and solutions:
8.1 No Sound from Subwoofer
- Check Power: Ensure the amplifier is powered on and receiving proper voltage. Check fuses and power connections.
- Check Signal: Verify that the amplifier is receiving an audio signal from the head unit. Check RCA cables and settings.
- Check Speaker Wires: Ensure speaker wires are securely connected to both the subwoofer and the amplifier, with correct polarity. Check for any short circuits.
- Amplifier Protection Mode: If the amplifier is in protection mode, refer to its manual for troubleshooting.
8.2 Distorted or Unclear Sound
- Gain Setting: The amplifier gain may be set too high, causing clipping. Reduce the gain until distortion disappears.
- Crossover Settings: Incorrect LPF or HPF settings can cause distortion. Adjust the LPF to a suitable frequency (e.g., 80Hz) and ensure the subsonic filter is correctly set for ported enclosures.
- Enclosure Issues: An improperly sealed or damaged enclosure can cause rattling or poor sound quality. Inspect the enclosure.
- Over-excursion: If the subwoofer cone is moving excessively, reduce volume or check subsonic filter settings.
8.3 Subwoofer Overheating
- Impedance Mismatch: Ensure the subwoofer is wired to an impedance that your amplifier can safely handle.
- Overpowering: The subwoofer may be receiving too much power. Reduce amplifier gain.
- Clipping: Amplifier clipping generates excessive heat. Correct gain settings.
- Ventilation: Ensure the amplifier has adequate ventilation.
If these steps do not resolve the issue, contact B2 Audio USA customer support.
9. Warranty and Support
B2 Audio products are designed and manufactured to the highest quality standards. For specific warranty terms and conditions, please refer to the warranty card included with your product or visit the official B2 Audio website. Keep your purchase receipt as proof of purchase for warranty claims.
For technical support, troubleshooting assistance, or warranty inquiries, please contact B2 Audio USA customer support:
- Website: www.b2audio.com
- Contact Information: Refer to the B2 Audio USA seller page on Amazon or the official website for current contact details.


