
Eonon C0327J
EONON 10.1-inch Headrest DVD Player Monitor Set (C0327J) User Manual
Model: C0327J
Introduction
This manual provides detailed instructions for the installation, operation, and maintenance of your EONON 10.1-inch Headrest DVD Player Monitor Set, model C0327J. Please read this manual thoroughly before using the product to ensure correct operation and to prevent damage.
This image displays the two EONON 10.1-inch headrest DVD player monitors, designed for rear-seat entertainment. Key features like downward-facing speakers, DVD/USB/SD support, CPRM compatibility, resume function, wired headphone support, and a 2-way cigarette lighter cable are highlighted.
Key Features
- Downward-Facing Speakers: Designed to direct sound away from the driver, enhancing driving safety.
- Dual Chip System: Ensures faster media reading speeds and supports various file formats.
- Multi-Format Playback: Compatible with DVD, DVD+R, DVD-R, DVD+RW, DVD-RW, MP3, CD, CD+R, CD-R, CD-RW, CD+RW, and CPRM discs.
- Region-Free DVD Playback: Allows playback of DVDs from any region. Note: Does not support Blu-ray discs or encrypted discs.
- Slot-in DVD Mechanism: Provides convenient and easy disc insertion and removal.
- Resume Function: Automatically continues DVD playback from the last stopped position.
- Extensive Connectivity: Features HDMI input, USB port, and SD card slot (up to 32GB) for connecting various external devices and playing multimedia files.
- Two-Unit Linking: Both monitors can be linked to display the same content simultaneously.
- Adjustable Viewing Angle: Screen angle can be adjusted up to 90° upwards and 36° downwards. The screen itself can be vertically adjusted by 50mm.
- Wired Headphone Support: Allows for private listening without disturbing others. (Headphones not included).
- Home Use Capability: Can be used indoors with an optional AC adapter (EONON POA025, sold separately).
- Improved Remote Control: Remote control labels are now in Japanese for enhanced user-friendliness.
Setup and Installation
The EONON C0327J headrest monitors are designed for easy, tool-free installation. Follow these steps:
- Attach Headrest Bracket: Secure the headrest bracket to the poles of the front seat headrest. Ensure the bracket is firmly tightened using the screws provided.
- Mount the Monitor: Fix the monitor onto the mounting bracket. Press the up/down movement button on the device, align the monitor with the bracket's slot, move it to the desired position, and then release the button to secure it.
- Connect Power: Use the included cigarette lighter 2-way cable to power the monitors. Connect one end to your vehicle's cigarette lighter socket and the other end to the DC 12V input on each monitor.
- Adjust Angle: Adjust the screen's viewing angle by tilting it up to 90° or down to 36°. The screen's vertical position can also be adjusted by 50mm.

This image provides a visual guide for installing the headrest monitor. It shows how to attach the bracket to the headrest poles, secure the monitor to the bracket, and adjust its position. The installation is designed to be tool-free and straightforward.
Operating Instructions
Power On/Off
To power on the monitors, ensure they are connected to the vehicle's power supply via the cigarette lighter cable. The monitors will typically power on automatically with the vehicle's ignition. To power off, turn off the vehicle's ignition or manually press the power button on the monitor or remote control.
Media Playback (DVD/USB/SD)
- DVD Playback: Insert a DVD disc into the slot-in drive. The monitor will automatically detect and begin playback. Use the remote control or front panel buttons to control playback (Play, Pause, Stop, Skip, Fast Forward/Rewind).
- USB/SD Playback: Insert a USB drive or SD card (up to 32GB) into the respective port. Navigate through the menu to select your desired video, audio, or image files.

The image shows the convenient slot-in DVD loading mechanism. The monitor supports various disc formats including DVD, DVD+R, DVD-R, DVD+RW, DVD-RW, MP3, CD, CD+R, CD-R, CD-RW, and CD+RW, along with CPRM playback and region-free functionality. Note that Blu-ray and encrypted discs are not supported.
Resume Function
The monitor features a resume function for DVD playback. If playback is stopped or the power is turned off, the monitor will automatically resume from the last played position when powered on again.

This image highlights the downward-facing speaker design, which directs sound away from the driver for a less distracting experience. It also demonstrates the resume function, allowing DVD playback to continue from where it was last stopped.
Remote Control
Use the provided remote control for convenient operation of the monitors. The remote features Japanese labeling for ease of use.

This image illustrates the improved remote control, now featuring Japanese labeling for easier operation by all users, including children. The previous English-labeled remote is shown for comparison.
Connectivity and Linking
Connecting External Devices
The monitors support various external devices via HDMI, USB, and SD card slots:
- HDMI Input: Connect smartphones, Amazon Fire TV Sticks, or other HDMI-enabled devices for high-quality video and audio. An HDMI adapter may be required for some devices (sold separately).
- USB/SD Card: Play multimedia files (videos, music, photos) directly from USB drives or SD cards up to 32GB.
Linking Two Units
The two monitors can be linked to display the same content. Use the provided 3.5mm interface connection cable to connect the AV OUT of one monitor to the AV IN of the other. This allows passengers in both rear seats to enjoy the same movie or content.
For displaying content from a single external HDMI source (e.g., a smartphone or Fire TV Stick) on both monitors, an HDMI splitter (sold separately) is required. Connect the external device to the splitter, and then connect the splitter's outputs to the HDMI inputs of both monitors.

This diagram explains the connectivity options. Two monitors can be linked for synchronized playback using AV cables. Additionally, external devices like smartphones can connect via HDMI (with an adapter) to a splitter (sold separately) to display content on both monitors.
TV Viewing
To enable TV viewing, an external digital TV tuner (e.g., EONON V0051, sold separately) is required. Connect the TV tuner to the monitor's AV input.

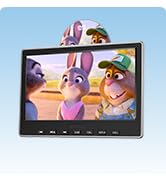
This image shows the monitor displaying TV content, which is possible with an optional external digital TV tuner.
Wired Headphone Support
Connect wired headphones to the 3.5mm headphone jack on the monitor for private audio listening. (Headphones are not included).

This image shows the monitor with wired headphones connected, illustrating the private listening feature.
Home Use
The monitor can be used in a home environment with an optional AC adapter (EONON POA025, sold separately). This allows for versatile use beyond the vehicle.

This image depicts the monitor being used in a home setting, demonstrating its compatibility with an optional AC adapter for indoor use.
Specifications
| Feature | Description |
|---|---|
| Brand | Eonon |
| Model Number | C0327J |
| Screen Size | 10.1 inches |
| Display Type | LCD |
| Native Resolution | 1024x600 |
| Supported Media Types | DVD, DVD+R, DVD-R, DVD+RW, DVD-RW, MP3, CD, CD+R, CD-R, CD-RW, CD+RW, CPRM |
| Connectivity Interfaces | HDMI, USB, SD |
| Compatible Devices | Smartphones, Amazon Fire TV Stick |
| Color | Black |
| Item Dimensions (L x W x H) | 25.4 x 5.3 x 17.4 cm |
| Country of Origin | China |

This image provides detailed technical information, including product dimensions and a wiring diagram.
Included Accessories
The following items are included with your EONON C0327J Headrest DVD Player Monitor Set:
- Monitor Unit x 2
- 3.5mm to RCA Conversion AV Cable (3m length) x 2
- 3.5mm Interface Connection Cable (2.5m length) x 2
- Cigarette Lighter 2-way Cable (3m length each) x 1
- Remote Control x 2
- Mounting Bracket Set x 2
- Screwdriver x 1
- Instruction Manual x 1

This image displays all the accessories included with the EONON headrest monitor set.
Maintenance
To ensure the longevity and optimal performance of your EONON headrest monitors, follow these maintenance guidelines:
- Cleaning the Screen: Use a soft, lint-free cloth to gently wipe the screen. For stubborn smudges, slightly dampen the cloth with water or a screen-cleaning solution specifically designed for electronics. Avoid harsh chemicals or abrasive materials.
- Cleaning the Unit: Wipe the exterior of the monitor with a soft, dry cloth. Do not use liquid cleaners directly on the unit.
- Disc Care: Handle DVD discs by their edges. Keep them clean and free of scratches. Store discs in their cases when not in use.
- Environmental Conditions: Avoid exposing the monitors to extreme temperatures, direct sunlight for prolonged periods, or high humidity.
- Power Disconnection: When not in use for extended periods, or during vehicle maintenance, disconnect the power cable from the cigarette lighter socket.
Troubleshooting
If you encounter issues with your EONON headrest monitors, refer to the following common problems and solutions:
| Problem | Possible Cause | Solution |
|---|---|---|
| No power | Power cable not connected properly; vehicle ignition off; blown fuse in cigarette lighter. | Check power cable connection. Ensure vehicle ignition is on. Check vehicle's fuse box for a blown fuse. |
| No picture/sound from DVD | Disc inserted incorrectly; dirty or scratched disc; unsupported disc format. | Reinsert disc correctly. Clean the disc. Ensure the disc format is supported (not Blu-ray or encrypted). |
| No picture/sound from external device (HDMI/USB/SD) | Cable not connected properly; incorrect input source selected; unsupported file format. | Check cable connections. Select the correct input source (HDMI, USB, SD) using the remote or menu. Ensure file format is supported. |
| Remote control not working | Batteries are dead or inserted incorrectly; obstruction between remote and monitor's IR sensor. | Replace batteries. Ensure batteries are inserted with correct polarity. Remove any obstructions. Point remote directly at the monitor's IR sensor. |
| One monitor not displaying when linked | AV cable loose or faulty; incorrect input source on secondary monitor. | Check the AV OUT/AV IN cable connection between the monitors. Ensure the secondary monitor is set to AV IN mode. |
Warranty and Support
Warranty Information
This EONON product comes with a 1-year warranty from the date of purchase. Please retain your proof of purchase for warranty claims. The warranty covers manufacturing defects and malfunctions under normal use. It does not cover damage caused by misuse, accidents, unauthorized modifications, or improper installation.
Customer Support
For technical assistance, troubleshooting not covered in this manual, or warranty inquiries, please contact EONON customer support. Refer to the contact information provided with your product packaging or visit the official EONON website for the most up-to-date support details.
Related documentsC0327J

Ask a question about this manual
Ask about setup, troubleshooting, compatibility, parts, safety, or missing instructions. Manuals+ will review the question and use this page’s manual context to help answer it.