
1. Introduction
This manual provides essential instructions for the installation, operation, and maintenance of your new Generic carburetor. This carburetor is designed as a direct replacement part for various trimmer models, ensuring consistent power output and extended service life. Please read this manual thoroughly before attempting any installation or maintenance.
2. Package Contents
Carefully unpack the box and verify that all items listed below are present and undamaged. If any parts are missing or damaged, please contact customer support.
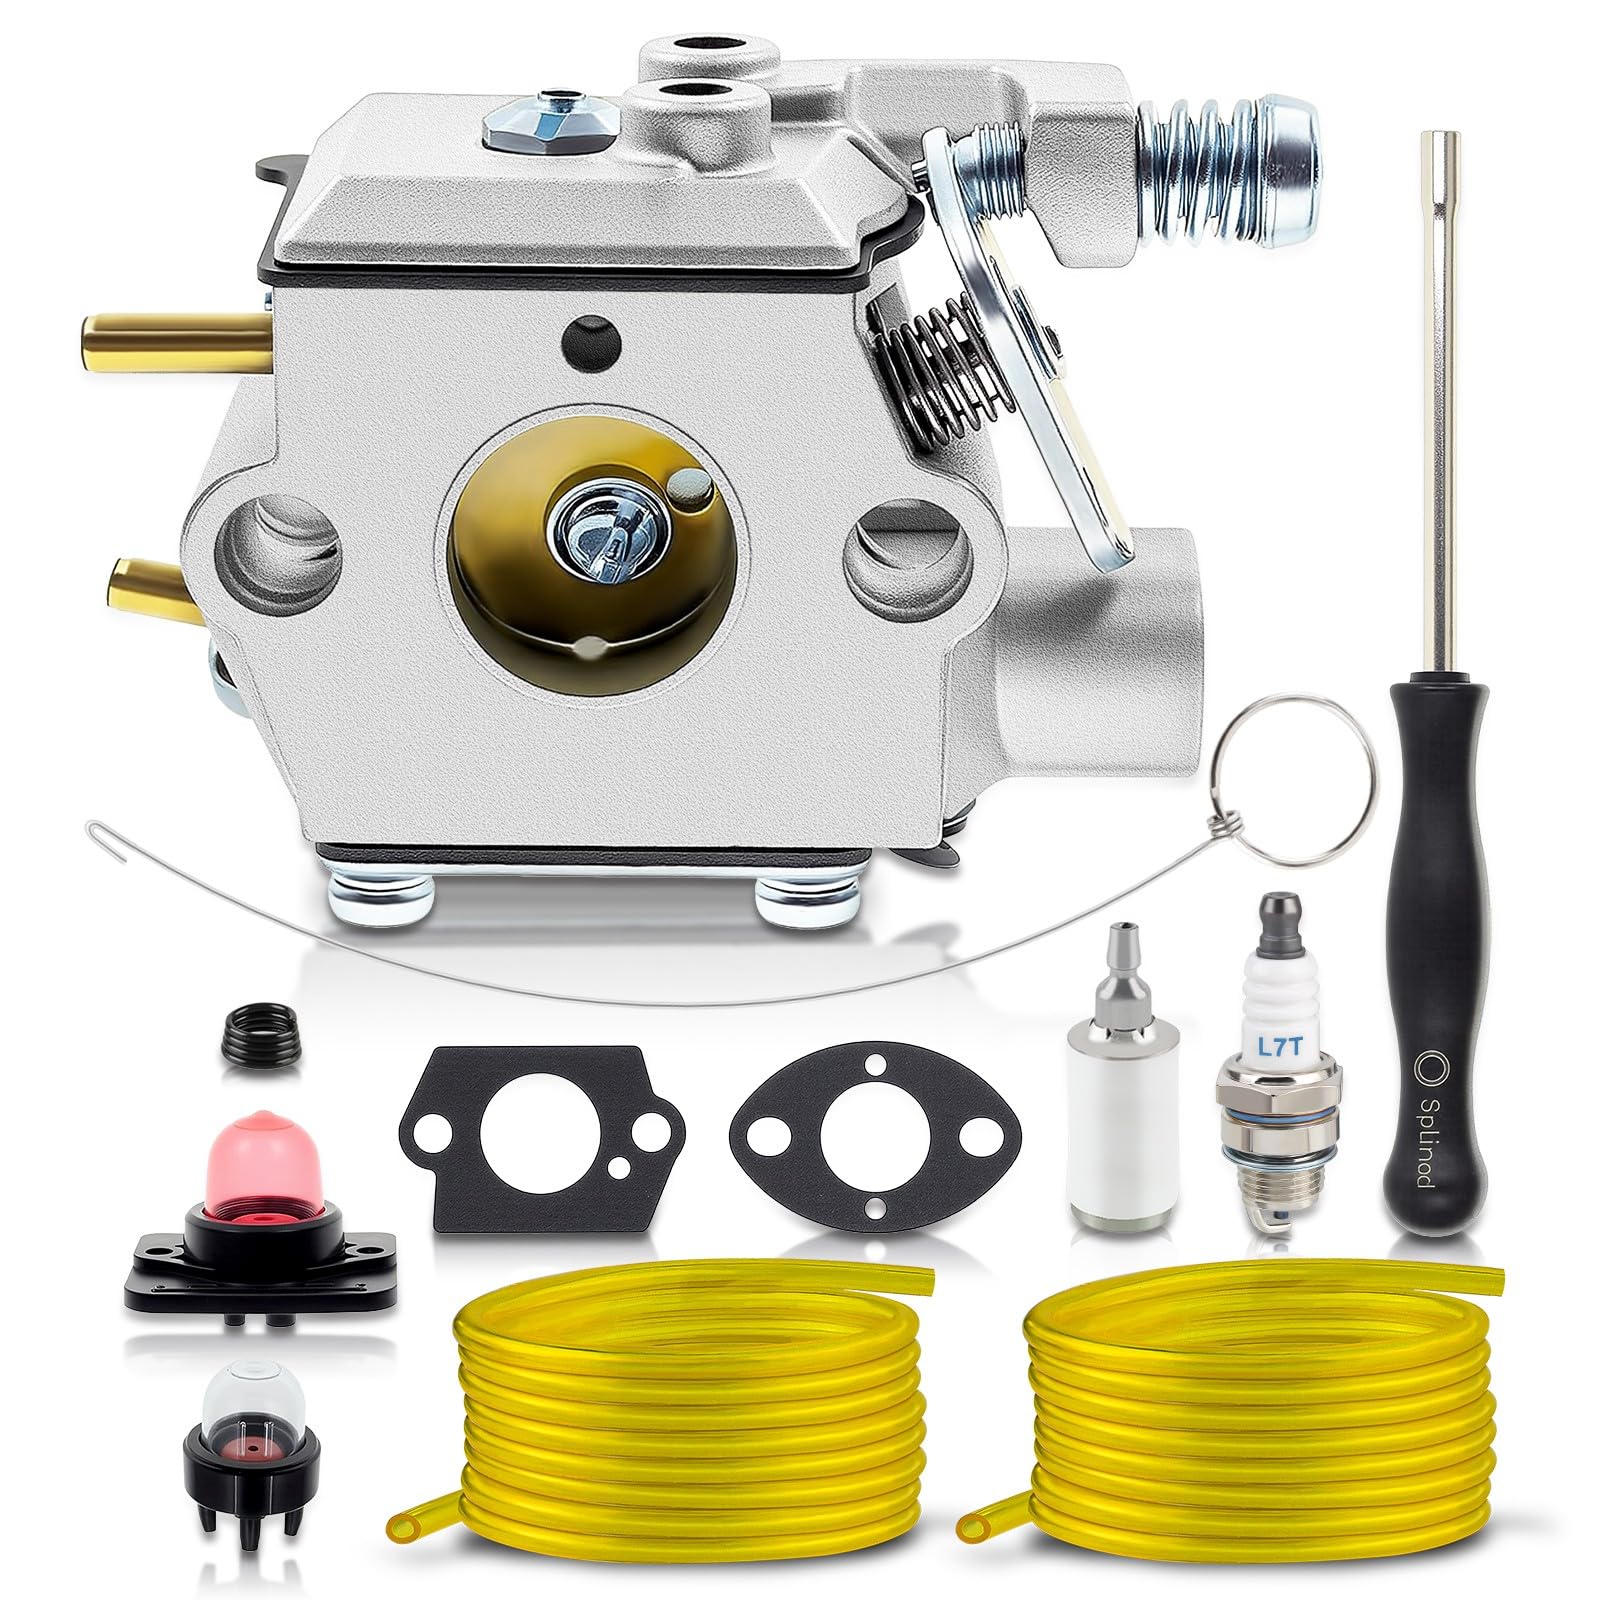
Figure 2.1: Complete Carburetor Kit Components. This image displays the main carburetor unit along with all included accessories: two gaskets, two primer bulbs, two fuel lines, one fuel filter, one spark plug, one screwdriver, and one hook tool.
- 1x Carburetor
- 2x Gasket
- 2x Primer Bulb
- 2x Fuel Line
- 1x Fuel Filter
- 1x Spark Plug (L7T type)
- 1x Screw Driver (for adjustments)
- 1x Hook (for fuel line installation)
3. Compatibility
This carburetor is compatible with the following trimmer models:
- XT-50
- XT-85
- XT100
- XT125
- XT125KT
- XT125T
- XT125TR
Please ensure your trimmer model matches one of the listed compatible models before proceeding with installation.
4. Safety Information
Always prioritize safety when working with power tools and fuel systems. Failure to follow these safety guidelines may result in injury or damage to equipment.
- Disconnect Spark Plug: Before beginning any work, always disconnect the spark plug wire to prevent accidental starting.
- Work in a Well-Ventilated Area: Fuel fumes can be hazardous. Ensure adequate ventilation.
- Wear Protective Gear: Use safety glasses and gloves to protect against fuel splashes and sharp edges.
- Handle Fuel Carefully: Fuel is highly flammable. Avoid open flames, sparks, and smoking. Clean up any spills immediately.
- Allow Engine to Cool: Ensure the engine is completely cool before handling any components.
5. Installation
This section outlines the general steps for replacing a carburetor. Specific steps may vary slightly depending on your trimmer model. Refer to your trimmer's original service manual for detailed instructions if necessary.
5.1 Preparation
- Ensure the trimmer engine is cool and the spark plug wire is disconnected.
- Drain any remaining fuel from the fuel tank into an approved container.
- Remove the air filter cover and air filter element.
5.2 Removing the Old Carburetor
- Locate the carburetor on your trimmer. It is typically mounted between the engine and the air filter housing.
- Carefully disconnect the fuel lines from the old carburetor. Be prepared for residual fuel to leak out.
- Disconnect the throttle linkage and choke linkage from the carburetor. Note their positions for reassembly.
- Unscrew the mounting bolts or nuts that secure the carburetor to the engine.
- Remove the old carburetor and any old gaskets. Inspect the intake manifold for debris or damage.

Figure 5.1: Carburetor Detail. This image highlights the various ports and adjustment screws on the carburetor, which are crucial for proper installation and tuning.
5.3 Installing the New Carburetor
- Place new gaskets on both sides of the carburetor, ensuring they align correctly with the mounting holes and ports.
- Mount the new carburetor onto the engine, securing it with the original mounting bolts or nuts. Do not overtighten.
- Reconnect the throttle linkage and choke linkage to the new carburetor. Ensure they operate smoothly without binding.
- Connect the new fuel lines (if replacing) and primer bulbs. Use the included hook tool to assist with routing fuel lines if needed. Ensure correct routing for fuel intake and return.
- Install the new fuel filter into the fuel tank if replacing the old one.
- Install the new spark plug (L7T type) and reconnect the spark plug wire.
- Reinstall the air filter element and air filter cover.

Figure 5.2: Carburetor Mounting Side. This view shows the primary mounting surface and air intake, which connects to the engine's intake manifold.
6. Operation (Initial Start-up and Adjustment)
After installation, the carburetor may require minor adjustments for optimal performance. Most replacement carburetors are pre-tuned, but environmental factors or specific engine conditions might necessitate fine-tuning.
- Fill with Fuel: Fill the fuel tank with the appropriate fuel mixture for your trimmer.
- Prime the System: Press the primer bulb several times until fuel is visible in the bulb and flows freely.
- Start the Engine: Follow your trimmer's standard starting procedure.
- Idle Adjustment: If the engine idles too high or too low, use the included screwdriver to adjust the idle speed screw (usually marked 'T' or 'Idle'). Turn clockwise to increase RPM, counter-clockwise to decrease.
- High/Low Speed Adjustment (if applicable): Some carburetors have high (H) and low (L) speed adjustment screws. These are typically factory set. If adjustment is needed, turn in small increments (1/8 turn) and test. Consult a professional if unsure.
- Warm-up: Allow the engine to warm up for a few minutes before making final adjustments or operating under load.
7. Maintenance
Regular maintenance ensures the longevity and optimal performance of your carburetor and trimmer.
- Fuel Filter: Inspect and replace the fuel filter periodically (e.g., annually or every 50 hours of use) to prevent contaminants from reaching the carburetor.
- Air Filter: Clean or replace the air filter regularly to ensure proper air-fuel mixture and prevent dirt from entering the engine.
- Fuel Lines: Check fuel lines for cracks, hardening, or leaks. Replace as needed.
- Spark Plug: Inspect the spark plug for wear and proper gap. Replace if fouled or worn.
- Fuel Quality: Always use fresh, clean fuel mixed according to your trimmer manufacturer's specifications. Stale fuel can cause carburetor issues.
- Storage: Before long-term storage, drain the fuel tank and run the engine until it stops to clear the carburetor of fuel, or use a fuel stabilizer.
8. Troubleshooting
| Problem | Possible Cause | Solution |
|---|---|---|
| Engine won't start | No fuel, clogged fuel filter, fouled spark plug, incorrect choke setting, carburetor not primed. | Check fuel level, replace fuel filter, replace spark plug, adjust choke, prime carburetor. |
| Engine starts then dies | Fuel starvation, vacuum leak, clogged fuel line, incorrect idle adjustment. | Check fuel flow, inspect gaskets for leaks, clear fuel lines, adjust idle screw. |
| Engine runs rough/poor acceleration | Dirty air filter, incorrect fuel mixture, carburetor needs adjustment. | Clean/replace air filter, ensure correct fuel mix, adjust high/low speed screws (if applicable). |
| Fuel leaks from carburetor | Damaged gasket, loose mounting bolts, faulty primer bulb. | Inspect and replace gaskets, tighten mounting bolts, replace primer bulb. |
If troubleshooting steps do not resolve the issue, it is recommended to consult a qualified service technician.
9. Specifications
| Product Type | Replacement Carburetor Kit |
| Brand | Generic |
| Compatible Models | XT-50, XT-85, XT100, XT125, XT125KT, XT125T, XT125TR Trimmers |
| Material | High-strength components |
| Dimensions (Approx.) | 2.54 x 2.54 x 2.54 cm (Carburetor unit) |
| Weight (Approx.) | 453.59 g (Total package) |
10. Warranty and Support
This product is manufactured to high-quality standards. For any questions regarding installation, operation, or troubleshooting, please refer to the retailer or manufacturer's customer support channels. Specific warranty details may vary by retailer; please retain your proof of purchase for warranty claims.