Introduction
This manual provides instructions for the installation and care of your BoxWave ClearTouch Anti-Glare Screen Protector for the Tidradio TD-H3 Plus. This screen protector is designed to reduce glare, resist fingerprints, and provide a precise fit for your device's screen, enhancing visibility and protection.

Image: BoxWave ClearTouch Anti-Glare Screen Protector packaging shown alongside a Tidradio TD-H3 Plus device.
Setup and Installation
Proper installation is crucial for optimal performance. Please follow these steps carefully.
Included Accessories:
- Two (2) ClearTouch Anti-Glare Screen Protectors
- Applicator Card
- Microfiber Cleaning Cloth
- Dust Removing Sticker
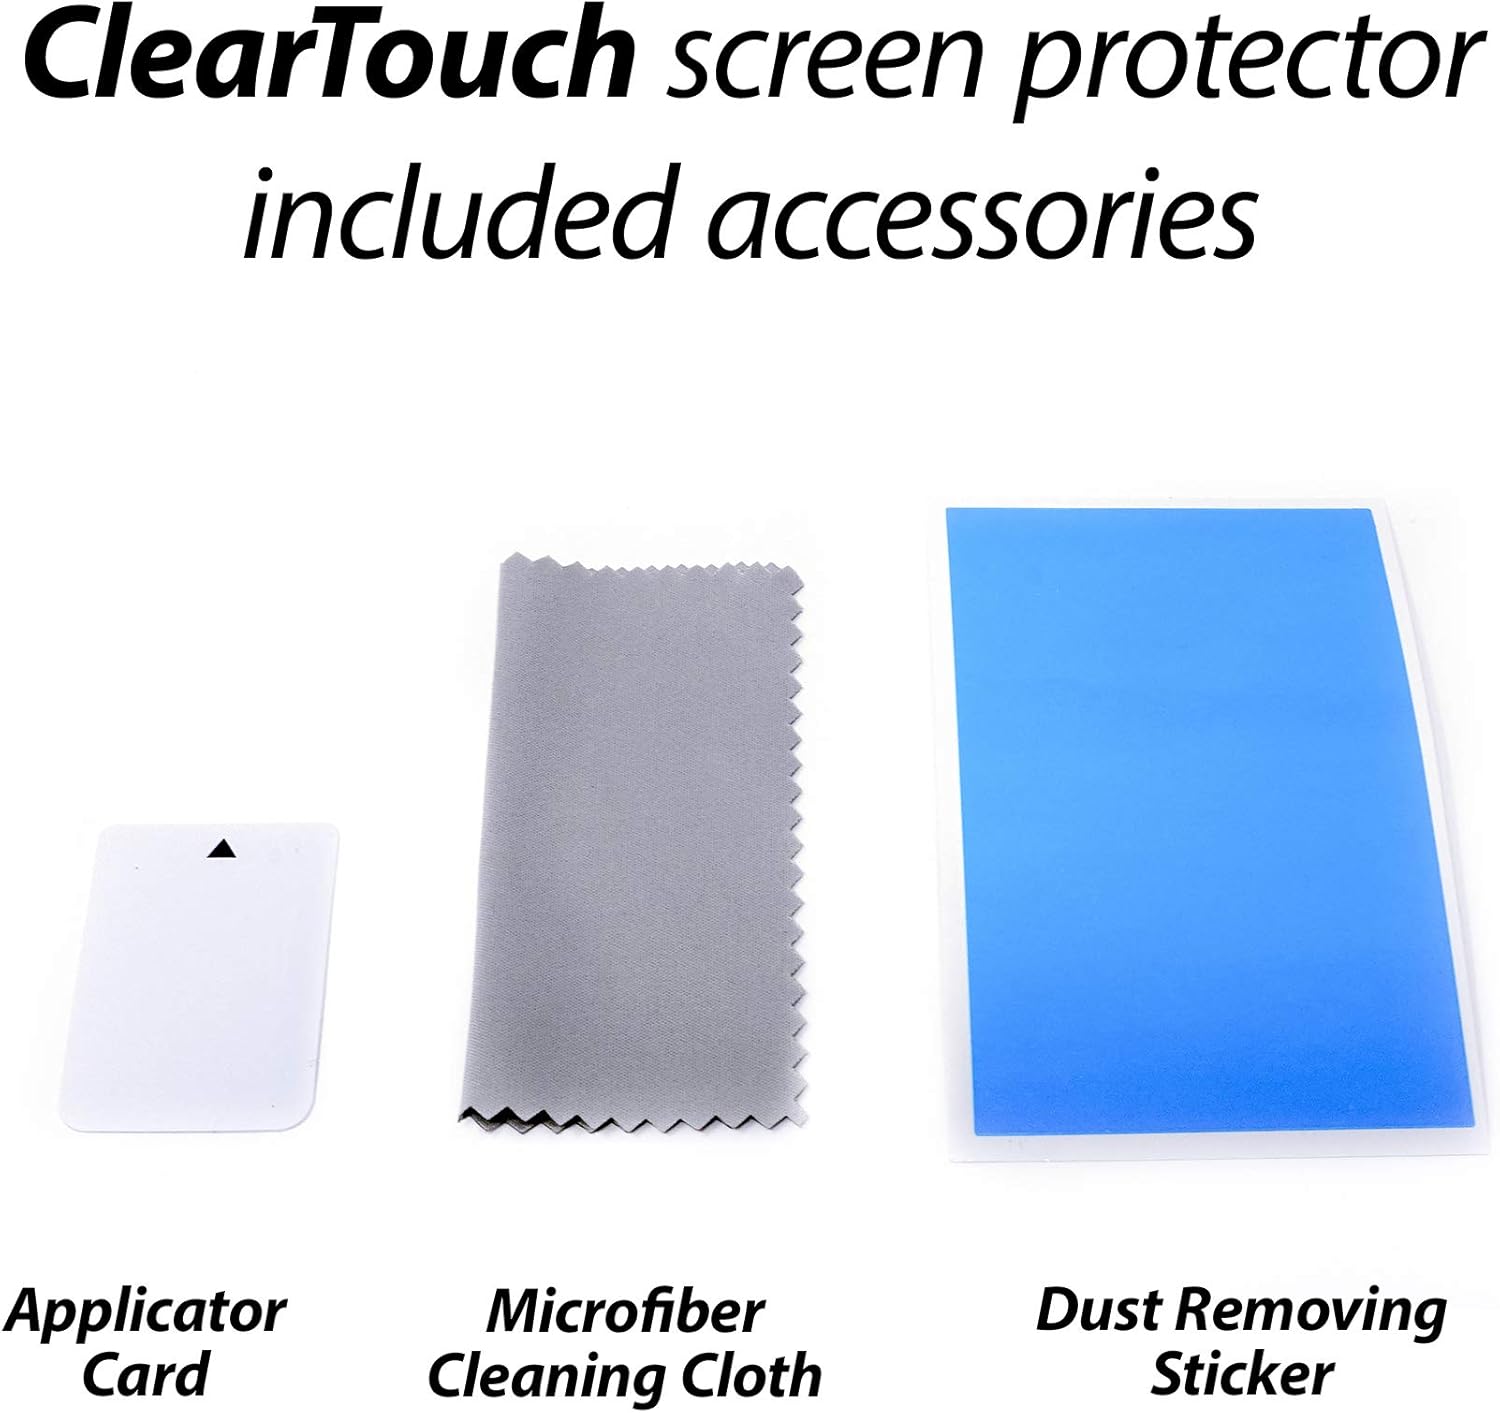
Image: The essential tools for screen protector application, including an applicator card, microfiber cleaning cloth, and dust removing sticker.
Installation Steps:
- Clean the Device Screen: Use the provided microfiber cleaning cloth to thoroughly wipe the screen of your Tidradio TD-H3 Plus. Ensure all dust, smudges, and fingerprints are removed. For stubborn marks, a slightly damp cloth (water only) followed by the dry microfiber cloth can be used.
- Remove Dust: Use the dust removing sticker to lift any remaining dust particles from the screen. Gently dab the sticker across the entire screen surface.
- Align the Screen Protector: Carefully peel back a small portion of the protective layer (usually labeled 'Step 1' or similar) from one end of the screen protector. Align the exposed edge of the screen protector with the corresponding edge of your device screen. Ensure precise alignment with all cut-outs (e.g., speaker, camera) if present.
- Apply and Smooth: Once aligned, slowly peel off the rest of the protective layer while simultaneously using the applicator card to smooth the screen protector onto the device screen. Apply gentle, even pressure from the aligned edge outwards to push out any air bubbles.
- Remove Remaining Protective Layer: Once the screen protector is fully applied, carefully peel off the top protective layer (usually labeled 'Step 2' or similar).
- Final Smoothing: Use the microfiber cloth to gently wipe down the newly installed screen protector, removing any remaining small bubbles or smudges.
The glueless adhesive ensures a clean application without leaving sticky residue upon removal.

Image: The complete package of the BoxWave ClearTouch Anti-Glare screen protector, showing the packaging, two screen protectors, and a cleaning cloth.
Operating and Features
The ClearTouch Anti-Glare screen protector offers several benefits for your device's display.
Anti-Glare Properties:
The matte finish of the screen protector is designed to disperse light, significantly reducing glare from direct sunlight or overhead lighting. This improves screen readability in various environments and reduces eye strain by blocking up to 90% of UV rays.
Anti-Fingerprint Surface:
The specialized matte surface repels unwanted smudges, dust, and fingerprints, keeping your screen cleaner for longer periods. This oleophobic layer helps maintain a smooth touch response.

Image: A visual comparison demonstrating the anti-smudge capabilities of the BoxWave screen protector against a standard screen prone to fingerprints.
Paper-like Feel:
The ultra-smooth matte surface provides a tactile experience similar to writing on paper, which can be beneficial for devices used with styluses or for users who prefer a less slick feel.

Image: A tablet screen showing digital notes and drawings, with a stylus interacting with the display, highlighting the paper-like texture provided by the screen protector.
Maintenance
To maintain the clarity and effectiveness of your screen protector, regularly clean it with the provided microfiber cloth. For more persistent smudges, lightly dampen the cloth with water and gently wipe the surface, then dry with a clean part of the microfiber cloth. Avoid using harsh chemicals or abrasive materials, as these can damage the screen protector's finish.
Troubleshooting
Bubbles After Installation:
- Small Bubbles: Many small bubbles will dissipate naturally within 24-48 hours.
- Large Bubbles: Gently lift the nearest edge of the screen protector and re-apply, using the applicator card to push the air out as you smooth it back down.
Dust Under the Protector:
If dust particles are trapped, carefully lift the nearest edge of the screen protector. Use a dust removing sticker or a piece of tape to gently dab and lift the dust from both the device screen and the underside of the screen protector. Re-apply as per installation steps.
Misalignment:
If the screen protector is misaligned, carefully lift it from one corner and re-align it. The glueless adhesive allows for repositioning during installation. If it has been on for a while, it might be best to use a fresh protector from the 2-pack.
Specifications
| Product Type | Screen Protector |
| Compatibility | Tidradio TD-H3 Plus |
| Features | Anti-Glare, Anti-Fingerprint, Matte Finish, Precision Cut, Glueless Adhesive, UV Reduction |
| Quantity | 2-Pack |
| Item Weight | 0.7 ounces |
| Manufacturer | BoxWave |
Warranty and Support
This product is manufactured by BoxWave. For specific warranty information, product support, or assistance with any issues not covered in this manual, please refer to the official BoxWave website or contact their customer service directly. Contact details are typically available on the product packaging or the manufacturer's website.


