
1. Introduction
This manual provides essential information for the proper installation, adjustment, and maintenance of your maXpeedingrods Coilovers for the Chevy Camaro (2010-2015). Adherence to these instructions is crucial for optimal performance and safety. Professional installation is highly recommended.
2. Product Overview
The maXpeedingrods Coilover Suspension Kit is designed to enhance the handling and appearance of your vehicle by allowing for height adjustment and providing a preset damping value for consistent performance.

Image 2.1: Detailed view of a single coilover unit, highlighting key components such as the adjustable damper setting, spring seat, dust boot, high rigidity steel spring, height adjustment mechanism, and heavy-duty steel lower mounts.
Key Features:
- Height Adjustable: Allows for a ride height adjustment range of 1-3 inches, enabling a customized vehicle stance.
- High Tensile Springs: Front springs rated at 8 kg/mm (448 lbs/in) and rear springs at 13 kg/mm (728 lbs/in). These springs undergo rigorous testing to ensure minimal distortion and improved durability.
- Preset Damping: Factory-set damping values are designed to provide consistent and predictable handling characteristics, reducing stress on the suspension system.
- Twin-tube Construction: Engineered to minimize oil leakage and enhance durability.
- Heavy Duty Steel Lower Mounts: Constructed from robust steel for strength and longevity.
- Corrosion Resistance: Components are treated to improve durability and resist corrosion, as indicated by DIN 60021SS testing.

Image 2.2: Exploded diagram illustrating the internal and external components of the coilover, including the quality collar, heavy-duty steel lower mounts, and the spring with a note on DIN 60021SS corrosion testing for durability.
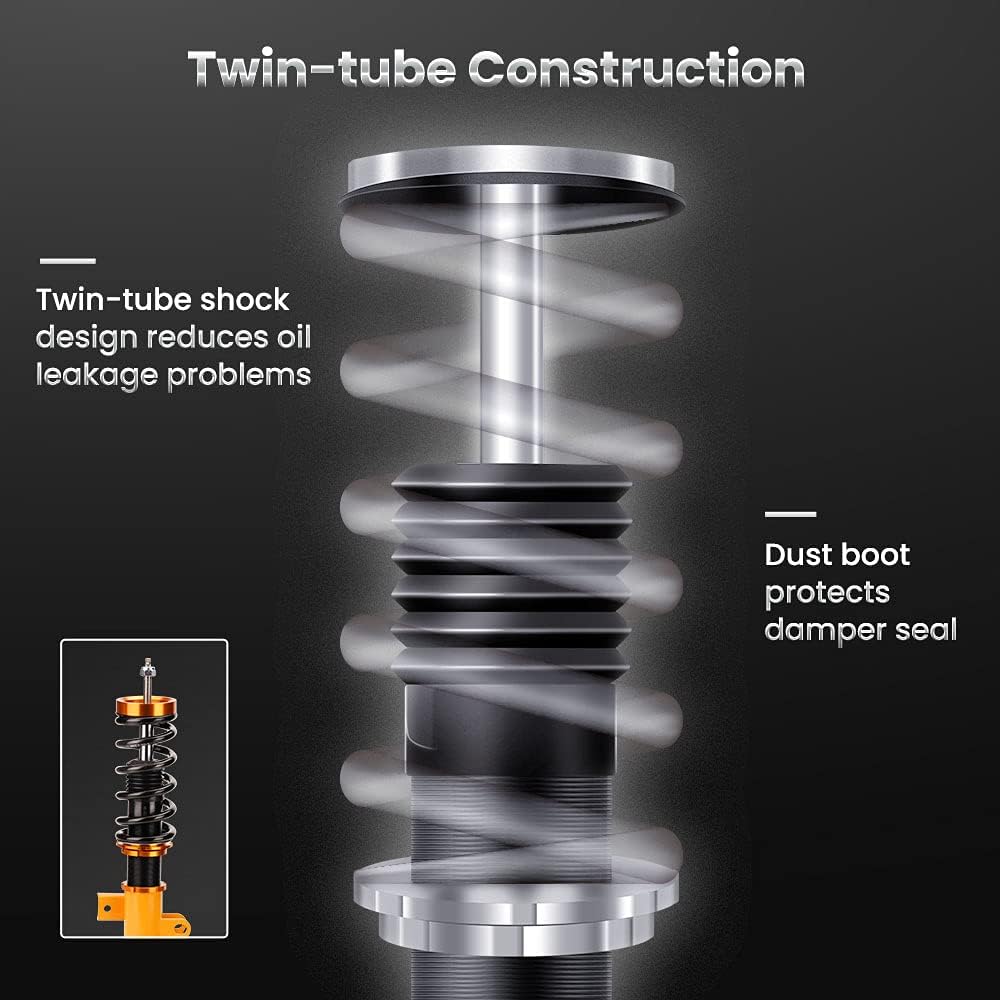
Image 2.3: Diagram illustrating the twin-tube construction of the shock absorber, designed to reduce oil leakage, and highlighting the dust boot which protects the damper seal.
3. Specifications
| Specification | Value |
|---|---|
| Brand | maXpeedingrods |
| Model Number | PE91MN |
| Fitment | Chevy Camaro All Models 2010-2015 (Excluding MagneRide Suspension) |
| Front Spring Rate | 8 kg/mm (448 lbs/in) |
| Rear Spring Rate | 13 kg/mm (728 lbs/in) |
| Height Adjustment Range | 1-3 inches (from original ride height) |
| Damping | Factory Preset |
| Item Weight | 55.6 pounds |
| Product Dimensions | 25.16 x 19.96 x 7.83 inches |
4. Compatibility
These coilovers are specifically designed for:
- Vehicle: Chevy Camaro
- Model Years: 2010, 2011, 2012, 2013, 2014, 2015
- Exclusions: Not compatible with vehicles equipped with MagneRide Suspension.
Please verify your vehicle's specifications before installation to ensure proper fitment.
5. Package Contents
Upon opening the package, please ensure all the following components are present:

Image 5.1: Overview of the complete maXpeedingrods Coilover Kit, showing four coilover assemblies, two sway bar end links, and two adjustment wrenches.
- 2x Front Coilover Assemblies
- 2x Rear Coilover Assemblies
- 2x Height Adjustment Wrenches
- Note: Front and rear Original Equipment (OE) top mounts are required for installation and are not included in this package.
6. Safety Information
Working on vehicle suspension systems can be hazardous. Always prioritize safety and follow these guidelines:
- Professional Installation: It is strongly recommended that these coilovers be installed by a qualified automotive technician.
- Vehicle Support: Always use appropriate jack stands to support the vehicle securely when working underneath it. Never rely solely on a jack.
- Personal Protective Equipment (PPE): Wear safety glasses, gloves, and appropriate clothing to protect against injury.
- Tools: Use the correct tools for each step of the installation process.
- Spring Compression: Coil springs are under high tension. Exercise extreme caution when handling or compressing springs. Use a proper spring compressor if necessary.
- Torque Specifications: Adhere to the vehicle manufacturer's torque specifications for all fasteners.
7. Installation (Setup)
This section provides a general overview of the installation process. Specific steps may vary depending on your vehicle's exact configuration. Refer to a service manual for your specific Chevy Camaro model for detailed instructions.

Image 7.1: An illustrative diagram showing the placement of coilovers within a vehicle's chassis, indicating their position relative to the wheels and suspension components.
General Installation Steps:
- Prepare Vehicle: Park the vehicle on a level surface, engage the parking brake, and loosen the lug nuts on the wheels.
- Lift and Secure: Safely lift the vehicle using a hydraulic jack and secure it with jack stands. Remove the wheels.
- Remove OEM Suspension: Carefully disconnect and remove the original shock absorbers and springs. This typically involves detaching brake lines, ABS sensors, sway bar links, and upper/lower mounting bolts.
- Transfer Top Mounts: If your new coilovers do not come with top mounts, you will need to transfer the OEM top mounts from your original suspension to the new coilover assemblies. Use a spring compressor if necessary.
- Install New Coilovers: Install the maXpeedingrods coilover assemblies into the vehicle's suspension points. Ensure all bolts are finger-tight initially.
- Reconnect Components: Reattach brake lines, ABS sensors, and sway bar links.
- Initial Tightening: With the vehicle still on jack stands, tighten all mounting bolts to the manufacturer's specified torque.
- Lower Vehicle: Carefully lower the vehicle to the ground.
- Final Torque: With the vehicle's weight on the suspension, perform a final torque check on all fasteners.
- Alignment: After installation, a professional wheel alignment is mandatory to ensure proper handling and tire wear.
8. Adjustment (Operating)
Your maXpeedingrods Coilovers allow for ride height adjustment. The damping value is factory preset and not user-adjustable.

Image 8.1: Diagram illustrating the process of adjusting the ride height of the coilover by rotating the lower spring seat, allowing the user to set their preferred ride height.
Ride Height Adjustment:
- Lift Vehicle: Safely lift the vehicle so the wheels are off the ground, relieving pressure from the suspension.
- Loosen Locking Collars: Use the provided adjustment wrenches to loosen the locking collars on the coilover body.
- Adjust Height: Rotate the main spring seat collar to raise or lower the vehicle. Turning clockwise typically lowers the vehicle, while counter-clockwise raises it. Make small, even adjustments to all four coilovers.
- Tighten Locking Collars: Once the desired height is achieved, securely tighten the locking collars against the spring seat to prevent movement.
- Lower Vehicle and Test: Carefully lower the vehicle and drive it a short distance to allow the suspension to settle. Re-measure the ride height and make further adjustments if necessary.
- Re-alignment: Any significant change in ride height will require a professional wheel alignment.
9. Maintenance
Regular maintenance helps prolong the life and performance of your coilovers.
- Regular Inspection: Periodically inspect the coilovers for any signs of damage, leaks, or loose components. Check dust boots for tears.
- Cleaning: Keep the coilover bodies and threads clean, especially after driving in harsh conditions (e.g., snow, salt, dirt). Use a mild soap and water solution.
- Lubrication: Apply a thin layer of anti-seize lubricant to the adjustment threads annually to prevent seizing and facilitate future adjustments.
- Torque Check: Re-check the torque on all mounting bolts and locking collars after the first 500 miles of driving and then periodically (e.g., every 10,000 miles).
10. Troubleshooting
This section addresses common issues you might encounter.
Common Issues and Solutions:
- Noise (Clunking/Squeaking):
- Cause: Loose mounting bolts, worn bushings, or improper installation.
- Solution: Re-check all mounting bolts for proper torque. Inspect bushings for wear and replace if necessary. Ensure top mounts are correctly installed.
- Uneven Ride Height:
- Cause: Uneven height adjustment, suspension not settled.
- Solution: Re-measure and adjust all coilovers to ensure even height. Drive the vehicle briefly to allow suspension to settle before final measurement.
- Poor Handling/Steering:
- Cause: Incorrect wheel alignment, loose components, or damaged coilover.
- Solution: Get a professional wheel alignment. Inspect all suspension components for damage or looseness.
- Oil Leakage from Damper:
- Cause: Damaged seal or damper.
- Solution: If a significant oil leak is observed, the damper unit may be faulty and require replacement. Contact customer support.
11. Warranty and Support
For warranty information, technical support, or to inquire about replacement parts, please contact maXpeedingrods customer service through their official website or the retailer where the product was purchased. Please have your model number (PE91MN) and purchase details available when contacting support.
Website: www.maxpeedingrods.com