
1. Product Overview
The Shark Glam Hot Tool Air Styling & Drying System is designed to dry, curl, air straighten, and gloss hair with innovative heat-controlled ceramic and powerful airflow. This multi-styler includes various attachments to achieve different styles without excessive heat damage.
Key Features:
- Shark Silki Hot Tool + Air Straightener: Provides a silky-smooth finish on wet or dry hair with up to 2x more shine.
- Shark Glossi Hot Tool + Air Glosser: Offers ultra-fast drying for glossy blowouts without frizz, suitable for hair types 1A to 4C.
- No Hot Tool Damage: Heat-controlled ceramic plates and precise, high-speed airflow regulate heat to prevent damage.
- Gloss Lock: Seals in 24-hour glossy shine on dry hair.
- Scalp Shield: Instantly adjusts temperatures to protect the scalp from extreme heat, designed for wet-to-dry styling with less heat exposure.
- Coanda Auto-Wrap Curlers: Automatically wraps, sets, and curls hair without heat damage.

Figure 1.1: The Shark Glam Hot Tool Air Styling & Drying System with its various attachments.
2. Setup
Unboxing and Initial Inspection:
- Carefully remove all components from the packaging.
- Inspect the main unit and all attachments for any signs of damage. Do not use if damaged.
- Ensure all listed components are present: main styling wand, Shark Silki Straightener, Shark Glossi Styler, 1.25" Coanda Auto-Wrap Curlers (left and right), FrizzFighter Finishing Tool, and Styling Concentrator.
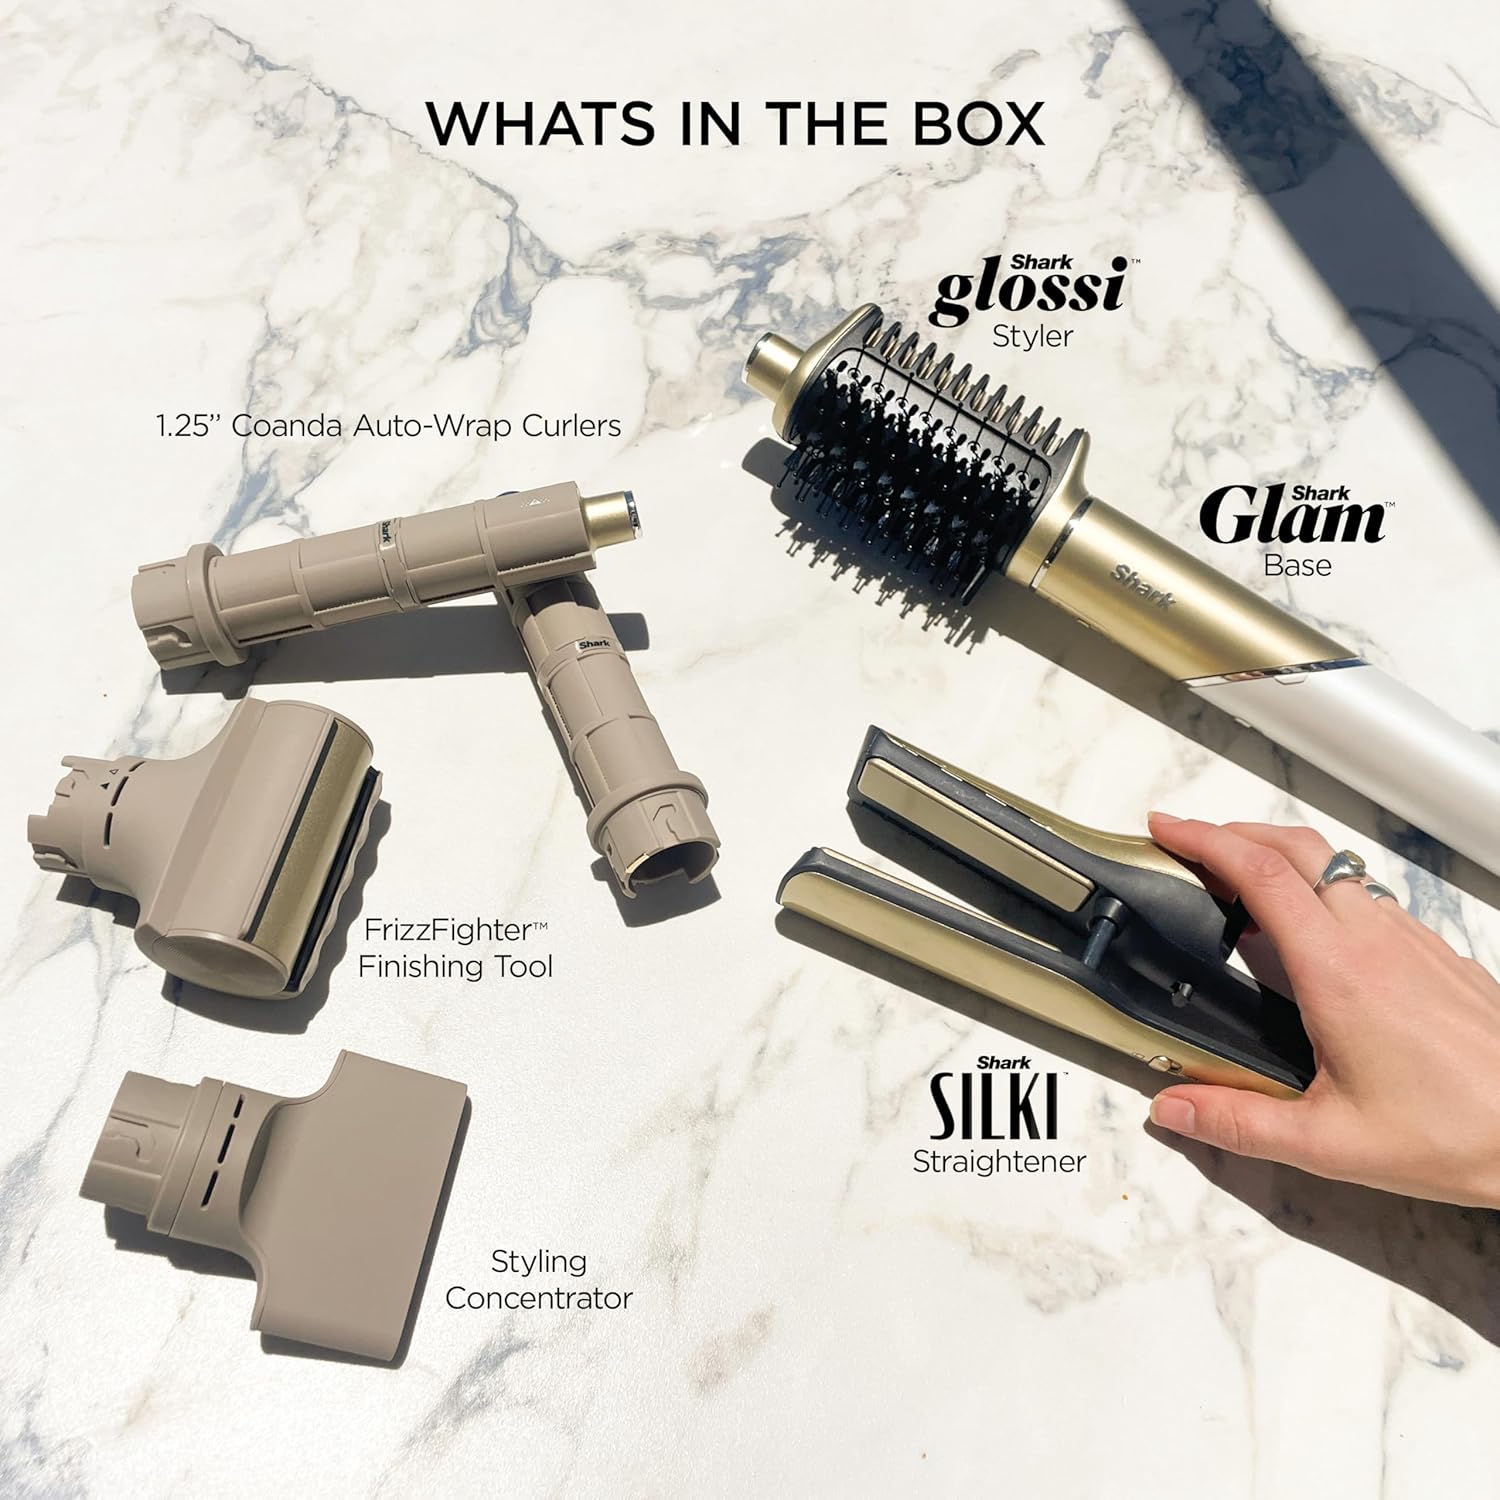
Figure 2.1: All components included in the Shark Glam system packaging.
Attaching Accessories:
- To attach an accessory, align the outline arrow on the accessory with the solid arrow on the back of the main styling wand.
- Insert the accessory and twist it to the left until the solid arrows align and the parts click into place.
- To detach, pull down the latch below the hinge and rotate the top of the wand to the left.
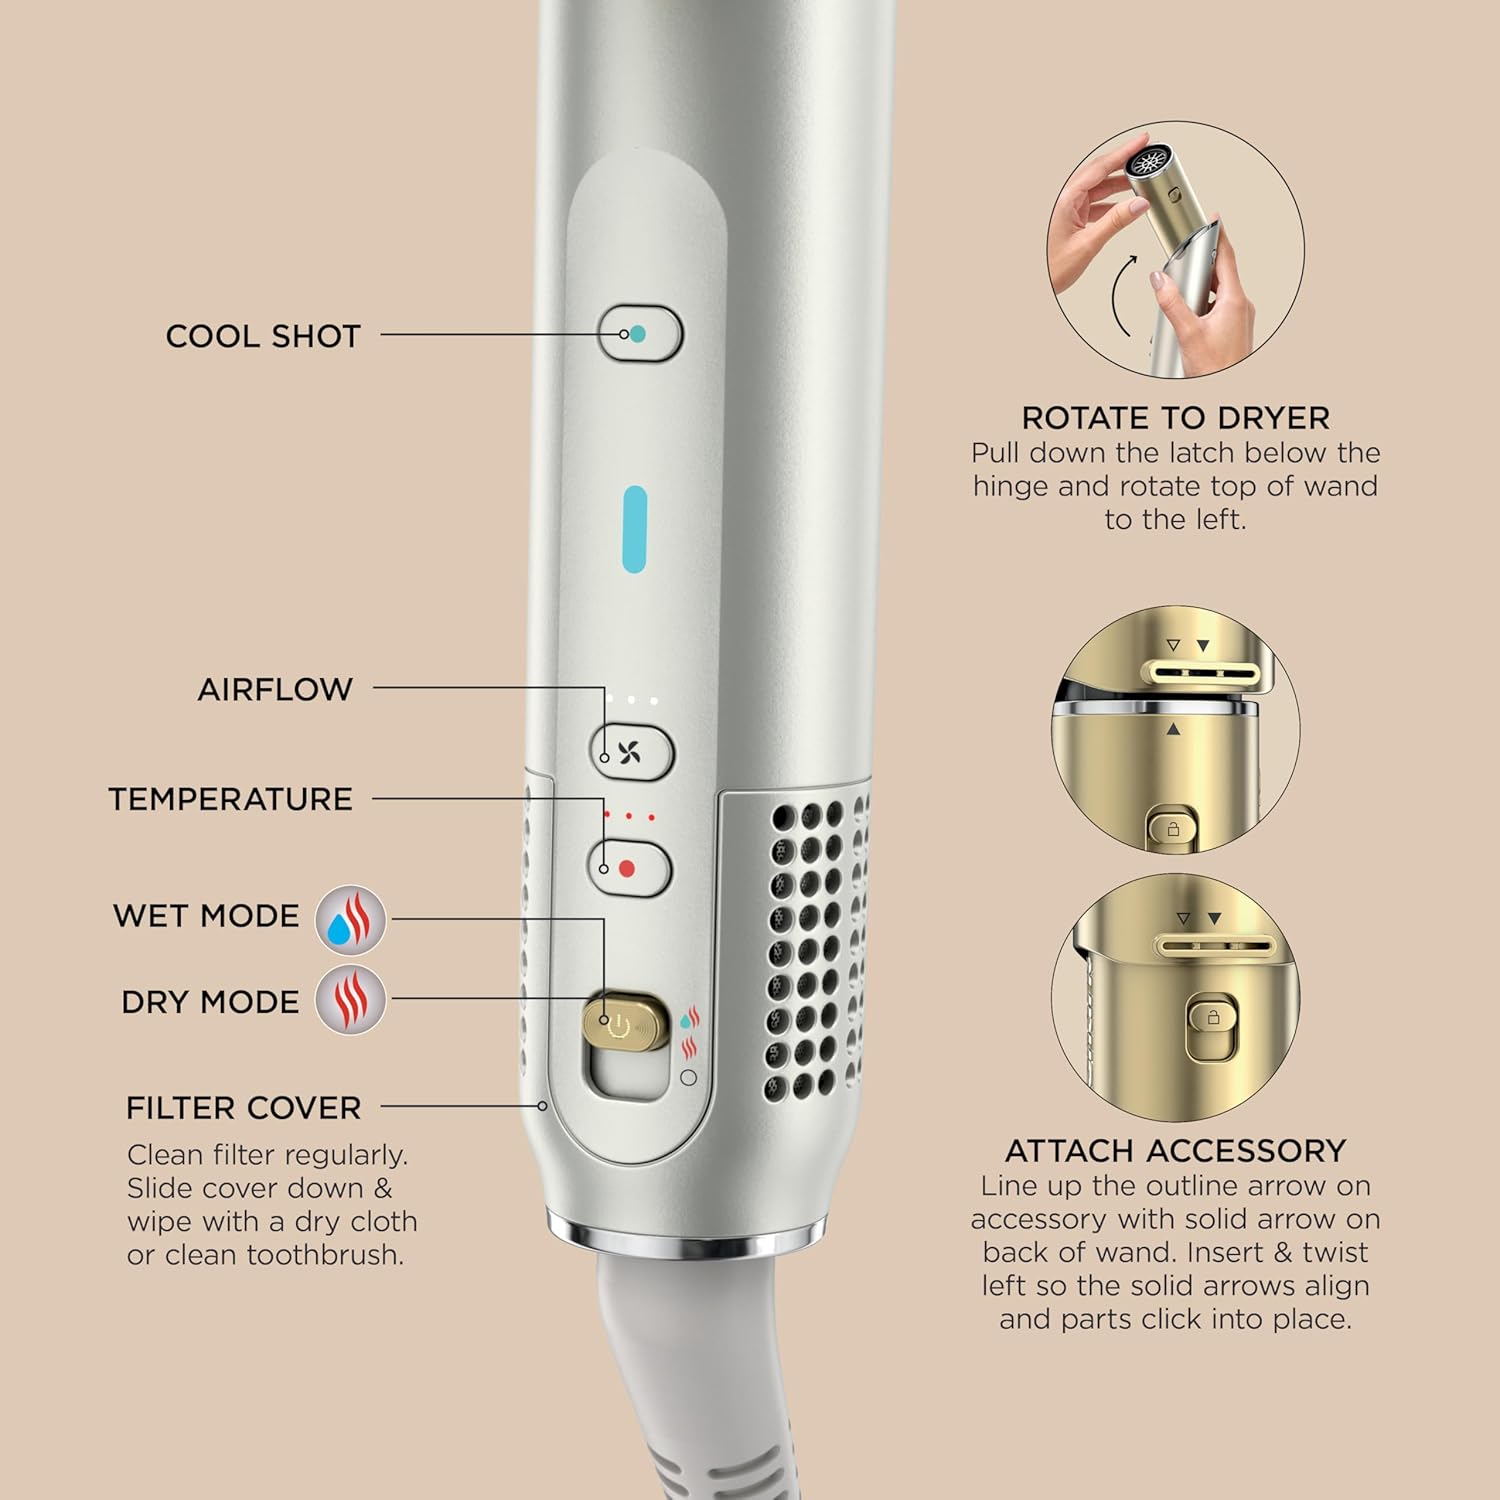
Figure 2.2: Instructions for attaching and detaching styling accessories.
3. Operating Instructions
Main Unit Controls:
- Cool Shot Button: Provides a burst of cool air to set your style.
- Airflow Settings: Adjust the fan speed (low, medium, high).
- Temperature Settings: Adjust the heat level (low, medium, high).
- Wet Mode: For thoroughly drying and styling slightly damp hair.
- Dry Mode: To lock in glossy shine with heat-controlled ceramic plates on dry hair.
- Filter Cover: Slide down to clean the filter regularly with a dry cloth or clean toothbrush.
Figure 3.1: Overview of the main unit's controls and settings.
Using the Shark Silki Straightener:
- Rough dry hair until 70% dry. Fully detangle with a wide-tooth comb or brush before sectioning.
- Switch to Wet Mode. Position ceramic plates towards your roots with airflow pointing down to dry and straighten simultaneously.
- Finish and touch-up with Gloss Lock. Switch to Dry Mode and pass through completely dry hair.
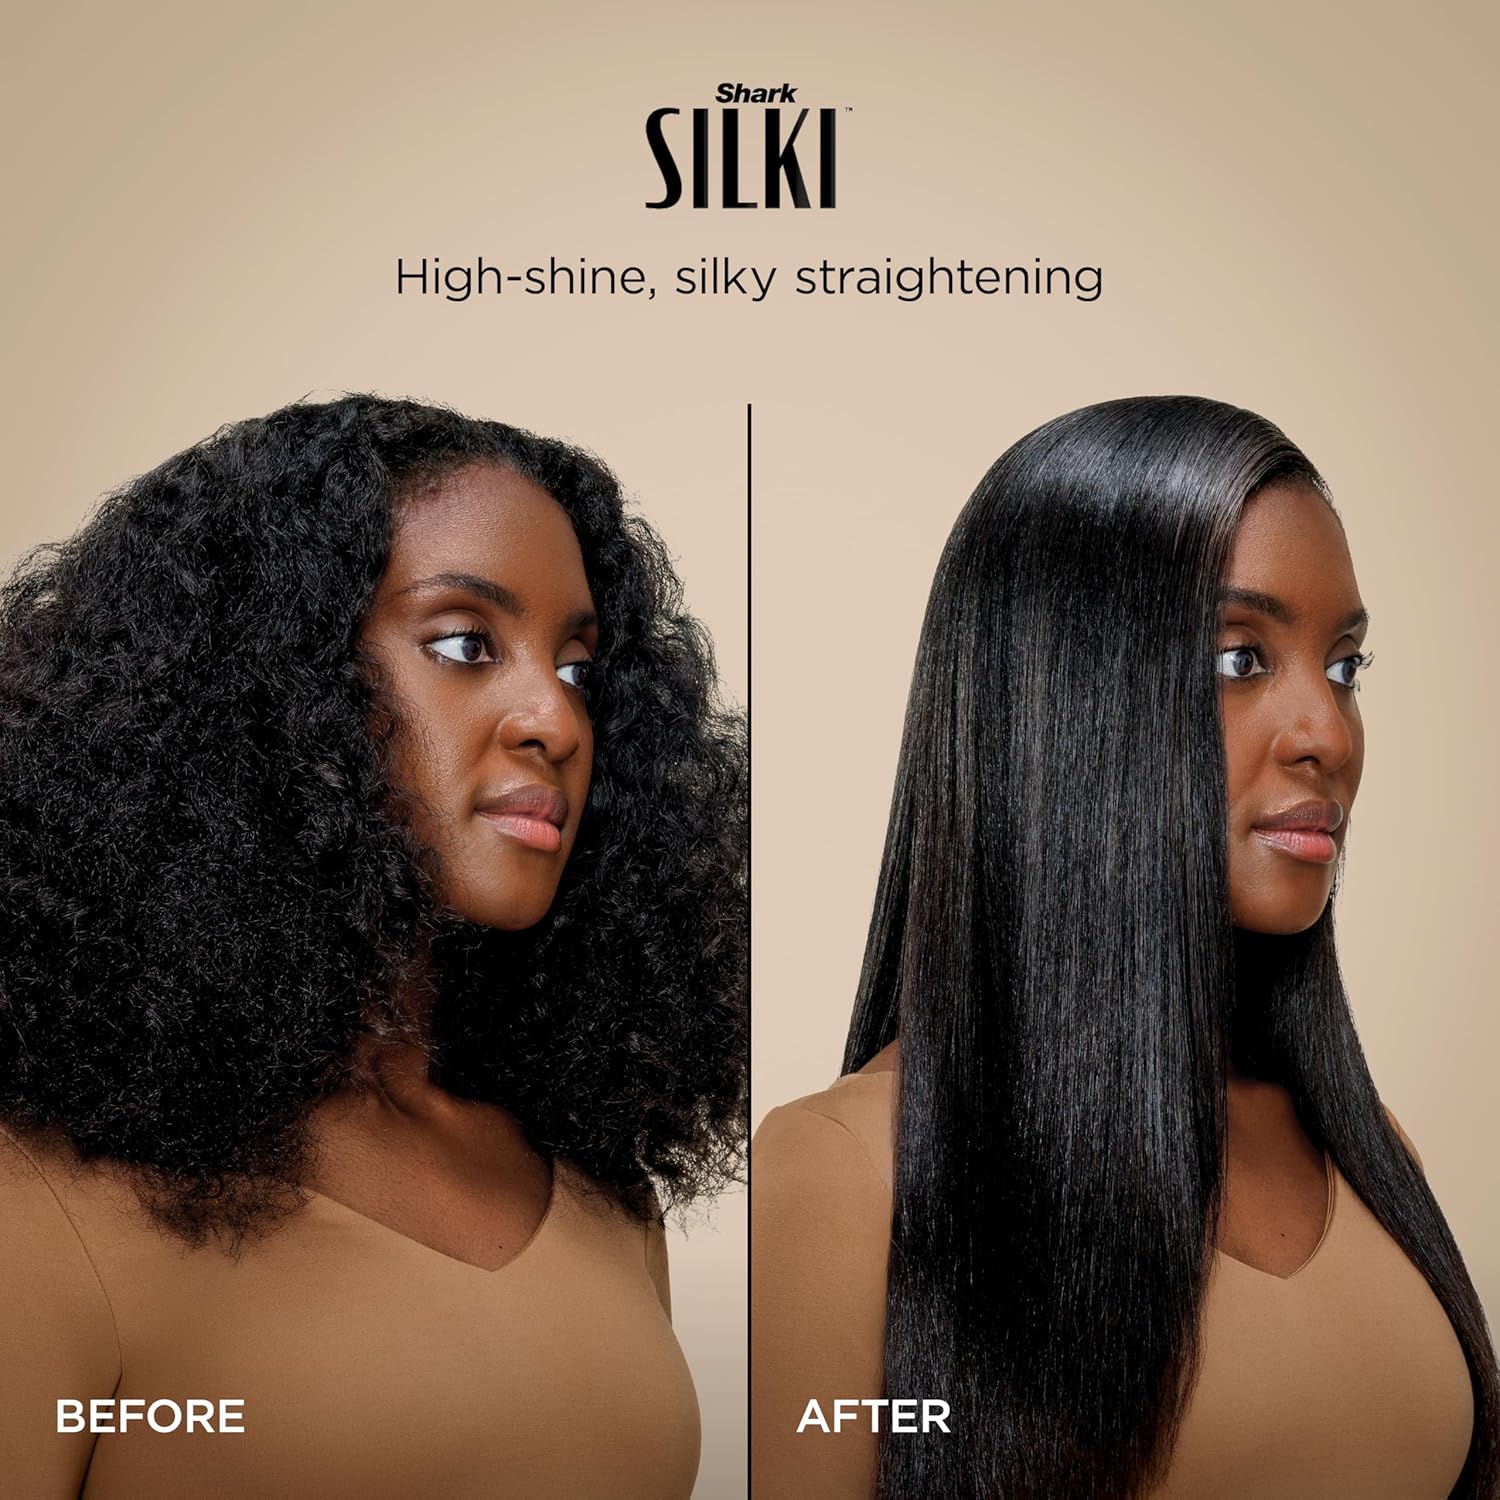
Figure 3.2: Hair before and after using the Shark Silki Straightener for a high-shine, silky finish.

Figure 3.3: Detailed steps for using the Shark Silki Straightener.
Using the Shark Glossi Air Glosser:
- Rough dry hair until 70% dry. Fully detangle with a wide-tooth comb or brush before sectioning.
- Switch to Wet Mode. Take a small section of hair and position the bristles underneath, close to the roots. Rotate UP and AWAY while brushing through each section. Pass through both ceramic plates and bristles.
- Finish and touch-up with Gloss Lock. Switch to Dry Mode and rotate away through both ceramic plates and bristles to add body, bounce, and shine.

Figure 3.4: Hair before and after using the Shark Glossi Air Glosser for a high-gloss, voluminous blowout.
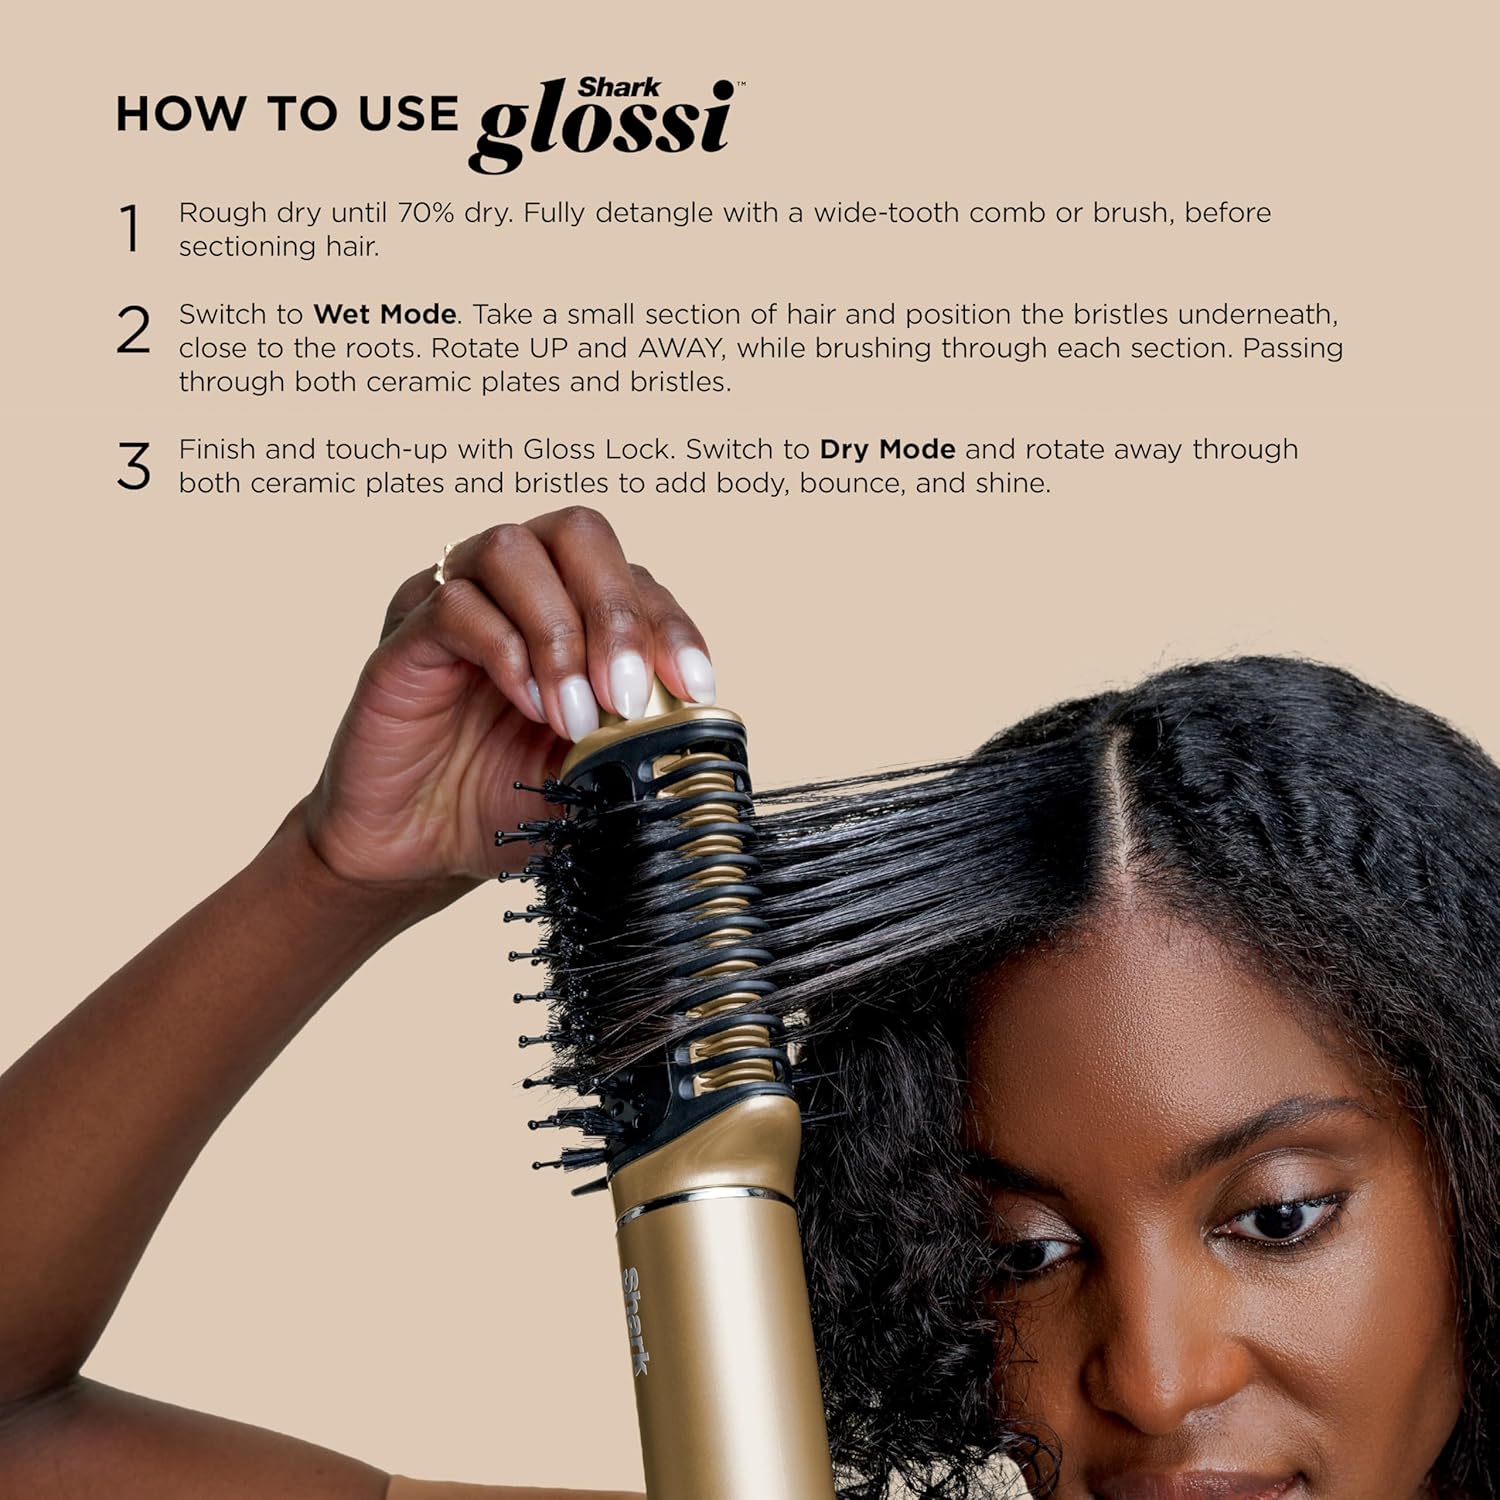
Figure 3.5: Detailed steps for using the Shark Glossi Air Glosser.
Using Coanda Auto-Wrap Curlers:
- Attach the appropriate curler (left or right) for your desired curl direction.
- Hold a section of hair near the curler, and the Coanda effect will automatically wrap the hair around the barrel.
- Hold until the curl is set, then release. Use the cool shot function to lock in the curl.
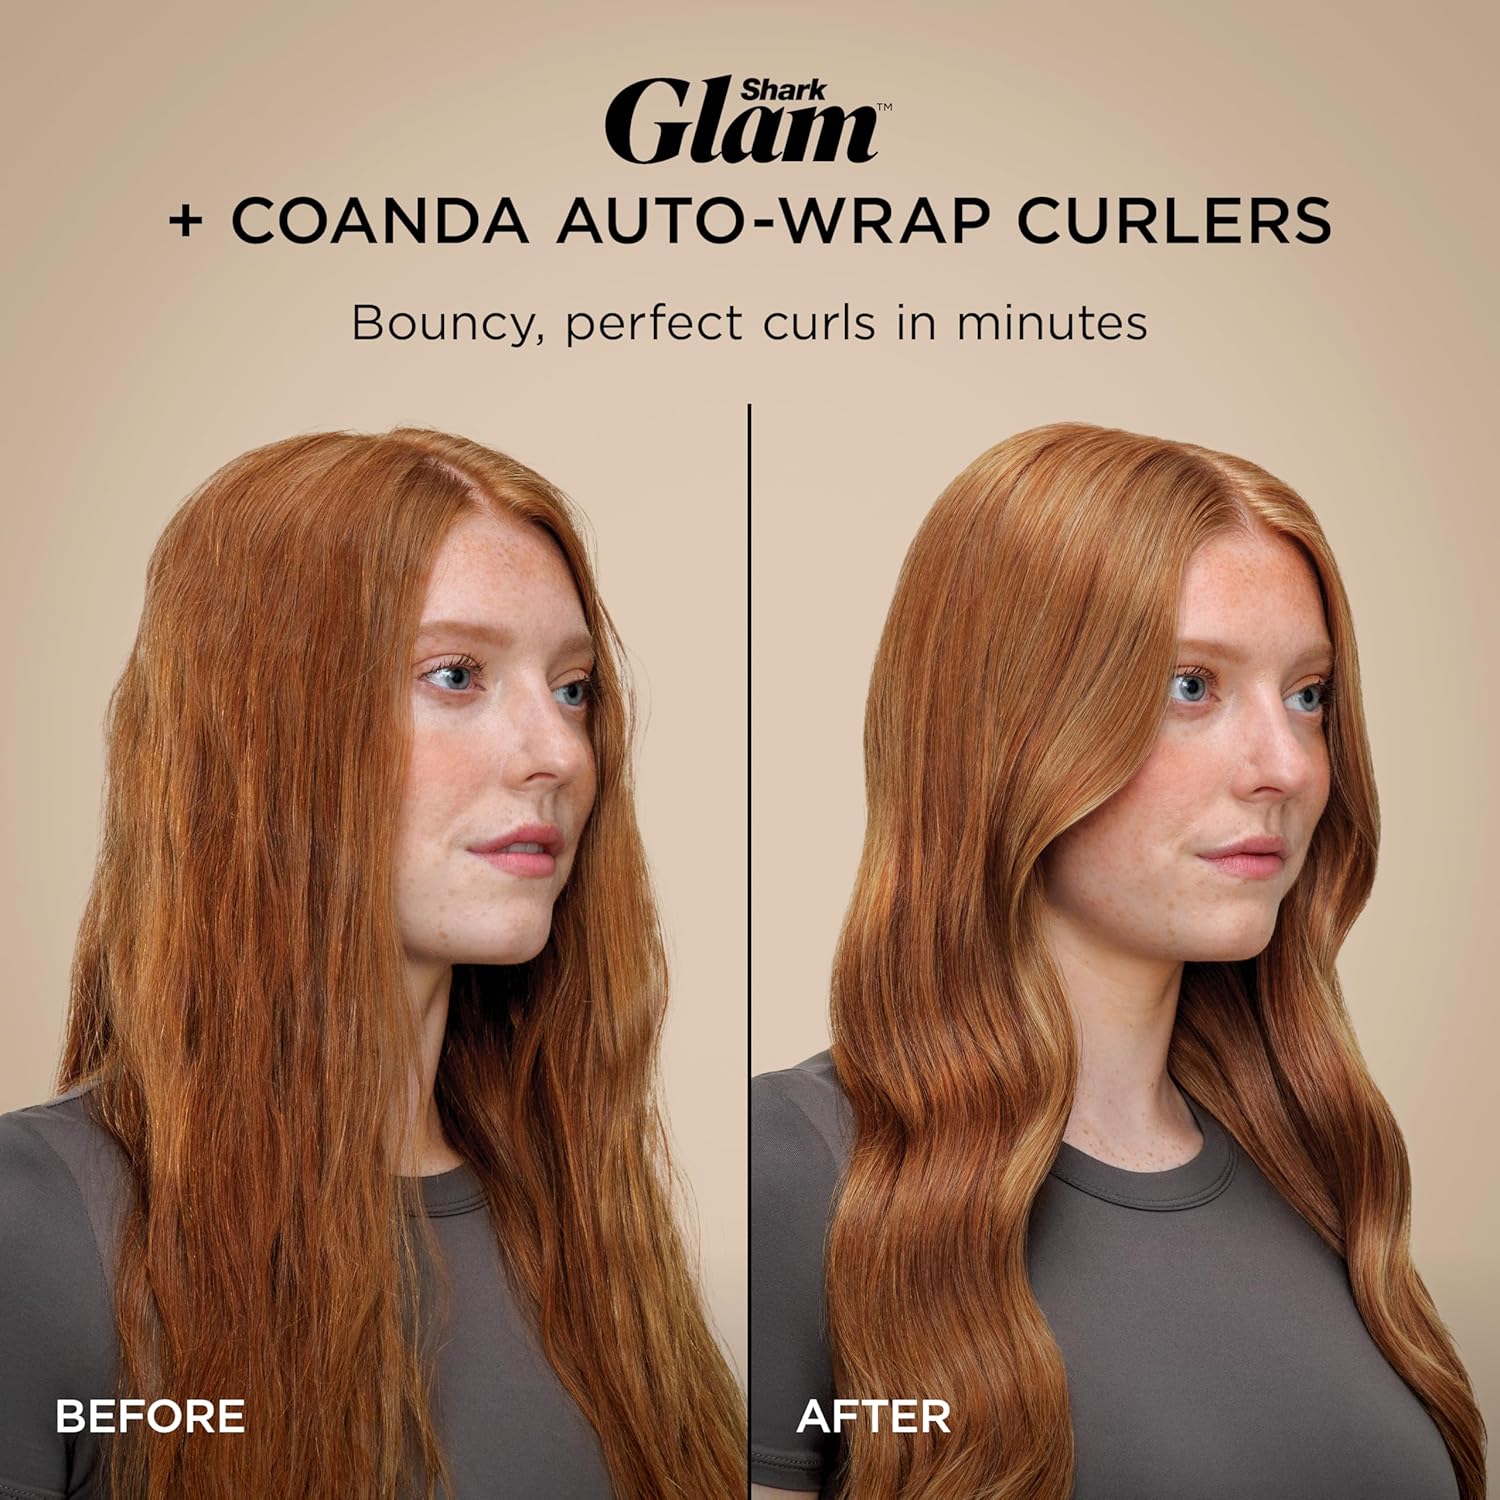
Figure 3.6: Hair before and after using the Coanda Auto-Wrap Curlers for bouncy curls.
Using FrizzFighter Finishing Tool:
- Attach the FrizzFighter Finishing Tool to the main unit.
- Use on dry hair to reduce frizz and smooth flyaways.
- Pass the tool over sections of hair, ensuring the airflow is directed downwards for a sleek finish.
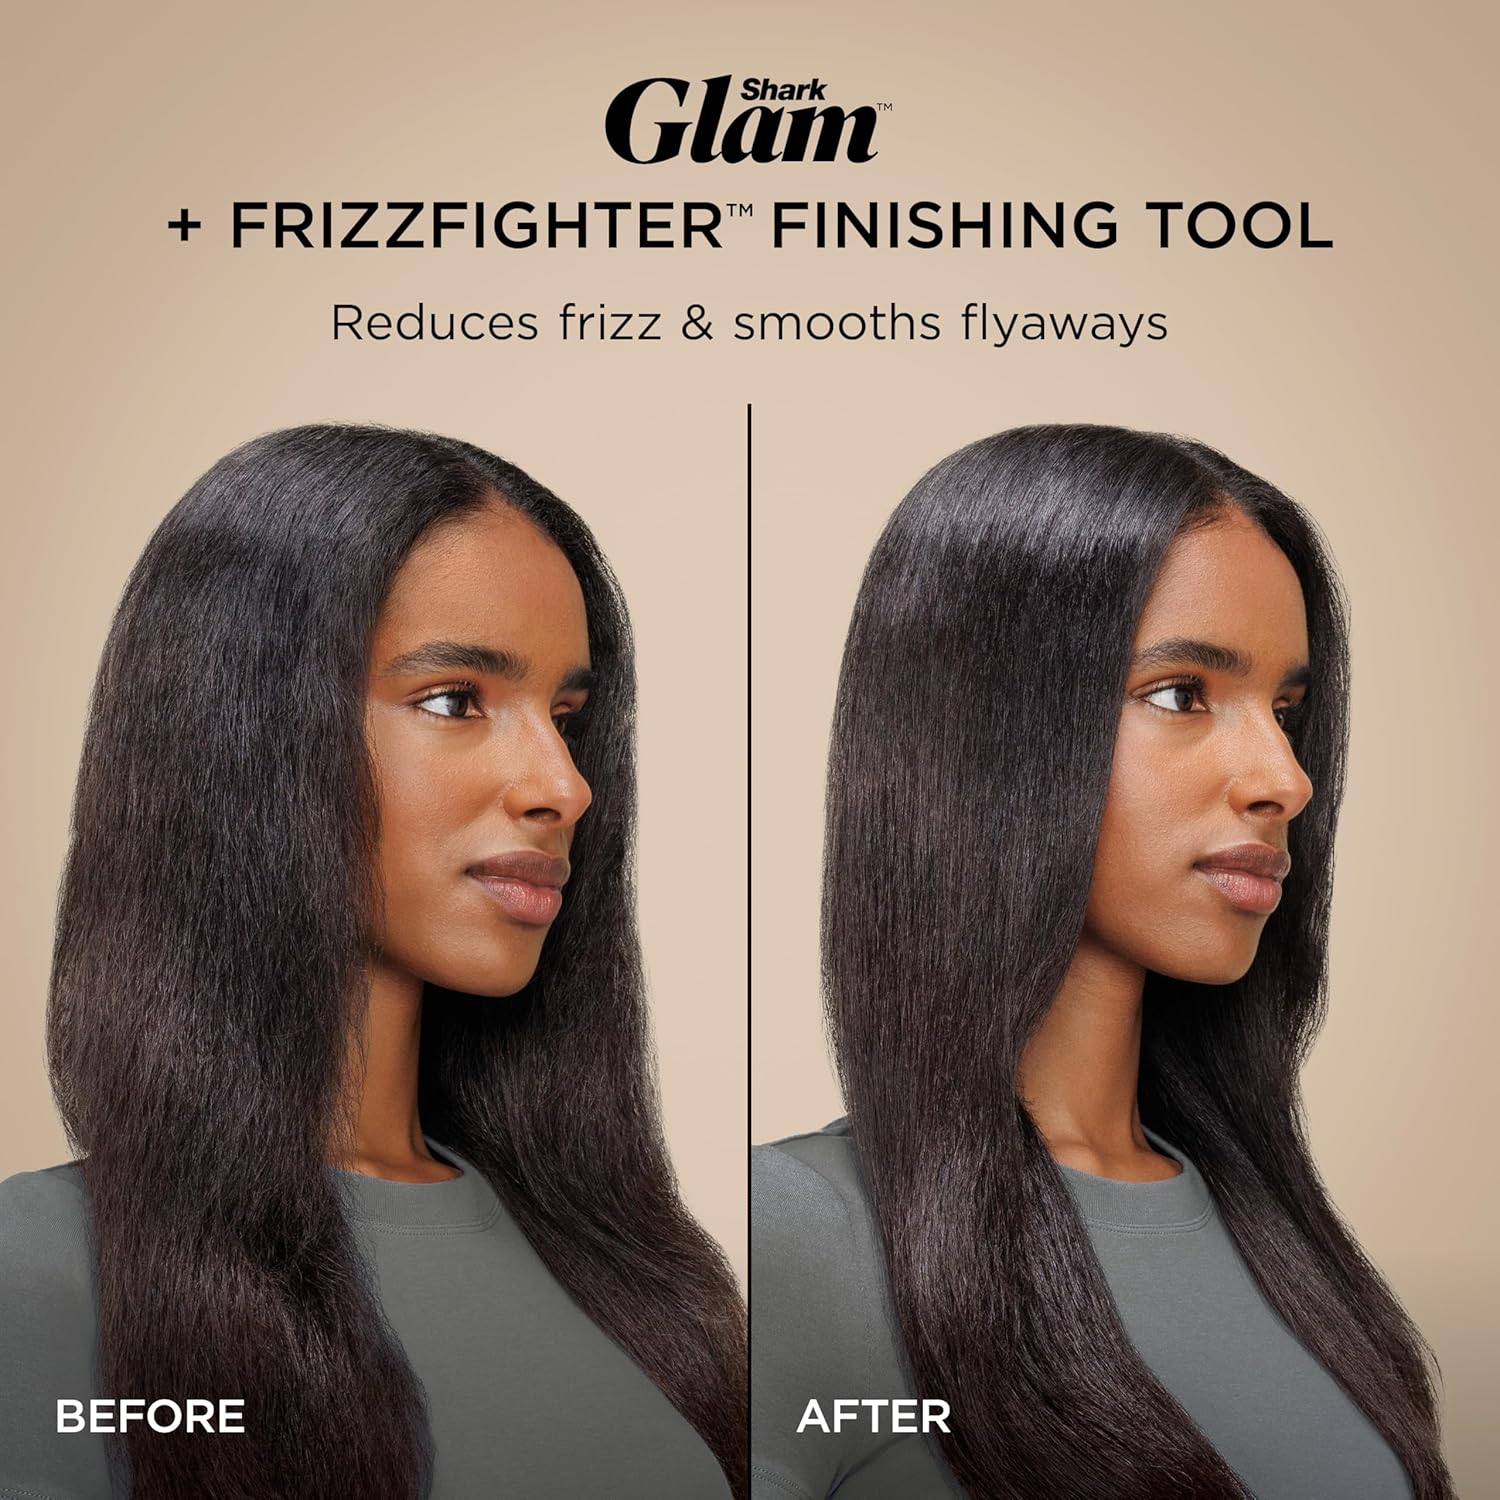
Figure 3.7: Hair before and after using the FrizzFighter Finishing Tool to reduce frizz and smooth flyaways.
Using Styling Concentrator:
- Attach the Styling Concentrator to the main unit.
- Use on damp hair to help smooth and straighten hair while blow-drying.
- Direct the concentrated airflow down the hair shaft for a sleek and controlled finish.
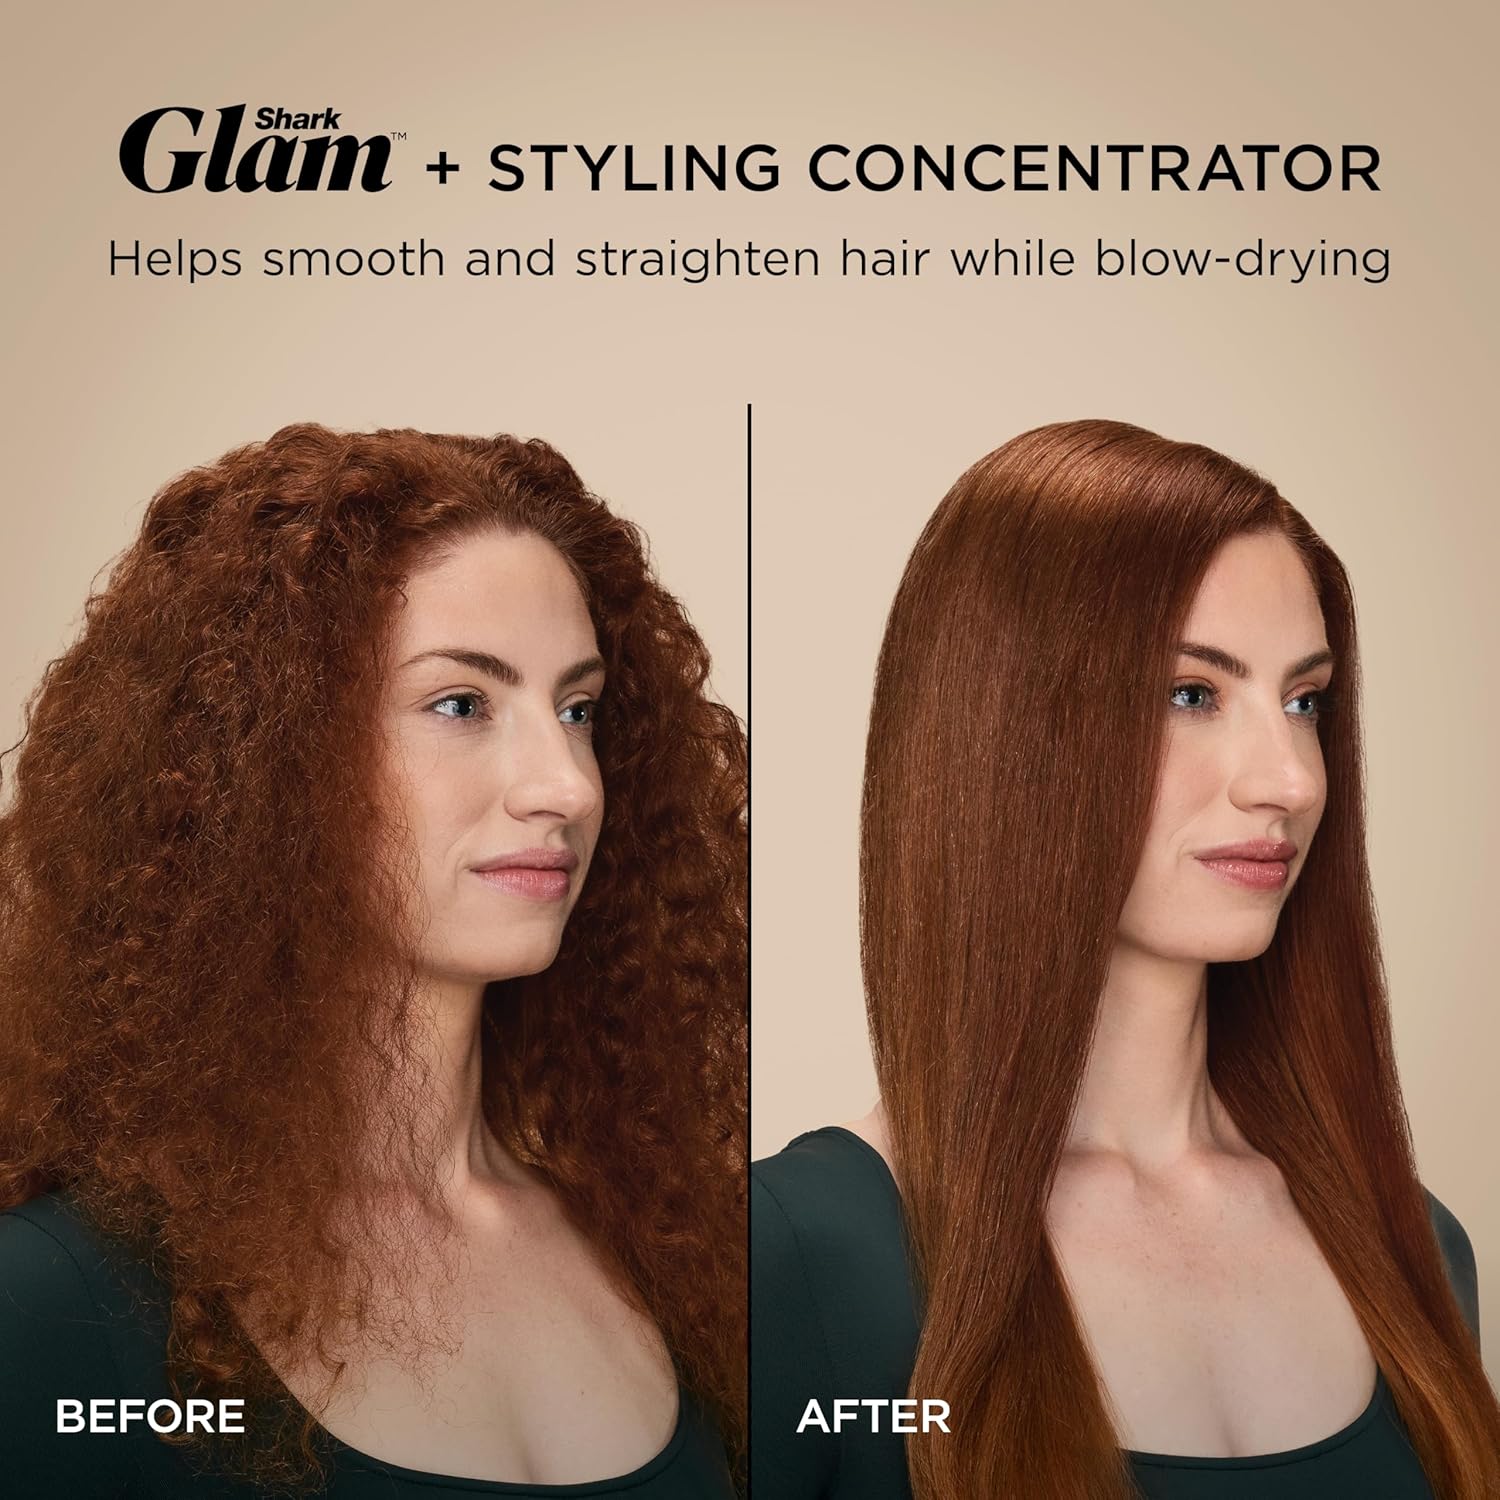
Figure 3.8: Hair before and after using the Styling Concentrator to smooth and straighten while blow-drying.
Wet Mode vs. Dry Mode:
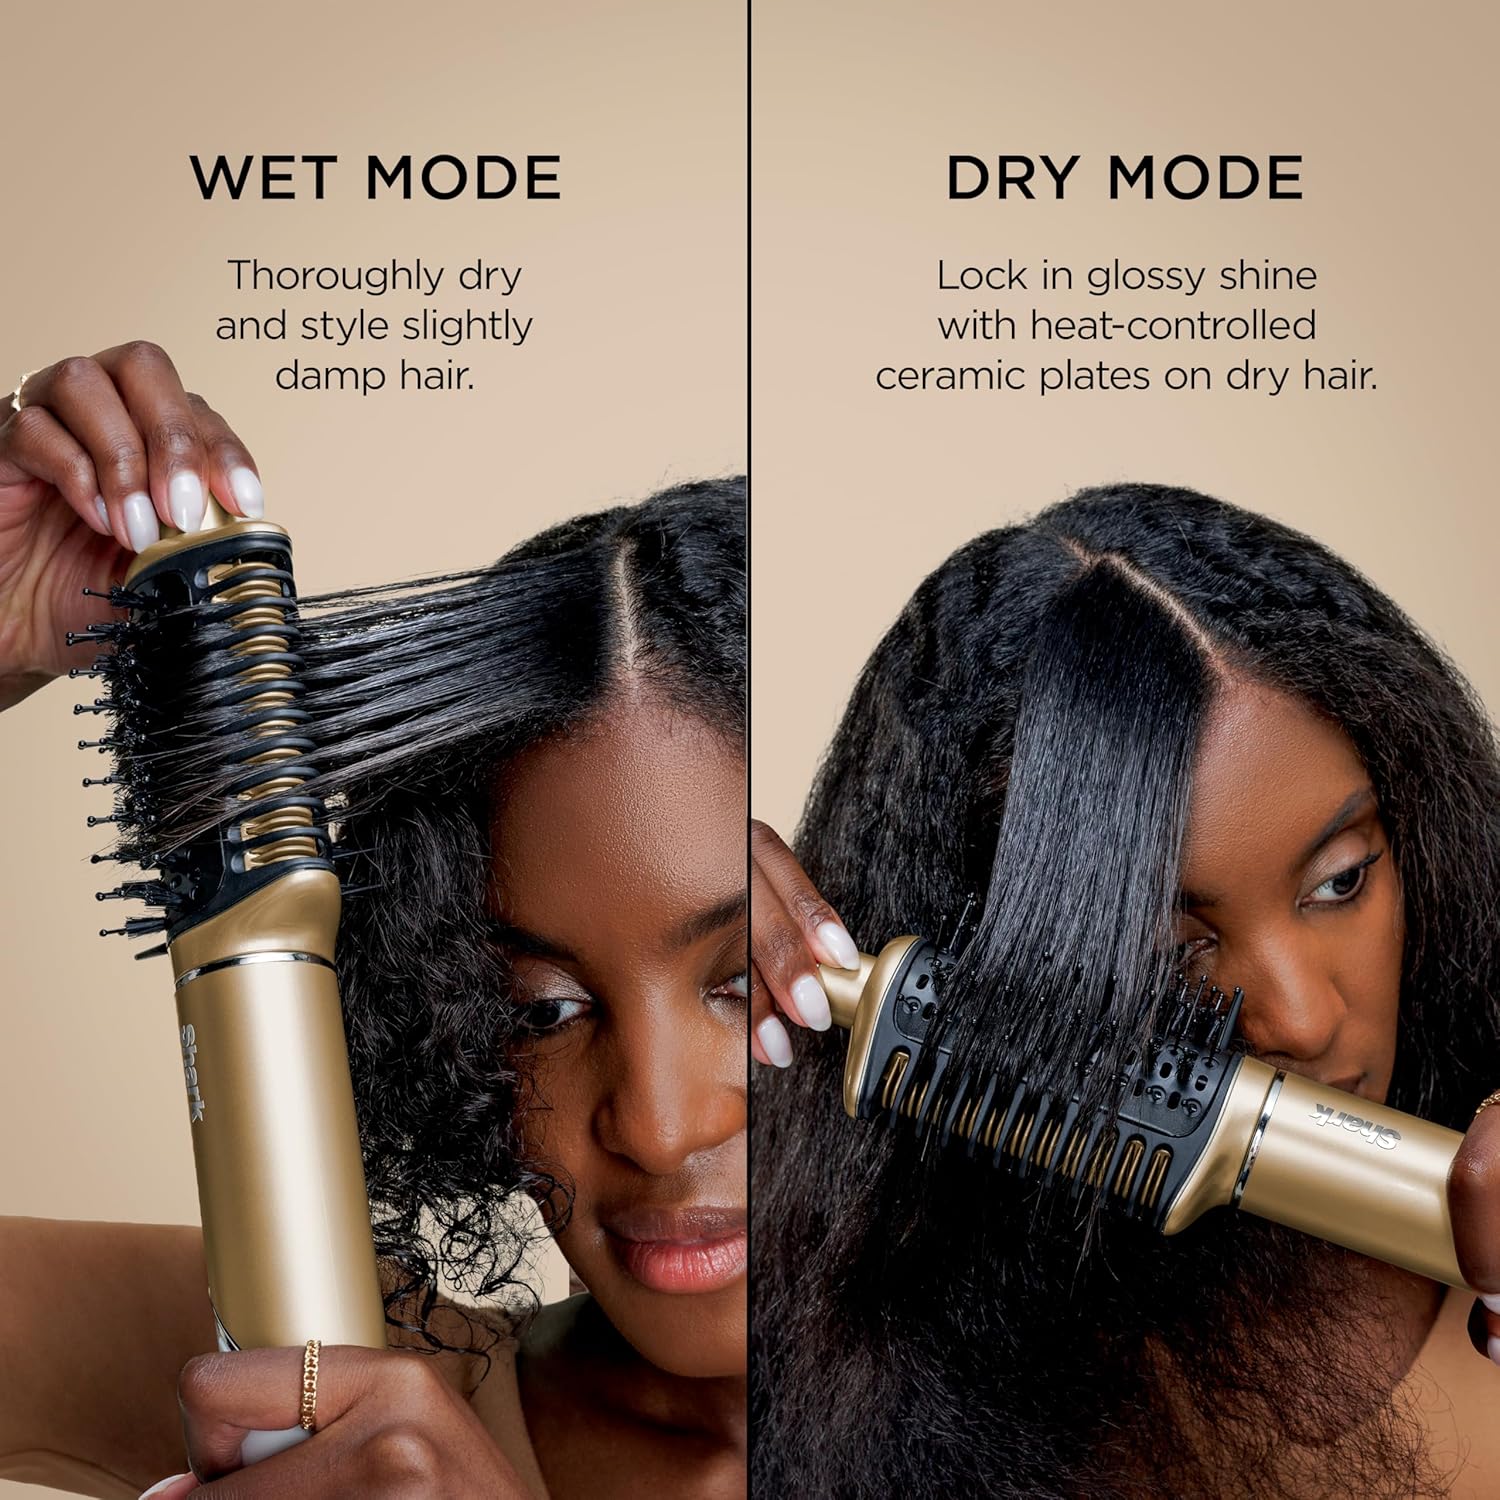
Figure 3.9: Visual guide for Wet Mode (thoroughly dry and style slightly damp hair) and Dry Mode (lock in glossy shine on dry hair).
Official Product Video: Meet the Shark Glam
Video 3.1: An official overview of the Shark Glam system and its capabilities.
4. Maintenance
Cleaning the Filter:
- Regularly clean the filter to maintain optimal performance.
- Slide down the filter cover located on the main unit.
- Wipe the filter with a dry cloth or use a clean toothbrush to remove any accumulated dust or hair.
- Ensure the filter cover is securely reattached before next use.
Cleaning Attachments:
- Ensure the device is unplugged and cooled down before cleaning.
- Wipe down all attachments with a soft, damp cloth. Do not use abrasive cleaners or immerse in water.
- Remove any hair tangled in the brushes or curlers using a comb or your fingers.
5. Troubleshooting
Common Issues and Solutions:
| Issue | Possible Cause | Solution |
|---|---|---|
| Device not turning on | Not plugged in correctly; power outlet issue | Ensure the device is fully plugged into a working outlet. Check circuit breaker. |
| Weak airflow or reduced performance | Clogged air filter | Clean the filter cover as described in the Maintenance section. |
| Hair not styling effectively | Hair too wet/dry; incorrect attachment/mode; section size too large | Ensure hair is at the recommended dampness. Use the correct attachment and mode for desired style. Work with smaller sections of hair. |
| Frizz or flyaways persist | Incorrect technique; hair not fully dry | Ensure the FrizzFighter tool is used on fully dry hair and passed downwards. Apply Gloss Lock in Dry Mode. |
| Curls do not hold | Hair too wet; not using cool shot; section size too large | Ensure hair is slightly damp for curling. Use the cool shot function to set curls. Try smaller hair sections. |
6. Specifications
| Feature | Detail |
|---|---|
| Product Dimensions | 1.69 x 1.61 x 1.61 inches |
| Item Model Number | HD6051S |
| UPC | 622356702799 |
| Manufacturer | SharkNinja |
| Item Weight | 1.63 Pounds |
| Power Source | Corded Electric |
| Heater Surface Material | Ceramic |
| Color | Gold |
| Hair Type Compatibility | All |
| Resulting Hair Type | Curly, Straight, Volumized |
7. Safety Information
WARNING: To reduce the risk of burns, electrocution, fire, or injury to persons:
- Burn Hazard: Surfaces get extremely hot during use. Avoid direct contact with skin.
- Electric Shock Risk: Keep away from water. Do not use near bathtubs, sinks, or other water sources.
- Fire Risk: Unplug when not in use. Do not leave unattended when plugged in.
- Keep out of reach of children.
- Do not operate any appliance with a damaged cord or plug, or if the appliance malfunctions or has been dropped or damaged in any manner.
- Do not use an extension cord with this appliance.
8. Warranty & Support
For warranty information and customer support, please refer to the documentation included with your product or visit the official SharkNinja website. Keep your purchase receipt as proof of purchase for warranty claims.