
1. Product Overview
The LARKSOUND 2.2 CH Detachable Soundbar offers flexible audio solutions for various entertainment setups. This soundbar features a unique 2-in-1 design, allowing it to be used as a single unit or split into two tower speakers. It incorporates four high-performance speakers and dual built-in reflex tubes for enhanced sound. Multiple connectivity options, including Bluetooth 5.3, HDMI ARC, Optical, AUX, and USB, ensure compatibility with a wide range of devices. Three custom-tuned EQ modes are available to optimize audio for music, movies, and dialogue.
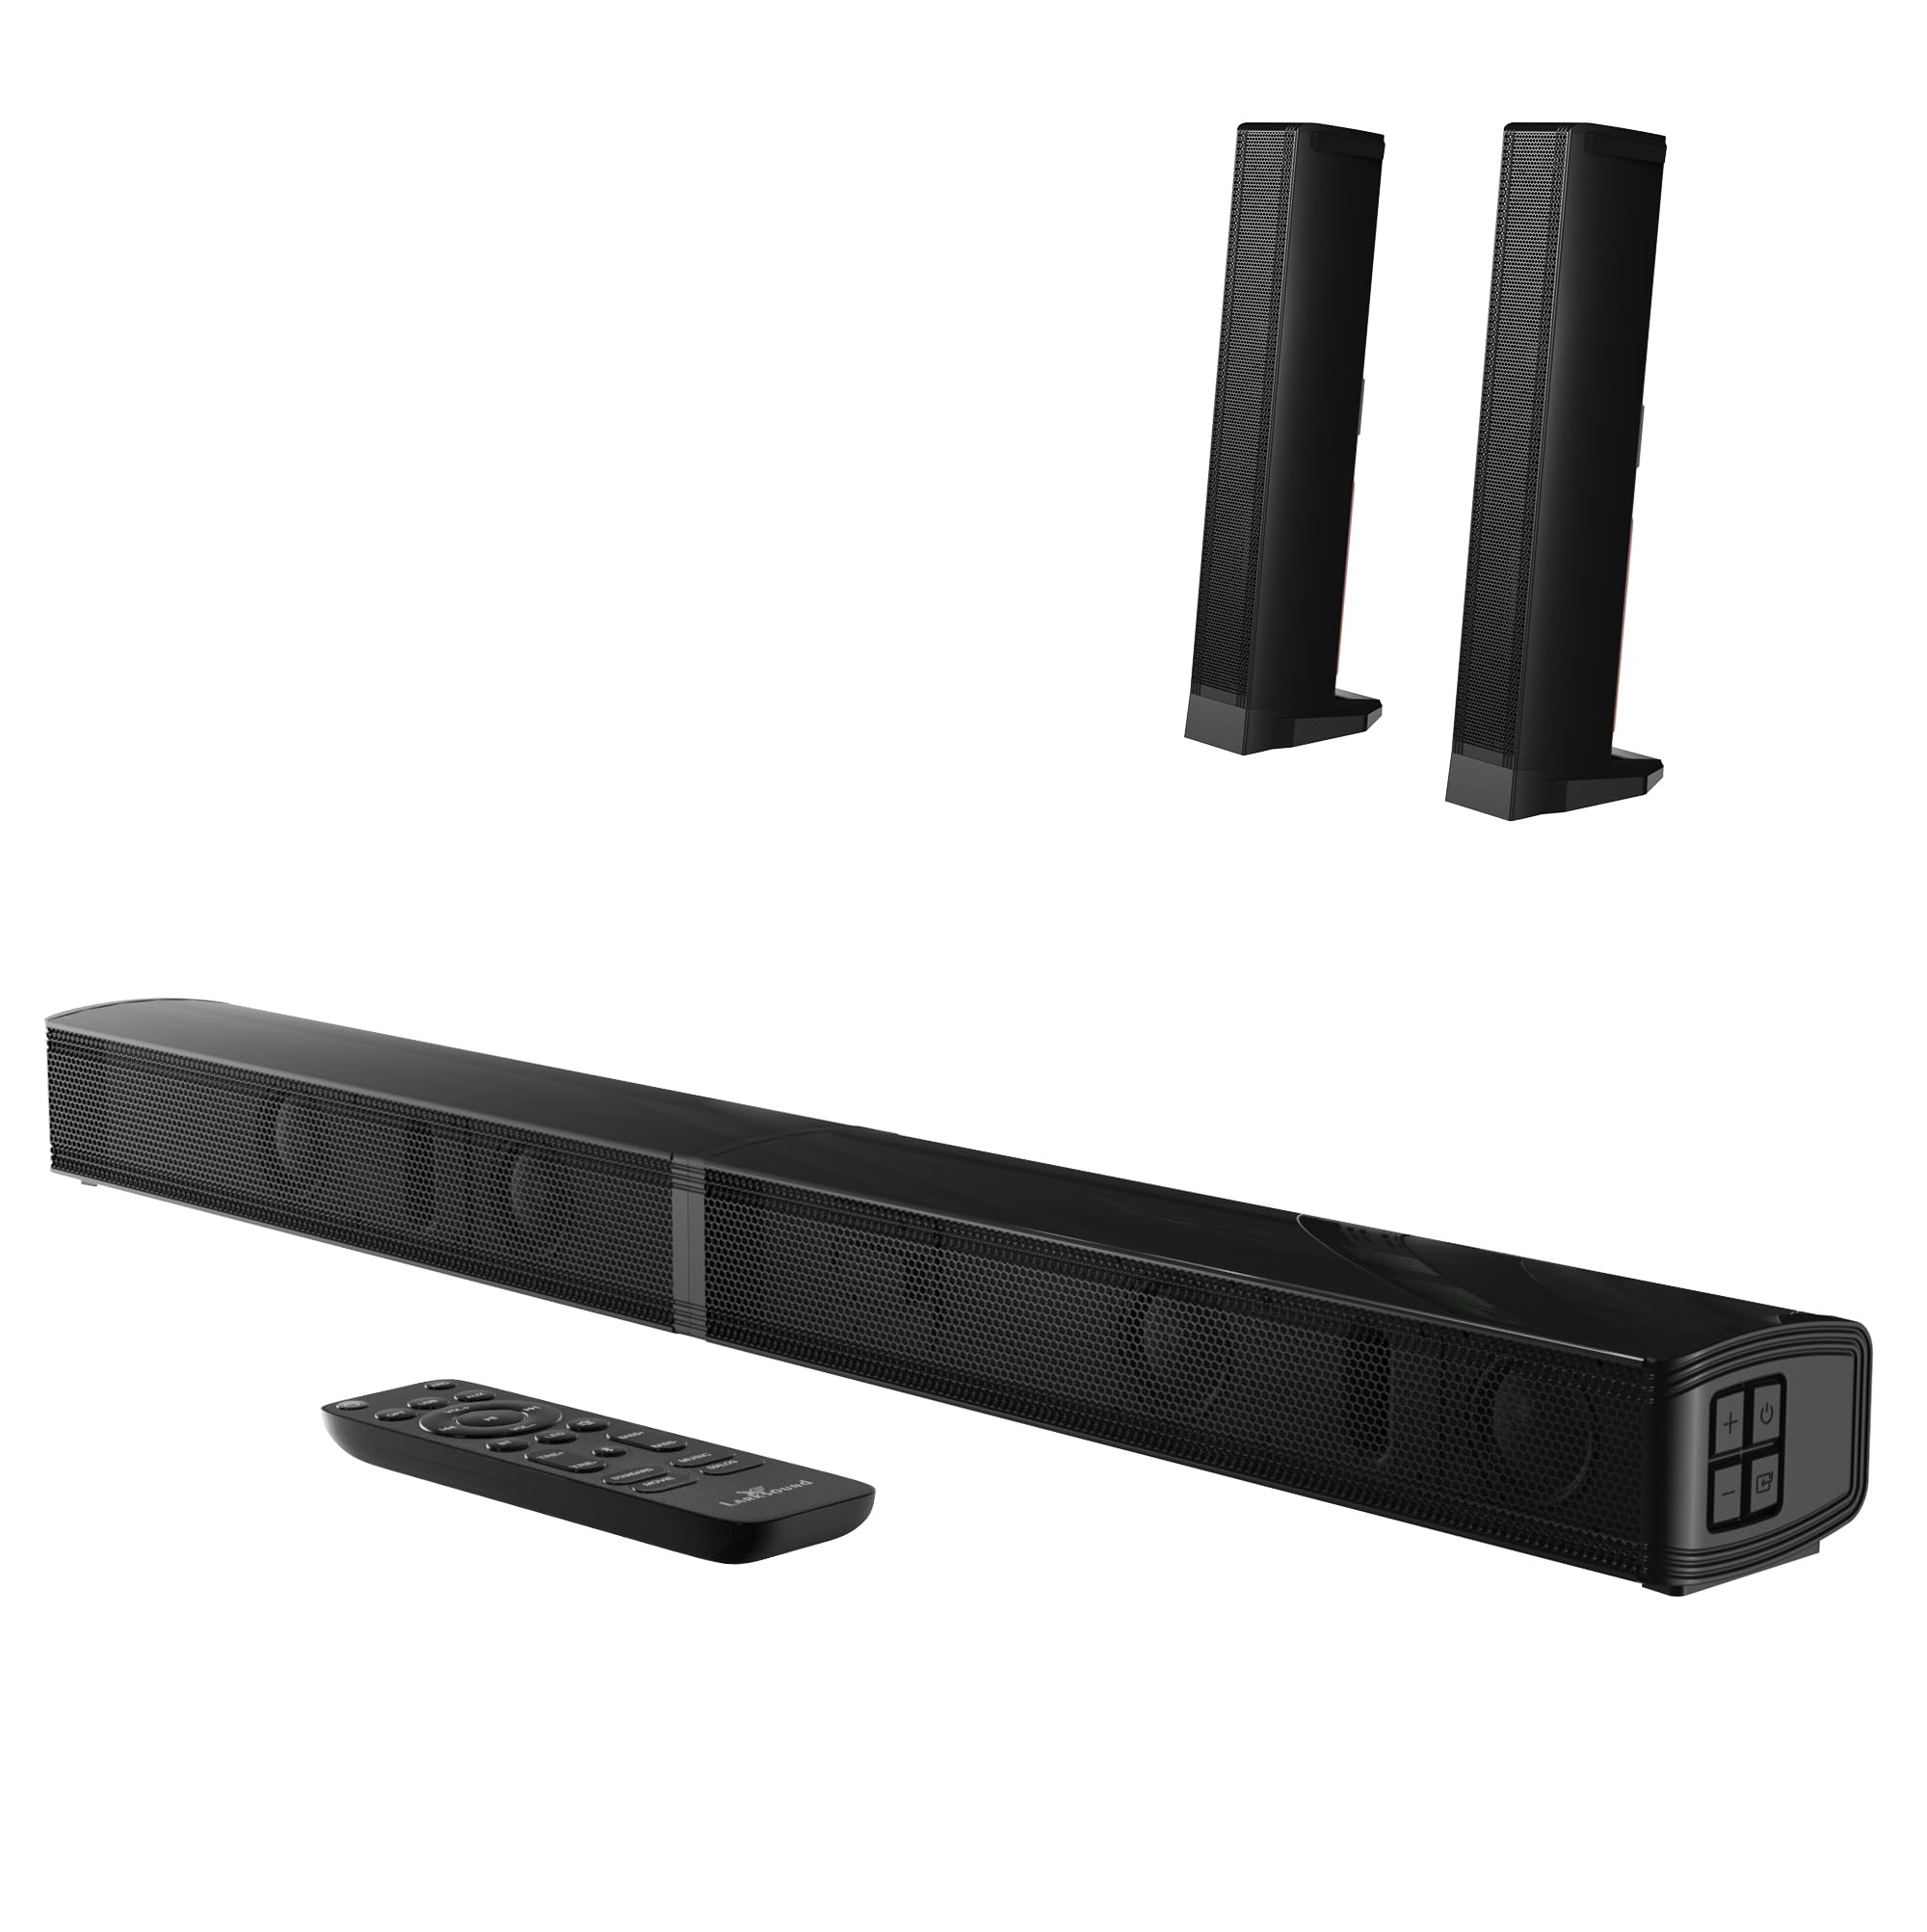
Figure 1.1: LARKSOUND 2.2 CH Detachable Soundbar in a home entertainment setup.

Figure 1.2: The soundbar features a 7-degree tilt design for optimal audio projection.
2. Package Contents
Verify that all items listed below are included in your package. If any items are missing or damaged, please contact customer support.
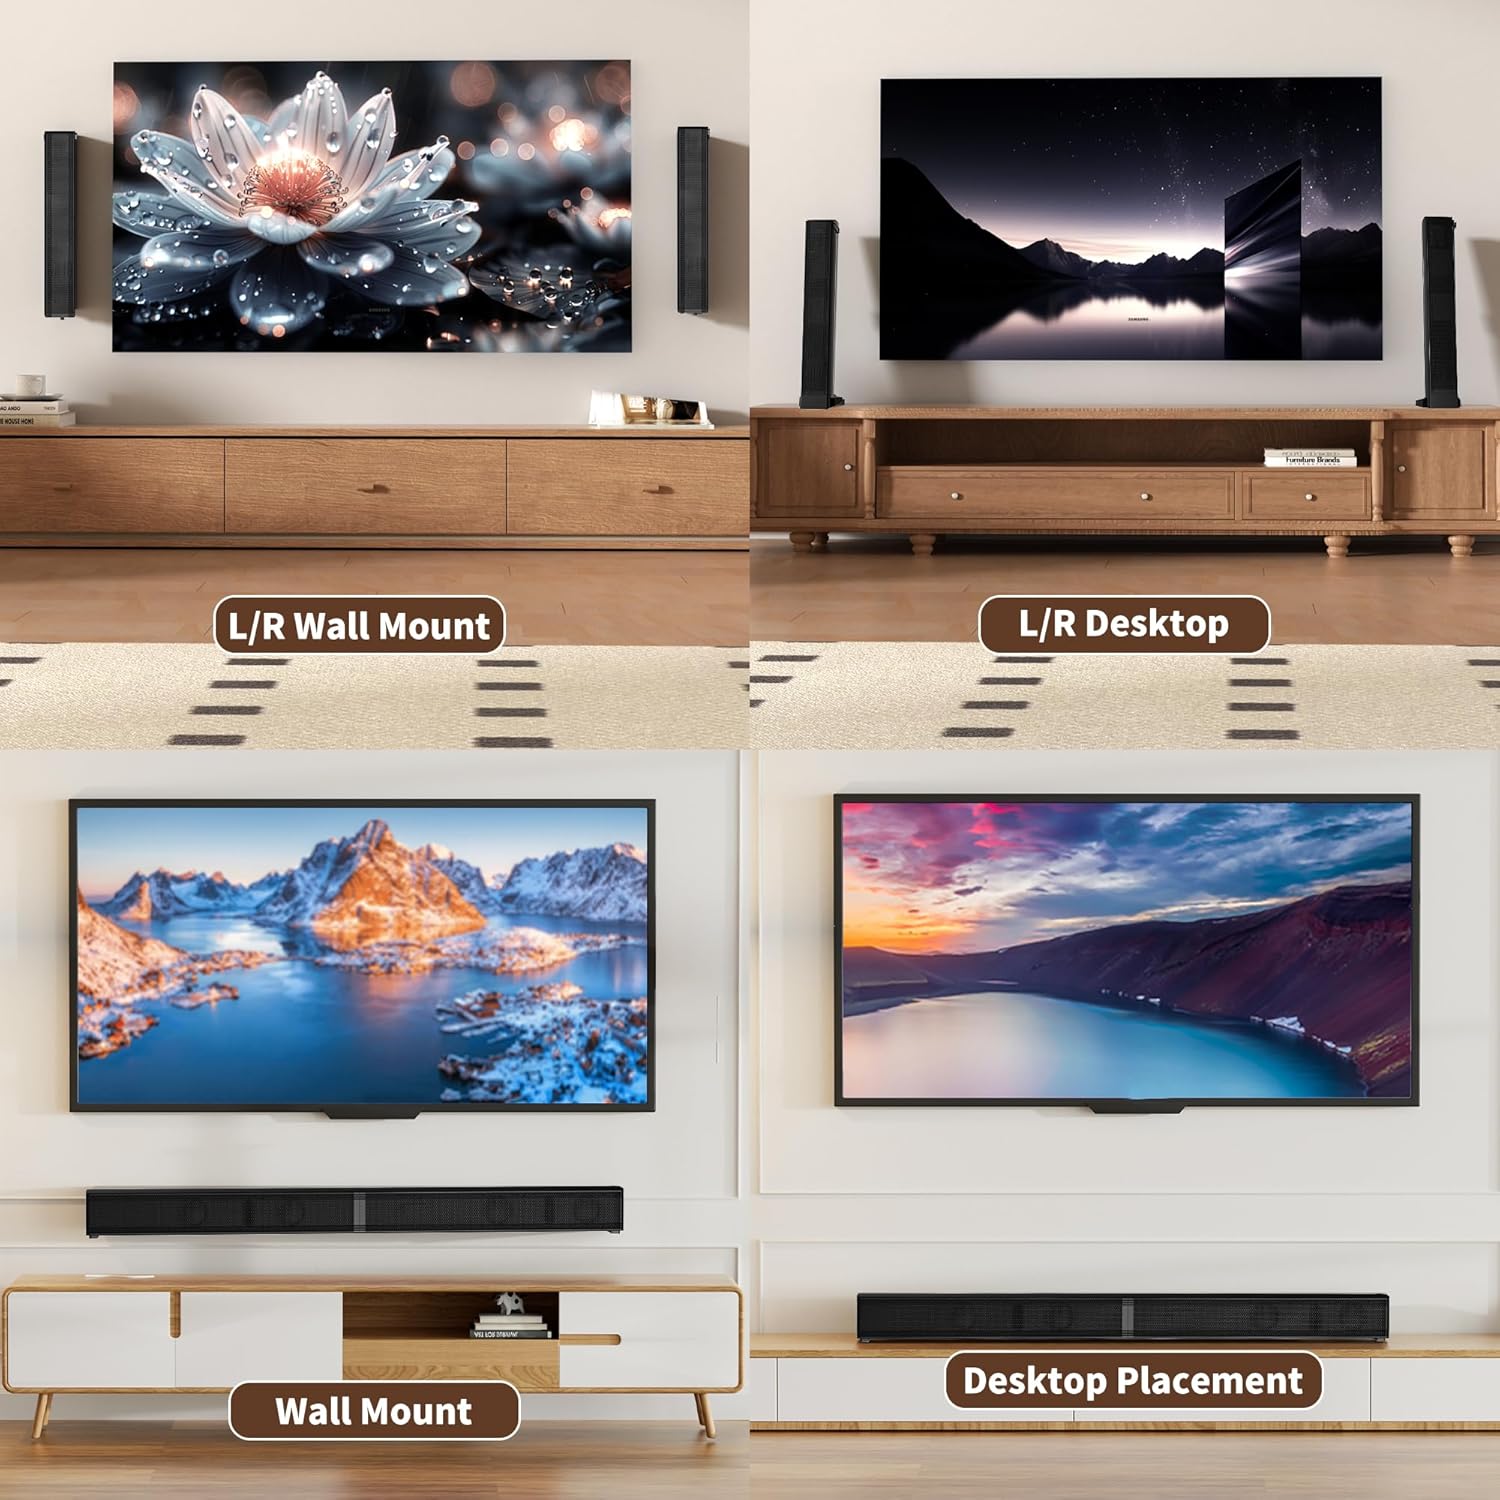
Figure 2.1: All components included in the product package.
- Soundbar (2 detachable sections)
- Remote Control
- Optical Cable
- AUX Cable
- Wall Mounting Kit (screws, wall anchors, mounting template)
- Short Stereo RCA to RCA Audio Cable
- Long Stereo RCA to RCA Audio Cable
- Stand Bases (for split configuration)
- User Manual
- AAA Batteries (2 for remote control)
3. Assembly and Placement
3.1 Assembling the Soundbar
The soundbar can be assembled as a single unit or split into two separate tower speakers.

Figure 3.1: Soundbar assembly and detachable configuration.
Single Soundbar Assembly:
- Align the two soundbar sections and gently push them together.
- Twist the sections to lock them securely in place.
- Connect the two sections using the provided short stereo RCA to RCA audio cable.
Detached Tower Speaker Assembly:
- Ensure the two soundbar sections are detached.
- Place each soundbar section onto its respective stand base.
- Twist each section to securely connect it to its base.
- Connect the two sections using the provided long stereo RCA to RCA audio cable.
3.2 Placement Options
The soundbar offers versatile placement options to suit your room layout.

Figure 3.2: Desktop Placement (single unit).

Figure 3.3: Wall Mount Placement (single unit). Use the provided wall mounting kit.

Figure 3.4: L/R Desktop Placement (detached units).

Figure 3.5: L/R Wall Mount Placement (detached units). Use the provided wall mounting kit.
4. Connectivity
The soundbar supports various wired and wireless connection methods.

Figure 4.1: Available connection ports on the soundbar.
4.1 HDMI ARC Connection
For the best audio quality and simplified control, connect your TV using HDMI ARC.

Figure 4.2: Steps for HDMI ARC connection.
- Insert an HDMI cable (not included) into your TV's HDMI ARC/eARC port.
- Connect the other end of the HDMI cable to the soundbar's HDMI ARC port.
- Press the 'ARC' button on the remote control or the 'SOURCE' button on the soundbar to select the ARC input.
- Enable CEC (Consumer Electronics Control) on your TV settings for one-touch control.
4.2 Optical Connection
Use the optical cable for high-quality digital audio if your TV does not have an HDMI ARC port.
- Connect the provided optical cable from your TV's Optical Out port to the soundbar's OPTICAL port.
- Press the 'OPT' button on the remote control or the 'SOURCE' button on the soundbar to select the Optical input.
- Ensure your TV's audio output is set to 'PCM' or 'Stereo' format.
4.3 AUX Connection
For analog audio devices, use the AUX connection.
- Connect the provided 3.5mm AUX cable from your device's audio output to the soundbar's AUX port.
- Press the 'AUX' button on the remote control or the 'SOURCE' button on the soundbar to select the AUX input.
4.4 USB Connection
Play audio files directly from a USB drive.
- Insert a USB drive into the soundbar's USB port.
- Press the 'USB' button on the remote control or the 'SOURCE' button on the soundbar to select the USB input.
- The soundbar will automatically detect and play compatible audio files.
4.5 Bluetooth 5.3 Pairing
Connect your Bluetooth-enabled devices wirelessly to the soundbar.

Figure 4.3: Bluetooth 5.3 wireless connection.
- Press the 'BT' button on the remote control or the 'SOURCE' button on the soundbar to select Bluetooth input. The LED indicator will flash, indicating pairing mode.
- On your device (smartphone, tablet, etc.), enable Bluetooth and search for 'LARKSOUND L200D'.
- Select the soundbar from the list of available devices to pair. Once connected, the LED indicator will stop flashing.
- The soundbar offers a stable wireless range of up to 49 feet (15 meters).
5. Operation
5.1 Power On/Off
- Press the Power button on the remote control or the soundbar to turn the unit on or off.
5.2 Volume Control
- Use the 'VOL+' and 'VOL-' buttons on the remote control or the soundbar to adjust the volume.
5.3 EQ Modes
Optimize your listening experience with three specialized equalizer modes.

Figure 5.1: Customized EQ Modes.
- Press the 'EQ' button on the remote control to cycle through the modes:
- Music Mode: Enhances musical clarity and depth.
- Movie Mode: Provides a dynamic audio experience with impactful bass for films.
- Dialogue Mode: Optimizes vocal clarity for news, podcasts, or conversations.
5.4 Input Source Selection
- Press the 'SOURCE' button on the soundbar or the dedicated input buttons (HDMI ARC, OPT, AUX, USB, BT) on the remote control to switch between audio sources.
5.5 CEC Synchronization (HDMI ARC only)
- If connected via HDMI ARC and CEC is enabled on your TV, you can control the soundbar's power and volume using your TV remote.
6. Specifications
| Feature | Specification |
|---|---|
| Model Name | LARKSOUND LS 200D |
| Speaker Type | Soundbar |
| Surround Sound Channel Configuration | 2.2 |
| Speaker Maximum Output Power | 90 Watts |
| Frequency Response | 20000 Hz |
| Connectivity Technology | Auxiliary, Bluetooth, HDMI, Optical, USB |
| Bluetooth Version | 5.3 |
| Bluetooth Range | 15 Meters (49 Feet) |
| Product Dimensions | 3.54"D x 31.5"W x 2.36"H |
| Item Weight | 6.35 Pounds |
| Material | Metal |
| Input Voltage | 240 Volts |
| Control Method | Remote |
| Power Source | Corded Electric |
| Batteries Required | 2 AAA batteries (for remote) |
| Mounting Type | Table Top/Wall Mount |
| Recommended Uses | For Televisions, Computers, Smartphones or Tablets |
7. Troubleshooting
If you encounter issues with your soundbar, refer to the following common solutions:
- No Power: Ensure the power cable is securely connected to both the soundbar and a working power outlet.
- No Sound:
- Check that the correct input source is selected on the soundbar.
- Verify that the volume is not muted or set too low on both the soundbar and your connected device.
- For Optical connection, ensure your TV's audio output is set to 'PCM' or 'Stereo'.
- For HDMI ARC, confirm that your TV's HDMI ARC/eARC port is used and CEC is enabled.
- Bluetooth Disconnection: Ensure the soundbar and your Bluetooth device are within the 15-meter range and there are no significant obstructions. Try re-pairing the device.
- Remote Control Not Working: Check if the AAA batteries are correctly inserted and not depleted. Ensure there are no obstructions between the remote and the soundbar.
For further assistance, please contact customer support.
8. Care and Maintenance
To ensure the longevity and optimal performance of your soundbar, follow these care guidelines:
- Cleaning: Use a soft, dry cloth to clean the surface of the soundbar. Do not use liquid cleaners or abrasive materials.
- Placement: Avoid placing the soundbar in direct sunlight, near heat sources, or in areas with high humidity or dust.
- Ventilation: Ensure adequate ventilation around the soundbar to prevent overheating.
- Handling: Handle the soundbar with care, especially when detaching or reassembling the sections.
9. Warranty and Support
LARKSOUND products are built on over 30 years of engineering and manufacturing excellence, committed to delivering outstanding sound quality and reliable craftsmanship. This product comes with a limited warranty.

Figure 9.1: LARKSOUND brand commitment and support details.
For warranty claims, technical support, or any inquiries, please contact LARKSOUND customer service:
- Email: support@larksound.com