
1. Introduction
Thank you for choosing the CUSIMAX Espresso and Cappuccino Machine. This appliance is designed to bring the authentic coffee shop experience to your home with ease and convenience. Please read this manual thoroughly before operation to ensure proper use, optimal performance, and safety.
Important Safety Instructions
- Always place the machine on a stable, level, heat-resistant surface.
- Do not immerse the machine, cord, or plug in water or other liquids.
- Keep out of reach of children.
- Unplug from outlet when not in use and before cleaning.
- Do not operate any appliance with a damaged cord or plug.
- Use only accessories recommended by the manufacturer.
- Exercise extreme caution when handling hot surfaces and steam.
2. Product Overview
The CUSIMAX Espresso and Cappuccino Machine is a versatile appliance designed for ease of use and high-quality coffee beverages.

Figure 2.1: Overall view of the CUSIMAX Espresso and Cappuccino Machine.
Components
- Coffee Spoon with Tamper
- Detachable Milk Reservoir
- Portafilter & 1 or 2 Cup Filter
- Portafilter Basket
- Removable Water Tank

Figure 2.2: All accessories included with your CUSIMAX Espresso Machine.
Key Features
- 3-IN-1 Functionality: Easily make espresso, cappuccino, and latte with one-touch controls on the touchscreen panel.
- Automatic Milk Frothing System: Creates rich and fine foam for lattes or cappuccinos, with a removable design for easy cleaning.
- 20 BAR Professional High Pressure Extraction: Features a 20 bar Italian pump and 1350W motor for thorough penetration and enhanced coffee taste.
- Thoughtfully Designed: Stainless steel compact design with a 34 oz removable clear water tank and 23 oz milk reservoir. Includes a removable drip tray for larger cups.
- Cup Warmer: Integrated heating plate on top to preheat your coffee cups.
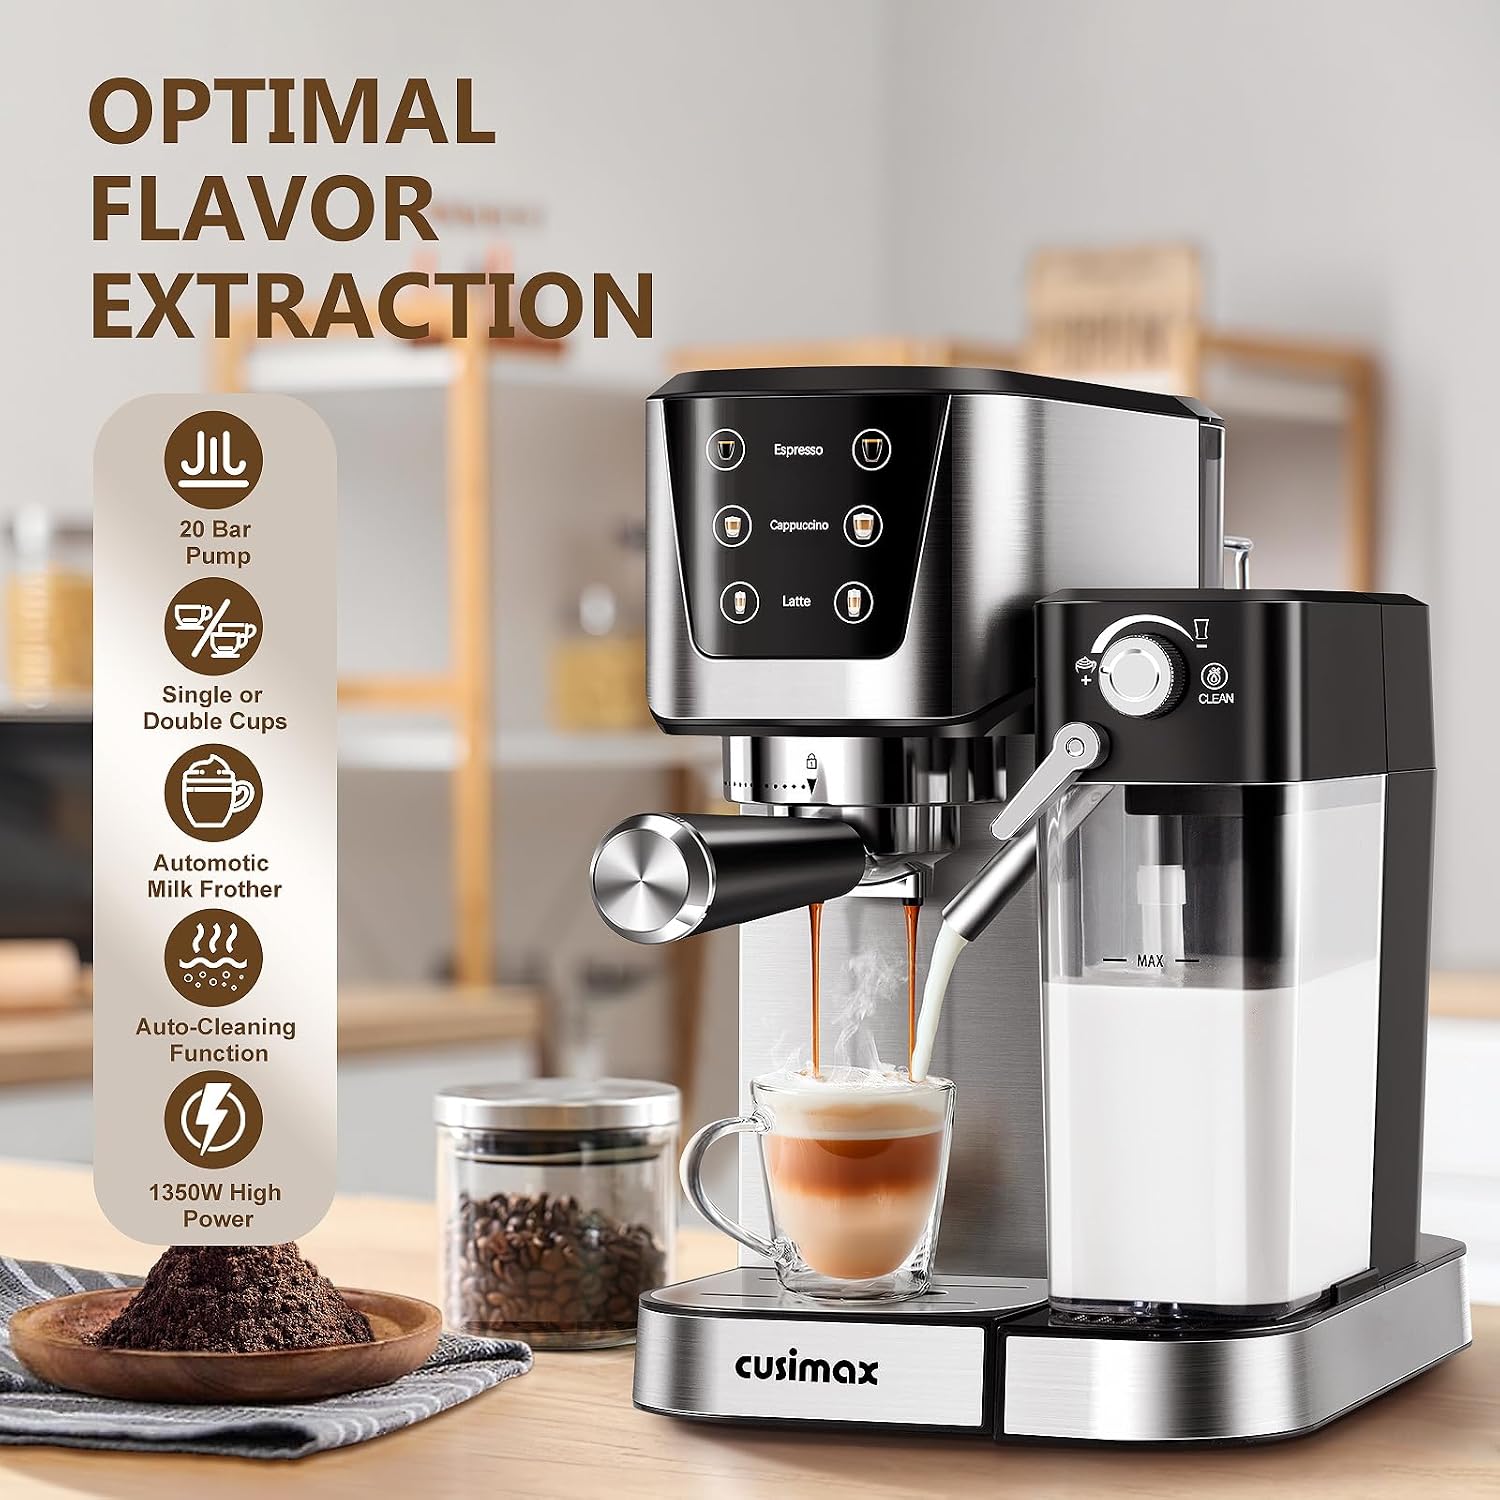
Figure 2.3: Key features of the CUSIMAX Espresso Machine for optimal flavor extraction.
3. Setup
3.1 Unboxing and Initial Preparation
Carefully remove all components from the packaging. Ensure all packing materials, including Styrofoam and plastic wraps, are removed. Before first use, clean all removable parts (water tank, milk reservoir, portafilter, drip tray) with warm, soapy water and rinse thoroughly. Wipe the main unit with a damp cloth.
3.2 Filling the Water Tank
Locate the removable water tank at the back of the machine. Lift it out, fill it with fresh, cold water up to the MAX line, and place it back securely. Ensure it is properly seated to avoid leaks.

Figure 3.1: Filling the removable water tank.
3.3 Filling the Milk Reservoir
The detachable milk reservoir is located on the side of the machine. Remove it, fill with desired milk (dairy or non-dairy) up to the MAX line, and reattach it. Ensure it clicks into place; otherwise, the cappuccino and latte buttons will not illuminate.

Figure 3.2: Removing and filling the milk reservoir.
3.4 Preheating and Cup Warming
Plug in the machine and turn it on. Allow it to preheat until the indicator lights are stable. You can place your cups on the cup warming plate on top of the machine to preheat them, which helps maintain beverage temperature.

Figure 3.3: Preheating cups on the integrated cup warmer.
3.5 Preparing the Portafilter
Insert the appropriate filter basket (single or double shot) into the portafilter. Fill the basket with finely ground coffee. Use the tamper to press the coffee grounds firmly and evenly. Ensure the grind size is suitable for espresso extraction.
4. Operating Instructions
4.1 Making a Beverage
The machine offers one-touch brewing for Espresso, Cappuccino, and Latte. Select your desired beverage and portion size (single or double) directly from the touchscreen control panel.

Figure 4.1: Touchscreen control panel for beverage selection.

Figure 4.2: Detailed view of one-touch brewing options and milk froth adjustment.
4.2 Step-by-Step Brewing Guide
- Step 1: Turn on and Preheat. Plug in the machine and press the power button. Wait for the machine to preheat until indicator lights are ready.
- Step 2: Add Milk and Water. Ensure the water tank is filled with fresh water and the milk reservoir is filled with your preferred milk. Install both securely.
- Step 3: Add Coffee Powder and Tamp. Place the desired amount of finely ground coffee into the portafilter basket and tamp it evenly.
- Step 4: Install Portafilter. Securely attach the portafilter to the brewing head by twisting it into place.
- Step 5: Choose Coffee Type and Portion Size. Use the touchscreen to select Espresso, Cappuccino, or Latte, and choose between single or double shot.
- Step 6: Start Brewing. The machine will automatically brew your selected beverage. Enjoy your fresh coffee!

Figure 4.3: Visual guide for brewing a perfect cappuccino or latte.
4.3 Adjusting Milk Froth
The machine features an automatic milk frothing system. You can adjust the density of the milk froth using the dial on the milk reservoir unit. This allows for customization of your cappuccino or latte to your preferred texture.

Figure 4.4: The automatic milk frothing system provides consistent foam without manual effort.
4.4 High-Pressure Extraction and Pre-Soaking
The 20-bar Italian pump ensures optimal flavor extraction, producing a rich and creamy espresso. The pre-brewing technology allows for thorough saturation of coffee grounds, enhancing the overall taste and aroma.

Figure 4.5: Stable 20-BAR extraction for a fragrant and creamier espresso.

Figure 4.6: Pre-soaking technology ensures uniform humidity for intense flavor extraction.
5. Maintenance
Regular cleaning and maintenance will prolong the life of your CUSIMAX Espresso Machine and ensure consistent beverage quality.
5.1 Daily Cleaning
- Drip Tray: The removable drip tray collects excess liquid. When the red indicator button pops up, it's full and needs to be emptied. Remove, empty, rinse with warm water, and replace.

Figure 5.1: The drip tray is easily removable for cleaning.
- Portafilter and Filter Baskets: After each use, remove the portafilter, discard coffee grounds, and rinse the portafilter and filter basket under warm water.
- Milk Reservoir: After each use, empty any remaining milk, rinse the reservoir and its components thoroughly with warm water. The automatic cleaning function can also be used for quick rinse.
- Exterior: Wipe the exterior of the machine with a soft, damp cloth. Do not use abrasive cleaners or scouring pads.
5.2 Descaling
Over time, mineral deposits can build up inside the machine, affecting performance. Descale your machine regularly (e.g., every 2-3 months, or more frequently if you have hard water) using a commercial descaling solution designed for coffee machines. Follow the descaling solution manufacturer's instructions carefully.
6. Troubleshooting
If you encounter issues with your CUSIMAX Espresso Machine, refer to the table below for common problems and solutions.
| Problem | Possible Cause | Solution |
|---|---|---|
| Machine does not turn on. | Not plugged in; power outlet issue. | Ensure power cord is securely plugged into a working outlet. |
| No coffee dispenses. | Water tank empty; portafilter not properly installed; coffee too finely ground or tamped too hard. | Fill water tank; ensure portafilter is locked in place; adjust coffee grind size or tamping pressure. |
| Milk frother not working. | Milk reservoir not installed correctly; milk level too low; frother nozzle clogged. | Ensure milk reservoir is securely attached; refill milk; clean frother nozzle. |
| Red indicator light on drip tray. | Drip tray is full. | Remove, empty, and clean the drip tray. |
7. Specifications
| Feature | Detail |
|---|---|
| Brand | CUSIMAX |
| Model Name | CMEM-5280S |
| Color | Silvery |
| Product Dimensions | 11.4"D x 8.5"W x 12.5"H |
| Item Weight | 10.14 pounds |
| Coffee Maker Type | Espresso Machine |
| Special Feature | Auto Clean Function, Cup Warmer, Milk Frother, Removable Tank, Single Cup Brew |
| Filter Type | Reusable |
| Specific Uses For Product | Cappuccino, Espresso, Latte |
| Operation Mode | Fully Automatic |
| Voltage | 120 Volts |
| Human Interface Input | Touchscreen |
8. Warranty and Support
For warranty information and customer support, please refer to the warranty card included in your product packaging or visit the official CUSIMAX website. You may also contact CUSIMAX customer service directly for assistance with product inquiries, troubleshooting, or replacement parts.
CUSIMAX Official Store: Visit the CUSIMAX Store on Amazon