
EMP EZIMEDPIL B0FJXXDP27
EMP EZIMEDPIL Automatic Pill Dispenser User Manual
Model: Automatic Pill Dispenser (Blue + Frosted)
1. Introduction
The EMP EZIMEDPIL Automatic Pill Dispenser is designed to assist with medication adherence by providing scheduled dosages with audio and visual alerts. This device helps ensure that medications are taken at the correct time and dosage, supporting independent living and caregiver assistance.
2. Safety Information
Please read all safety instructions before using the device. Failure to follow these instructions may result in injury or damage to the product.
- Choking Hazard: Small parts are a potential choking hazard. Keep out of reach of children.
- Product Integrity: Do not use if the product seal is broken or if the device appears damaged.
- Medical Advice: Consult a healthcare professional before use, especially regarding medication schedules.
- Medication Use: Only use for prescribed medications. Do not refill or modify the device in any way.
- Disposal: Dispose of the device and batteries properly according to local regulations.
- Water Exposure: Do NOT submerge the pill dispenser base in water. Do not clean any part of the pill dispenser in a dishwasher.
3. What's Included
The package includes the following components:
- 1x Automatic Pill Dispenser with Frosted Lid
- 1x Medication Tray (removable carousel)
- 6x Dosage Rings
- 2x Metal Keys
- 1x User Manual
- 4x AA Batteries
4. Setup Guide
4.1. Inserting Batteries
The device requires 4 AA batteries (included). Ensure correct polarity when inserting.
- Locate the battery compartment on the underside of the dispenser.
- Slide the battery door latch to the open position and remove the battery door.
- Insert 4 fresh AA batteries, matching the positive (+) and negative (-) terminals as indicated.
- Replace the battery door and close the latch securely.

Image: Battery compartment with 4 AA batteries.
Note: The device retains program settings for approximately 30 seconds during battery changes.
4.2. Opening and Locking the Top Cover
The dispenser features a key-locked cover for security.
- If the top cover is locked, locate the cover lock on the bottom of the unit.
- Insert the included key and turn clockwise to unlock.
- Place the pill dispenser on a stable surface. Press the "PRESS" button on the front to release the cover latch.
- Lift the cover handle to open the cover.

Image: Pill dispenser with the lid open, revealing the internal tray.
Video: Step-by-step guide on initial setup, including battery installation, lid operation, tray preparation, dosage ring placement, and filling the compartments.
4.3. Cleaning and Preparing the Removable Tray
Before first use, and periodically thereafter, clean the removable tray.
- With the top cover open, the removable tray lifts straight out of the pill dispenser base.
- Wash the removable tray with warm, soapy water.
- Allow the tray to dry completely before re-inserting and using.

Image: Removable medication tray being lifted from the dispenser.
4.4. Placing the Dosage Ring
Six interchangeable dosage rings are included to customize your medication schedule.
- Select a dosage ring that aligns with your medication schedule (e.g., 1x, 2x, 3x, 4x, 5x, or 6x per day).
- Insert the removable tray back into the pill dispenser base, aligning the arrows.
- Place the selected dosage ring into the removable tray with the tab resting in the slot, aligning with the arrows.
- Fold the tab downwards to secure the ring.

Image: Various dosage rings and their corresponding daily dose schedules.
5. Filling the Dispenser
Carefully place pills into the compartments of the removable tray.
- Place pills in correct dosages in each compartment, following the selected dosage ring.
- The dosage in the slot immediately to the right of the tab on the dosage ring will be your starting dose.
- Do not place pills in compartments corresponding to red markings on the dosage ring, as these are not active dose times.
- Once all compartments are filled, close the cover securely. Lock for extra security if desired using the key.
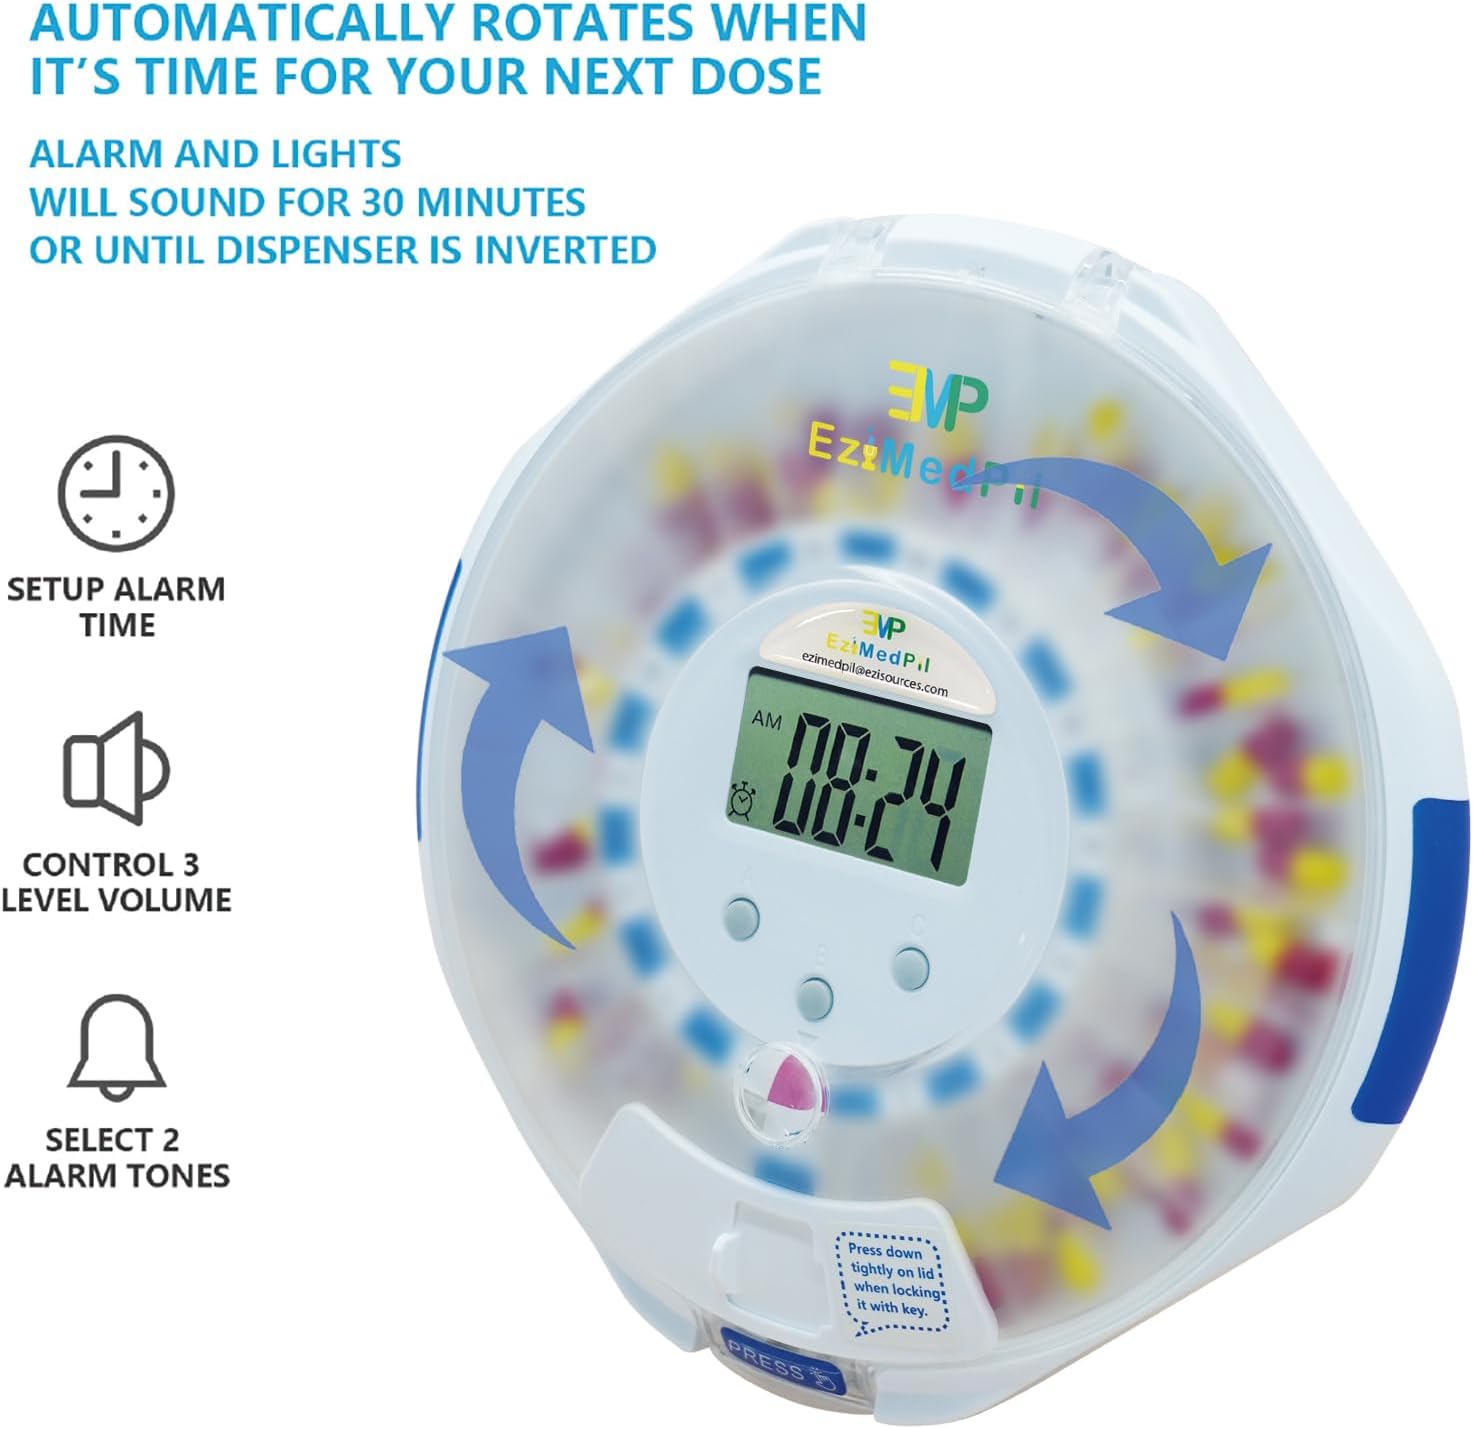
Image: Pill dispenser filled with medications, ready for use.
6. Operation
6.1. Setting Time and Alarms
The dispenser features a 3-button interface and a large LCD display for easy programming.
- Use the three buttons (A, B, C) located below the LCD display to set the current time, alarm times, volume, and beep tones.
- The device supports up to 6 alarms per day and offers 12-hour or 24-hour time format options.
- Refer to the detailed instructions in the included user manual for specific programming steps.
- Program settings are saved even after changing batteries (within a short timeframe).

Image: LCD display and control buttons with feature callouts.
6.2. Taking Medication
When it is time to take your medication, the dispenser will alert you.
- An alarm will sound, and its lights will flash.
- Open the small dispensing door on the cover.
- Flip the unit upside down to pour medications into your hand or a suitable container. This motion will deactivate the alarm and lights.
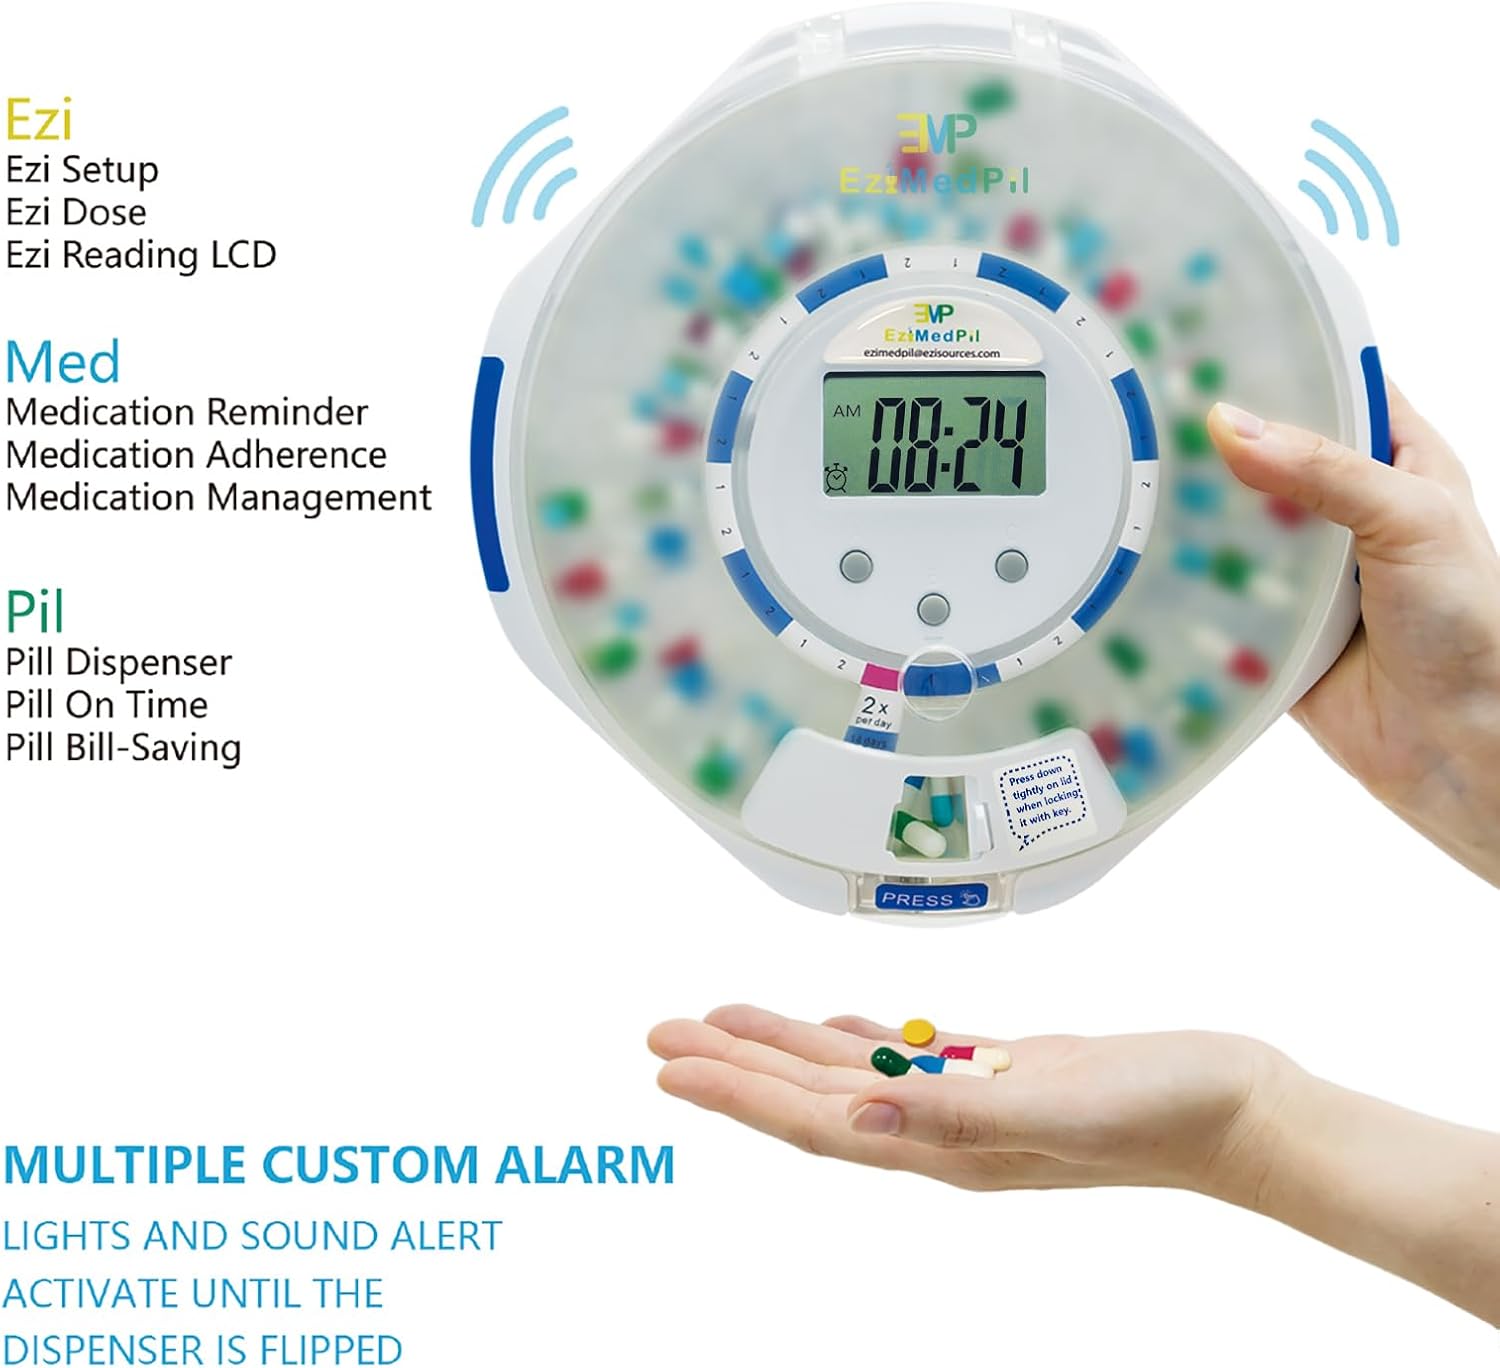
Image: Dispensing pills from the unit.
7. Maintenance
- Cleaning: Regularly clean the removable tray as described in Section 4.3. Wipe the exterior of the dispenser with a damp cloth. Do not use abrasive cleaners.
- Battery Replacement: Replace batteries when the low battery alert appears on the LCD display to ensure continuous operation.
- Storage: Store the dispenser in a cool, dry place away from direct sunlight and extreme temperatures.
8. Troubleshooting
| Problem | Possible Cause | Solution |
|---|---|---|
| Dispenser not turning on. | Batteries are dead or incorrectly inserted. | Replace with fresh AA batteries, ensuring correct polarity. |
| Alarm not sounding. | Alarm volume is set too low or turned off. Alarm time not set correctly. | Check and adjust alarm volume. Verify alarm settings are programmed correctly. |
| "ERR" message on LCD. | Internal error, possibly due to incorrect time setting or battery issue. | Remove and re-insert batteries. Re-set time and alarm settings. If problem persists, contact customer support. |
| Pills not dispensing correctly. | Tray not properly seated, or pills are too large/small for the compartment. | Ensure the removable tray is correctly aligned. Check pill size compatibility. |
9. Specifications
- Product Dimensions: 8.86 x 8.86 x 2.68 inches
- Item Weight: 1.9 Pounds (0.86 Kilograms)
- Power Source: 4 AA batteries (included)
- Number of Compartments: 28
- Material Type: Acrylonitrile Butadiene Styrene
- Color: Blue + Frosted
- Special Features: Automatic, Built-In Alarm, Lockable, Moisture Proof, Waterproof (lid seal)
- Included Components: User Manual, 2 Keys, Pill Tray, 4 AA Batteries, Dosage Rings
10. Warranty and Support
For warranty information or technical support, please refer to the contact details provided in the packaging or visit the official EMP EZIMEDPIL website.
Manufacturer: EZIMEDPIL
Ask a question about this manual
Ask about setup, troubleshooting, compatibility, parts, safety, or missing instructions. Manuals+ will review the question and use this page’s manual context to help answer it.