
1. Important Safety Instructions
Please read all instructions carefully before using your Midea MERI26B1AGY Countertop Bullet-Ice Maker. Retain this manual for future reference.
- Ensure the appliance is connected to a properly grounded electrical outlet.
- Do not immerse the power cord, plug, or appliance in water or other liquids.
- Supervise children when the appliance is in use.
- Unplug the appliance from the outlet when not in use and before cleaning.
- Do not operate any appliance with a damaged cord or plug, or after the appliance malfunctions or has been damaged in any manner.
- Use only potable water in the ice maker.
- Do not block ventilation openings.
- Do not place the appliance near heat sources or in direct sunlight.
- This appliance is for household use only.
2. Product Overview
The Midea MERI26B1AGY Countertop Bullet-Ice Maker is designed to produce bullet-shaped ice quickly and efficiently. It features a compact design, two ice cube size options, and a self-cleaning function.

Image: Midea MERI26B1AGY Countertop Bullet-Ice Maker in a kitchen setting, showcasing its sleek design.

Image: Midea MERI26B1AGY Ice Maker on a kitchen counter, demonstrating its compact size in a home environment.
3. Setup
3.1 Unpacking
Carefully remove the ice maker from its packaging. Remove all packing materials, including any tape or protective film. Inspect the appliance for any damage.
3.2 Placement
Place the ice maker on a stable, level surface away from direct sunlight and heat sources. Ensure there is adequate ventilation around the appliance (at least 4 inches of space on all sides). This unit is designed for countertop use.
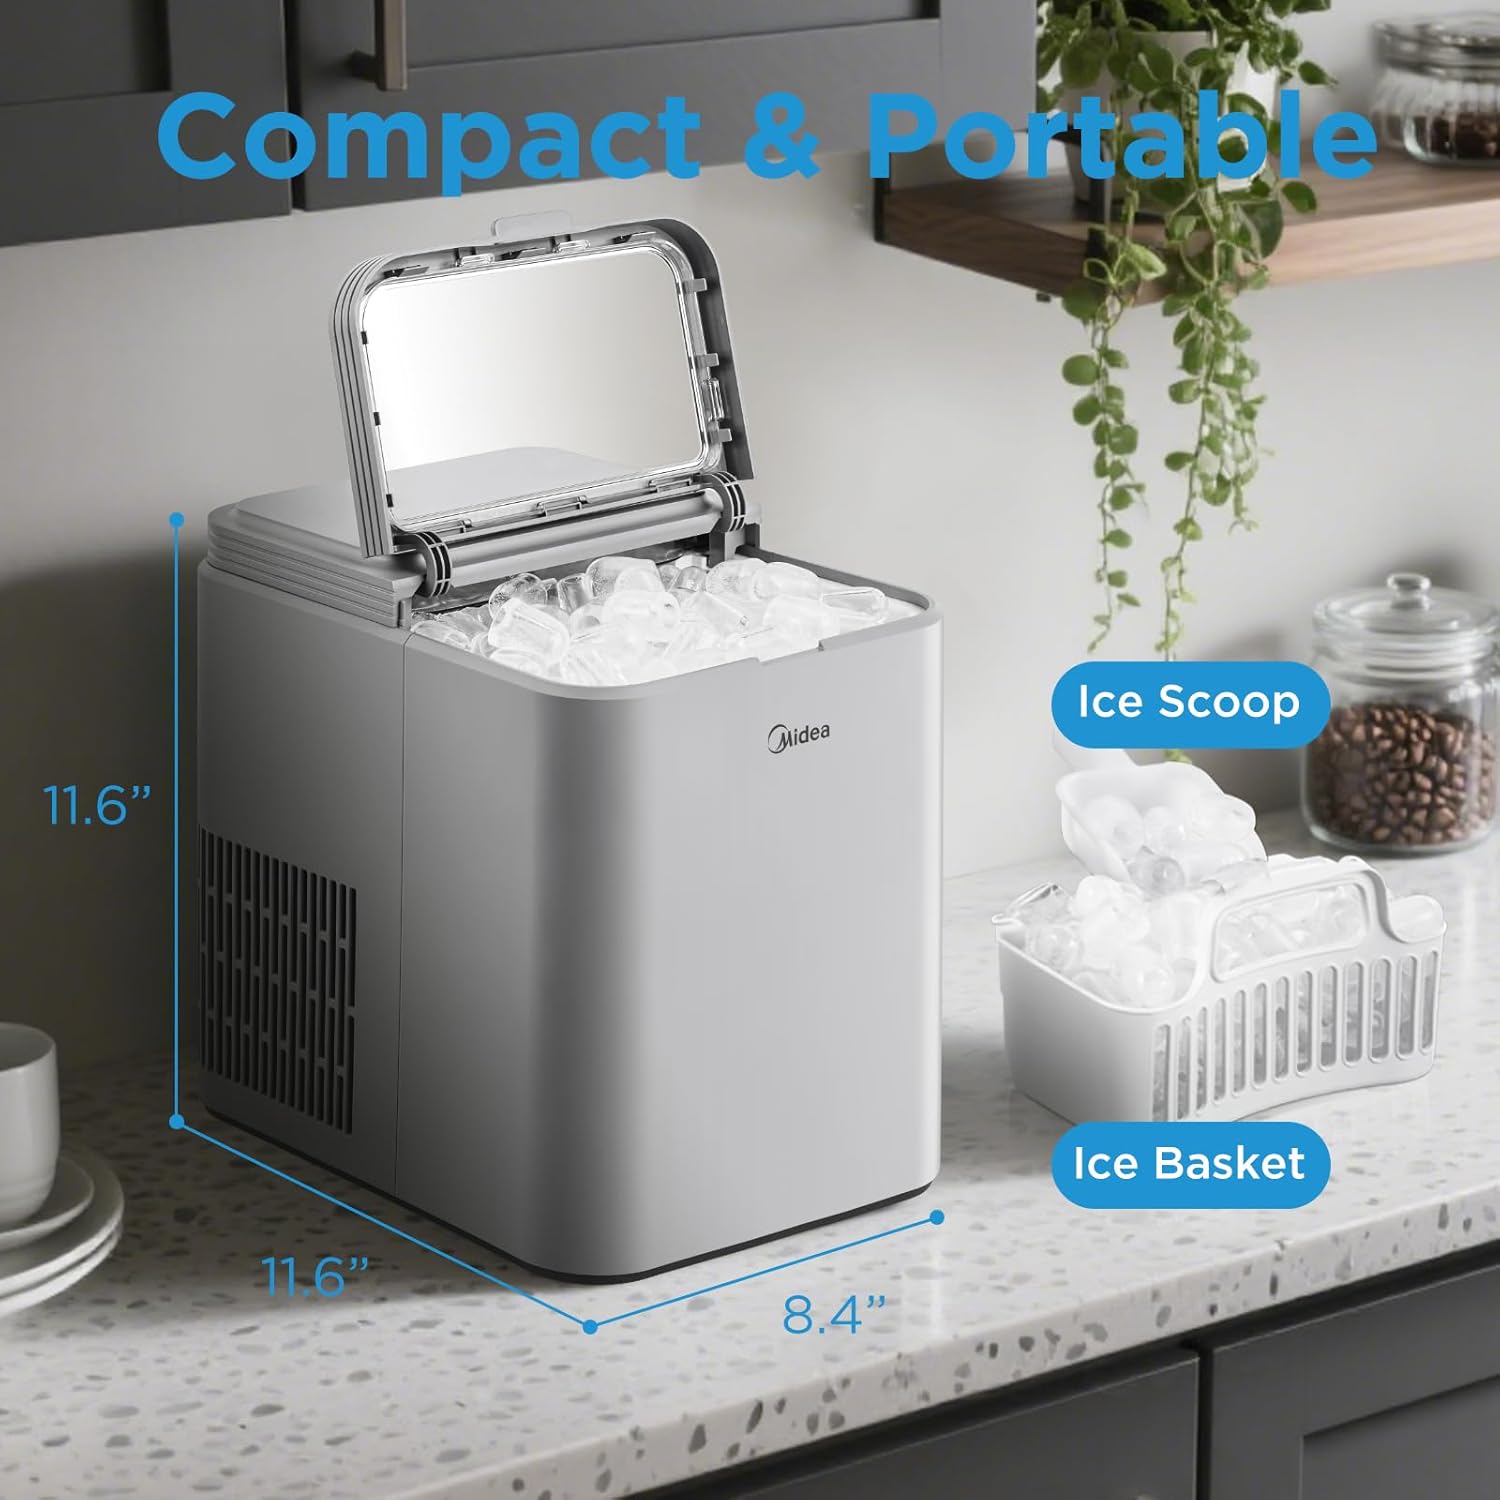
Image: Midea MERI26B1AGY Ice Maker on a countertop, illustrating its compact dimensions (11.6"D x 8.4"W x 11.6"H) and showing the included ice scoop and basket.
3.3 Initial Cleaning
Before first use, clean the interior of the ice maker. Refer to the 'Maintenance' section for detailed cleaning instructions.
4. Operation
4.1 Adding Water
Open the lid and fill the water reservoir with potable water up to the 'MAX' fill line. Do not overfill.
4.2 Powering On and Selecting Ice Size
- Plug the ice maker into a grounded electrical outlet.
- Press the 'ON/OFF' button to turn on the appliance.
- Press the 'MODE' button to select your desired ice cube size: 'LARGE' or 'SMALL'. The corresponding indicator light will illuminate.
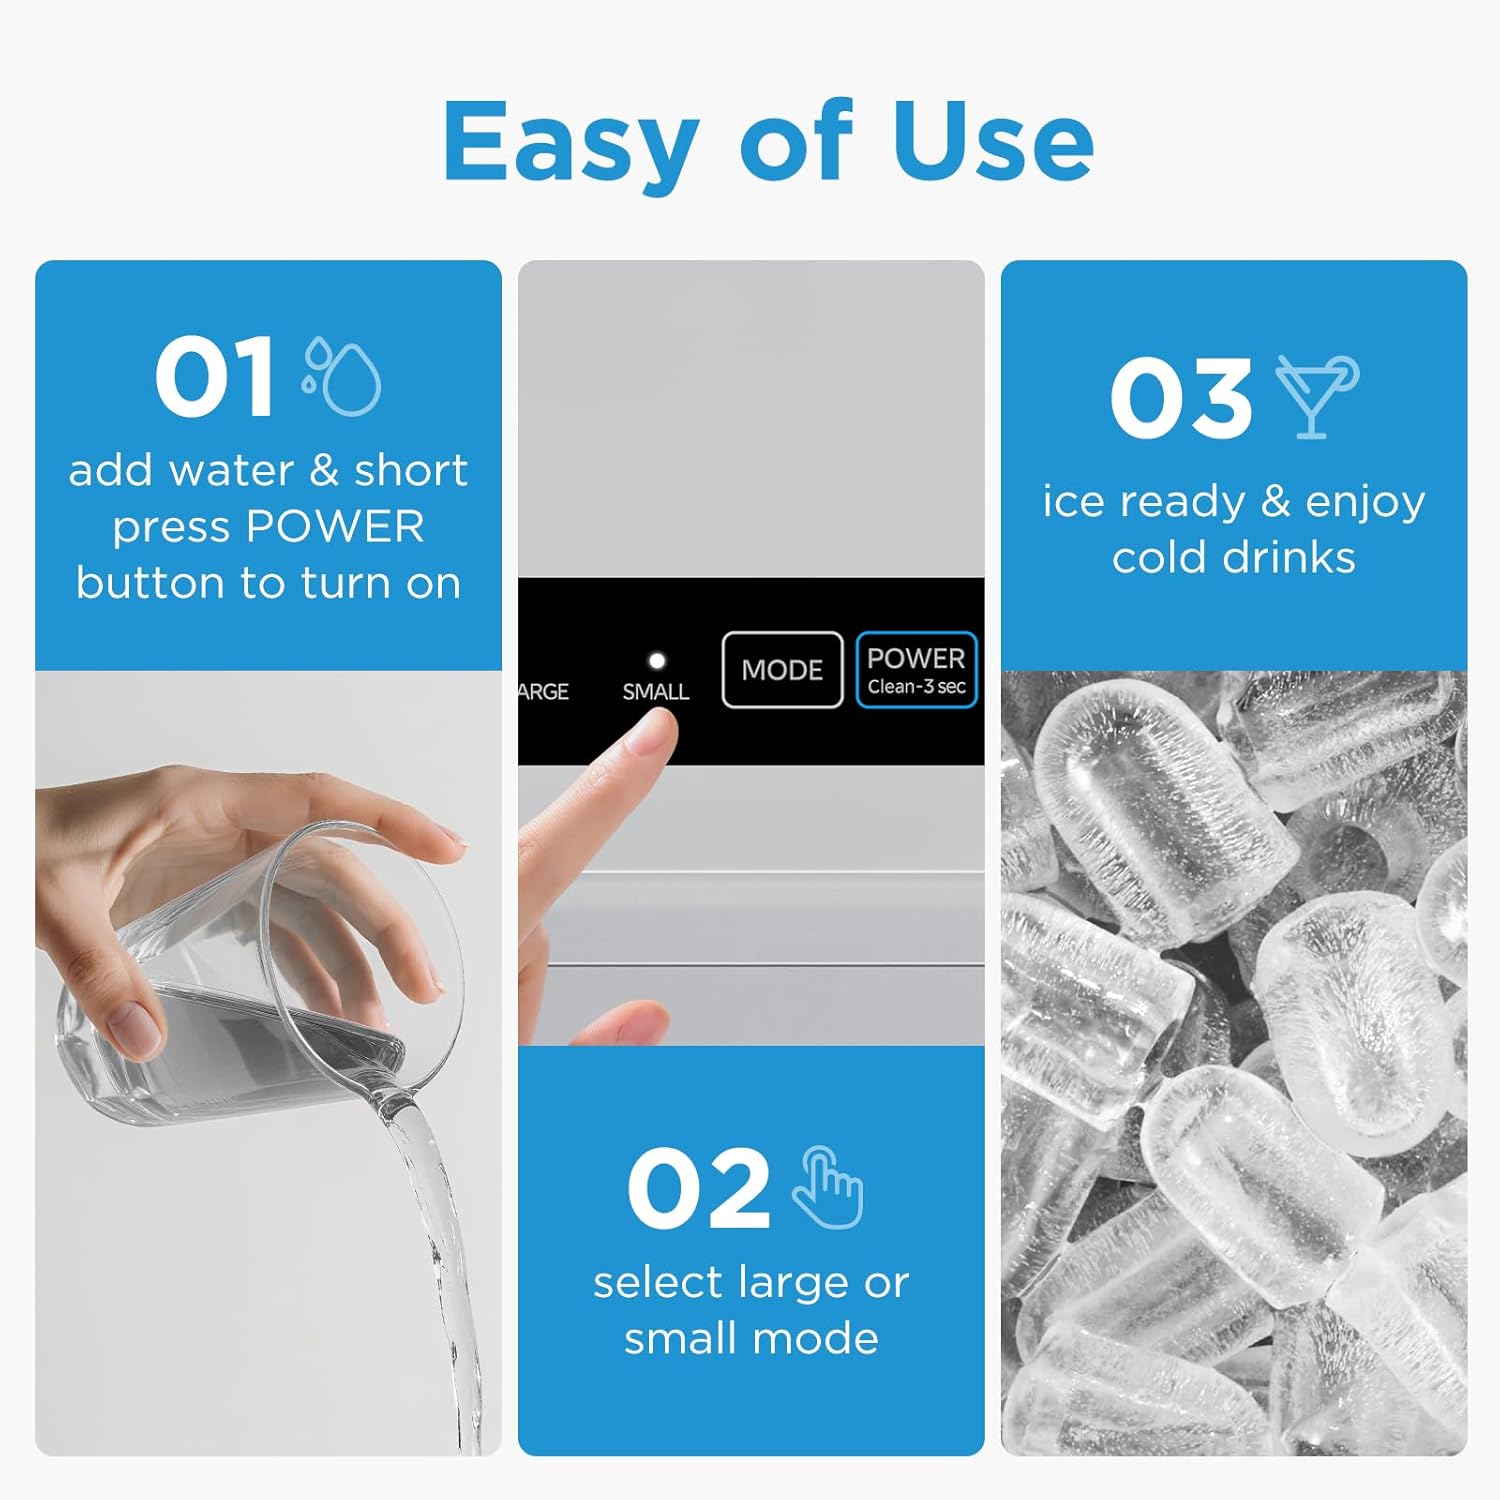
Image: Step-by-step guide for operating the ice maker, including adding water, selecting ice size (Large/Small), and the control panel with 'ON/OFF', 'ADD WATER', 'ICE FULL', 'LARGE', 'SMALL', 'MODE', and 'POWER (Clean-3 sec)' buttons.
4.3 Ice Production
The ice maker will begin its ice production cycle. The first batch of ice bullets will be ready in approximately 6 minutes. The appliance can produce up to 26 pounds of ice per day.

Image: Visual comparison of the two available ice cube sizes: Large (28mm length, 22mm diameter) and Small (27mm length, 20mm diameter) bullet ice.
4.4 Indicators
- ADD WATER: This indicator light will illuminate when the water reservoir needs to be refilled.
- ICE FULL: This indicator light will illuminate when the ice basket is full. The ice maker will pause production until ice is removed.
4.5 Using the Ice Scoop and Basket
The ice maker comes with a removable ice basket and an ice scoop for convenient serving. When the ice basket is full, carefully remove it and transfer the ice to a cooler or other container.
Video: Official Midea video demonstrating the features and operation of the Midea MERI26B1AGY Countertop Bullet-Ice Maker, including adding water, selecting ice size, and ice production.
Video: Official Midea video showcasing the Midea 26lbs Ice Maker Countertop, highlighting its fast ice production and ease of use.
5. Maintenance
5.1 Self-Cleaning Function
The ice maker is equipped with a one-touch auto-clean function to simplify maintenance.
- Ensure the water reservoir is filled with clean water.
- Press and hold the 'POWER' button for 3 seconds.
- The self-clean cycle will run for approximately 5 minutes.
- After the cycle, drain the water and rinse the interior.

Image: Diagram illustrating the three steps for activating the self-clean function: adding water, holding the power button for 3 seconds, and the 5-minute cleaning cycle.
5.2 Regular Cleaning
- Exterior: Wipe the exterior with a soft, damp cloth. Do not use abrasive cleaners.
- Interior: Periodically clean the water reservoir and ice basket with a mild detergent and warm water. Rinse thoroughly.
- Drainage: Regularly drain any remaining water from the reservoir to prevent mineral buildup.
5.3 Storage
If storing the ice maker for an extended period, ensure it is thoroughly cleaned and dried. Store in a cool, dry place.
6. Troubleshooting
| Problem | Possible Cause | Solution |
|---|---|---|
| Ice maker not producing ice. | No water in reservoir. Power not connected. | Fill water reservoir. Ensure power cord is securely plugged in. |
| "ADD WATER" indicator is on. | Water level is low. | Add potable water to the reservoir up to the 'MAX' line. |
| "ICE FULL" indicator is on. | Ice basket is full. | Remove ice from the basket. |
| Ice cubes are too small or cloudy. | Water temperature too high. Ambient temperature too high. | Use colder water. Place the ice maker in a cooler environment. |
| Machine is noisy. | Normal operation sounds (compressor, water pump). | This is normal during operation. Ensure the unit is on a stable surface. |
7. Specifications
| Feature | Specification |
|---|---|
| Brand | Midea |
| Model Name | Countertop Ice Maker |
| Model Number | MERI26B1AGY |
| Product Dimensions (D x W x H) | 11.6" x 8.4" x 11.6" |
| Ice Production Capacity | Up to 26 lbs per 24 hours |
| Ice Production Speed | 8 ice bullets in 6 minutes |
| Voltage | 115 Volts |
| Refrigerant | R600a |
| Material Type | Metal, Plastic |
| Included Components | Ice maker, Ice scoop |
8. Warranty and Support
For warranty information and customer support, please refer to the warranty card included with your product or visit the official Midea website. Keep your purchase receipt as proof of purchase.


