
Introduction
This manual provides detailed instructions for the installation, operation, maintenance, and troubleshooting of your Vratzn Android 13 Car Radio Stereo. This unit is designed for Dodge Ram 1500, 2500, and 3500 models from 2013 to 2019, featuring a 9-inch touch screen, 2GB RAM, and 64GB ROM, along with wireless CarPlay and Android Auto compatibility. Please read this manual thoroughly before using the product to ensure proper function and safety.
1. Setup and Installation
1.1 Package Contents
Before installation, verify that all components are present in the package:

Figure 1: Included Accessories. The package contains the 9-inch head unit, a custom frame, a backup camera, power cables, a crowbar tool, a screwdriver, a reversing line cable, a Can Bus decoder, an external microphone, a GPS module, two USB cables, an RCA cable set, and an additional speaker.
- 9-inch Android Head Unit
- Custom Installation Frame
- Power Cable Harness
- Can Bus Decoder
- GPS Module
- USB Cables (x2)
- RCA Cable Set
- External Microphone
- Reversing Line (for backup camera)
- Backup Camera
- Installation Tools (Crowbar, Screwdriver)
1.2 Compatibility Check
This unit is specifically designed for Dodge Ram 1500, 2500, and 3500 models manufactured between 2013 and 2019, equipped with an automatic AC system. Ensure your vehicle matches these specifications for proper fit and functionality.

Figure 2: Compatibility with Automatic AC. The image displays the head unit after installation in a compatible Dodge Ram dashboard. It also illustrates the difference between compatible automatic AC controls (✓) and incompatible manual AC controls (X) for 2013-2019 models.
1.3 Installation Steps
Installation of this car stereo involves removing the factory head unit and connecting the new unit using the provided wiring harness and frame. Due to the complexity of automotive electrical systems, professional installation is recommended. If you choose to install it yourself, please follow these general guidelines:
- Disconnect Battery: Always disconnect the vehicle's negative battery terminal before starting any electrical work to prevent short circuits.
- Remove Factory Unit: Carefully remove the trim panels and screws securing the factory radio. Use the provided crowbar tool to avoid damaging interior surfaces.
- Connect Wiring: Connect the provided power cable harness and Can Bus decoder to the vehicle's wiring. Ensure all connections are secure. Connect the GPS module, USB cables, external microphone, and backup camera reversing line as needed.
- Mount New Unit: Secure the new Android head unit into the custom installation frame.
- Test Functionality: Before fully reassembling the dashboard, reconnect the battery and test the unit's basic functions (power on, audio, touch screen, AC controls).
- Reassemble: Once confirmed working, carefully reassemble the dashboard trim panels.
Note: Specific vehicle disassembly instructions may vary. Refer to your vehicle's service manual or online resources for detailed panel removal procedures.
2. Operating Instructions
2.1 Android 13 System Overview
The head unit runs on Android 13, offering a familiar smartphone-like interface. It features 2GB RAM and 64GB ROM for smooth operation and app storage. The adaptive UI, strengthened privacy features, and broad app compatibility enhance the user experience. You can download various applications from the APP Store by connecting to Wi-Fi.
2.2 Wireless CarPlay & Android Auto
Connect your iPhone or Android device wirelessly via Bluetooth to access CarPlay or Android Auto. This allows for seamless integration of navigation, calls, messages, and music directly on the head unit's display.
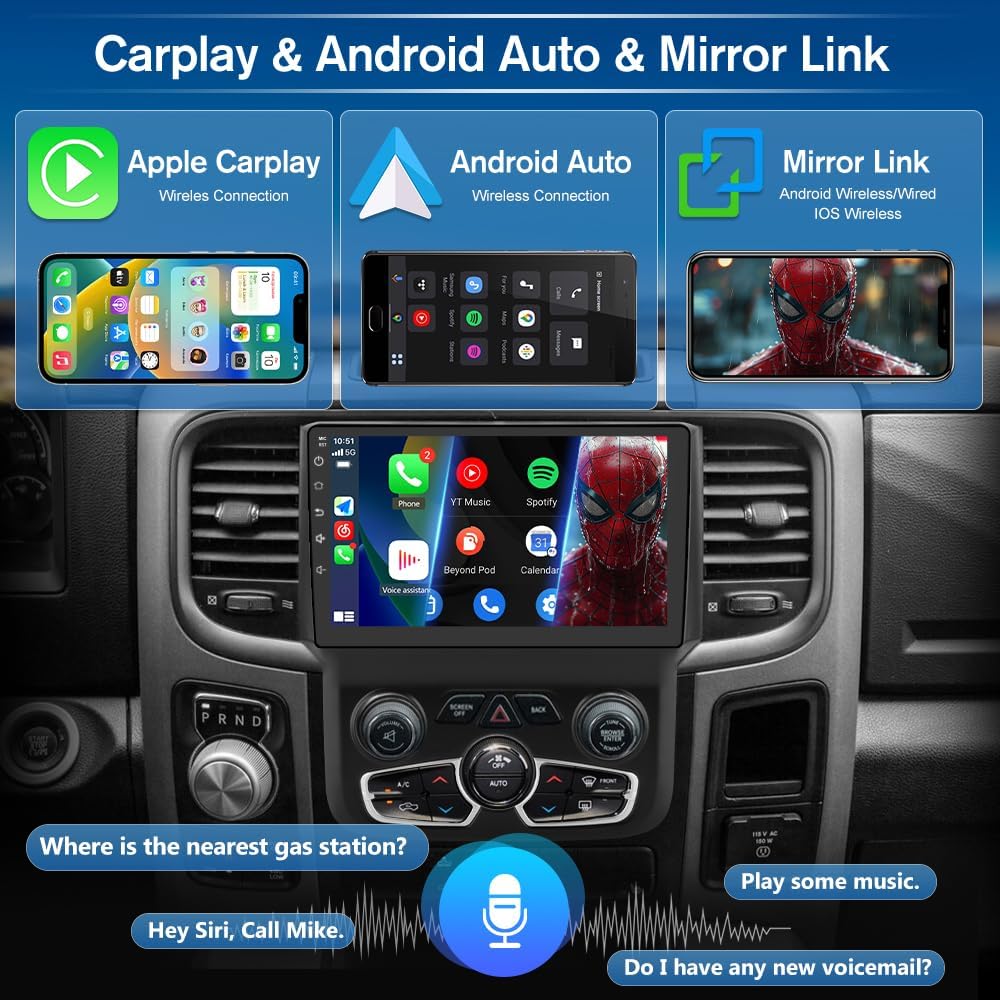
Figure 3: CarPlay, Android Auto, and Mirror Link. This image demonstrates the wireless connectivity for Apple CarPlay and Android Auto, as well as Mirror Link for both Android and iOS devices. It also illustrates examples of voice commands for navigation, calls, and music playback.
- Connection: Enable Bluetooth on your smartphone and pair it with the head unit. Follow the on-screen prompts to activate CarPlay or Android Auto.
- Voice Assistant: Use voice commands (e.g., "Hey Siri" or "Hey Google") for hands-free operation.
- Functions: Access navigation, make and receive calls, send and receive messages, and play music directly from your phone's apps.
2.3 GPS Navigation
The unit supports online and offline GPS navigation. With a Wi-Fi connection, you can use online maps. The system includes built-in offline North America maps for navigation without an internet connection.

Figure 4: GPS Navigation and WiFi. The top part of the image displays the GPS navigation interface on the 9-inch screen, showing a route with estimated time and distance. Below it, icons represent various navigation applications. The bottom part illustrates the WiFi connection feature, showing the head unit browsing web content and the WiFi signal icon.
2.4 WiFi Connection
Connect the head unit to a Wi-Fi network (e.g., mobile hotspot) to access online features. This enables downloading apps from the APP Store, browsing the internet, and streaming videos.
- Go to Settings > Network & Internet > Wi-Fi.
- Select your desired Wi-Fi network and enter the password if required.
2.5 Bluetooth Connectivity
The built-in Bluetooth allows for hands-free calling and wireless music streaming. The integrated microphone ensures clear call quality.

Figure 5: Bluetooth and FM Radio. The top section shows the Bluetooth dialer interface on the head unit, allowing users to make calls directly. An example of an incoming call with a voice assistant prompt is also displayed. The bottom section illustrates the FM radio interface, showing selectable frequencies and a visual representation of radio waves.
- Pairing: Go to Settings > Connected devices > Bluetooth. Enable Bluetooth on your phone and search for the head unit. Select it to pair.
- Hands-free Calling: Make or receive calls directly from the head unit. Your voice will be picked up by the built-in microphone, and the call audio will play through your car speakers.
- Music Streaming: Play audio from your phone wirelessly through the car's sound system.
2.6 FM Radio
Access local FM radio stations. The interface allows for easy tuning and saving of favorite stations.
- Open the "Radio" application from the main menu.
- Use the on-screen controls to scan for stations or manually tune to a specific frequency.
2.7 Steering Wheel Control
The unit supports integration with your vehicle's existing steering wheel controls (if equipped). This allows you to manage volume, tracks, and calls without taking your hands off the wheel.

Figure 6: Steering Wheel Control and Split Screen. The top section displays the "Steering Wheel Control" learning interface, where users can program functions like power, volume, navigation, and Bluetooth to their steering wheel buttons. The bottom section illustrates the "Split Screen" feature, showing a map application on one side and a music player on the other, labeled "MAP + Music".
- Navigate to the "Steering Wheel Control" settings in the unit's menu.
- Follow the on-screen instructions to program each button function.
2.8 Split Screen Functionality
Utilize the split-screen feature to run two applications simultaneously, such as navigation and music playback, for enhanced multitasking.
- While an app is open, press and hold the recent apps button or drag an app to one side of the screen to activate split-screen mode.
- Select a second app to occupy the other half of the screen.
2.9 Automatic AC Control
The unit integrates with your vehicle's automatic AC system, allowing you to control climate settings directly from the touch screen while retaining full factory functionality.
3. Maintenance
3.1 Screen Cleaning
To clean the touch screen, power off the unit. Use a soft, lint-free cloth slightly dampened with water or a screen-safe cleaning solution. Avoid abrasive materials or harsh chemicals that could damage the screen surface.
3.2 Software Updates
Periodically check for software updates to ensure optimal performance and access to new features. Updates can typically be found through the unit's system settings or the manufacturer's website. Follow the provided instructions carefully during any update process.
4. Troubleshooting
If you encounter issues with your Vratzn car radio stereo, refer to the following common troubleshooting steps:
- No Power: Check all power connections and ensure the vehicle's battery is properly connected and charged. Verify fuses.
- No Sound: Check speaker connections. Ensure volume is not muted or set too low. Verify audio output settings.
- Touch Screen Unresponsive: Try restarting the unit. If the issue persists, a factory reset might be necessary (note: this will erase all user data).
- CarPlay/Android Auto Not Connecting: Ensure Bluetooth is enabled on both the phone and the head unit. Try forgetting the device on both ends and re-pairing. Check for software updates on your phone and the head unit.
- GPS Signal Issues: Ensure the GPS antenna is properly installed and has a clear view of the sky.
- System Lag: Close unnecessary background applications. Clear cache data if available in settings.
- AC Controls Not Working: Verify the Can Bus decoder is correctly installed and configured.
For persistent issues not resolved by these steps, please contact customer support.
5. Specifications
| Feature | Specification |
|---|---|
| Model Compatibility | Dodge Ram 1500/2500/3500 (2013-2019) with Automatic AC |
| Operating System | Android 13 |
| RAM | 2 GB |
| Internal Storage (ROM) | 64 GB |
| Screen Size | 9 Inches |
| Human Interface Input | Touchscreen |
| Wireless Connectivity | Wireless CarPlay, Android Auto, Bluetooth, Wi-Fi |
| GPS | Built-in, supports online/offline maps (North America) |
| Included Components | Car radio, custom frame, wiring harness, GPS module, USB cables, external microphone, backup camera, installation tools |
| Item Weight | 2 Kilograms |
| Manufacturer | Vratzn |
6. Warranty and Support
6.1 Product Warranty
This Vratzn product is covered by a standard manufacturer's warranty against defects in materials and workmanship. The warranty period typically begins from the date of purchase. Please retain your proof of purchase for warranty claims. For specific warranty terms and conditions, refer to the documentation included with your product or contact Vratzn customer support.
6.2 Customer Support
If you require assistance with installation, operation, or troubleshooting, please contact Vratzn customer support. You can typically find contact information on the manufacturer's official website or through the retailer where the product was purchased.
When contacting support, please be prepared to provide your product model number (Android 13 Car Radio Stereo, 2G+64G, 9-inch) and a detailed description of the issue.