
DEEPOWER QS7
DEEPOWER QS7 Electric Bike User Manual
Model: QS7
1. Important Safety Guidelines
Please read this manual thoroughly before operating your DEEPOWER QS7 Electric Bike. Failure to follow these instructions can result in serious injury or damage to the bike.
1.1 General Riding Safety
- Always wear a helmet that meets safety standards.
- Familiarize yourself with and obey all local traffic laws and regulations.
- Perform a pre-ride inspection before each use: check tire pressure, brake function, battery charge, and ensure all bolts are tight.
- Do not ride under the influence of alcohol or drugs.
- Be aware of your surroundings and ride defensively.
- Avoid riding in adverse weather conditions (heavy rain, snow, ice) or on extremely slippery surfaces.
1.2 Battery Safety
- Use only the original charger provided with your DEEPOWER QS7.
- Do not expose the battery to extreme temperatures (hot or cold) or direct sunlight for extended periods.
- Never puncture, open, or disassemble the battery pack.
- Charge the battery in a well-ventilated area, away from flammable materials.
- If the battery shows signs of damage, overheating, or emits an unusual odor, discontinue use immediately and contact support.
- Keep the battery away from children and pets.
1.3 Braking Safety
- Test brakes before each ride.
- Apply both front and rear brakes simultaneously for optimal stopping power and control.
- Braking distance may increase in wet conditions.
2. Package Contents
Your DEEPOWER QS7 Electric Bike package includes:
- DEEPOWER QS7 Electric Bike (90% assembled)
- Battery (pre-installed or separate)
- Battery Charger(s)
- Tool Kit
- Pedals
- Front Fender
- Headlight
- User Manual (this document)
3. Assembly Instructions
Your DEEPOWER QS7 Electric Bike arrives approximately 90% assembled. Please follow these steps carefully to complete the assembly. It is highly recommended to watch the official installation video for visual guidance.
3.1 Installation Video Guide
Video Description: This official installation video provides a step-by-step visual guide for assembling your DEEPOWER QS7 Electric Bike, covering fender, headlight, handlebar, pedal, and front wheel installation.
3.2 Step-by-Step Assembly
- Unpack the Bike: Carefully remove the bike and all components from the packaging. Retain packaging for future transport or returns.
- Install Front Fender: Attach the front fender to the front fork using the provided screws and tools.
- Install Headlight: Mount the headlight to the designated bracket on the front of the bike and connect its cable.
- Install Handlebars: Loosen the stem bolts, insert the handlebar, adjust to a comfortable angle, and tighten the bolts securely. Ensure brake levers and shifters are correctly positioned.
- Install Pedals: Identify the left (L) and right (R) pedals. The left pedal tightens counter-clockwise, and the right pedal tightens clockwise. Apply a small amount of grease to the threads if available, then screw them in firmly.
- Install Front Wheel:
- Important: The front fork comes with a protective rod for shipping. This is NOT the front wheel axle. Remove this rod before installing the wheel.
- Align the front wheel into the fork dropouts, ensuring the brake rotor slides correctly into the brake caliper.
- Insert the front wheel axle, secure it with the safety hook (if applicable), washers, and nuts. Tighten securely.

Image Description: An illustration showing the difference between the front fork shipping protection rod and the actual front wheel axle, emphasizing not to confuse them during assembly.

Image Description: A diagram illustrating how to properly fit the safety hook into the small hole on the front fork, followed by the gasket, nut, and how to tighten it securely for front wheel installation.
After assembly, double-check all connections and ensure all bolts are tightened to the manufacturer's specifications.
4. Components Overview
Familiarize yourself with the key components of your DEEPOWER QS7 Electric Bike.

Image Description: A full view of the DEEPOWER QS7 Electric Bike, showcasing its robust frame, fat tires, and overall design.
4.1 Motor System

Image Description: A detailed view of the 1500W peak brushless motor, highlighting its internal components and power capabilities, including 30MPH max speed, 7-speed gears, and 35° climbing ability.
4.2 Dual Battery System
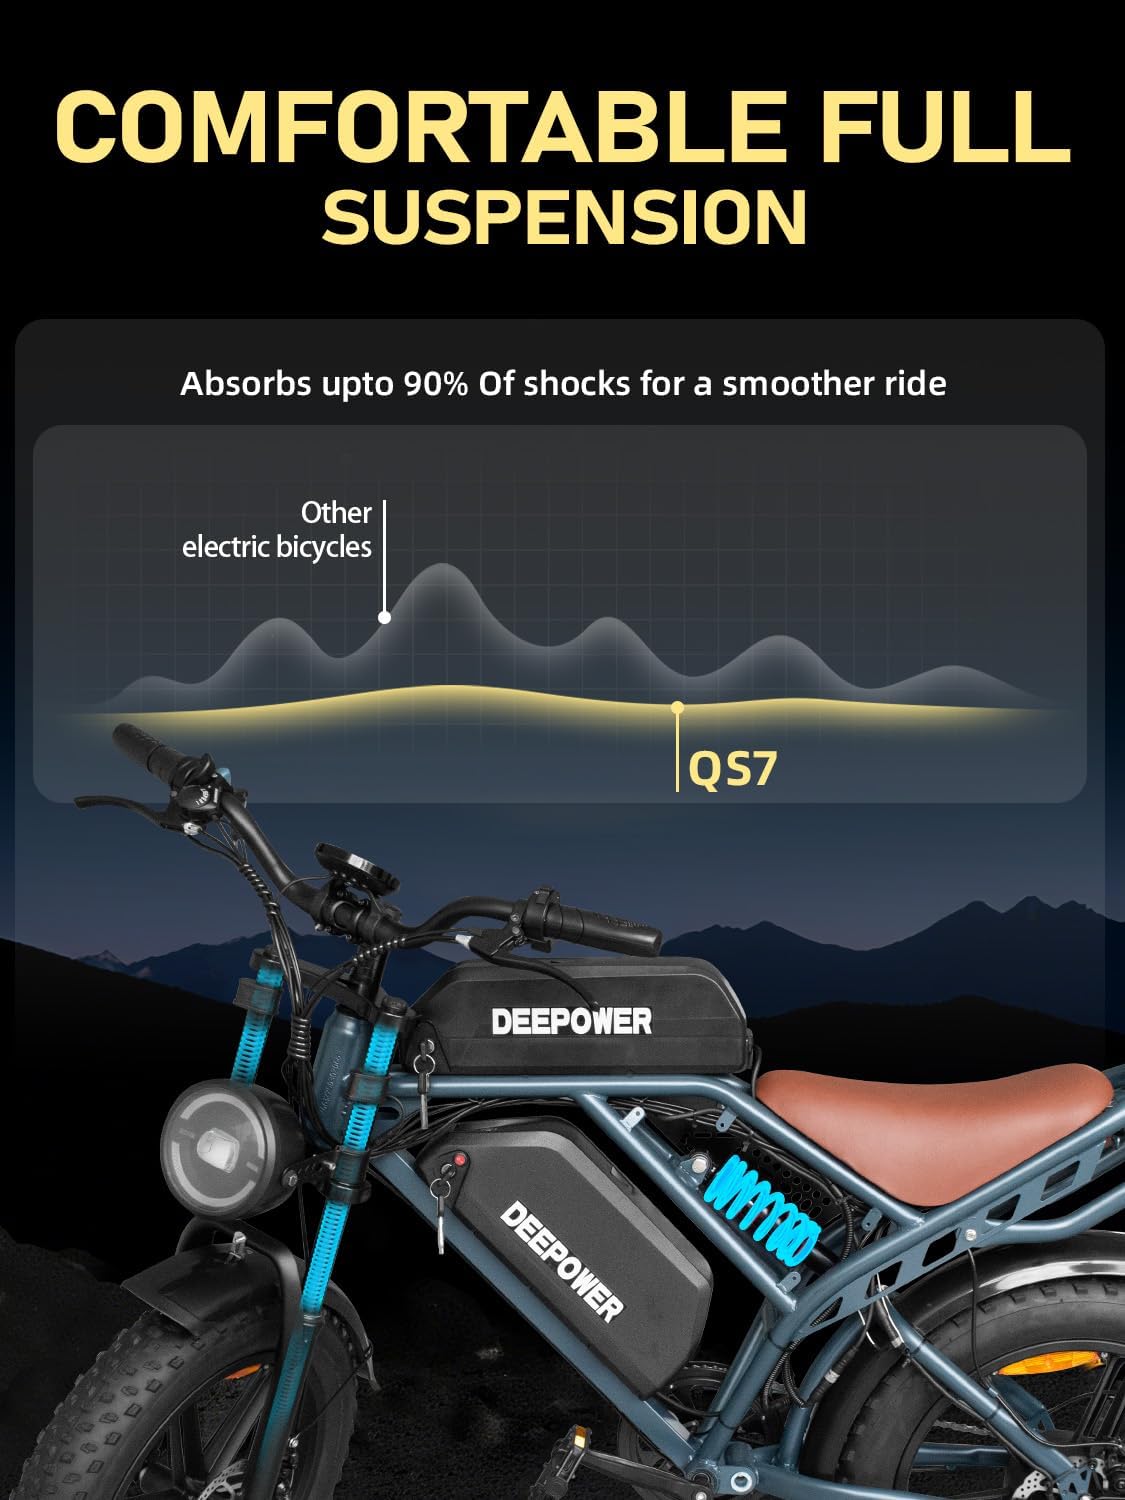
Image Description: A visual representation of the 48V dual battery system (25Ah + 35Ah), illustrating its placement on the bike and emphasizing the extended range it provides compared to single battery systems.
4.3 Suspension and Tires

Image Description: A view of the bike's full suspension system, designed to absorb shocks for a smoother ride, with a graphic comparing its shock absorption to other electric bicycles.

Image Description: A close-up of the 20" x 4.0" fat tires, illustrating their robust construction and suitability for various terrains including jungle, farm, mountain roads, and city streets.
4.4 Controls and Display

Image Description: A view of the LCD display screen, showing speed, battery level, and other ride data, alongside the light controls and throttle handle on the handlebars.
4.5 Lighting and Braking

Image Description: An overview highlighting the front headlight, rear taillight, comfortable saddle, and the mechanical disc brake system on the DEEPOWER QS7.
5. Operating Your DEEPOWER QS7
5.1 Powering On/Off
- To Power On: Insert the key into the ignition (usually near the battery or handlebar) and turn it to the 'ON' position. Press and hold the power button on the LCD display for a few seconds.
- To Power Off: Press and hold the power button on the LCD display until it turns off. Turn the key to the 'OFF' position and remove it.
5.2 LCD Display Functions
The LCD display provides essential riding information:
- Speed: Current riding speed (MPH/KMH).
- Battery Level: Indicates remaining battery charge.
- Odometer/Trip Meter: Total distance traveled or distance for the current trip.
- Pedal Assist Level: Shows the current level of motor assistance.
5.3 Riding Modes and Gears

Image Description: An illustration detailing the 7-speed gear cassette and the gear shifter, explaining how to switch between electric, pedal-assist, and manual modes to adapt to various terrains.
The DEEPOWER QS7 offers three riding modes and a 7-speed gear system:
- Electric Mode (Throttle Only): Use the thumb throttle to engage the motor without pedaling.
- Pedal-Assist Mode (PAS): The motor provides assistance as you pedal. Adjust the assist level on the display (usually 1-5) to control the amount of power.
- Manual Mode: Ride the bike like a traditional bicycle, using only pedal power.
Use the 7-speed Shimano gear shifter on the handlebars to change gears, adapting to different terrains and inclines for efficient pedaling.
5.4 Throttle and Braking
- Throttle: Gently twist or press the throttle to accelerate. Release the throttle to decelerate.
- Brakes: The bike is equipped with dual mechanical disc brakes. Squeeze the brake levers on the handlebars to slow down or stop. Both brakes should be applied smoothly and simultaneously for best results.
5.5 Lights and Signals
- Headlight: Press the light button on the handlebar control panel to turn the front headlight on or off.
- Brake Light: The rear light illuminates brighter when brakes are applied.
- Turn Signals: Use the dedicated buttons on the handlebar controls to activate left or right turn signals.
5.6 Product Overview Video
Video Description: This short video provides a dynamic overview of the DEEPOWER QS7 Electric Bike, showcasing its features and operation in various settings.
6. Battery Charging and Care
6.1 Charging the Battery
- Ensure the bike is turned off before charging.
- Locate the charging port on the battery (or bike frame if integrated).
- Connect the charger to the battery charging port, then plug the charger into a standard wall outlet.
- The charger indicator light will typically show red during charging and turn green when fully charged.
- Charging time for a single battery is approximately 5-6 hours. The dual battery system can be charged simultaneously using two chargers.
- Do not overcharge the battery; disconnect the charger once fully charged.
6.2 Battery Removal and Installation
The DEEPOWER QS7 features a removable battery for convenient charging or storage. Use the provided key to unlock and remove the battery from its compartment. To reinstall, align the battery with its slot and push firmly until it clicks into place, then lock it with the key.
6.3 Battery Care and Storage
- Store the battery in a cool, dry place, away from direct sunlight and extreme temperatures.
- If storing for an extended period, charge the battery to about 50-70% every 1-2 months to maintain its health.
- Avoid fully discharging the battery frequently, as this can reduce its lifespan.
7. Maintenance
Regular maintenance ensures the longevity and safe operation of your DEEPOWER QS7 Electric Bike.
7.1 Pre-Ride Checks (Before Each Ride)
- Tires: Check tire pressure (refer to tire sidewall for recommended PSI) and inspect for any damage or punctures.
- Brakes: Ensure brake levers are firm and brakes engage effectively. Check brake pads for wear.
- Battery: Verify sufficient charge for your planned ride.
- Bolts and Connections: Quickly check that all visible bolts (handlebars, seat post, wheels) are tight.
7.2 Regular Maintenance (Monthly or Every 100 Miles)
- Chain: Clean and lubricate the chain regularly, especially after riding in wet or dusty conditions.
- Brakes: Inspect brake cables for fraying and adjust tension as needed. Replace worn brake pads.
- Tires: Check for wear and tear. Rotate or replace if necessary.
- Frame: Clean the frame with a damp cloth. Avoid using high-pressure washers directly on electrical components.
- Electrical Connections: Ensure all electrical cables are securely connected and free from damage.
8. Troubleshooting
This section addresses common issues you might encounter with your DEEPOWER QS7 Electric Bike.
8.1 Battery Not Charging
- Check Connections: Ensure the charger is securely plugged into both the wall outlet and the battery.
- Power Outlet: Test the wall outlet with another device to confirm it's working.
- Charger Indicator: Observe the charger's indicator light. If it doesn't light up or stays green immediately, the charger or battery might be faulty.
- Battery Lock: Ensure the battery is properly seated and locked into the bike.
8.2 Motor Not Engaging
- Power On: Confirm the bike is powered on and the key is in the 'ON' position.
- Battery Charge: Check the battery level on the display. A low battery will prevent motor engagement.
- Brake Levers: Ensure brake levers are not partially engaged, as most e-bikes have a safety cut-off that disengages the motor when brakes are applied.
- Connections: Check motor cable connections for looseness or damage.
- Pedal Assist Level: If in PAS mode, ensure the assist level is set above zero.
8.3 Brakes Squealing or Ineffective
- Brake Pad Contamination: Squealing often indicates contamination (oil, grease) on brake pads or rotors. Clean with isopropyl alcohol.
- Brake Pad Wear: Inspect brake pads for wear. Replace if they are thin.
- Adjustment: Brakes may need adjustment. Refer to a bike mechanic or online guides for disc brake adjustment.
- Rotor Alignment: Ensure the brake rotor is not bent and is properly aligned within the caliper.
8.4 Loose Components (Pedals, Kickstand, Shifter)
- Tighten: Regularly check and tighten all bolts and screws on components like pedals, kickstand, and gear shifter using appropriate tools from your toolkit.
- Inspect for Damage: If a component repeatedly loosens or breaks, inspect for stripped threads or damaged parts that may require replacement.
If you encounter issues not listed here or cannot resolve a problem, please contact DEEPOWER customer support.
9. Specifications
Detailed specifications for the DEEPOWER QS7 Electric Bike.
Image Description: A diagram illustrating the key dimensions of the DEEPOWER QS7 Electric Bike (Length, Width, Height, Standover Height), along with load capacity, bicycle weight, and recommended rider height.
| Feature | Specification |
|---|---|
| Motor | 1500W Peak Brushless Motor, 85N·m Torque |
| Battery | 48V (25Ah + 35Ah) Dual High-Density Batteries (Total 60Ah) |
| Max Range | Up to 180 Miles (with dual batteries) |
| Max Speed | 30 MPH (48 KM/H) |
| Tires | 20" x 4.0" Puncture-Proof Fat Tires |
| Frame Material | Durable Carbon Steel |
| Gears | 7-Speed Shimano |
| Brakes | Dual Mechanical Disc Brakes |
| Suspension | Front Fork Shock Absorbers, Rear High-Performance Suspension |
| Load Capacity | 330 lbs (150 kg) |
| Item Weight | 88 lbs (39.9 kg) |
| Dimensions (L x W x H) | 68.11" x 25.19" x 43.70" (173cm x 64cm x 111cm) |
| Climbing Ability | 30° Slopes |
10. Warranty and Support
10.1 Warranty Information
DEEPOWER provides a 12-month warranty for the QS7 Electric Bike. This warranty covers manufacturing defects and component failures under normal use. To claim your warranty, please provide corresponding pictures or videos to prove that the parts are damaged.
For detailed warranty terms and conditions, please visit the official DEEPOWER website or contact customer support.
10.2 Customer Support
If you have any questions, concerns, or require assistance with your DEEPOWER QS7 Electric Bike, please do not hesitate to contact our support team:
- Email: amz-support@deepowerbike.com
- Response Time: We aim to respond to all inquiries within 24 hours on weekdays.
Related documentsQS7


Ask a question about this manual
Ask about setup, troubleshooting, compatibility, parts, safety, or missing instructions. Manuals+ will review the question and use this page’s manual context to help answer it.