Introduction
This manual provides detailed instructions for the installation, operation, and maintenance of your Thermalright Stream Vision 360 Black CPU Liquid Cooler. Please read this manual thoroughly before installation and use to ensure proper function and longevity of the product.

Image: Thermalright Stream Vision 360 Black CPU Liquid Cooler installed in a PC case, highlighting the LCD screen and radiator.
Safety Information
Always follow these safety guidelines to prevent damage to the product or injury:
- Ensure your computer system is powered off and unplugged from the wall outlet before installation.
- Handle components with care to avoid damage.
- Do not attempt to disassemble the cooler's pump or radiator.
- Keep out of reach of children.
- Refer to the installation video or manual for specific steps.
Package Contents
Verify that all components are present in the package:
- Thermalright Stream Vision 360 Black CPU Liquid Cooler (Radiator with pre-installed fans, pump/waterblock with LCD screen)
- Mounting fasteners for AMD (AM4/AM5) and Intel (LGA1150/1151/1155/1156/1200/2011/2066/1700/1851) platforms
- SS2 all-metal buckle
- Water guide clip
- USB-C to USB 2.0 connection cable (for LCD screen)
- Thermal paste

Image: Main components of the liquid cooler, showing the radiator, fans, and the waterblock with its detachable LCD module.
Setup and Installation
The Thermalright Stream Vision 360 Black CPU Liquid Cooler is designed for straightforward installation. Ensure you have the correct mounting hardware for your CPU socket type (AMD AM4/AM5 or Intel LGA1150/1151/1155/1156/1200/2011/2066/1700/1851).
General Installation Steps:
- Prepare the CPU: Clean the CPU surface of any old thermal paste. Apply a thin, even layer of new thermal paste to the center of the CPU.
- Install Radiator and Fans: Mount the radiator with its pre-installed fans to an available fan mounting location in your PC case (typically top or front). Ensure airflow direction is optimal for your case.
- Install Mounting Bracket: Attach the appropriate mounting bracket (Intel or AMD) to the waterblock. The SS2 all-metal buckle provides secure compatibility.
- Mount Waterblock: Carefully place the waterblock onto the CPU, aligning the mounting holes. Secure it with the provided fasteners. For AMD platforms, use the original motherboard backplate.
- Connect Cables:
- Connect the pump's 4-PIN PWM cable to the CPU_FAN or AIO_PUMP header on your motherboard.
- Connect the fan cables to appropriate fan headers on your motherboard or a fan controller.
- Connect the LCD screen via the USB-C to USB 2.0 cable to an available USB 2.0 header on your motherboard.
- Manage Tubing: Use the included water guide clips to route the water tubes neatly and prevent them from interfering with other components or fans.

Image: The magnetic LCD display module detaching from the waterblock, illustrating easy installation.
Software Installation (TRCC):
To customize the LCD screen and monitor system parameters, download and install the TRCC software from the official Thermalright website. The software allows for custom themes, static/dynamic picture switching, and video playback on the 3.5-inch IPS LCD screen.
Installation Video Reference:
For a visual guide, refer to the official installation video. This video demonstrates the process for various CPU platforms.
Video: Product overview and installation guide for the Thermalright Stream Vision 360 Black CPU Liquid Cooler.
Operating Instructions
LCD Screen Customization:
The 3.5-inch IPS LCD screen offers a 640x480 resolution for clear display. Use the TRCC software to:
- Display real-time system monitoring data (CPU/GPU temperature, clock frequencies, usage).
- Switch between various static and dynamic pictures.
- Upload and play custom GIFs and videos.
- Apply custom themes.

Image: The LCD screen showcasing various live system monitoring displays and customizable visual themes.
Active Motherboard Cooling:
The magnetic cold head pump features an integrated 60mm fan. This fan provides direct airflow to the motherboard's core power supply module (VRM) and memory, contributing to lower component temperatures and stable CPU power delivery.
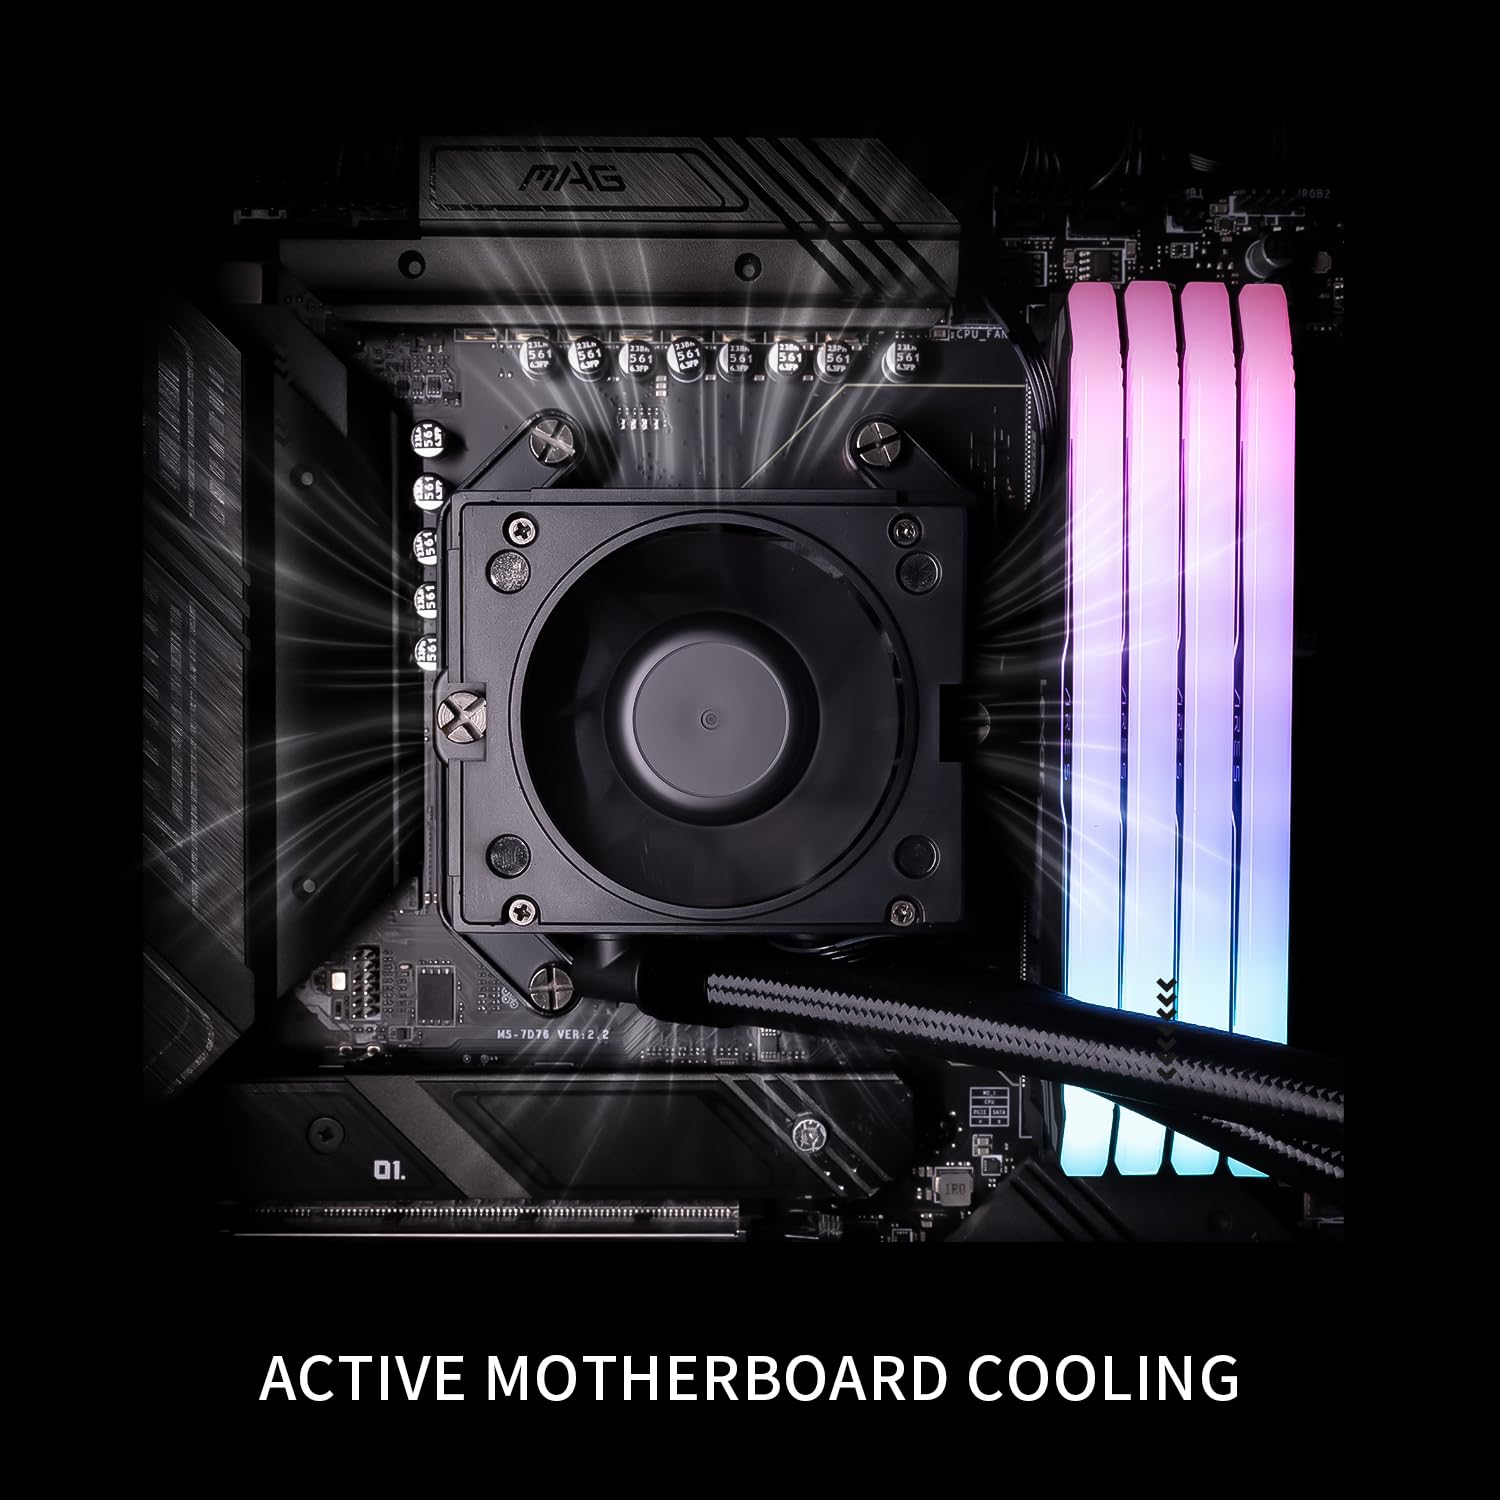
Image: The waterblock's integrated fan actively cooling the motherboard's voltage regulator modules (VRM) and RAM.
Maintenance
- Dust Cleaning: Periodically clean the radiator fins and fan blades with compressed air to prevent dust buildup, which can impede cooling performance.
- Cable Management: Ensure all cables are securely connected and not obstructing airflow.
- Software Updates: Keep the TRCC software updated to access new features and performance improvements.
- Liquid Level Check: This is a closed-loop system and does not require regular liquid refills. However, monitor for any signs of leaks.
Troubleshooting
| Problem | Possible Cause | Solution |
|---|---|---|
| High CPU Temperatures |
|
|
| LCD Screen Not Displaying |
|
|
| Unusual Noise from Cooler |
|
|
Specifications
| Component | Specification |
|---|---|
| Model | Stream Vision 360 Black |
| Radiator Dimensions | 403mm x 120mm x 52mm |
| Waterblock Dimensions | 69mm x 76mm x 92mm (cold head) |
| Pump Speed | 6400 RPM ±10% |
| Pump Voltage | DC 12V |
| Pump Connector | 4-PIN PWM |
| Fan Model | TL-H12-X28-R7 |
| Fan Dimensions | 120mm x 120mm x 28mm |
| Fan Speed | 2400 RPM ±10% |
| Fan Air Pressure | 2.78 MM H2O |
| Fan Air Volume | 95.4 CFM |
| Operating Noise | ≤31.4 dBA |
| Fan Bearing Type | S-FDB Bearing V2 |
| LCD Screen Size | 3.5 inches |
| LCD Resolution | 640x480 IPS |
| Compatibility | AMD: AM4/AM5, Intel: LGA1150/1151/1155/1156/1200/2011/2066/1700/1851 |
| Material | Aluminum |
| Item Weight | 6.74 pounds |

Image: Compatibility information for Intel and AMD platforms, alongside details of the radiator's internal water channels and polymer-sleeved tubes.

Image: Specifications and features of the TL-H12-X28-R7 fan, including its S-FDB V2 bearing and static pressure optimization.
Warranty and Support
For warranty information, technical support, or further assistance, please visit the official Thermalright website or contact their customer service department. Keep your purchase receipt as proof of purchase.
Official Website: www.thermalright.com


