
1. Introduction
Thank you for choosing the Darmoshark M5PRO Mini Wireless Gaming Mouse. This manual provides detailed instructions for setting up, operating, and maintaining your new gaming mouse. The M5PRO features a tri-mode connection (2.4G wireless, Bluetooth, wired), a high-precision PAW3950 optical sensor, and a lightweight design for optimal performance.
2. Product Overview
The Darmoshark M5PRO is designed for competitive gaming, offering versatile connectivity and advanced sensor technology. Its ergonomic shape is ideal for finger grip players, providing responsive control and comfort during extended use.

Image: Darmoshark M5PRO Mini Wireless Gaming Mouse in various colors, highlighting its design.
Key Features:
- Tri-Mode Connectivity: Seamlessly switch between 2.4G wireless, Bluetooth 5.0, and wired USB connections.
- PAW3950 Optical Sensor: Provides up to 30000 DPI, 750 IPS tracking speed, and 50G acceleration for precise and responsive tracking.
- 8KHz Polling Rate: Experience ultra-low latency with an 8KHz polling rate in 2.4G wireless mode, ensuring rapid response times.
- Ultra-Lightweight Design: Weighing approximately 38 grams, the mouse reduces hand fatigue during long gaming sessions.
- 5 Programmable Buttons: Customize button functions via the dedicated software.
- Built-in Lithium Battery: High-capacity rechargeable battery for extended wireless usage.
- Wide Compatibility: Compatible with Windows and Apple Mac operating systems.
3. Package Contents
Please check the package for the following items:
- Darmoshark M5PRO Mini Wireless Gaming Mouse
- 2.4G Wireless Receiver (USB Dongle)
- USB-C to USB-A Cable (for charging and wired connection)
- User Manual (this document)
- Grip Tape (optional accessory, if included)
4. Setup and Connectivity
4.1. Wired Mode
- Connect the USB-C end of the provided cable to the mouse.
- Connect the USB-A end of the cable to an available USB port on your computer.
- The mouse will automatically switch to wired mode and begin charging.
4.2. 2.4G Wireless Mode (with 8KHz Receiver)
- Locate the 2.4G wireless receiver (USB dongle) in the package.
- Plug the 2.4G wireless receiver into an available USB port on your computer.
- On the bottom of the mouse, locate the tri-mode switching key. Switch it to the 2.4G wireless icon (usually indicated by a small antenna or 'G' symbol).
- The mouse should automatically connect. If not, press and hold the pairing button (if available, refer to the diagram) on the mouse until the indicator light flashes, then release.

Image: M5PRO mouse with its 8KHz wireless receiver for 2.4G connectivity.
4.3. Bluetooth Mode
- On the bottom of the mouse, switch the tri-mode switching key to the Bluetooth icon.
- The mouse's indicator light will start flashing, indicating it is in pairing mode.
- On your computer or device, open Bluetooth settings.
- Search for new devices and select "Darmoshark M5PRO" from the list.
- Follow any on-screen prompts to complete the pairing process.
5. Operating the Mouse
5.1. Button Functions
The M5PRO mouse features 5 programmable buttons and a scroll wheel.
- Left Click: Standard primary click.
- Right Click: Standard secondary click.
- Track Roller Key (Scroll Wheel): Scrolls up/down, and acts as a middle click button.
- DPI Adjustment Key: Cycles through preset DPI levels.
- Forward Button: Default function for navigating forward in web browsers or file explorers.
- Backspace Button: Default function for navigating backward in web browsers or file explorers.

Image: Exploded view of the M5PRO mouse showing internal components and button layout.
5.2. DPI Adjustment
Press the DPI Adjustment Key (located on the underside of the mouse, refer to the product diagram) to cycle through different DPI sensitivity levels. The default DPI settings can be customized using the Darmoshark software.
5.3. Charging the Mouse
When the battery is low, the mouse's indicator light will typically flash red. Connect the mouse to your computer using the provided USB-C cable to charge it. The indicator light will show charging status and turn off or change color when fully charged.

Image: Darmoshark M5PRO mouse charging via USB-C cable, highlighting its built-in lithium battery.
6. Software Customization
To unlock the full potential of your Darmoshark M5PRO mouse, download and install the official Darmoshark driver software from the manufacturer's website. The software allows you to:
- Customize DPI settings and create multiple profiles.
- Program button functions and macros.
- Adjust polling rate.
- Manage power settings and battery life.
- Update firmware.

Image: Darmoshark proprietary driver software interface for mouse customization.
7. Specifications
| Model | M5PRO |
| Sensor | PAW3950 Optical Sensor |
| DPI | Up to 30000 DPI |
| Tracking Speed | 750 IPS |
| Acceleration | 50G |
| Polling Rate | 8KHz (2.4G Wireless), 1KHz (Wired/Bluetooth) |
| Connectivity | 2.4G Wireless, Bluetooth 5.0, USB-C Wired |
| Buttons | 5 Programmable Buttons |
| Weight | Approx. 38g |
| Dimensions (L x W x H) | 91.7 mm x 57.4 mm x 35.7 mm |
| Battery | Built-in Lithium Battery (300mAh) |
| Compatibility | Windows, Apple Mac |
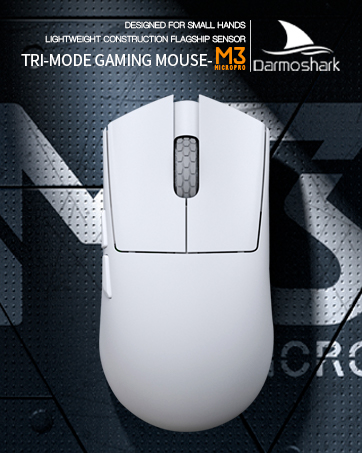
Image: Product parameter diagram with mouse dimensions.
8. Maintenance
- Cleaning: Use a soft, dry cloth to clean the mouse. Avoid using harsh chemicals or abrasive materials.
- Storage: Store the mouse in a cool, dry place away from direct sunlight and extreme temperatures.
- Battery Care: To prolong battery life, avoid fully discharging the mouse frequently. Charge it when the low battery indicator appears.
9. Troubleshooting
9.1. Mouse Not Responding
- Wired Mode: Ensure the USB cable is securely connected to both the mouse and the computer. Try a different USB port.
- 2.4G Wireless Mode: Ensure the 2.4G receiver is plugged in and the mouse is switched to 2.4G mode. Try re-pairing the mouse with the receiver. Ensure the mouse battery is charged.
- Bluetooth Mode: Ensure Bluetooth is enabled on your device and the mouse is in Bluetooth pairing mode. Try re-pairing the mouse in your device's Bluetooth settings. Ensure the mouse battery is charged.
9.2. Cursor Movement is Erratic or Inaccurate
- Clean the optical sensor on the underside of the mouse with a soft, dry cloth.
- Ensure you are using the mouse on a suitable surface (e.g., a mouse pad). Avoid highly reflective or transparent surfaces.
- Adjust the DPI settings using the DPI Adjustment Key or the software.
- Check for any software conflicts or outdated drivers. Update mouse drivers if necessary.
9.3. Wireless Connection Issues
- Reduce the distance between the mouse and the receiver/device.
- Avoid placing the receiver near other wireless devices or sources of interference (e.g., Wi-Fi routers, cordless phones).
- Ensure the mouse is fully charged.
10. Official Product Video
Watch the official product video for a visual guide on the Darmoshark M5PRO Mini Wireless Gaming Mouse.
Video: An overview of the Darmoshark M5PRO Wireless Gaming Mouse, showcasing its design and features in various colors.
11. Warranty and Support
For warranty information and technical support, please refer to the warranty card included with your product or visit the official Darmoshark website.
Manufacturer: Darmoshark
Website: Darmoshark Official Store


