1. Introduction
This manual provides detailed instructions for the installation, operation, and maintenance of your Thermalright TL-C12C-S X5 120mm ARGB CPU Air Fan 5-pack. These fans are designed to provide efficient and quiet cooling for computer cases and CPU coolers, featuring intelligent PWM speed control and customizable ARGB lighting.

Figure 1: Thermalright TL-C12C-S X5 120mm ARGB Fans (5-pack)
The TL-C12C-S X5 fans incorporate an S-FDB (Stably-FDB) bearing for stable, low-noise operation and a long service life. The high-brightness LED atomizing ARGB fan blades effectively reflect light, creating soft and vibrant lighting effects that can be synchronized with your motherboard.

Figure 2: Key Features of the TL-C12C-S X5 Fan
2. Setup and Installation
Follow these steps to properly install your Thermalright TL-C12C-S X5 fans into your computer system.
2.1 Physical Installation
- Prepare your system: Ensure your computer is powered off and unplugged from the wall outlet. Open your computer case to access the fan mounting locations.
- Mount the fans: Position the fan(s) in your desired location (e.g., chassis, CPU cooler, radiator). Use the included screws to secure each fan to the case or cooling component. Ensure the fan is oriented correctly for optimal airflow (intake or exhaust).

Figure 3: Fan Corner with Silicone Pad and S-FDB Bearing Detail
2.2 Wiring Connections
- PWM Signal Sync Wiring: Connect the 4-pin PWM connectors of the fans in series. This allows multiple fans to be controlled by a single motherboard header, synchronizing their speed.
- Connect to Motherboard (PWM): Connect the final 4-pin PWM connector from the fan series to an available CHA_FAN header on your motherboard. This provides power and allows for intelligent speed control.
- ARGB Lighting Wiring: Remove the protective caps from the 3-pin ARGB connectors on each fan. Connect these connectors in series. Up to five fans can be connected to one motherboard ARGB lighting header. Ensure the arrows on the connectors align.
- Connect to Motherboard (ARGB): Connect the final 3-pin +5V ARGB lighting cable to an available ADD_GEN header on your motherboard. This enables customizable lighting effects.
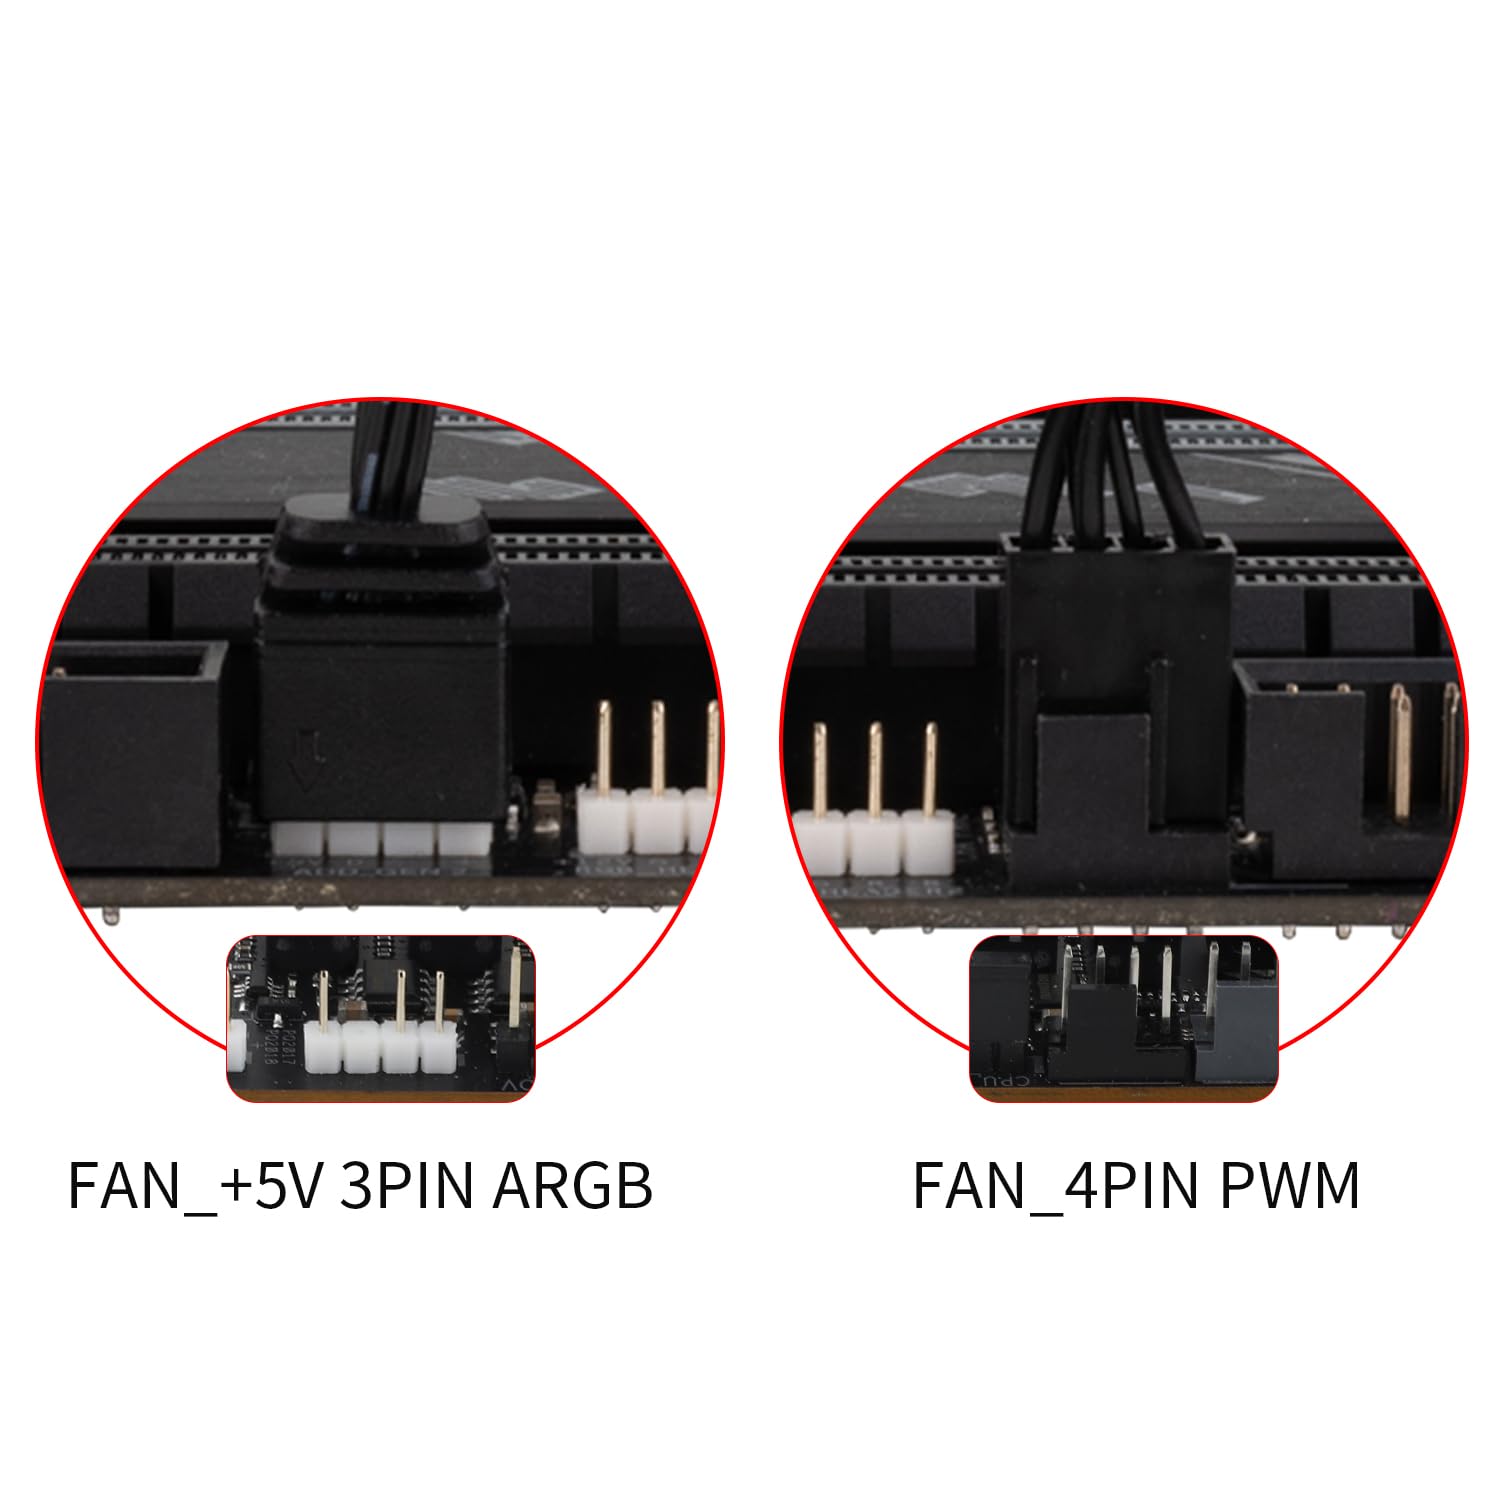
Figure 4: Motherboard Fan and ARGB Headers
2.3 Installation Video Guide
For a visual guide on the installation process, please refer to the official video below:
Video 1: Thermalright TL-C12C-S X5 Series Fan Installation Guide. This video demonstrates the step-by-step process of installing the fans, including physical mounting and connecting the PWM and ARGB cables to the motherboard.
3. Operating Instructions
The Thermalright TL-C12C-S X5 fans are designed for efficient and user-friendly operation.
3.1 Intelligent Temperature Control (PWM)
Once connected to a 4-pin PWM header on your motherboard, the fans will automatically adjust their speed based on the motherboard's temperature readings. This ensures optimal cooling performance while minimizing noise. No manual speed adjustment is typically required. If a fixed speed is desired, you may be able to adjust the fan to DC mode via your motherboard's BIOS/UEFI settings or fan control software, if supported.
3.2 ARGB Lighting Control
The fans feature high-brightness ARGB lighting with up to 17 modes of light effects. When connected to a compatible 3-pin +5V ARGB header on your motherboard, the lighting can be managed and synchronized using your motherboard's ARGB control software (e.g., ASUS Aura Sync, MSI Mystic Light Sync, Gigabyte RGB Fusion, ASRock Polychrome Sync). Refer to your motherboard manual for specific software instructions.
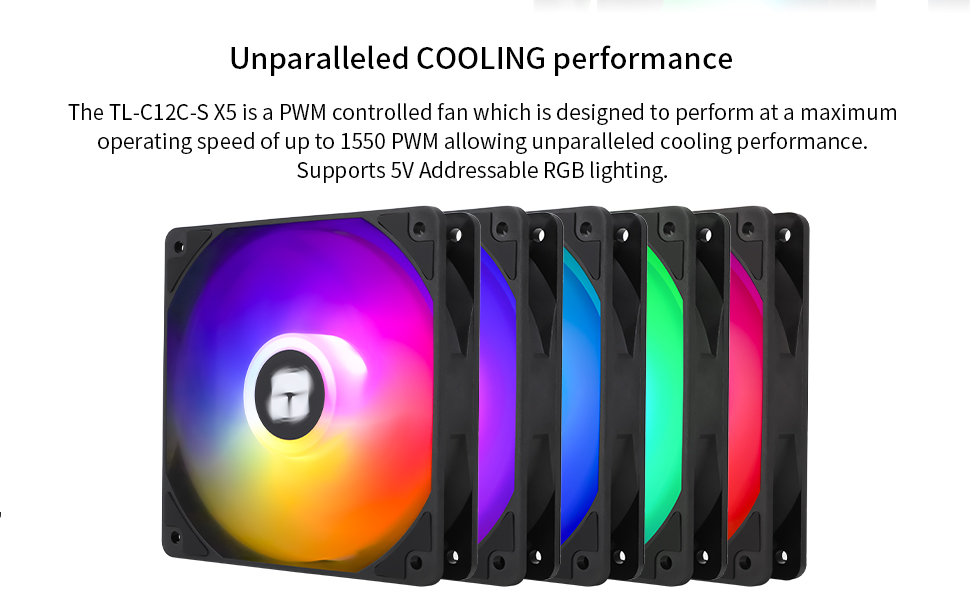
Figure 5: Customizable ARGB Lighting Effects
4. Maintenance
The Thermalright TL-C12C-S X5 fans are designed for long-term, maintenance-free operation.
4.1 S-FDB Bearing
These fans are equipped with a high-durability S-FDB (Fluid Dynamic Bearing) which provides low-friction and low-noise operation. This bearing type is designed to be maintenance-free and does not require lubrication or disassembly. Please do not attempt to disassemble the fan as this may damage the unit and void any potential warranty.
4.2 Cleaning
Periodically inspect the fan blades and frame for dust accumulation. To clean, ensure the computer is powered off and unplugged. Use compressed air or a soft, dry cloth to gently remove dust from the fan blades and housing. Avoid using liquid cleaners directly on the fan or its electrical components.

Figure 6: Long-Lasting S-FDB Bearing Design
5. Troubleshooting
If you encounter issues with your Thermalright TL-C12C-S X5 fans, consider the following common solutions:
- Fans not spinning:
- Ensure all 4-pin PWM connectors are securely seated in the motherboard headers and daisy-chained correctly.
- Check your motherboard's BIOS/UEFI settings to ensure fan headers are enabled and configured correctly (e.g., not set to 0 RPM at low temperatures).
- Verify that your power supply is providing adequate power to the motherboard and its fan headers.
- ARGB lighting not working or incorrect colors:
- Ensure all 3-pin +5V ARGB connectors are securely seated and daisy-chained correctly, paying attention to arrow alignment.
- Confirm that the ARGB cable is connected to a +5V ARGB header on your motherboard, not a +12V RGB header (which can damage the LEDs).
- Use your motherboard's ARGB control software to check and adjust lighting settings. Ensure the software is up-to-date.
- If only one fan's lighting is affected, check its individual ARGB connection within the daisy chain.
- Excessive noise:
- Check for any cables or obstructions touching the fan blades.
- Ensure the fan is securely mounted and screws are tightened.
- Dust accumulation can cause imbalance and noise; clean the fans as described in the Maintenance section.
- Adjust fan speed settings in your motherboard's BIOS/UEFI or software to a lower RPM if noise is a concern and temperatures allow.
6. Specifications
| Feature | Detail |
|---|---|
| Model Number | TL-C12C-S X5 |
| Product Dimensions | 4.72"L x 0.98"W x 4.72"H (120 x 25 x 120 mm) |
| Weight | 1.68 Pounds (for 5-pack) |
| Brand | Thermalright |
| Power Connector Type | 4-Pin PWM |
| Lighting Interface | 5V 3-Pin ARGB |
| Voltage | 12 Volts (DC) |
| Current | 0.20A |
| Cooling Method | Air |
| Compatible Devices | Desktop |
| Noise Level | ≤ 25.6 dBA |
| Material | Industrial Grade PBT+PC |
| Maximum Rotational Speed | 1550 RPM ±10% |
| Air Flow Capacity | 66.17 CFM |
| Air Pressure | 1.53 mm H2O |
| Bearing Type | S-FDB (Fluid Dynamic Bearing) |
| What's in the Box | CPU Fan (5-pack) |
7. Safety Information
- Always disconnect power to your computer before installing, cleaning, or performing any maintenance on the fans.
- Avoid touching moving fan blades.
- Ensure proper cable management to prevent cables from interfering with fan operation.
- Do not expose the fans to moisture or extreme temperatures.
- Only connect the ARGB lighting to a +5V 3-pin ARGB header. Connecting to a +12V 4-pin RGB header will damage the LEDs.
8. Warranty and Support
Specific warranty details and direct support contact information are not provided in the product description. For warranty claims or technical assistance, please refer to the official Thermalright website or contact the retailer where the product was purchased.


