
1. Introduction
This manual provides essential information for the safe operation, assembly, maintenance, and storage of your AMERISUN 21-inch 170cc Self-Propelled Gas Lawn Mower. Please read these instructions thoroughly before using the product to ensure proper function and to prevent injury or damage.
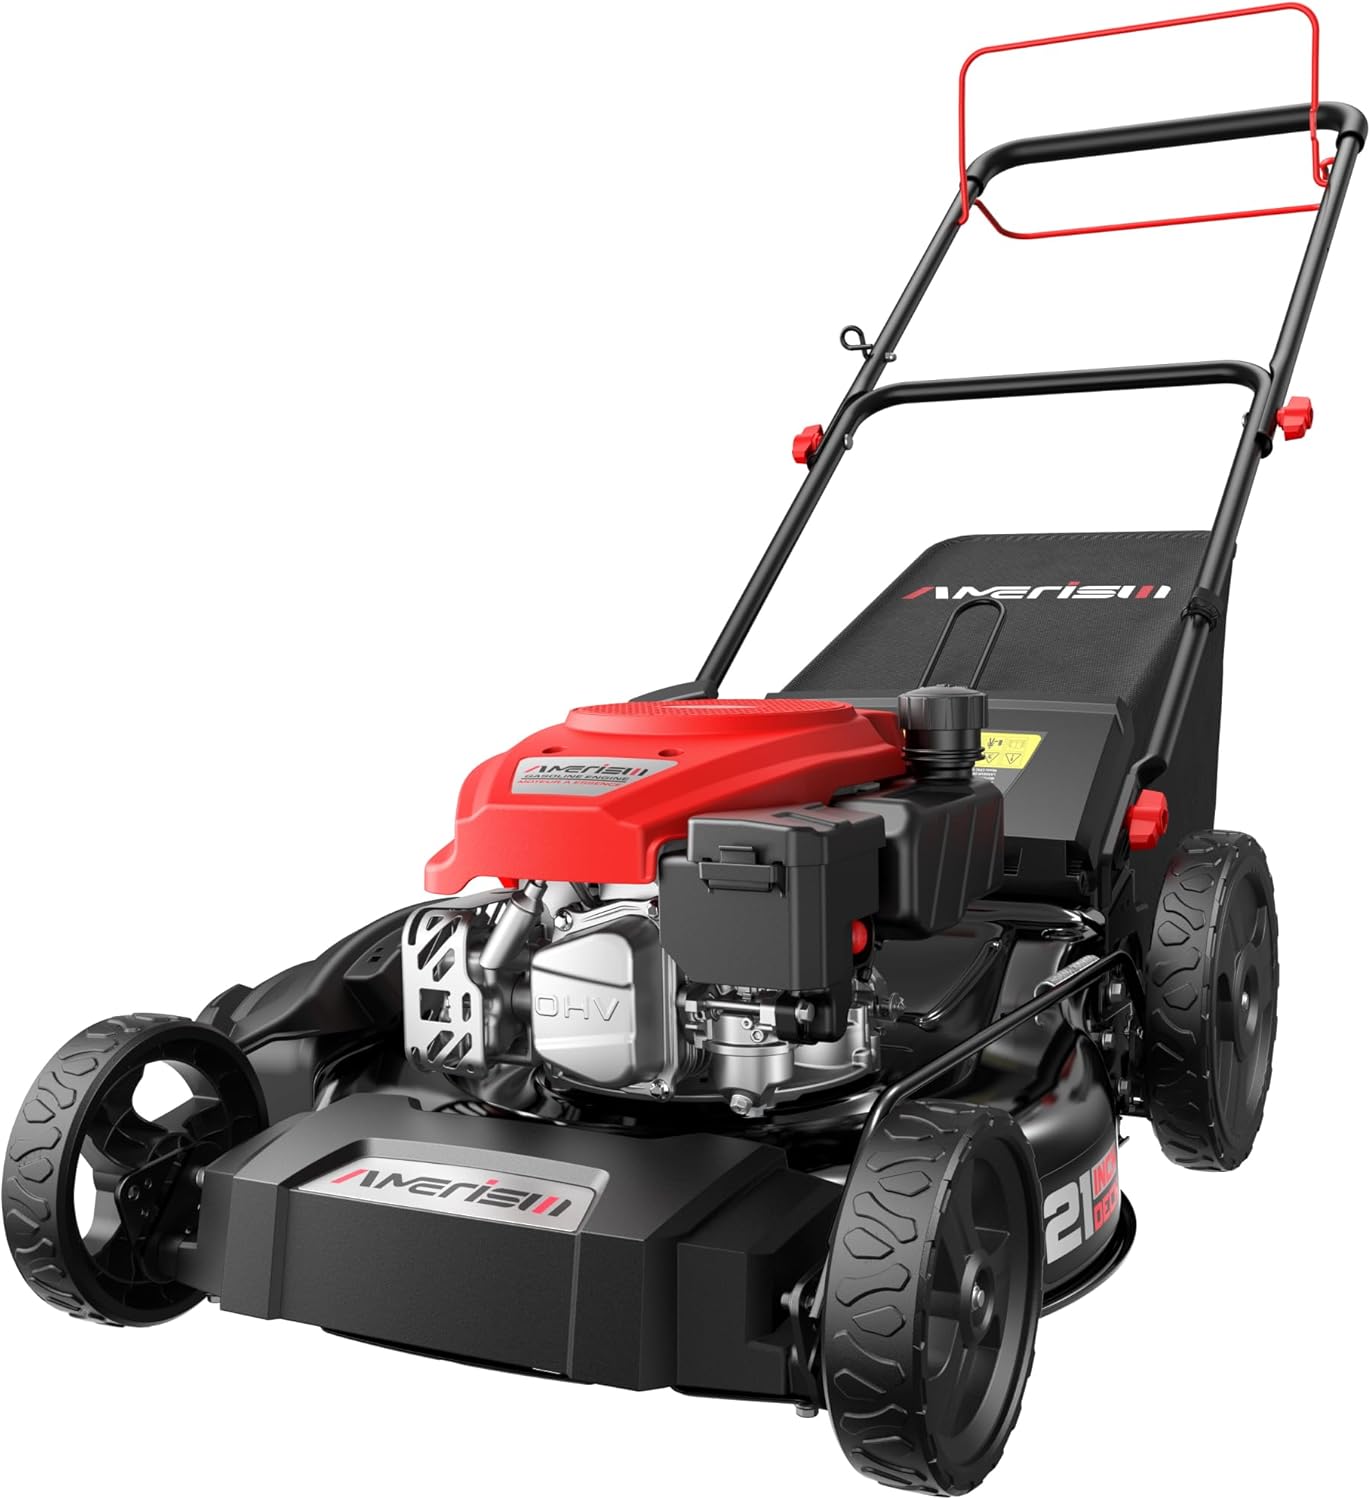
Figure 1: Overview of the AMERISUN 21-inch 170cc Self-Propelled Gas Lawn Mower.
2. Safety Information
Always prioritize safety when operating power equipment. Failure to follow safety instructions can result in serious injury or property damage.
- Read and understand all instructions before operating the mower.
- Wear appropriate personal protective equipment (PPE), including eye protection, hearing protection, and sturdy footwear.
- Keep hands and feet away from rotating parts.
- Ensure the area is clear of bystanders, children, and pets before starting the mower.
- Never operate the mower in wet grass or adverse weather conditions.
- Turn off the engine and disconnect the spark plug wire before performing any maintenance or clearing obstructions.
- Refuel in a well-ventilated area with the engine off and cool.
3. Package Contents
Verify that all items are present upon unpacking:
- AMERISUN 21-inch Self-Propelled Gas Lawn Mower Unit
- Upper Handle Assembly
- Lower Handle Assembly
- Grass Catcher Bag
- Side Discharge Chute
- Spark Plug Wrench
- Owner's Manual

Figure 2: The 1.4-bushel grass catcher, part of the 3-in-1 cutting system.
4. Assembly
The lawn mower requires minimal assembly. Follow these steps:
- Handle Assembly:
Attach the lower handle to the mower deck using the provided bolts and knobs. Then, attach the upper handle to the lower handle, securing it with the quick-release levers or bolts. Ensure all connections are tight. - Grass Catcher Assembly:
Assemble the grass catcher bag by sliding the fabric bag over the frame. Lift the rear discharge door on the mower and hook the grass catcher onto the mower deck. - Side Discharge Chute (Optional):
For side discharge, lift the mulching plug cover on the side of the mower deck and slide the side discharge chute into place.

Figure 3: The foldable handle design, illustrating its compact storage capability.
5. Setup
Before first use, prepare the engine for operation.
- Add Engine Oil:
Locate the oil fill cap/dipstick on the engine. Remove it and slowly add the recommended engine oil (refer to the engine manual for specific type and quantity) until it reaches the 'Full' mark on the dipstick. Do not overfill. - Add Fuel:
Ensure the engine is off and cool. Remove the fuel cap and fill the fuel tank with fresh, unleaded gasoline. Do not use E85 fuel. Leave some space for fuel expansion. Securely replace the fuel cap.

Figure 4: The 170cc OHV engine, indicating the location for oil and fuel input.
6. Operating Instructions
6.1. Starting the Engine
- Ensure the spark plug wire is securely connected.
- Push the primer bulb 3-5 times (if equipped) until fuel is visible in the bulb.
- Move the throttle lever to the 'Fast' or 'Start' position.
- Grip the engine brake lever against the handle.
- Pull the starter rope with a smooth, steady motion until the engine starts.
6.2. Stopping the Engine
Release the engine brake lever. The engine will stop automatically.
6.3. Adjusting Cutting Height
The mower features a 6-level height adjustment system, ranging from 1.5 inches to 3.9 inches.
- Turn off the engine and wait for the blade to stop completely.
- Locate the height adjustment levers on each wheel.
- Pull each lever outwards and move it to the desired height setting. Ensure all wheels are set to the same height.

Figure 5: Detail of the 6-position cutting height adjustment mechanism.
6.4. 3-in-1 Cutting System
Your mower offers mulching, rear bagging, and side discharge options.
- Mulching: Ensure the grass catcher is removed and the side discharge chute is not installed. The mulching plug should be in place.
- Rear Bagging: Attach the grass catcher bag (Figure 2) and ensure the side discharge chute is not installed.
- Side Discharge: Install the side discharge chute (as per Assembly section) and ensure the grass catcher is removed.

Figure 6: The 21-inch steel cutting deck and blade, central to the 3-in-1 cutting system.
7. Maintenance
Regular maintenance ensures optimal performance and extends the life of your lawn mower.
- After Each Use: Clean the mower deck of grass clippings and debris. Check for loose fasteners.
- Engine Oil: Check oil level before each use. Change oil after the first 5 hours of operation, then every 25 hours or annually.
- Air Filter: Inspect and clean the air filter every 25 hours or more frequently in dusty conditions. Replace if damaged.
- Spark Plug: Inspect and clean the spark plug annually or every 50 hours. Replace if worn.
- Cutting Blade: Inspect the blade for sharpness and damage before each use. Sharpen or replace as needed. Always wear heavy gloves when handling the blade.
8. Troubleshooting
| Problem | Possible Cause | Solution |
|---|---|---|
| Engine will not start | No fuel; stale fuel; spark plug issue; engine brake not engaged | Add fresh fuel; replace spark plug; engage engine brake lever |
| Mower cuts unevenly | Dull blade; wheels set to different heights | Sharpen or replace blade; ensure all wheels are at the same height setting |
| Excessive vibration | Bent or unbalanced blade; loose fasteners | Inspect and replace blade if bent; tighten all fasteners |
| Engine loses power | Clogged air filter; low oil level; stale fuel | Clean/replace air filter; add oil; replace fuel |
9. Storage
Proper storage is crucial for maintaining your mower during off-season periods.
- Clean the mower thoroughly, removing all grass clippings and debris.
- Drain the fuel tank or add a fuel stabilizer to prevent fuel degradation.
- Change the engine oil and replace the spark plug and air filter if due for maintenance.
- Store the mower in a dry, well-ventilated area, away from direct sunlight and extreme temperatures.
- Utilize the foldable handle feature (Figure 3) for compact storage in garages or sheds.
10. Specifications
| Feature | Detail |
|---|---|
| Brand | AMERISUN |
| Model Number | AV8621S1 |
| Power Source | Gas Powered |
| Engine Displacement | 170cc OHV |
| Cutting Width | 21 Inches |
| Cutting Height Adjustment | 6-Position (1.5" - 3.9") |
| Cutting System | 3-in-1 (Mulch, Rear Bag, Side Discharge) |
| Grass Catcher Capacity | 1.4 Bushels |
| Handle Type | Foldable |
| Product Dimensions | 32.9"D x 16.5"W x 22.6"H |
| Item Weight | 74.8 pounds |
| UPC | 840432711699 |
11. Warranty and Support
This AMERISUN lawn mower is typically covered by a manufacturer's warranty, often for a period of one year from the date of purchase, covering defects in materials and workmanship. For specific warranty details, claims, or technical support, please refer to the warranty card included with your product or contact AMERISUN customer service directly.
For assistance, please visit the official AMERISUN website or contact their customer support line. Keep your purchase receipt as proof of purchase for warranty purposes.


