
Introduction
Thank you for choosing the Oaks Aura 60-inch Farmhouse Ceiling Fan with Light. This manual provides essential information for the safe and efficient use of your new ceiling fan. Please read all instructions carefully before installation and operation. Keep this manual for future reference.
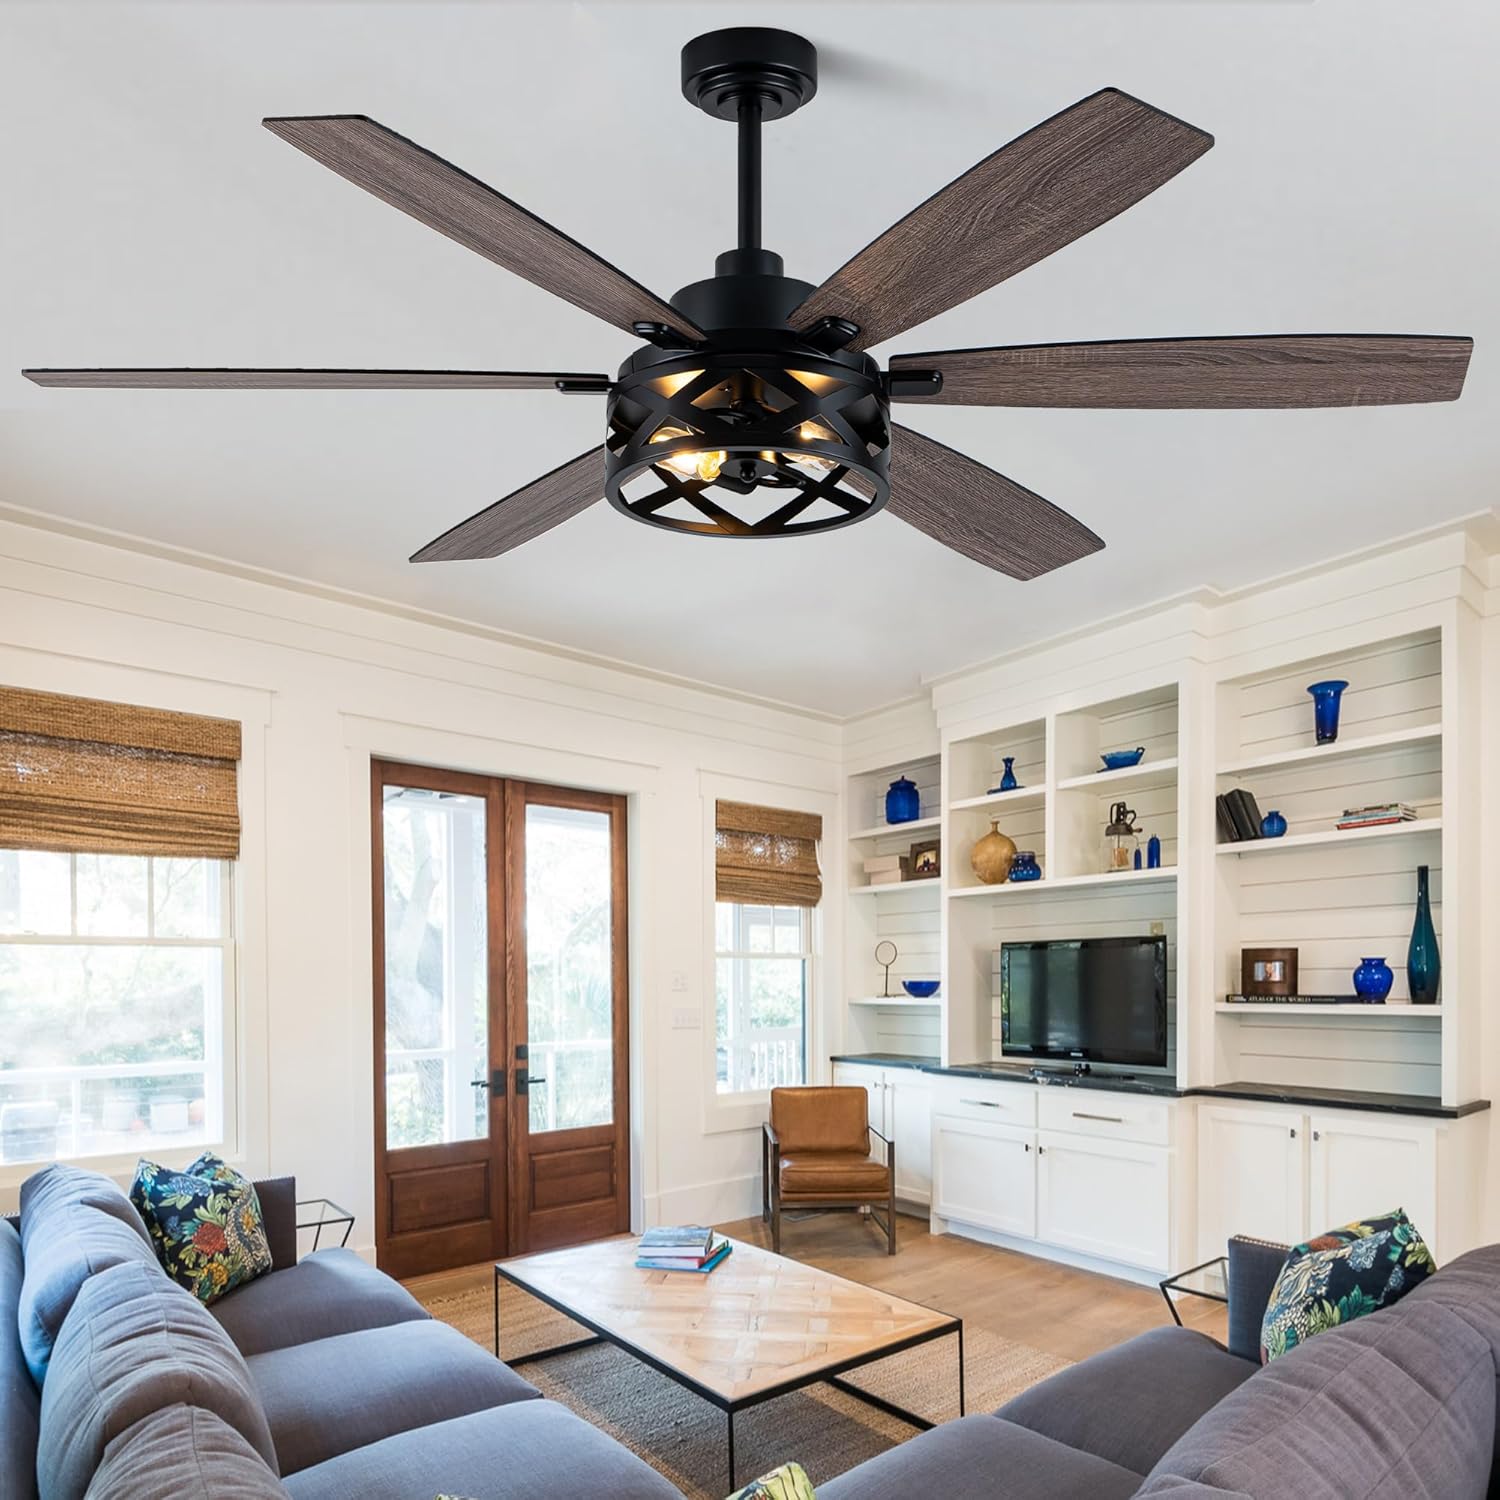
The Oaks Aura 60-inch Farmhouse Ceiling Fan features a matte black body, 6 double-finished distressed wood blades, and a rustic caged light fixture, designed for large rooms.
Safety Information
Always follow basic safety precautions when installing and operating electrical appliances. This includes:
- Ensure power is disconnected at the circuit breaker before installation or servicing.
- All wiring must be in accordance with national and local electrical codes.
- Consult a qualified electrician if you are unsure about wiring procedures.
- Mount the fan to a ceiling joist or support structure capable of supporting the fan's weight.
- Do not bend the blade holders during installation or cleaning.
- Keep hands clear of rotating blades.
Package Contents
Verify that all components are present before beginning installation:
- Ceiling Fan Motor and Housing
- Fan Blades (6)
- Light Kit (Rustic Caged Design)
- Remote Control
- Downrods (4.9" and 9.8")
- Mounting Bracket and Hardware
- Instruction Manual
Setup and Installation
Follow these steps for proper assembly and installation:
- Mounting Bracket Installation: Securely attach the mounting bracket to a ceiling joist or suitable support structure using the provided hardware. Ensure all screws are tightened.
- Downrod Assembly: Select the desired downrod length (4.9" or 9.8"). Thread the electrical wires from the fan motor through the downrod. Secure the downrod to the fan motor assembly.
- Blade Attachment: Attach each of the 6 fan blades to the blade holders on the motor housing. The blades are reversible, offering a black finish on one side and a distressed wood grain on the other. Choose your preferred side before attaching.
- Light Kit Assembly: Connect the light kit wiring to the fan motor wiring. Secure the rustic caged light fixture to the bottom of the fan motor housing. Install two E26 base bulbs (not included).
- Wiring Connections: Carefully connect the fan's electrical wires to your household wiring (Live, Neutral, Ground) according to local electrical codes. Ensure all connections are secure.
- Canopy Installation: Slide the canopy cover up the downrod and secure it to the mounting bracket, covering the wiring connections.

This image highlights the fan's robust construction, featuring a durable iron cage design for the light kit, two E26 bulb bases (bulbs not included), an energy-efficient DC inverter motor, and the dual-finish fan blades.

The fan blades are reversible, offering two distinct finishes: a sleek black side and a rustic oak wood grain side, allowing customization to match your decor.

The fan offers adjustable height options with included downrods (4.9 inches and 9.8 inches) to suit various ceiling heights, ensuring optimal air circulation and aesthetic appeal. Total fan height with the longer downrod is 22.5 inches.
This video provides a step-by-step guide on how to install your Oaks Aura Farmhouse Ceiling Fan with Lights, covering all necessary assembly and wiring procedures.
Watch this video for a comprehensive overview of the Glowivia 60-inch Farmhouse Ceiling Fan with Lights, including key features and installation highlights.
This video demonstrates the installation process for the 60-inch Farmhouse Ceiling Fan with Lights, highlighting key steps for a smooth setup.
Operation
Your Oaks Aura ceiling fan is operated using the included remote control:
- Power On/Off: Use the 'ALL OFF' button to turn off both the fan and light.
- Light Control: The 'LIGHT ON/OFF' button controls the light fixture.
- Fan Speed: Select from 6 fan speeds (1-6) to adjust airflow.
- Reversible Function: Use the 'F' (Forward) and 'R' (Reverse) buttons to change blade direction. Forward rotation creates a cooling downdraft for summer, while reverse rotation circulates warm air for winter.
- Timer Function: Set the fan to automatically turn off after 1, 2, or 4 hours using the '1H', '2H', '4H' buttons.

Experience personalized comfort with 6 adjustable fan speeds. Speeds 1-2 provide a gentle 'smooth sleep wind', 3-4 offer a 'steady and soft wind', and 5-6 deliver a powerful 'bionic breeze and fresh' airflow.

The fan's reversible DC motor allows for year-round comfort. In summer, it creates a downward airflow for a cooling effect. In winter, it reverses direction to circulate warm air trapped near the ceiling, distributing heat more evenly.

Designed for quiet operation, the fan produces less than 35 decibels of noise, ensuring a peaceful environment. It also includes a convenient timer function with 1, 2, and 4-hour settings.
Maintenance
Regular maintenance ensures the longevity and optimal performance of your fan:
- Cleaning: Use a soft, damp cloth to clean the fan blades and motor housing. Do not use abrasive cleaners or solvents.
- Tighten Screws: Periodically check all screws for tightness, especially those on the blade attachments and mounting bracket.
- Dusting: Dust the fan blades and light fixture regularly to prevent buildup that can affect performance.
Troubleshooting
| Problem | Possible Cause | Solution |
|---|---|---|
| Fan does not start | Loose wiring connection, power off, remote battery dead | Check wiring, ensure power is on, replace remote batteries. |
| Fan wobbles | Loose blade screws, unbalanced blades, loose mounting bracket | Tighten all screws, use balancing kit (if provided), ensure mounting bracket is secure. |
| Light does not work | Bulbs not installed, faulty bulbs, loose wiring | Install bulbs, replace bulbs, check light kit wiring. |
| Remote not working | Dead batteries, remote not paired | Replace AAA batteries, refer to remote pairing instructions in the full manual. |
Specifications
- Brand: Oaks Aura
- Model Name: MD-FS8962-60
- Size: 60 Inch
- Electric Fan Design: Ceiling Fan
- Style: Farmhouse
- Product Dimensions: 60"D x 60"W x 22.5"H
- Room Type: Bedroom, Dining Room, Kids Room, Kitchen, Living Room
- Special Features: Adjustable Height, Quiet Operation, Remote Controlled, Safety Certified, Timer, Reversible Motor
- Noise Level: 35 Decibels
- Wattage: 40 watts
- Motor Type: Brushless DC
- Number of Power Levels: 6
- Control Method: Remote
- Power Source: AC
- Installation Type: Self-Installation
- Item Weight: 20.3 pounds
Warranty & Support
For warranty information or technical support, please refer to the contact details provided with your purchase documentation or visit the Oaks Aura official website. Keep your purchase receipt as proof of purchase.
A scene video showcasing the 60-inch Large Ceiling Fan with Lights in various room settings, demonstrating its aesthetic appeal and functionality.

