
1. Introduction
This manual provides detailed instructions for the WUPP 12V 6-Circuit Automotive Fuse Block with Relay, Model CS-1858A1. This device is designed to simplify wiring and enhance electrical safety in various vehicles, including cars, trucks, marine vessels, SUVs, UTVs, ATVs, RVs, Pickup Trucks, Trailers, and Campers. It features an integrated relay kit, an ACC interface for automatic power cut-off, and LED safety indicators for each fuse strip.
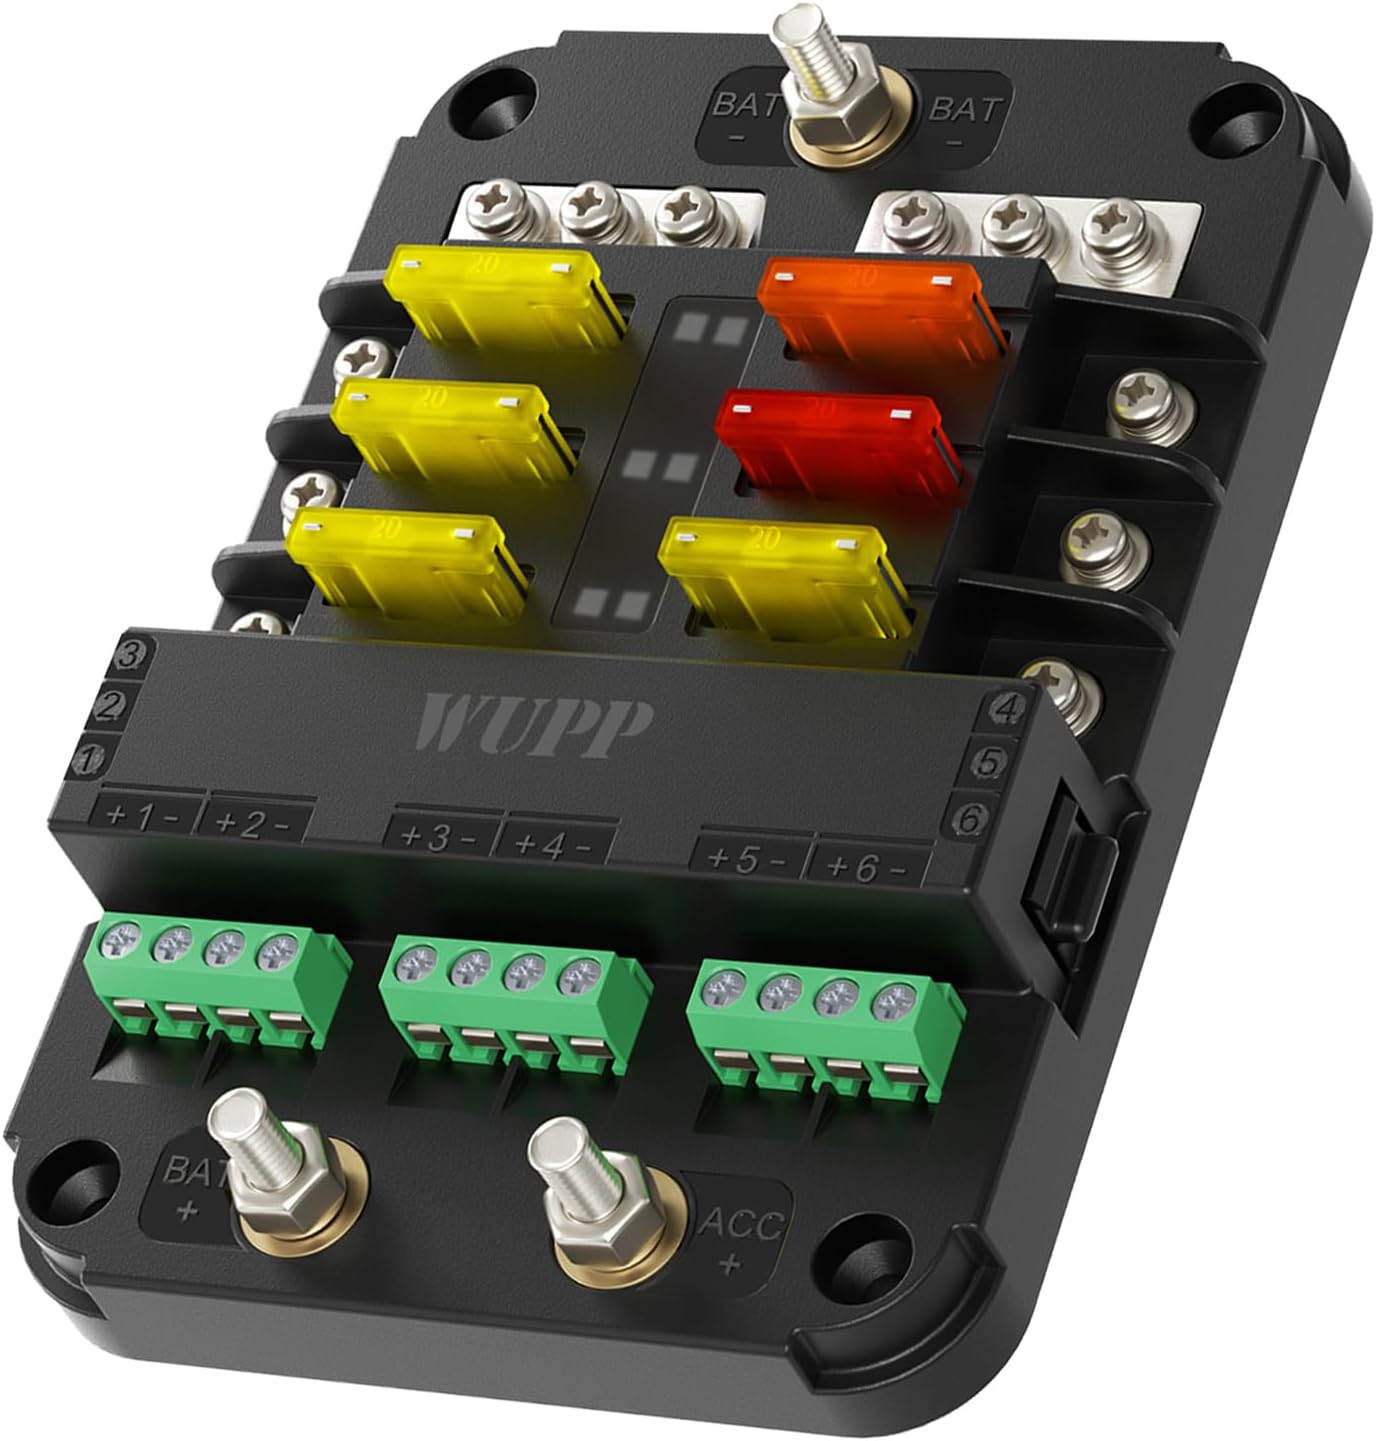
Figure 1: WUPP 12V 6-Circuit Automotive Fuse Block with Relay, Model CS-1858A1.
2. Package Contents
Verify that all items listed below are included in your package:
- 1 x WUPP 6-Circuit Fuse Block with Relay
- 2 x 5A Fuses (Yellow)
- 2 x 10A Fuses (Red)
- 4 x 15A Fuses (Blue)
- 4 x 20A Fuses (Yellow)
- 4 x Self-tapping screws
- 2 x Paster (Labels for circuits)

Figure 2: Contents included in the WUPP 6-Circuit Fuse Block package.
3. Specifications
| Feature | Detail |
|---|---|
| Brand | WUPP |
| Model Number | CS-1858A1 |
| Voltage | 12 Volts |
| Current Rating | 80 Amps |
| Number of Contacts | 6 |
| Connector Type | Through Hole |
| Mounting Type | Through-Hole Mount |
| Material | Polybutylene Terephthalate (PBT) |
| Product Dimensions | 6.54 x 3.86 x 1.85 inches |
| Item Weight | 12.6 ounces |
| Specification Met | Environmental and Safety Standards |

Figure 3: Dimensions and terminal specifications of the fuse block.
4. Safety Information
Always prioritize safety when working with electrical systems. Improper installation or handling can lead to electrical shock, fire, or damage to the product and vehicle. Adhere to the following guidelines:
- Disconnect the vehicle's battery before beginning any installation or maintenance.
- Ensure all connections are secure and properly insulated to prevent short circuits.
- Use appropriate wire gauges for your applications to avoid overheating.
- Install the fuse block in a dry, protected location, away from excessive heat or direct exposure to elements, unless specifically designed for such conditions.
- Do not exceed the maximum current rating of the fuse block (80 Amps) or individual circuits.
- Replace blown fuses only with fuses of the same type and rating.
- If unsure about any step, consult a qualified automotive electrician.
5. Setup & Installation
The WUPP 6-Circuit Fuse Block with Relay is designed for straightforward installation, minimizing complex wiring. Follow these steps for proper setup:
5.1 Removing the Cover
To access the fuse and wiring terminals, gently push the tabs on the side of the clear plastic cover to release it from the main unit. Set the cover aside in a safe place.
5.2 Power Connections
- Main Power Input: Connect the positive (+) terminal of your vehicle's battery to the main positive input stud on the fuse block (labeled "BAT +").
- Main Ground Connection: Connect the negative (-) terminal of your vehicle's battery or a suitable chassis ground point to the main negative input stud on the fuse block (labeled "BAT -").
- ACC Interface Connection: For circuits that should only be active when the vehicle's ignition is on, connect a switched 12V source (e.g., from an ACC wire) to the "ACC +" terminal on the fuse block. This feature automatically cuts off power to connected accessories when the car key is turned off, preventing battery drain.

Figure 4: General wiring diagram for the WUPP 6-Circuit Fuse Block.

Figure 5: Illustration of the built-in relay and ACC control features.
5.3 Connecting Accessories
- Accessory Positive Connections: Each of the 6 circuits has a dedicated positive output terminal. Connect the positive wire of your accessory to the corresponding numbered terminal (1-6) on the fuse block.
- Accessory Ground Connections: The fuse block provides common ground terminals. Connect the negative (ground) wire of your accessory to one of the available ground terminals.
- Fuse Installation: Insert the appropriate amperage fuse for each connected accessory into its designated slot. The package includes various fuse ratings (5A, 10A, 15A, 20A).
- Mounting: Secure the fuse block to a stable surface using the provided self-tapping screws. Ensure the mounting location is protected and allows for proper wire routing.
For a visual guide on installation, please refer to the video below:
Video 1: Official WUPP 12V Fuse Block 6 Circuits Fuse and Relay Box installation guide.
6. Operating Instructions
Once properly installed, the WUPP 6-Circuit Fuse Block operates automatically. The integrated relays manage power distribution to your accessories, and the ACC interface ensures power is supplied only when the vehicle's ignition is on (if connected to an ACC source).
6.1 LED Safety Indicators
The fuse block is equipped with intuitive LED indicators for each fuse strip:
- Blue LED Light: A blue light indicates that the circuit is operating normally and power is flowing through the fuse.
- Red LED Light: A red light indicates a disconnected or blown fuse. This alerts you to a problem in that specific circuit, allowing for quick identification and replacement.

Figure 6: Explanation of blue (normal operation) and red (blown fuse) LED indicators.
7. Maintenance
Regular maintenance ensures the longevity and reliable operation of your WUPP Fuse Block.
- Fuse Replacement: If a red LED illuminates, indicating a blown fuse, disconnect power to the fuse block before replacing the fuse. Use a fuse puller or small pliers to carefully remove the blown fuse and insert a new one of the exact same amperage rating.
- Cleaning: Periodically inspect the fuse block for dirt, dust, or moisture. Clean the exterior with a dry, soft cloth. Ensure the clear PC cover is properly sealed to maintain dustproof and waterproof properties.
- Connection Checks: Occasionally check all wire connections to ensure they remain tight and free from corrosion. Loose connections can lead to resistance, heat buildup, and potential electrical issues.
Figure 7: The clear PC cover provides protection against dust and water.
8. Troubleshooting
If you encounter issues with your WUPP Fuse Block, refer to the following troubleshooting guide:
| Problem | Possible Cause | Solution |
|---|---|---|
| Accessory not receiving power. |
|
|
| All accessories connected to the fuse block are not working. |
|
|
| Fuse blows repeatedly. |
|
|
9. Warranty and Support
WUPP products are manufactured to high-quality standards. For specific warranty information, please refer to the product packaging or contact WUPP customer support directly. If you have any questions or require assistance with your fuse block, please reach out to our customer service team.
Contact Information: Please refer to the contact details provided on the product packaging or the official WUPP website.