
Introduction
This manual provides detailed instructions for the installation, operation, and maintenance of your NIVIAN 2K WiFi Surveillance Camera Kit (Model: NV-KIT830W-8CAM). This professional security system is designed to provide comprehensive surveillance with high-resolution imaging, intelligent detection, and remote access capabilities.
Key features of your system include:
- 2K Super HD Resolution: Capture clear and detailed images with 3MP resolution.
- Dual Night Vision: Choose between infrared for discreet monitoring or white LED for full-color night vision.
- AI Human Detection: Reduce false alarms with intelligent human shape recognition.
- Two-Way Audio: Communicate directly through the cameras.
- Long Range WiFi-6: Stable wireless connection up to 300m with repeater function.
- EseeCloud App: Remote access and control from your smartphone or tablet.
- Continuous and Event Recording: Flexible recording options with H.265+ codec for efficient storage.
What's in the Box
Carefully unpack your NIVIAN 2K WiFi Surveillance Camera Kit and verify that all components are present:
- NVR (Network Video Recorder)
- 8 x IP Cameras
- Power Adapters for NVR and Cameras
- USB Mouse
- Ethernet Cable
- Installation Kit (screws, anchors)
- User Manual

Image: Contents of the NIVIAN 2K WiFi Surveillance Camera Kit. This image displays the NVR unit, eight IP cameras, individual power adapters for each camera, a USB mouse, an Ethernet cable, and a small bag containing installation hardware like screws and anchors.
Setup
1. NVR and Camera Placement
NVR Placement: Position the NVR in a central location, ideally near your internet router and a power outlet. Ensure it is in a secure, dry, and well-ventilated area.
Camera Placement: Mount cameras in desired surveillance areas. The cameras have an IP66 rating, making them suitable for outdoor use. Consider areas with clear lines of sight and within the WiFi range of the NVR. The system supports a repeater function to extend the range up to 300m.

Image: An NIVIAN outdoor camera mounted on a building, illustrating its weather-resistant design and suitability for 24/7 monitoring in various environments, including rain.
2. Hardware Connections
- Install Hard Drive (Optional): If your NVR did not come with a pre-installed hard drive, open the NVR casing and install a compatible 3.5-inch SATA hard drive for local recording.
- Connect NVR: Connect the NVR to a power source using the provided power adapter. Connect a monitor or TV to the NVR's HDMI output for local viewing. Connect the USB mouse to the NVR.
- Connect Cameras: Plug each camera into its respective power adapter and connect to a power outlet. The cameras will automatically attempt to connect to the NVR via WiFi.
- Network Connection: For remote access, connect the NVR to your internet router using the provided Ethernet cable. Alternatively, the NVR can connect to your WiFi network.

Image: A diagram showing the connectivity of the NIVIAN system. It illustrates cameras wirelessly connecting to the NVR, the NVR connecting to a monitor via HDMI, and the NVR connecting to a router via LAN or WiFi for cloud services and remote access via the EseeCloud app.
3. EseeCloud App Setup
- Download App: Download the 'EseeCloud' app from your smartphone's app store (available for Android and iOS).
- Register Account: Open the app and follow the on-screen instructions to register a new account.
- Add Device: Use the in-app wizard to add your NVR system. You may need to scan a QR code displayed on your NVR's monitor or enter the device ID manually.
- Verify Connection: Once added, you should see the live feeds from your cameras within the app.

Image: An overview of the NIVIAN surveillance system, featuring the NVR unit, eight cameras, and a display showing multiple camera feeds. Below, a smartphone screen displays the EseeCloud app interface with live camera views and control options.
4. WiFi Signal Repetition
The system features a signal repetition function to extend the wireless range of your cameras. If a camera is too far from the NVR, it can connect through another camera that is closer to the NVR, effectively boosting the signal. This allows for flexible placement up to 250m.

Image: A diagram illustrating the signal repetition function. It shows the NVR and multiple cameras, with dotted lines indicating wireless connections. Some cameras connect directly to the NVR, while others connect through an intermediate camera, extending the overall WiFi coverage around a house.
Operating Instructions
1. Live View and Playback
Access live camera feeds via the connected HDMI monitor or through the EseeCloud app on your mobile device. The app allows you to view multiple cameras simultaneously. To review recorded footage, navigate to the playback section within the NVR interface or the EseeCloud app, select the desired date and time, and choose the camera feed.
2. Recording Modes
Your NVR supports various recording modes:
- Continuous Recording: Records 24/7, overwriting the oldest footage when the hard drive is full.
- Event Recording: Records only when motion is detected. This saves storage space and makes reviewing events easier.
- Scheduled Recording: Configure specific times for continuous or event-based recording.
The system uses H.265+ video compression to optimize storage space while maintaining video quality.
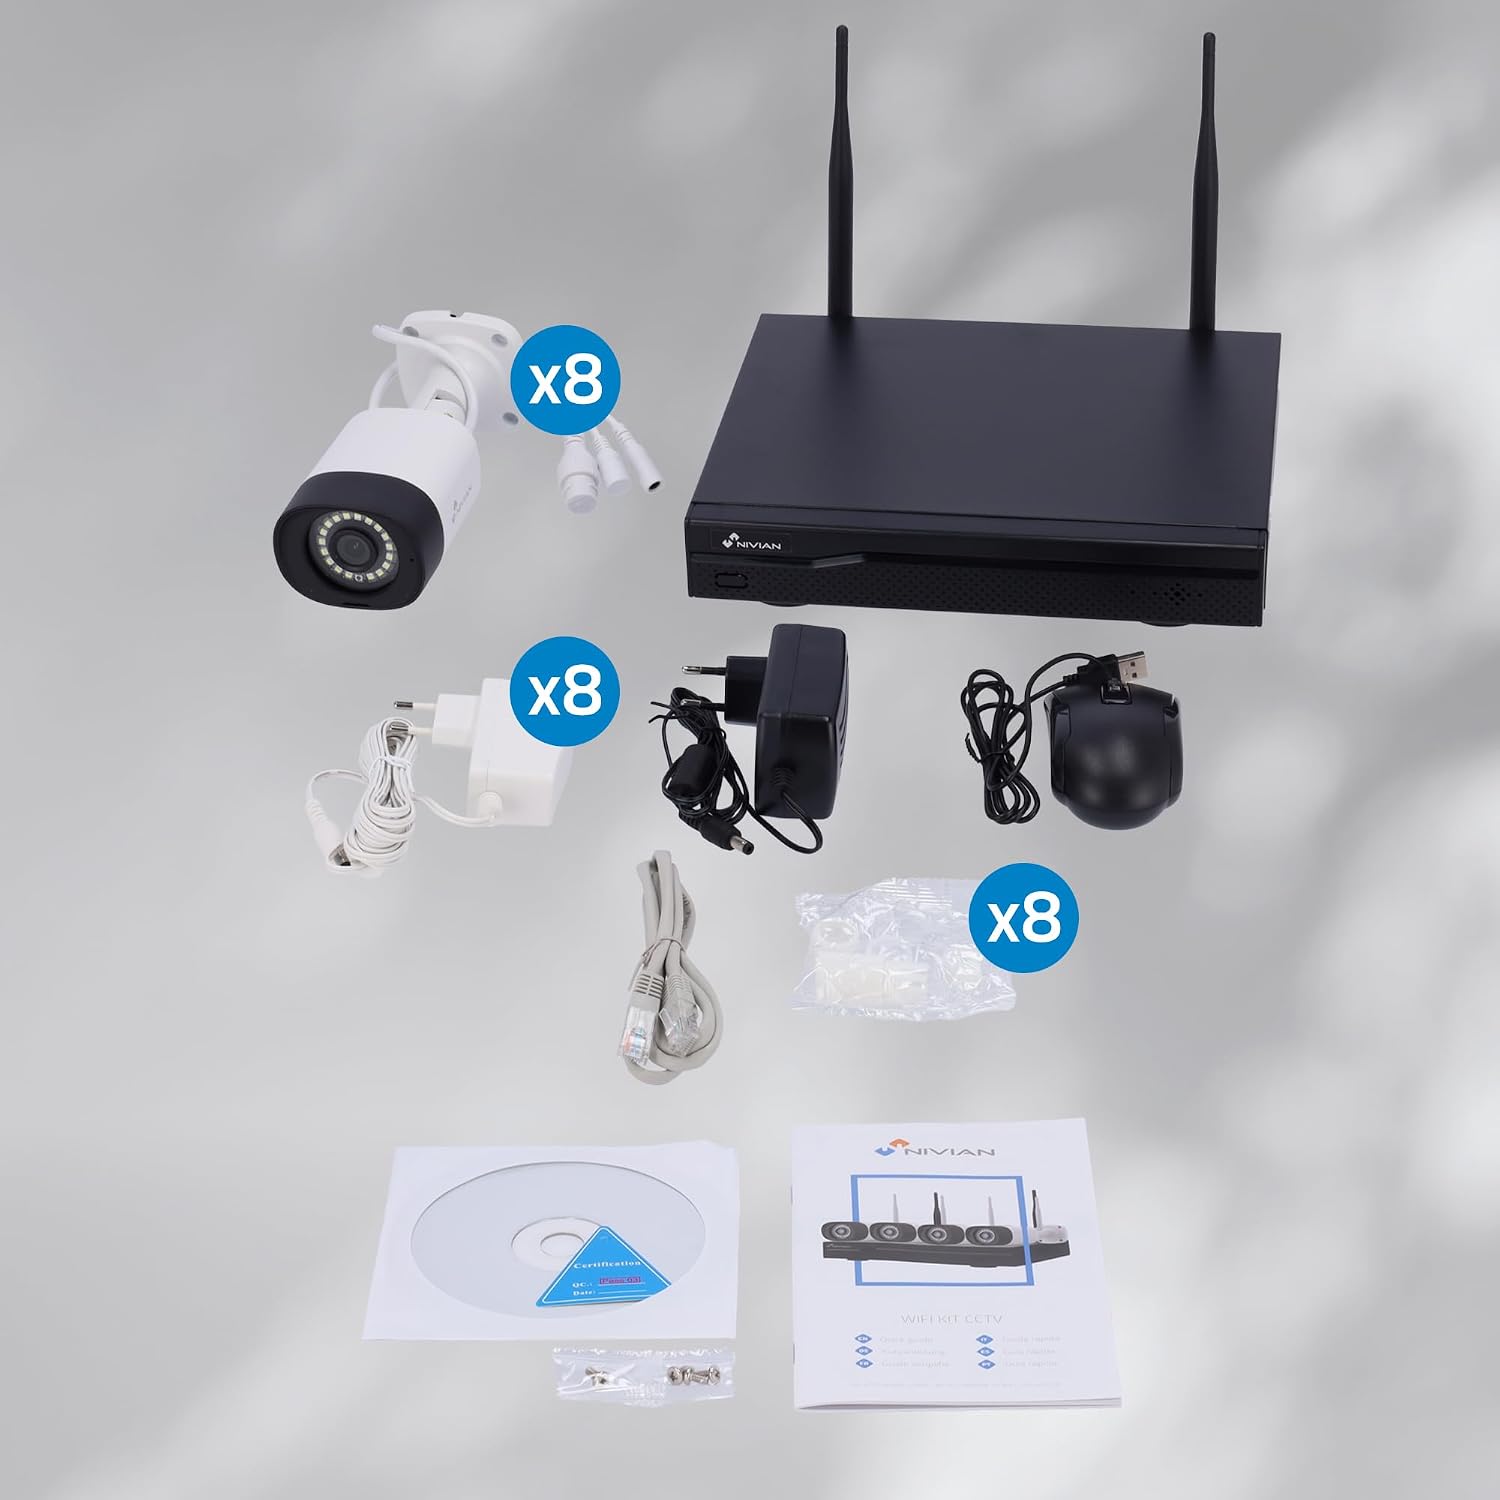
Image: A side-by-side comparison demonstrating the difference between 1080p Full HD and 2K Super HD resolution. The 2K image on the right shows significantly more detail and clarity in an outdoor setting.
3. AI Human Detection
The cameras are equipped with AI human detection to differentiate human movement from other motion sources (e.g., animals, swaying branches), reducing false alarms. You can configure detection zones and sensitivity settings for each camera through the NVR interface or the EseeCloud app.

Image: An illustration of the AI human detection feature. A child is running towards a house at night, and the camera's interface on a smartphone shows a notification indicating "Motion detected in channel 1," highlighting the human figure.
4. Dual Night Vision
The cameras offer two night vision modes:
- Infrared (IR) Mode: Provides black and white video in low-light conditions, offering discreet surveillance.
- White LED Mode: Activates built-in white LEDs to illuminate the area, providing full-color video even in complete darkness. This mode can also act as a deterrent.
You can switch between these modes or set them to activate automatically based on ambient light conditions.

Image: A split image demonstrating the dual night vision feature. The left side shows a scene in complete darkness with only infrared illumination, resulting in a black and white image. The right side shows the same scene illuminated by white LEDs, providing a clear, full-color view at night.
5. Two-Way Audio
Each camera includes a built-in microphone and speaker, enabling two-way audio communication. Through the EseeCloud app, you can listen to audio from the camera's location and speak through the camera's speaker.
Maintenance
- Cleaning: Regularly clean the camera lenses with a soft, damp cloth to ensure clear image quality. Avoid abrasive cleaners.
- Firmware Updates: Check the EseeCloud app or NIVIAN's official website periodically for firmware updates. Keeping your system updated ensures optimal performance and security.
- Hard Drive Management: If using a local hard drive, ensure it has sufficient space. The system will automatically overwrite old footage, but regular checks are recommended.
- Power Supply: Ensure all power adapters are securely connected and free from damage.
Troubleshooting
No Image/Video Display
- Check if the NVR and cameras are powered on.
- Verify HDMI cable connection to the monitor/TV.
- Ensure cameras are within WiFi range of the NVR.
- Restart the NVR and affected cameras.
Poor Image Quality
- Clean camera lenses.
- Ensure sufficient lighting for optimal image quality, especially at night.
- Check camera resolution settings in the NVR or app.
Motion Detection Issues
- Adjust motion detection sensitivity and detection zones.
- Ensure AI Human Detection is enabled if you are experiencing false alarms from non-human movement.
- Verify that the camera's view is not obstructed.
Remote Access Problems
- Ensure the NVR is connected to the internet (Ethernet or WiFi).
- Check your router's internet connection.
- Verify your smartphone has a stable internet connection.
- Ensure the EseeCloud app is updated to the latest version.
Specifications
| Feature | Specification |
|---|---|
| Brand | NIVIAN |
| Model Number | NV-KIT830W-8CAM |
| Connectivity Technology | Wireless (WiFi-6) |
| Video Capture Resolution | 2K (3MP) / 2560x1440 |
| Number of Channels | 16 (NVR supports up to 16 channels, kit includes 8 cameras) |
| Special Features | AI Human Detection, Two-Way Audio, Cloud Storage Integration, Remote Access via Mobile Apps |
| Night Vision | Dual Night Vision (Infrared & White LED) |
| Night Vision Range | Up to 300 Metres (WiFi range) |
| Frame Rate | 30 fps |
| Recording Mode | Continuous, Event-based |
| Hardware Interface | 802.11 ac/b/g/n (WiFi-6) |
| Video Input | HDMI |
| Viewing Angle | 120 Degrees |
| Operating System (App) | Android, iOS |
| Camera Housing | IP66 Weatherproof Metal |
Warranty and Support
NIVIAN offers technical support for all customers. If you have any questions, suggestions, or encounter problems with your WiFi surveillance camera kit, please do not hesitate to contact us.
- Technical Support: Contact NIVIAN through Amazon messages or any other official brand channel.
- Spare Part Availability: EU spare parts are available for a duration of 2 years.
