1. Introduction
This manual provides essential information for the proper operation and maintenance of the PROTECTOR Coxo C-Root I(V) Root Apex Locator. This device is designed to accurately measure the working length of the root canal during endodontic procedures. Please read this manual thoroughly before using the device to ensure safe and effective operation.
2. Safety Information
Always adhere to standard dental safety protocols when using this device. Ensure the device is clean and sterilized according to clinical guidelines before each use. Do not attempt to repair or modify the device yourself. Refer all servicing to qualified personnel. Keep the device away from water and extreme temperatures. Use only the provided accessories and power adapter.
3. Product Overview
The C-Root I(V) is a compact and precise root apex locator featuring a high-definition digital display. It provides real-time measurements of the file's position within the root canal, aiding in accurate endodontic treatment.
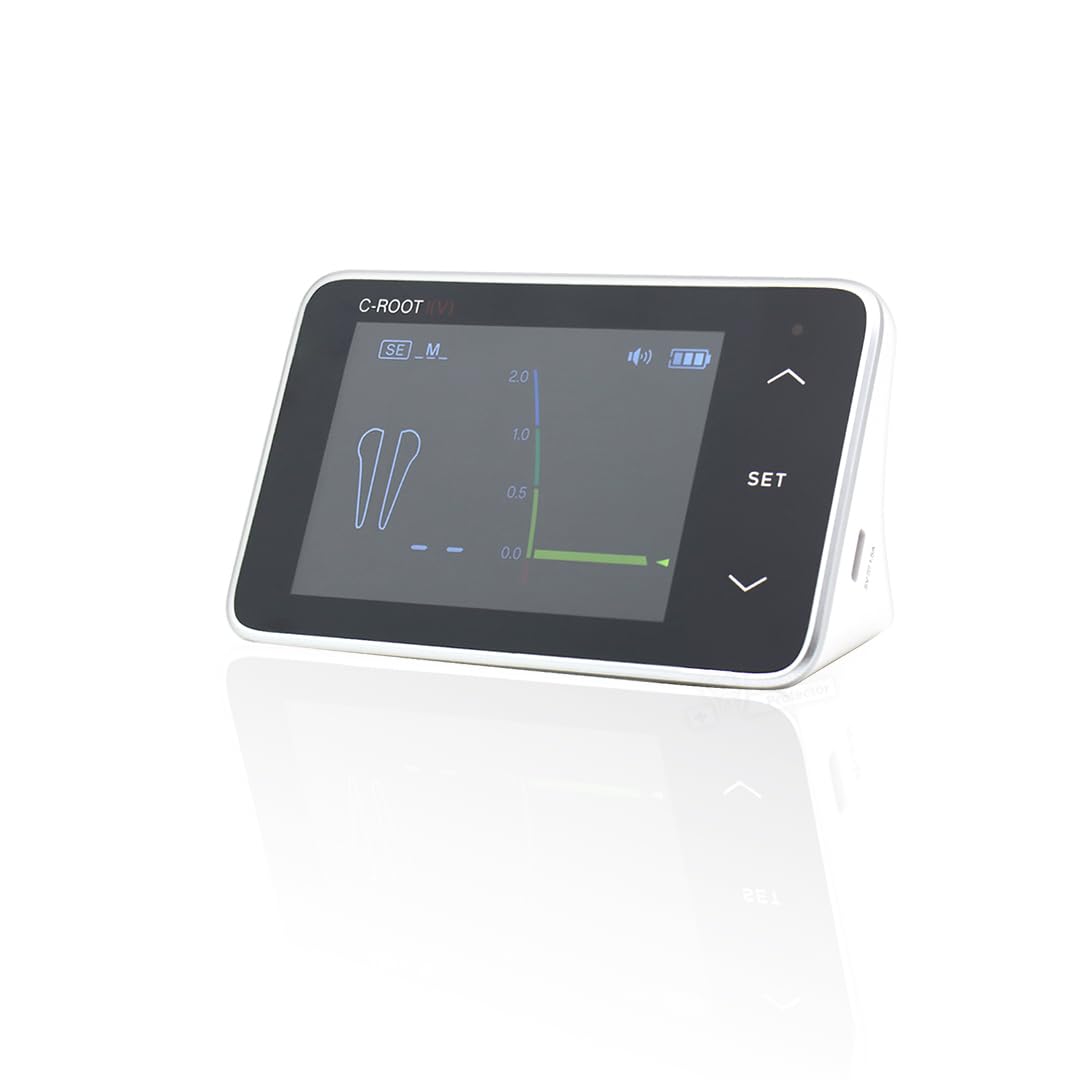
Image 3.1: The Coxo C-Root I(V) Root Apex Locator main unit, showing its compact design and digital display.
Key Features:
- Accurate Measurement: Provides highly accurate readings of root canal depth.
- User-Friendly Interface: Clear digital display with intuitive graphical indicators and simple controls.
- Multiple Sensitivity Levels: Supports different sensitivity settings for various clinical situations.
- Compact and Portable: Lightweight design suitable for both mobile and clinic-based use.
- Easy Connectivity: Seamlessly connects to file clips and lip hooks.

Image 3.2: The C-Root I(V) display, illustrating the Full Canal Image, Volume Icon, Apical Location Arrow, Sensitivity Icon, Apical Zoom Image, and Number of Apical distance indicators.
4. Package Contents
Verify that all items listed below are present in the package:
- C-ROOT I(V) Main Unit (x1)
- File Clips (x2)
- Test Wire (x1)
- Lip Hook (x1)
- Charging Adapter (x1)
- USB Cable (x1)
- User Manual (x1)

Image 4.1: All components included in the C-Root I(V) package, laid out for inspection.
5. Setup
5.1. Charging the Device
- Connect the provided USB cable to the charging port on the side of the C-Root I(V) main unit.
- Plug the other end of the USB cable into the charging adapter.
- Insert the charging adapter into a standard electrical outlet.
- The battery indicator on the display will show charging status. Charge the device fully before first use.

Image 5.1: Detail of the USB-C charging port on the C-Root I(V) and the corresponding cable connection.
6. Operating Instructions
6.1. Connecting Accessories
- Ensure the device is powered off before connecting accessories.
- Connect the test wire to the appropriate port on the C-Root I(V) main unit.
- Attach a file clip to one end of the test wire and the lip hook to the other end.
- Ensure all connections are secure.
6.2. Performing a Measurement
- Power on the C-Root I(V) by pressing the power button.
- Place the lip hook onto the patient's lip, ensuring good electrical contact.
- Attach the file clip to the endodontic file.
- Carefully insert the file into the root canal. The display will show real-time progression of the file's tip.
- Observe the graphical indicators and numerical values on the display to determine the precise working length. The device provides visual and audible feedback as the file approaches the apex.

Image 6.1: Diagram illustrating the connection of the file and lip hook during a root canal test.
6.3. Interpreting the Display
The digital display provides a clear visual representation of the file's position. The graphical bar and numerical values indicate the distance from the apical foramen. An audible signal will typically increase in frequency as the file approaches the apex, becoming continuous when the apex is reached.

Image 6.2: The C-Root I(V) display showing a precise measurement with the apical zoom feature, indicating the file's proximity to the apex.
6.4. Adjusting Settings
Use the 'SET' button and arrow keys on the device to navigate through settings such as sensitivity levels and volume. Adjust sensitivity according to the specific clinical situation and patient's anatomy for optimal accuracy.
7. Maintenance
7.1. Cleaning and Disinfection
- After each use, disconnect all accessories from the main unit.
- Clean the main unit with a soft cloth dampened with a mild disinfectant. Do not immerse the unit in liquid.
- The file clips and lip hook should be sterilized according to standard dental practice guidelines (e.g., autoclaving if material permits, or chemical disinfection).
- Ensure all components are completely dry before storage.
7.2. Storage
Store the C-Root I(V) and its accessories in a clean, dry environment, away from direct sunlight and extreme temperatures. Keep it in its original packaging or a protective case when not in use to prevent damage.
8. Troubleshooting
| Problem | Possible Cause | Solution |
|---|---|---|
| Device does not power on | Low battery; Power button not pressed correctly | Charge the device; Press and hold the power button firmly |
| Inaccurate readings | Poor electrical contact; Incorrect sensitivity setting; Damaged accessories | Ensure lip hook and file clip have good contact; Adjust sensitivity; Inspect and replace damaged accessories |
| No display or flickering screen | Device malfunction; Low battery | Charge the device; Contact customer support if issue persists |
9. Specifications
- Model: C-Root I(V)
- Brand: PROTECTOR
- Weight: 0.46 kg (1 lb)
- Dimensions (L x W x H): 17.8 cm x 11.7 cm x 6.8 cm (7 inches x 4.6 inches x 2.7 inches)
- Display: Digital, high-definition
- Power Source: Rechargeable battery
- Date First Available: July 18, 2025
- Manufacturer: Protector
10. Warranty and Support
For warranty information, technical support, or service inquiries, please refer to the contact details provided with your purchase documentation or visit the official PROTECTOR website. Keep your proof of purchase for warranty claims.


