
1. Introduction
Thank you for purchasing the Seeday Farmhouse End Table with Charging Station. This manual provides essential information for the safe assembly, proper operation, and effective maintenance of your new furniture. Please read all instructions carefully before beginning assembly and retain this manual for future reference.
This versatile end table features a farmhouse-style design, three spacious drawers for storage, and an integrated charging station with Type-C, USB ports, and AC outlets, making it ideal for bedrooms, living rooms, or home offices.
2. Product Features
- Built-In Charging Station: Includes 2 AC outlets, 1 USB port, and 1 Type-C port, allowing simultaneous charging of up to 4 devices. The power panel is discreetly hidden to manage cables.
- Farmhouse Style: Crafted from white wood with clean lines and black metal handles, offering a timeless design suitable for various interior styles.
- Spacious Storage: Three large drawers (15.7"W × 12.5"D × 6.4"H) provide ample space for organizing books, chargers, and daily essentials.
- Multi-Room Versatility: Functions effectively as a bedside table, living room side table, or utility cabinet.
- Sturdy & Safe Design: Constructed from eco-friendly MDF with a reinforced base for stability. Includes an anti-tip kit for enhanced safety.
3. Assembly Instructions
Please ensure all parts are present and undamaged before beginning assembly. Refer to the included hardware and panel identification for each step. A Phillips head screwdriver is required (not included).

Figure 3.1: Product Dimensions. Overall: 18"D x 15"W x 25.6"H. Drawer: 15.7"W x 12.5"D x 6.4"H.
- Prepare Drawer Slides: Separate the drawer slides (D1 and D2) as shown in the diagram. Ensure the smaller D2 part is detached from D1.
- Attach Drawer Slides to Side Panels: Secure the D1 parts of the drawer slides to the side panels (parts 6 and 7) using screws (Cx12). Ensure correct orientation (front/back).
- Assemble Base Frame: Connect the base side panels using screws (Ax2) and dowels (Bx2) to form the base frame.
- Attach Bottom Panel to Base: Secure the bottom panel to the assembled base frame using screws (Ax8) and dowels (Bx8).
- Attach Side Panels to Base: Connect the side panels (6 and 7) to the base assembly using screws (Bx4).
- Attach Top Panel: Secure the top panel to the main frame using screws (Ax4) and dowels (Ex4).
- Install Charging Station: Place the charging station (Fx1) into the designated slot on the top panel and secure it. Route the power cord through the back opening.
- Assemble Drawers (Repeat 3 times):
- Attach the D2 parts of the drawer slides to the drawer side panels using screws (Cx12).
- Connect the drawer front, back, and side panels using screws (Ax4) and dowels (Bx4).
- Attach the drawer handle (Gx1) to the front panel of each drawer.

Figure 3.9: Attaching D2 Slides to Drawer Sides.

Figure 3.10: Assembling Drawer Box.

Figure 3.11: Attaching Drawer Handle.
- Insert Drawers: Carefully align the assembled drawers with the slides in the main cabinet. Push them in until they click into place. Ensure the sliders are moved to the front end before inserting the drawers.
- Install Anti-Tip Kit: For safety, attach the anti-tip kit to the back of the end table and secure it to a wall stud according to the instructions provided with the kit.

Figure 3.2: Separating Drawer Slides.

Figure 3.3: Attaching D1 Slides to Side Panels.

Figure 3.4: Base Frame Assembly.

Figure 3.5: Attaching Bottom Panel.

Figure 3.6: Attaching Side Panels.

Figure 3.7: Attaching Top Panel.

Figure 3.8: Installing Charging Station.

Figure 3.12: Inserting Drawers.

Figure 3.13: Anti-Tip Kit Installation.
Video 3.1: Assembly Guide for the Seeday Nightstand. This video demonstrates the step-by-step process of assembling the nightstand, including drawer construction and overall frame setup.
4. Operating Instructions (Charging Station)
The integrated charging station provides convenient power access for your electronic devices.
- Power Connection: Plug the end table's power cord into a standard 125V/12A wall outlet.
- Device Charging: Use the 2 AC outlets for larger electronics, and the 1 USB-A (5V/2A) and 1 Type-C (5V/2A) ports for charging smartphones, tablets, and other compatible devices.
- Cable Management: The hidden power panel helps keep charging cables organized and out of sight.

Figure 4.1: Charging station in use, showing a tablet and smartphone connected.
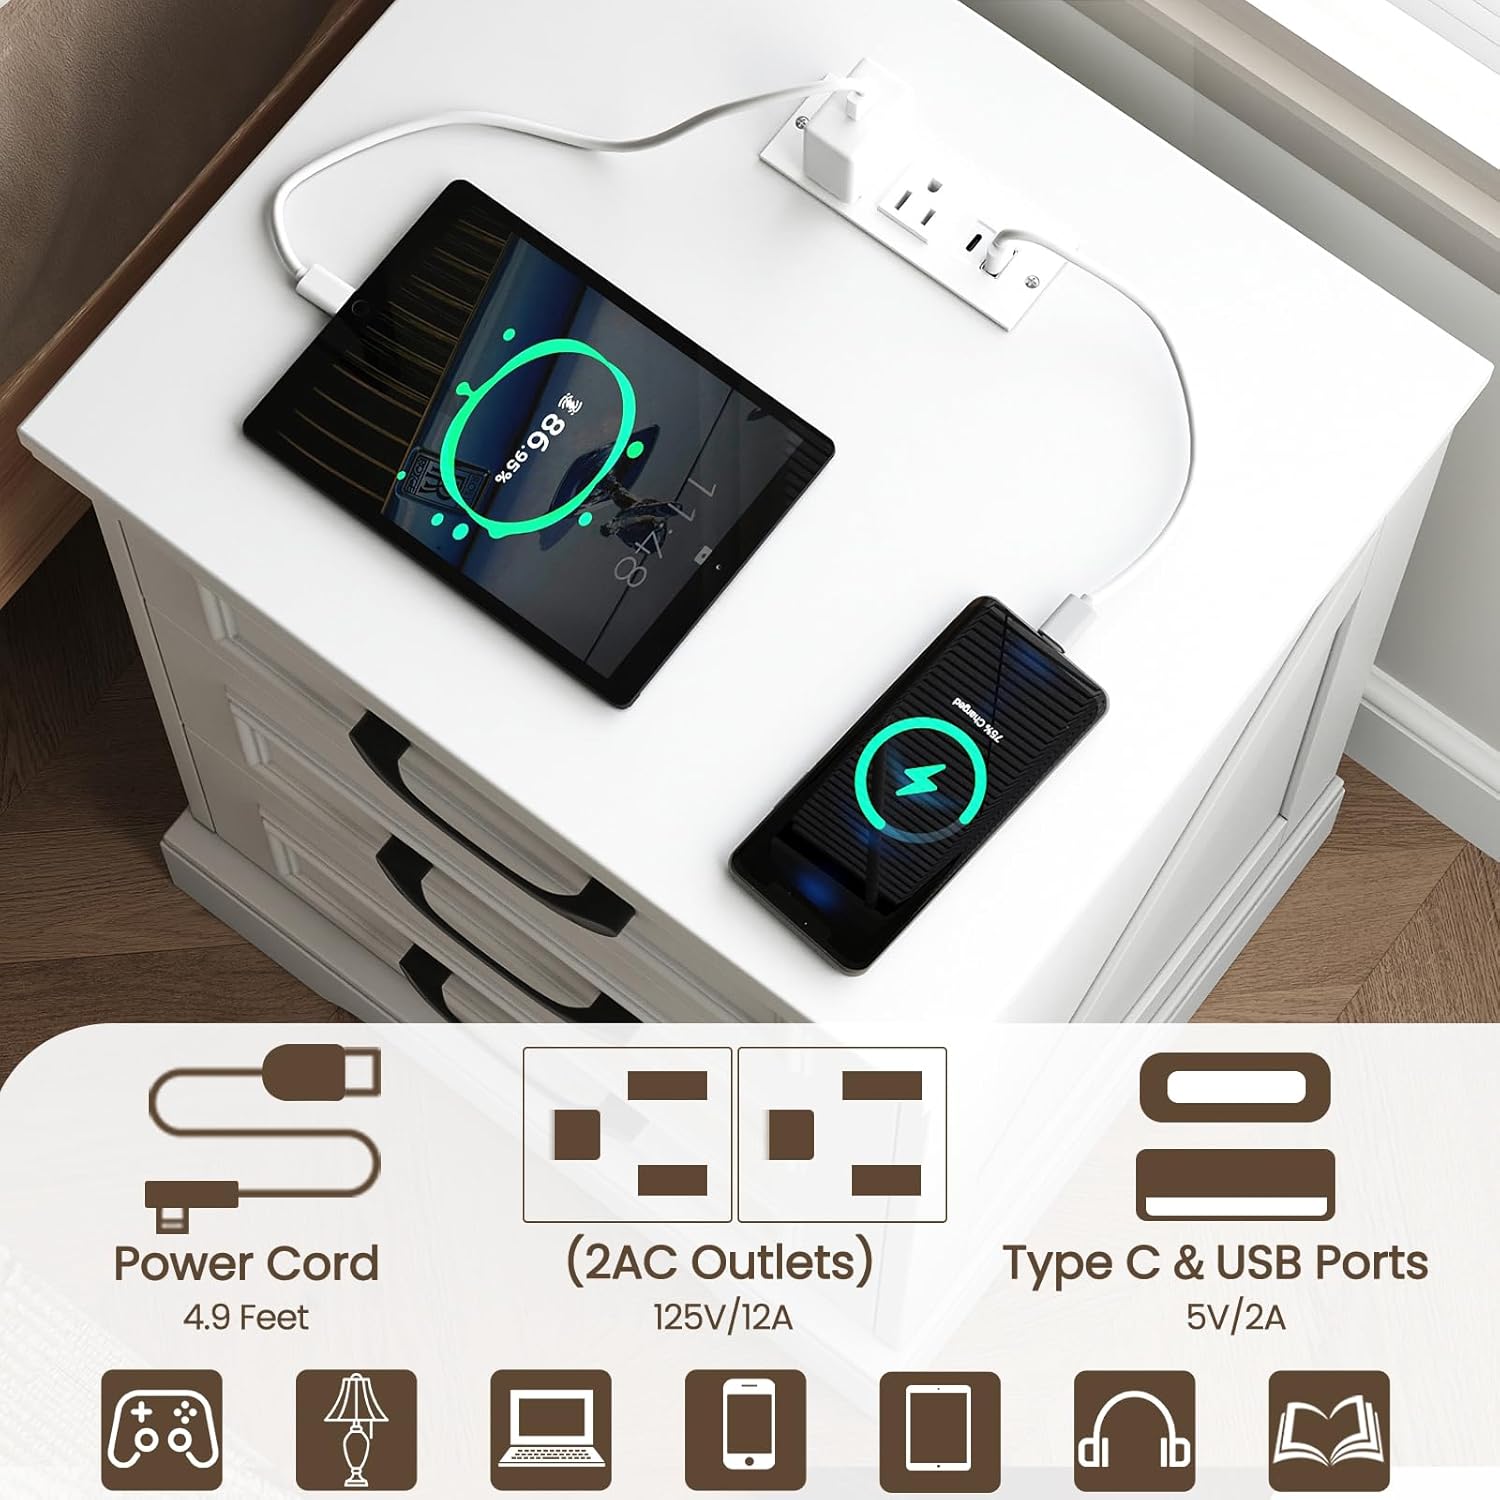
Figure 4.2: Charging station specifications: 4.9 ft power cord, 2 AC outlets (125V/12A), Type-C & USB ports (5V/2A).
5. Maintenance
To ensure the longevity and appearance of your end table, follow these maintenance guidelines:
- Cleaning: Wipe surfaces with a soft, damp cloth. Avoid harsh chemicals or abrasive cleaners, which can damage the finish.
- Spills: Immediately blot any spills with a clean, dry cloth to prevent staining or water damage.
- Sunlight & Heat: Avoid prolonged exposure to direct sunlight or extreme heat, which can cause fading or warping.
- Hardware: Periodically check and tighten all screws and fasteners to maintain stability.
- Charging Station: Keep the charging ports free of dust and debris. Do not overload the outlets.
6. Troubleshooting
If you encounter any issues with your end table, refer to the following common problems and solutions:
- Wobbly Table: Ensure all assembly screws are securely tightened. Check that the table is on a level surface. Adjust floor glides if present.
- Drawers Not Sliding Smoothly: Verify that the drawer slides are correctly installed and aligned. Apply a silicone-based lubricant to the slides if necessary. Ensure no objects are obstructing the drawer's path.
- Charging Station Not Working:
- Check if the main power cord is securely plugged into a functional wall outlet.
- Ensure the device's charging cable is properly connected to both the device and the charging port.
- Avoid overloading the charging station; disconnect some devices if it's not providing power.
- Test with a different device or cable to rule out device-specific issues.
- Missing Parts: If any parts are missing or damaged upon arrival, please contact customer support immediately for assistance.
7. Specifications
| Feature | Detail |
|---|---|
| Brand | Seeday |
| Model Name | CTG-PB-0004 |
| Product Dimensions (D x W x H) | 18" x 15" x 25.6" |
| Item Weight | 35.5 Pounds |
| Frame Material | Engineered Wood (MDF) |
| Color | White |
| Number of Drawers | 3 |
| Charging Station | 2 AC Outlets (125V/12A), 1 USB Port (5V/2A), 1 Type-C Port (5V/2A) |
| Power Cord Length | 4.9 Feet |
| Style | Rustic / Farmhouse |
| Included Components | 1 x Nightstand (Note: Product data indicates '2 x Nightstand' for 'Included Components', but this manual is for a single unit.) |
8. Warranty and Support
For warranty information, please refer to the documentation provided at the time of purchase or contact your retailer. Seeday is committed to customer satisfaction.
If you have any questions, require assistance with assembly, or need to report missing/damaged parts, please contact Seeday customer support through the retailer's platform or the official Seeday website.