
1. Introduction
This instruction manual provides detailed guidance for installing and operating the LocoLee LED Light Kit, specifically designed for the Lego 21357 Pixar Luxo Jr building model. This kit enhances the visual appeal of your model with integrated lighting. Please note that the Lego building model itself is not included with this light kit and must be purchased separately or already owned.

Image 1.1: The LocoLee Light Kit illuminating the Lego 21357 Pixar Luxo Jr model.
2. Package Contents
Before beginning installation, please verify that all components listed below are present in your package. If any parts are missing or damaged, please contact customer support.

Image 2.1: Components included in the LocoLee Light Kit.
- 1 x 14CM Warm White Circular Light
- 1 x D2 Pair Of Plug-in Terminal Blocks
- 1 x Tweezers (for handling small parts)
- 1 x USB Cable White Touch Switch Cable 1.5M + D2 Pair Plug-in Terminal Block
- Instruction Manual (online PDF/video available)
Important Note: The Lego 21357 Pixar Luxo Jr model is NOT included in this package.

Image 2.2: Clarification that the Lego model is not part of the light kit package.
3. Safety Information
Please read and understand the following safety precautions before installation and use:
- This product contains small parts which may pose a choking hazard. Keep out of reach of small children to prevent accidental ingestion.
- Handle wires carefully. Do not pull wires too hard during installation to avoid damage.
- Ensure the power source is less than 5V (USB power). Do not use power adapters exceeding this voltage.
- This product is intended for users aged 16 years and up.
4. Setup and Installation
Installation of the light kit requires careful handling and may involve disassembling certain sections of your Lego model. Detailed step-by-step video and PDF instructions are available online. Please refer to these resources for the most accurate guidance.
4.1 General Installation Steps
- Prepare the Model: Identify the sections of your Lego 21357 Pixar Luxo Jr model where lights will be installed. You may need to carefully disassemble a few bricks to create space for the light fixtures and wires.
- Install Lights: Using the provided tweezers, carefully place the LED lights into the designated areas as shown in the online instructions. Ensure wires are routed neatly and are not pinched.
- Connect Wires: Connect the light wires to the terminal blocks. Pay attention to the correct polarity if indicated.
- Integrate Touch Switch: Connect the USB cable with the touch switch to the terminal blocks.
- Reassemble Model: Carefully reassemble the Lego bricks, ensuring that all wires are hidden and not obstructing the model's structure.

Image 4.1: Illustrative steps for light installation within the model.
4.2 Accessing Online Instructions
For detailed visual guidance, scan the QR code provided in your physical manual or visit the manufacturer's website to access the step-by-step PDF and video installation guides.

Image 4.2: Reference for accessing online installation instructions.
5. Operating Instructions
The LocoLee Light Kit features a customized touch switch for easy control of power and brightness.
5.1 Powering the Light Kit
Connect the USB cable to a power source (e.g., USB wall adapter, power bank, computer USB port). The voltage must be less than 5V. The lights will be brighter when powered via USB compared to other low-power sources.
5.2 Using the Touch Switch
- Power On/Off: Lightly tap the touch switch button to turn the lights on or off.
- Adjust Brightness: Press and hold the touch switch button to cycle through different brightness levels. Release the button when the desired brightness is achieved.

Image 5.1: Touch-dimming functionality for power and brightness adjustment.
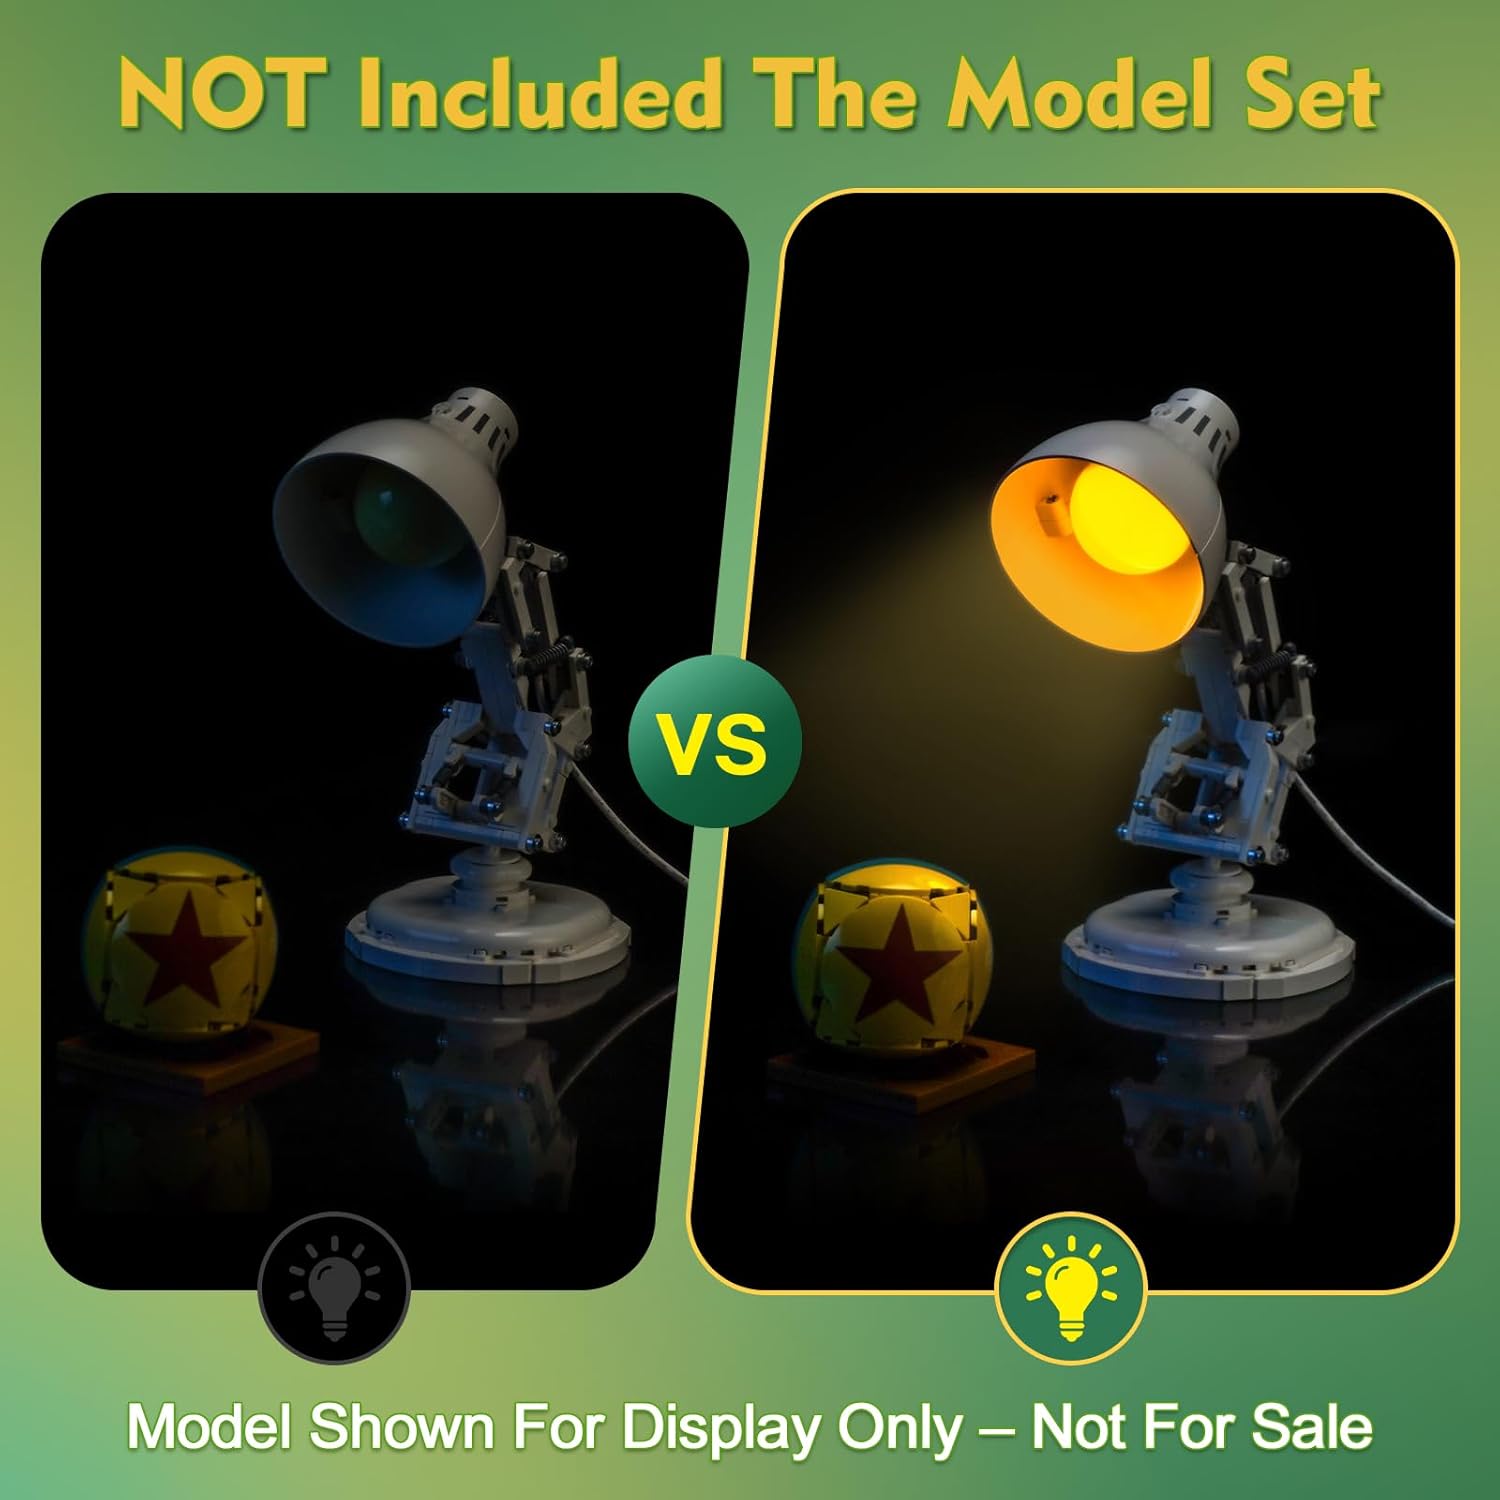
Image 5.2: Before and after installation of the light kit, demonstrating illumination.
6. Maintenance
To ensure the longevity and optimal performance of your LocoLee Light Kit, follow these maintenance guidelines:
- Cleaning: Use a soft, dry cloth to gently wipe any dust from the light components and wires. Avoid using liquid cleaners directly on the electrical parts.
- Handling: Avoid excessive bending or pulling of the wires, as this can cause internal damage.
- Storage: If storing the model for an extended period, disconnect the USB power cable.
7. Troubleshooting
If you encounter any issues with your light kit, please refer to the following common troubleshooting steps:
- Lights Not Turning On:
- Ensure the USB cable is securely connected to both the light kit and a functional power source.
- Verify that the power source provides less than 5V.
- Check all wire connections to the terminal blocks to ensure they are firm.
- Test each light part before assembling, as recommended in the product features.
- Lights Flickering:
- Check for loose connections at the terminal blocks or where wires connect to the LEDs.
- Ensure the power source is stable and providing consistent voltage.
- Uneven Brightness:
- Confirm that all lights are properly installed and not obstructed by Lego bricks.
- Adjust brightness using the touch switch as described in Section 5.2.
If these steps do not resolve the issue, please contact LocoLee customer support for further assistance.
8. Specifications
| Feature | Detail |
|---|---|
| Brand | LocoLee |
| Model Number | 21357 (Compatible with Lego Pixar Luxo Jr) |
| Style | Customized Touch Switch Version |
| Material | Plastic, Copper Lines |
| Light Source Type | Light Emitting Diode (LED) |
| Power Source | Corded Electric (USB, less than 5V) |
| Bulb Features | Touch-sensitive switch, customizable lighting effects |
| Item Weight | 3.52 ounces |
| Product Dimensions | 6.05 x 1.26 x 3.98 inches (packaging/kit components) |
| Manufacturer Recommended Age | 16 years and up |
9. Warranty and Support
LocoLee products are manufactured with quality in mind. If you have any questions or concerns regarding your light kit, including installation, operation, or potential defects, please do not hesitate to contact LocoLee customer support. Information on how to reach support can typically be found on the product packaging or the official LocoLee website.
Replacement parts may be available for aftercare. Please refer to the online instructions or contact support for details.