1. Introduction
This manual provides detailed instructions for the safe and effective operation of the FNIRSI IPS3608 DC Power Supply. The IPS3608 is a programmable bench power supply designed to deliver stable and clean DC power for various electronic applications, featuring a 36V, 8A, 285W output, ultra-low ripple, and versatile connectivity options.
2. Safety Information
Please read and understand all safety warnings and operating instructions before using the device. Failure to do so may result in injury or damage to the unit or connected equipment.
- Ensure the power supply is connected to a grounded outlet.
- Do not operate the device in wet or damp conditions.
- Avoid exceeding the maximum voltage and current ratings of the device or the connected load.
- Always disconnect power before making or changing connections.
- Do not open the casing; there are no user-serviceable parts inside. Refer servicing to qualified personnel.
- Keep the ventilation openings clear to prevent overheating.
3. Product Overview
The FNIRSI IPS3608 features a compact design with an IPS display, intuitive controls, and multiple output ports.

Figure 3.1: Front view of the FNIRSI IPS3608 DC Power Supply, showing the IPS display, control knob, navigation buttons, output terminals, and USB ports.
3.1. Front Panel Controls and Ports
- 2.8" TFT Display: Shows voltage, current, power, and other operational data.
- Encoder Button: Used for navigation and value adjustment.
- Selection Area Buttons: For selecting parameters on the display.
- Setting Menu Button: Accesses device settings.
- Output Power Button: Toggles the main DC output.
- Positive Output Terminal: Red terminal for positive DC output.
- Negative Output Terminal: Black terminal for negative DC output.
- USB-A Port: For fast charging compatible devices.
- USB-C Port: For fast charging compatible devices and PC connection.
- Power Indicator: Indicates power status.
3.2. Rear Panel Features
- Cooling Fan Outlet: Ensures proper heat dissipation.
- Power Switch: Main power on/off switch.
- Power Cord Connector: For connecting the AC power cable.
- USB Port for Firmware Upgrade: Used for updating device firmware.

Figure 3.2: Detailed diagram of the FNIRSI IPS3608 showing labeled front and rear panel components.
4. What's in the Box
Verify that all items are present upon unpacking:
- FNIRSI IPS3608 Host (1)
- Power Cable (1)
- Alligator Clip Wires (2)
- User Manual (1)
- Data Cable (1)
- Packing Box (1)

Figure 4.1: Image showing the FNIRSI IPS3608 power supply and its included accessories: power cable, alligator clip wires, user manual, and data cable.
5. Setup Instructions
5.1. Power Connection
- Connect the provided power cable to the power cord connector on the rear panel of the IPS3608.
- Plug the other end of the power cable into a standard AC power outlet (100-240V AC, 50/60Hz).
- Ensure the rear power switch is in the OFF position before plugging into the outlet.
5.2. Connecting a Load
- With the power supply OFF, connect the red alligator clip wire to the positive output terminal and the black alligator clip wire to the negative output terminal.
- Connect the other ends of the alligator clip wires to your load, ensuring correct polarity.
- Verify that the load's voltage and current requirements are within the IPS3608's specifications (0-36V, 0-8A).
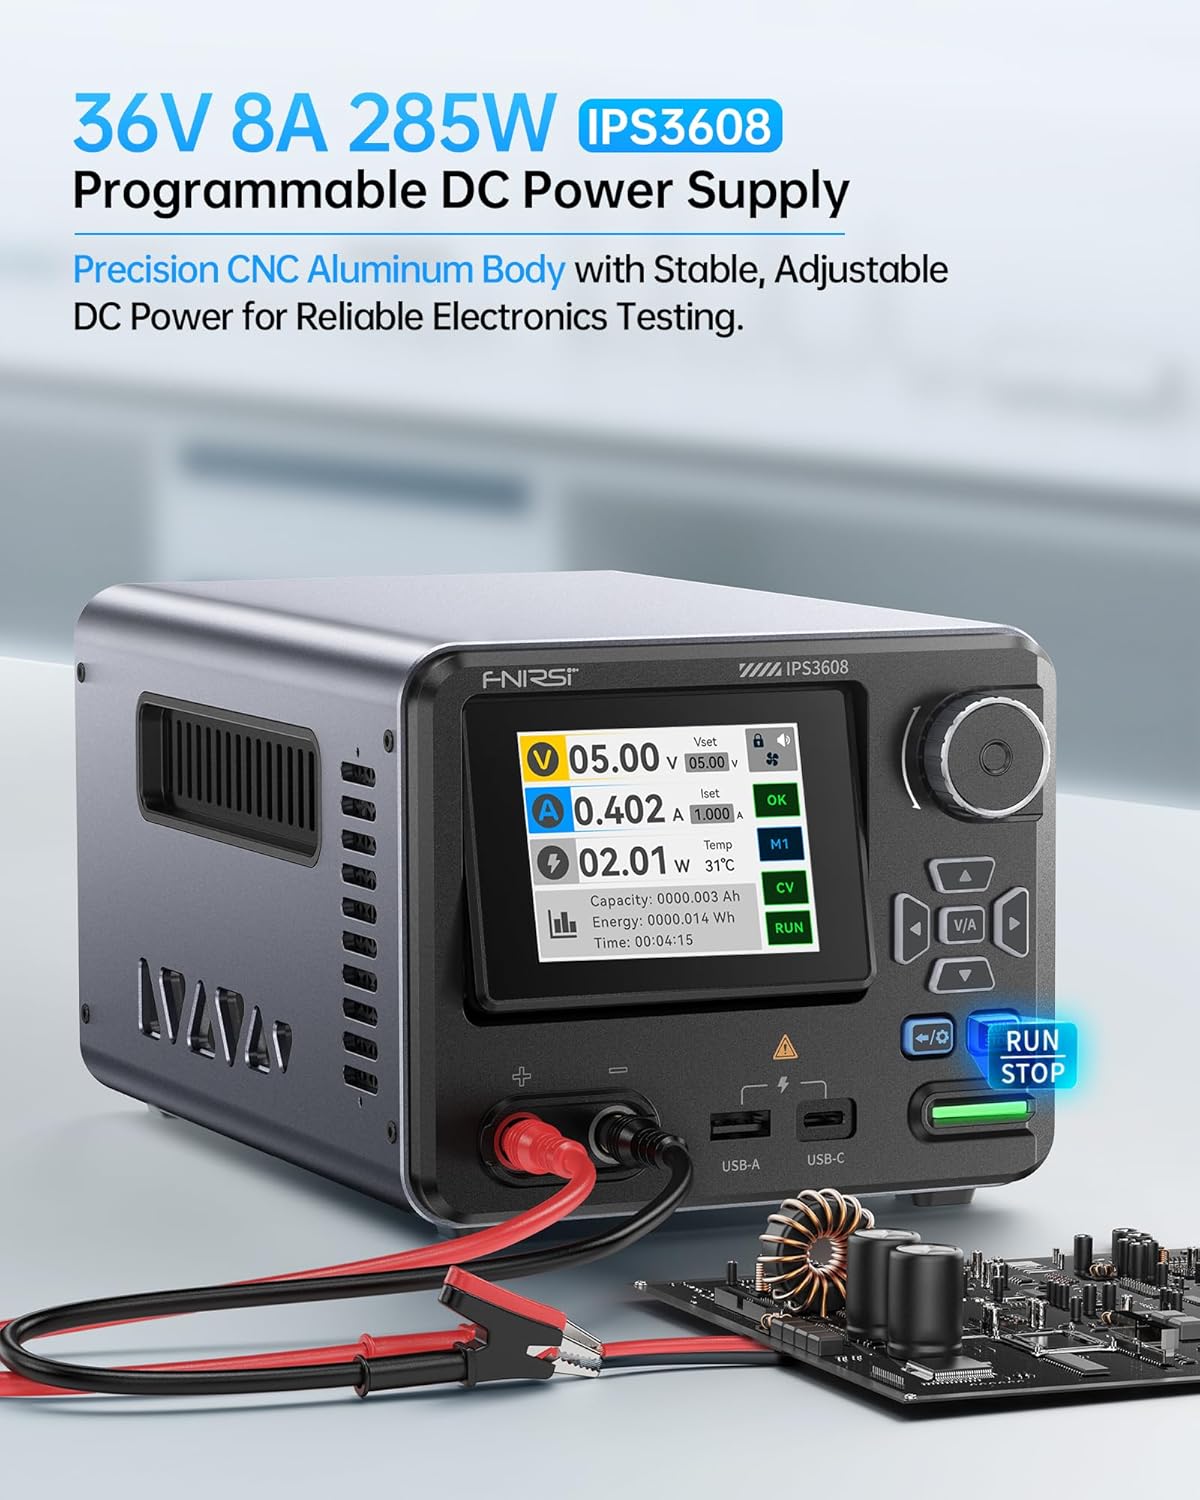
Figure 5.1: The FNIRSI IPS3608 connected to a circuit board using alligator clips, demonstrating a typical load connection.
6. Operating Instructions
6.1. Powering On/Off
- Flip the rear power switch to the ON position. The display will illuminate.
- To turn off, flip the rear power switch to the OFF position.
6.2. Setting Voltage and Current
- After powering on, the display shows the current output and set values.
- Use the encoder button to navigate and select the voltage (Vset) or current (Iset) parameter you wish to adjust.
- Rotate the encoder button to change the value. Press the encoder button to confirm or move to the next digit.
- Press the Output Power button (RUN/STOP) to enable or disable the main DC output. The button will illuminate green when output is active.
6.3. Display Modes
The IPS3608 offers three display modes for monitoring output:
- Standard Mode: Displays real-time voltage, current, power, and temperature.
- Curve Mode: Provides a graphical representation of voltage and current over time, including max/min values.
- USB Output Mode: Shows detailed information for the USB-A and USB-C fast charging ports.
Navigate between display modes using the appropriate navigation buttons on the front panel.

Figure 6.1: The IPS3608 display illustrating the Standard, V&I Curve, and USB-C/A Output modes.
6.4. Programmable Features and Presets
The IPS3608 supports PC programmable outputs and includes six preset data slots for quick recall of common voltage and current settings.
- Saving Presets: Access the preset menu via the Setting Menu button. Adjust voltage, current, and protection parameters (OVP, OCP, OPP, OTP) for a desired preset. Save the configuration to one of the six data slots (Data Set 1-6).
- Recalling Presets: Select the desired preset from the menu to instantly apply its saved settings.
- PC Software Control: Connect the IPS3608 to a computer via the USB-C port. The PC software allows for real-time display, curve recording, advanced preset management, sequential output, and voltage/current scanning. Refer to the separate PC software guide for detailed instructions.

Figure 6.2: The IPS3608 display showing preset data settings and an illustration of PC software control capabilities.
6.5. USB-A and USB-C Charging Ports
The integrated USB-A and USB-C ports support various fast charging protocols, including PD, FCP, SCP, AFC, and QC. These ports can be used to charge compatible devices while the main DC output is in use or independently.
- Connect your device to the USB-A or USB-C port using a compatible cable.
- Monitor the charging status and output parameters via the USB Output display mode.
7. Safety Features and Protections
The IPS3608 incorporates multiple safety mechanisms to protect both the device and the connected load:
- Over Voltage Protection (OVP): Shuts off output if voltage exceeds a set limit.
- Over Current Protection (OCP): Shuts off output if current exceeds a set limit.
- Over Power Protection (OPP): Shuts off output if power exceeds a set limit.
- Over Temperature Protection (OTP): Shuts off output if internal temperature becomes too high.
- Under Voltage Protection: Protects the load from insufficient voltage.
- Short Circuit Protection: Prevents damage in case of a short circuit.
- Reverse Polarity Protection: Protects against incorrect connection of load polarity.
- Reverse Current Protection: Prevents current from flowing back into the power supply.
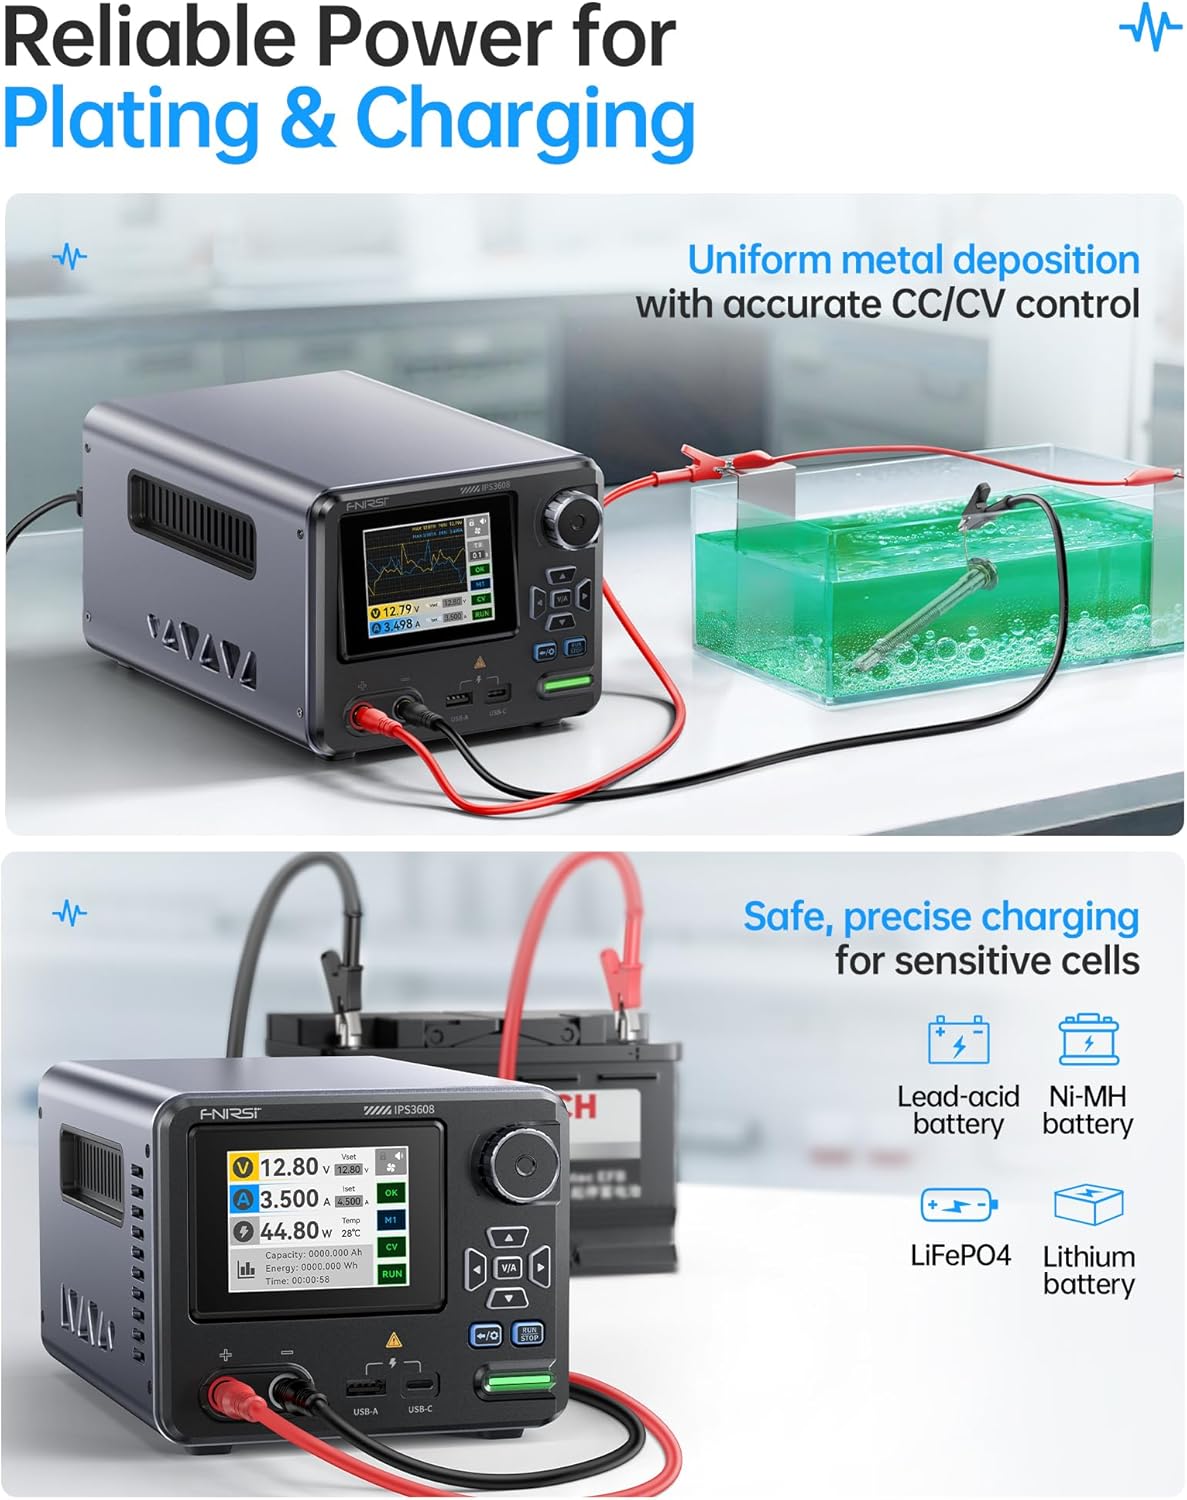
Figure 7.1: Visual representation of the eight built-in safety protections of the FNIRSI IPS3608.
8. Maintenance
8.1. Cleaning
To maintain optimal performance and appearance, clean the device regularly:
- Ensure the device is powered off and disconnected from all power sources and loads.
- Use a soft, dry cloth to wipe the exterior.
- Do not use abrasive cleaners or solvents.
- Periodically check the cooling fan outlet for dust accumulation and gently clean if necessary to ensure proper airflow.
8.2. Firmware Updates
Firmware updates may be released to improve performance or add new features. These can be performed by connecting the device to a PC via the rear USB-C port. Refer to the FNIRSI official website or contact customer support for the latest firmware and update instructions.
9. Troubleshooting
If you encounter issues with your FNIRSI IPS3608, refer to the following common problems and solutions:
- No Power/Display:
- Check if the power cable is securely connected to both the device and the AC outlet.
- Ensure the rear power switch is in the ON position.
- Verify the AC outlet is functional.
- No Output Voltage/Current:
- Ensure the Output Power button (RUN/STOP) is pressed and illuminated green.
- Check if the set voltage and current values are above zero.
- Verify that no protection (OVP, OCP, OPP) has been triggered. Reset if necessary.
- Check load connections for proper contact and polarity.
- Inaccurate Readings:
- Ensure all connections are secure and free from corrosion.
- If using PC software, ensure the latest version is installed and the data cable is properly connected.
- Overheating:
- Ensure the cooling fan outlet is not obstructed.
- Reduce the load or operating time if the device consistently overheats.
For persistent issues, contact FNIRSI customer support.
10. Specifications
Detailed technical specifications for the FNIRSI IPS3608 DC Power Supply:
| Category | Parameter Description |
|---|---|
| Input Voltage Range | 100-240V AC (50/60Hz) |
| Output Voltage | 0-36V DC |
| Output Current | 0-8A |
| Output Power | 0-285W |
| Setting Resolution (Voltage) | 0.01V |
| Setting Resolution (Current) | 0.001A |
| Output Voltage Accuracy | ± (0.3% + 5 bits) |
| Output Current Accuracy | ± (0.15% + 5 bits) |
| Load Regulation Rate | ± (0.2% + 2 bits) |
| Ripple | <10mV |
| Operating Environment | -10°C ~ 40°C, 0% ~ 75% RH |
| Cooling Method | Air Cooling (Built-in fan) |
| Product Dimensions (L x W x H) | 8.43 x 5.43 x 4.53 inches |
| Item Weight | 4.44 pounds |
10.1. Fast Charging Protocol Support
| Output Terminal Category | Fast Charging Protocol |
|---|---|
| USB-C | PD3.0, HUAWEI FCP, HUAWEI SCP |
| USB-A | AFC, QC2.0, QC3.0 |
Note: Accuracy calculation method: one byte is the minimum resolution, such as 5V, the error is ± (5x0.3% + 5x0.01), that is, 5 ± 0.045V.

Figure 10.1: Detailed table outlining the technical specifications and supported fast charging protocols.
11. Warranty and Support
FNIRSI provides comprehensive customer support for the IPS3608 DC Power Supply. For warranty information, technical assistance, or to obtain PC software and operating instructions, please visit the official FNIRSI website or contact their customer service department directly. Contact details can typically be found on the product packaging or the FNIRSI official website.


