
Introduction
This manual provides detailed instructions for the setup, operation, and maintenance of your ATTACK SHARK X8 PLUS Wireless Gaming Mouse. Please read this manual thoroughly to ensure optimal performance and longevity of your device. The X8 PLUS is designed for users seeking a lightweight, high-performance gaming mouse with versatile connectivity options and advanced customization features.
Package Contents
Upon unboxing, please verify that all the following items are included:
- ATTACK SHARK X8 PLUS Wireless Gaming Mouse
- USB-C to USB-A Charging Cable
- 2.4GHz Wireless Receiver
- User Manual (this document)
- Grip Tape (optional application)
- Replacement PTFE Skates
Product Overview
The ATTACK SHARK X8 PLUS features an ergonomic design and multiple buttons for enhanced gaming control. Familiarize yourself with the mouse components:
- Left/Right Click Buttons: Primary input buttons.
- Scroll Wheel: For scrolling and middle-click functionality.
- Side Buttons: Typically for forward/backward navigation, customizable.
- DPI Button: Located on the underside, for cycling through DPI settings.
- Connectivity Mode Switch: Located on the underside, for selecting Wired, 2.4GHz, or Bluetooth mode.
- USB-C Port: For wired connection and charging.
- Optical Sensor: PixArt PAW3395PRO for precise tracking.
- PTFE Skates: For smooth gliding on surfaces.

Figure 1: Top view of the ATTACK SHARK X8 PLUS Wireless Gaming Mouse in Berry color.

Figure 2: Side view highlighting the lightweight design and core features.

Figure 3: Infographic of X8 PLUS core features.

Figure 4: PixArt PAW3395PRO gaming sensor.

Figure 5: Double-layer PTFE skates on the mouse underside.
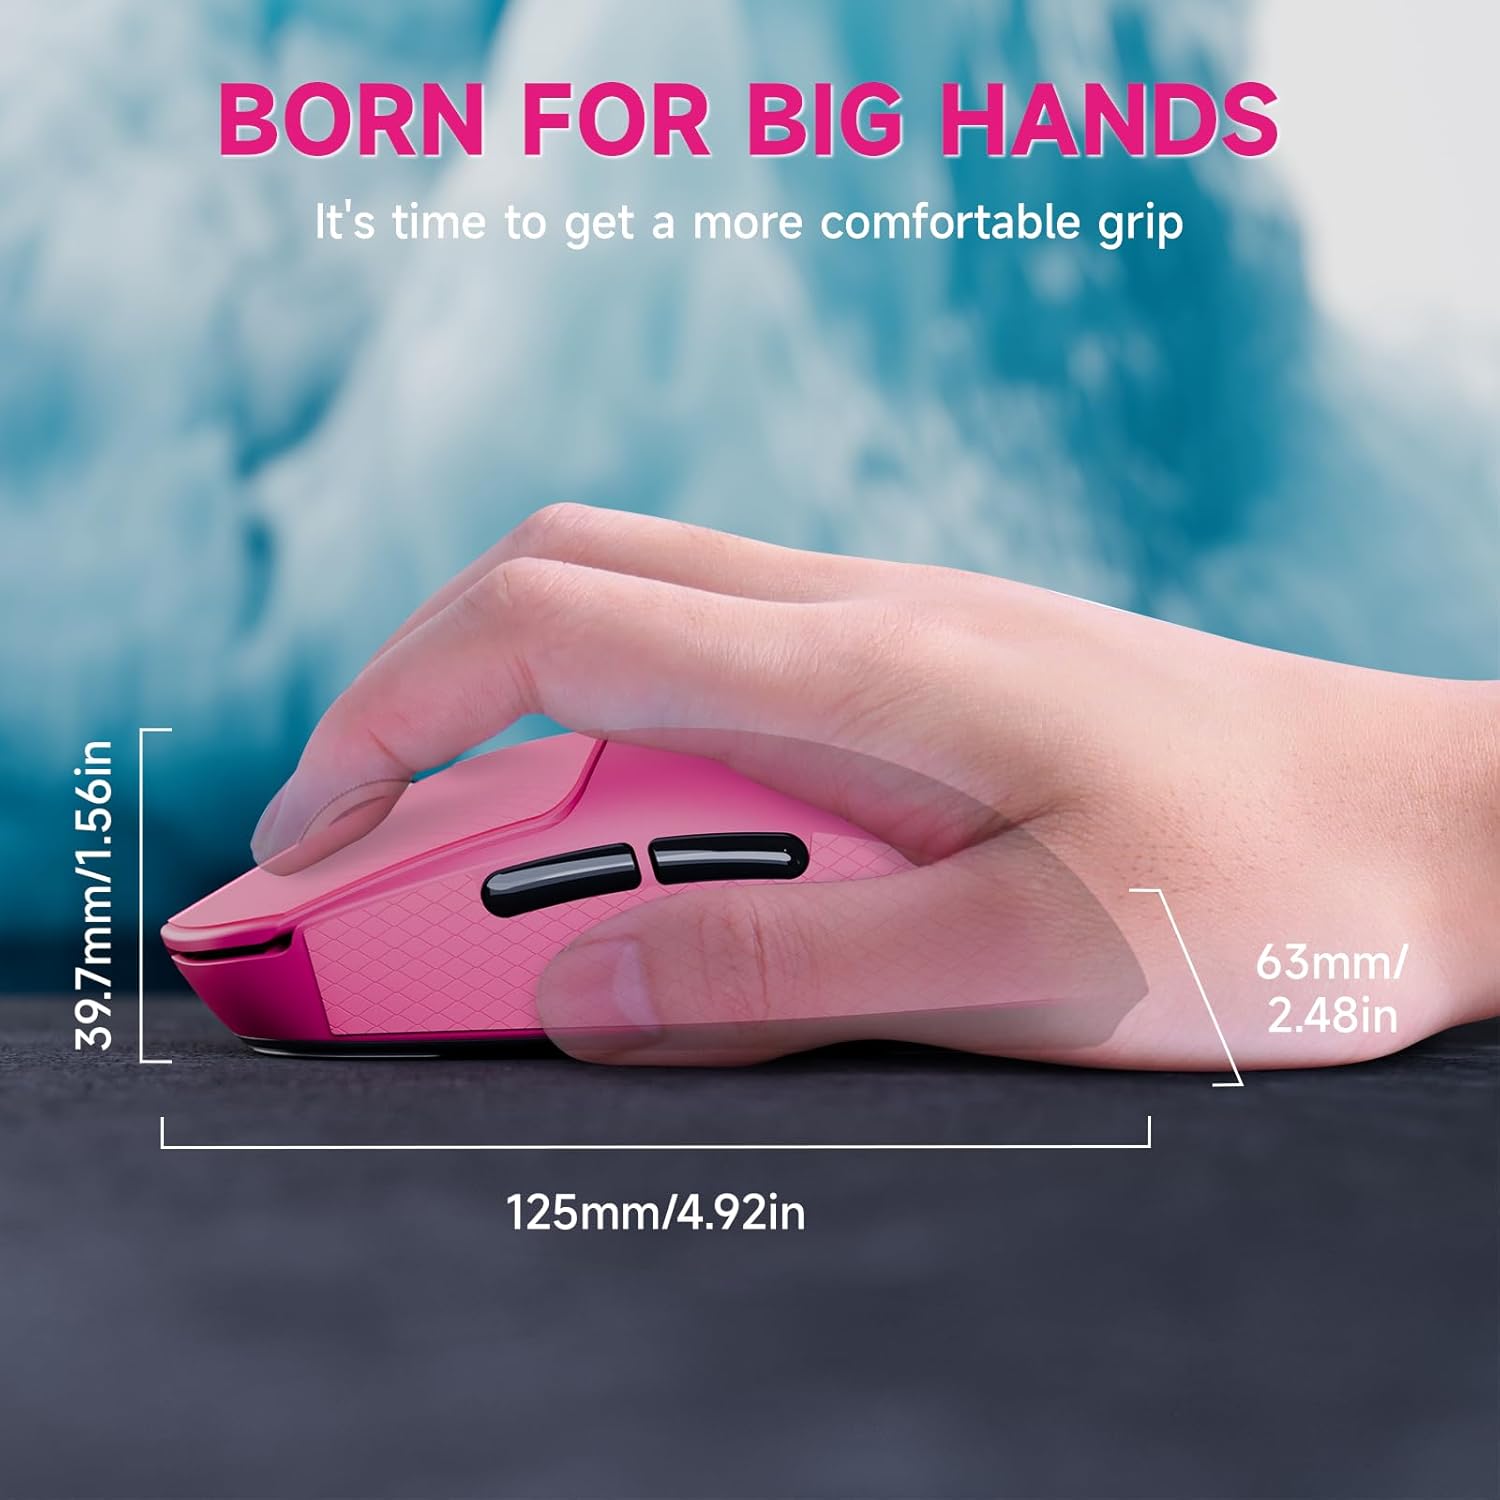
Figure 6: X8 PLUS dimensions and hand grip illustration.
Setup
1. Charging the Mouse
Before initial use, it is recommended to fully charge the mouse. Connect the provided USB-C cable to the mouse's USB-C port and the other end to a powered USB-A port on your computer or a USB wall adapter. The mouse features a 500mAh battery, offering extended usage on a single charge.
2. Connectivity Options
The X8 PLUS supports three connectivity modes: Wired, 2.4GHz Wireless, and Bluetooth. Use the switch on the underside of the mouse to select your desired mode.
2.1. Wired Connection
- Set the connectivity switch on the mouse to the 'Wired' position.
- Connect the USB-C cable from the mouse to a USB-A port on your computer.
- The mouse will be recognized automatically and is ready for use.
2.2. 2.4GHz Wireless Connection
- Set the connectivity switch on the mouse to the '2.4G' position.
- Insert the 2.4GHz wireless receiver into an available USB-A port on your computer.
- The mouse should connect automatically. If not, press the DPI button for 3 seconds to initiate pairing.
2.3. Bluetooth Connection
- Set the connectivity switch on the mouse to the 'BT' position.
- On your computer, navigate to Bluetooth settings and enable Bluetooth.
- Search for new devices. The mouse should appear as 'ATTACK SHARK X8 PLUS'.
- Select the mouse to pair.
Operating Instructions
1. DPI Adjustment
The X8 PLUS features a PixArt PAW3395PRO sensor with adjustable DPI from 50 to 40,000. To change the DPI sensitivity, press the dedicated DPI button located on the underside of the mouse. Each press cycles through preset DPI levels. The LED indicator on the mouse will change color to indicate the current DPI setting.
2. Polling Rate
The mouse supports a 1KHz (1000Hz) polling rate in both wired and 2.4GHz wireless modes, ensuring rapid response and precise tracking.
3. Customization (Cloud Driver)
The ATTACK SHARK X8 PLUS offers extensive customization options through its cloud-driven web interface. This allows for DPI adjustment, polling rate settings, competitive mode activation, customized button assignments, macro recording, and personalized key mapping without the need for traditional software installation.
- Ensure your mouse is connected via 2.4GHz wireless or wired mode.
- Open a web browser and navigate to the official ATTACK SHARK customization portal (refer to product packaging or official website for the exact URL).
- The web interface will automatically detect your mouse, allowing you to configure settings.
- Changes made through the web interface are saved directly to the mouse's onboard memory.

Figure 7: Cloud-driven web interface for mouse customization.
4. Battery Management
The X8 PLUS is equipped with a 500mAh large-capacity battery. A single charge can provide up to 300 hours of intermittent use under simulated normal usage scenarios. When the battery level is low, the mouse's indicator light will signal the need for recharging. Connect the mouse via the USB-C cable to charge.
Maintenance
1. Cleaning
To maintain optimal performance and hygiene, regularly clean your mouse. Use a soft, dry cloth to wipe the surface. For stubborn dirt, a slightly damp cloth with mild soap can be used, ensuring no liquid enters the mouse. Avoid harsh chemicals or abrasive materials.
2. PTFE Skates
The double-layer PTFE skates are designed for durability and smooth gliding. If the skates show significant wear or damage, they can be replaced using the provided spare set. Carefully peel off the old skates and apply the new ones, ensuring proper alignment.
3. Storage
When not in use for extended periods, store the mouse in a cool, dry place away from direct sunlight and extreme temperatures. Ensure the mouse is powered off to conserve battery life.
Troubleshooting
- Mouse not responding:
- Check battery level and charge if necessary.
- Ensure the connectivity switch is in the correct position (Wired, 2.4G, or BT).
- For 2.4GHz, ensure the receiver is properly inserted and try re-pairing (press DPI button for 3 seconds).
- For Bluetooth, ensure Bluetooth is enabled on your device and the mouse is paired.
- Try connecting the mouse via the USB-C cable to rule out wireless issues.
- Cursor movement is erratic or imprecise:
- Clean the optical sensor on the underside of the mouse.
- Ensure the mouse is used on a clean, suitable surface (mouse pad recommended).
- Adjust DPI settings to a comfortable level.
- Buttons not functioning:
- Check customization settings via the cloud driver to ensure buttons are correctly mapped.
- Test the mouse on another computer to determine if the issue is with the mouse or the computer's settings.
- Connectivity issues (disconnections, lag):
- Ensure the 2.4GHz receiver is not obstructed and is close to the mouse.
- Minimize interference from other wireless devices.
- Update your computer's Bluetooth drivers if using Bluetooth mode.
Specifications
The following table outlines the key technical specifications for the ATTACK SHARK X8 PLUS Wireless Gaming Mouse:

Figure 8: Technical specifications for X8 series models, including X8 PLUS.
| Feature | Specification (X8 PLUS) |
|---|---|
| Sensor | PixArt PAW3395PRO |
| DPI | 50 - 40,000 (Adjustable) |
| Movement Speed | 700 IPS |
| Acceleration | 60G |
| Button Lifespan | 100 Million Clicks |
| Micro Switch | Huano Switch |
| Polling Rate | 1000Hz (Wired/Wireless) |
| MCU | BK52820 |
| Connectivity | Wired, 2.4GHz Wireless, Bluetooth |
| Dimensions (L x W x H) | 125.5mm x 63mm x 40mm (4.96 x 2.5 x 1.6 inches) |
| Weight | 55g (Ultra-lightweight) |
| Battery Capacity | 500mAh |
Warranty and Support
ATTACK SHARK products are designed for reliability and performance. For warranty information, technical support, or service inquiries, please refer to the official ATTACK SHARK website or contact their customer support directly. Keep your purchase receipt as proof of purchase for warranty claims.


