
1. Product Overview
The DOKIO 200W Flexible Monocrystalline Solar Panel system consists of two 100W panels designed for efficient 12V battery charging in various off-grid applications. These panels feature a semi-flexible ETFE surface and MC4 connectors, making them suitable for RVs, boats, campers, and trailers. Their lightweight and slim design allows for installation in locations where traditional rigid panels may not fit.

Image 1.1: DOKIO 200W Flexible Monocrystalline Solar Panels.
Key Features:
- Dual Panel System: Two 100W panels provide a total of 200W, offering flexibility for series or parallel wiring configurations.
- Flexible Design: Can bend up to 30 degrees, ideal for mounting on curved surfaces like RV roofs or boat decks.
- Lightweight & Portable: Each panel weighs approximately 2.3 pounds, making them easy to transport and install.
- Durable ETFE Surface: The ETFE top sheet enhances light transmission and provides wear resistance, ensuring longevity.
- MC4 Connectors: Standard MC4 connectors simplify wiring and ensure secure connections.
- High Efficiency: Monocrystalline cells offer high conversion efficiency for optimal power generation.

Image 1.2: Cross-section illustrating the protective layers of the DOKIO flexible solar panel, including ETFE, EVA, A+ Monocrystalline cells, and TPT for heat dissipation.
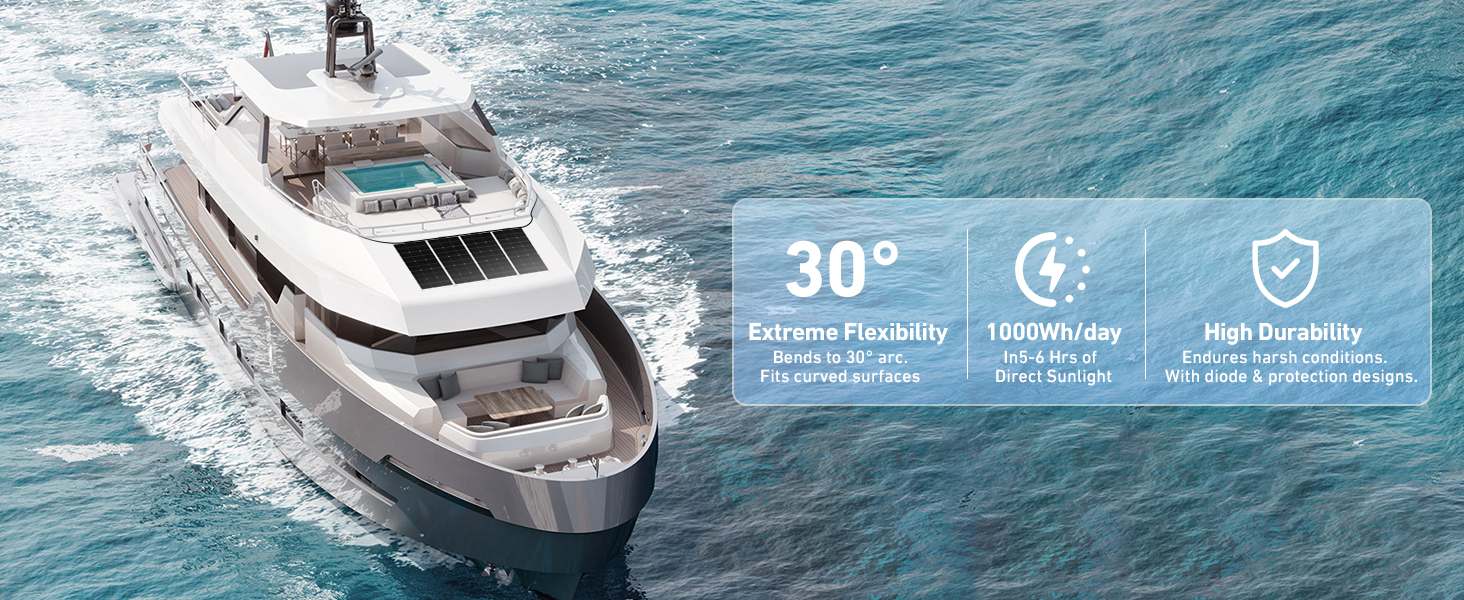
Image 1.3: A DOKIO flexible solar panel demonstrating its bendability, highlighting its adaptability to various surfaces.
2. Setup and Installation
2.1 Unpacking and Inspection
- Carefully remove the solar panels from their packaging.
- Inspect both panels for any signs of damage during shipping. Contact customer support immediately if any issues are found.
2.2 Mounting Considerations
These flexible panels can be mounted using hooks or attached to a surface with appropriate adhesive. Ensure the mounting surface is clean and dry before installation.
- Ventilation: Always leave adequate ventilation space around and beneath the panels to allow heat to escape. Overheating can reduce efficiency and panel lifespan.
- Surface Material: Do not mount directly on combustible materials such as wood, asphalt shingles, fabric, or foam without proper insulation or an air gap.
- Cable Management: Avoid trapping heat or running cables directly beneath the panel, as this can impede cooling.
- Orientation: For optimal performance, position the panels to receive maximum direct sunlight throughout the day.
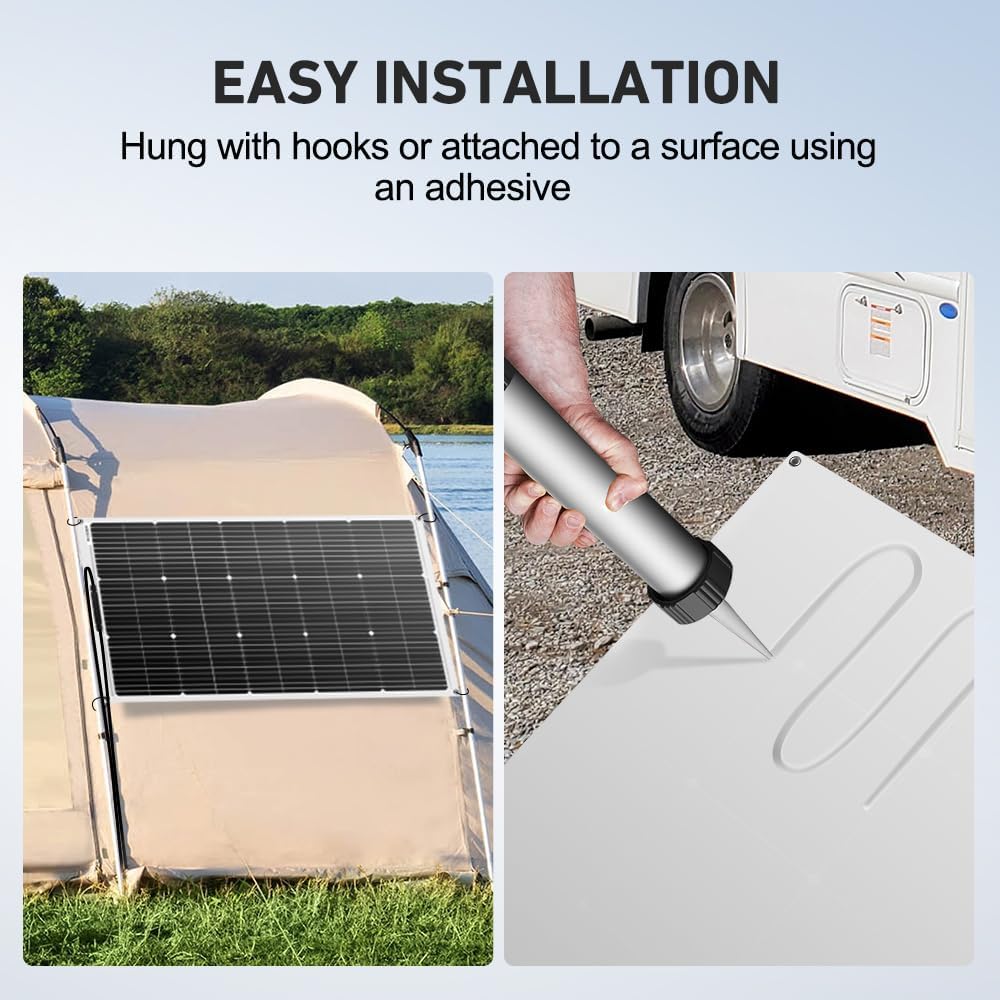
Image 2.1: Examples of flexible solar panel installation using hooks on a tent or adhesive on a flat surface.
2.3 Wiring Configurations
The two 100W panels can be wired in series or parallel depending on your system's voltage and current requirements. Always check your charge controller's input limits before connecting.
- Series Connection: Connect the positive (+) terminal of one panel to the negative (-) terminal of the next. This increases the total voltage while keeping the current the same. Suitable for MPPT charge controllers.
- Parallel Connection: Connect positive (+) terminals together and negative (-) terminals together. This increases the total current while keeping the voltage the same. Suitable for PWM or MPPT charge controllers with appropriate voltage input.
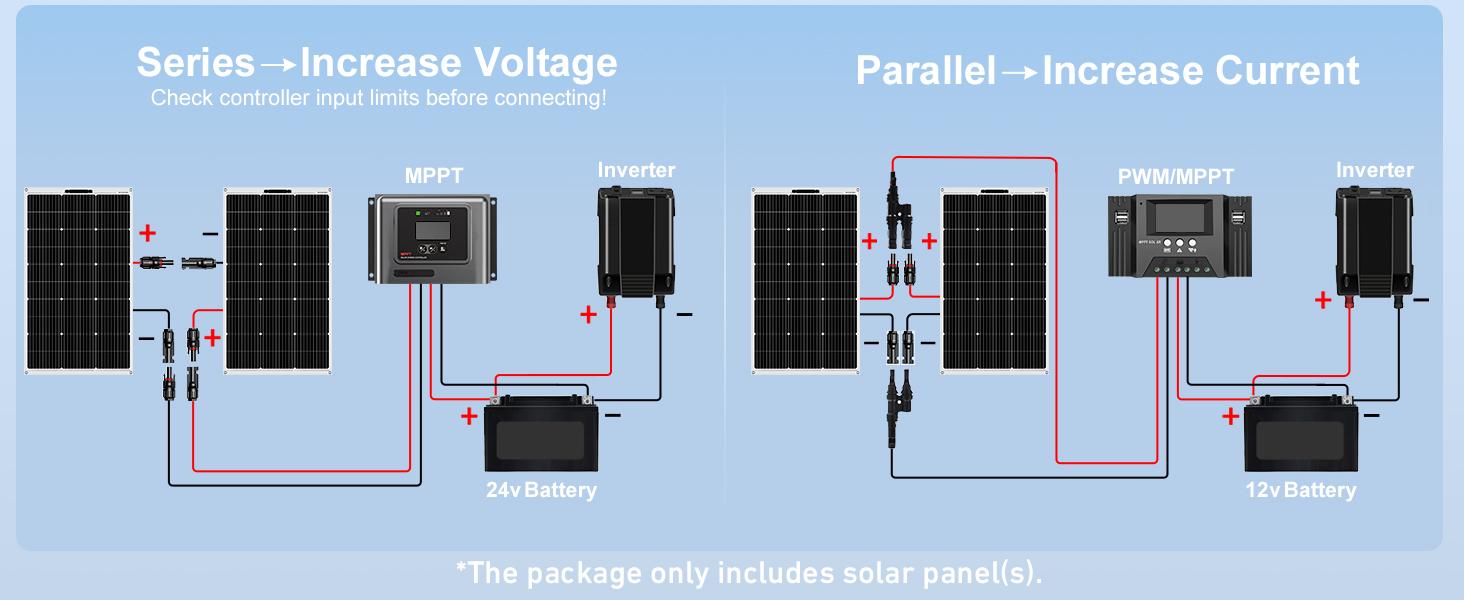
Image 2.2: Diagrams illustrating how to connect solar panels in series to increase voltage for a 24V battery system (left) and in parallel to increase current for a 12V battery system (right).
3. Operating Instructions
3.1 Connecting to a Charge Controller and Battery
- Ensure all connections are secure and properly insulated.
- Connect the solar panels to a compatible charge controller (PWM or MPPT, depending on your wiring configuration).
- Connect the charge controller to your 12V battery bank.
- The charge controller will regulate the power flow from the panels to the battery, preventing overcharging and optimizing charging efficiency.
- Monitor the charge controller display for charging status and battery voltage.

Image 3.1: A typical solar charging system setup, showing two solar panels connected to a PWM/MPPT charge controller, which then charges a 12V battery and powers an inverter for various devices.
3.2 Applications
These flexible solar panels are versatile and can be used in a variety of off-grid scenarios:
- Recreational Vehicles (RVs) & Campers: Provide power for lights, small appliances, and charging devices while on the go.
- Boats: Ideal for marine applications due to their flexibility and resistance to harsh conditions.
- Camping: Lightweight design makes them easy to deploy for portable power during outdoor adventures.
- Off-Grid Systems: Suitable for remote cabins, sheds, or backup power solutions.

Image 3.2: Collage showing the DOKIO flexible solar panels used in diverse settings, including powering a water pump, on an RV, a boat, a camping tent, and for emergency backup.
4. Maintenance
Regular maintenance ensures optimal performance and extends the lifespan of your solar panels.
- Cleaning: Periodically clean the panel surface with a soft cloth and mild soapy water to remove dirt, dust, and debris. Avoid abrasive cleaners or harsh chemicals.
- Inspection: Regularly inspect the panels for any physical damage, such as cracks, delamination, or discoloration. Check all wiring and connections for signs of wear, corrosion, or loose contacts.
- Shading: Ensure the panels are not shaded by trees, buildings, or other obstructions, as shading can significantly reduce power output.
- Ventilation: Verify that the ventilation space around the panels remains clear to prevent heat buildup.
5. Troubleshooting
If you experience issues with your DOKIO solar panels, consider the following common troubleshooting steps:
| Problem | Possible Cause | Solution |
|---|---|---|
| Low or no power output | Shading on panels, dirty panel surface, faulty connections, incorrect wiring, damaged panel, insufficient sunlight. | Remove shading, clean panels, check all wiring for secure connections, verify series/parallel wiring, inspect for physical damage, ensure direct sunlight exposure. |
| Battery not charging | Charge controller issue, battery fault, incorrect wiring between controller and battery, low panel output. | Check charge controller status, test battery voltage, verify battery connections, troubleshoot panel output (see above). |
| Overheating panels | Lack of ventilation, direct mounting on heat-retaining surface. | Ensure adequate air circulation around panels, consider adding spacers for better airflow if directly mounted. |
If problems persist after attempting these solutions, please contact DOKIO customer support.
6. Specifications
Technical specifications for the DOKIO 200W Flexible Monocrystalline Solar Panels:
| Feature | Detail |
|---|---|
| Brand | DOKIO |
| Model Number | flexible solar panel 200w |
| Maximum Power | 200 Watts (2 x 100W panels) |
| Maximum Voltage | 12 Volts |
| Amperage Capacity | 5.56 Amps |
| Product Dimensions (each panel) | 38.4"L x 22.2"W x 0.08"H (97.5cm x 56.5cm x 0.2cm) |
| Item Weight (each panel) | 2.3 Pounds (1.04 kg) |
| Material | ETFE, Glass, Metal |
| Efficiency | High Efficiency (Monocrystalline) |
| Connector Type | MC4 |
| Flexibility | Up to 30 degrees |
7. Warranty Information
DOKIO provides a 1-year manufacturer's warranty for this product. This warranty covers defects in materials and workmanship under normal use. Please retain your proof of purchase for warranty claims.
For specific warranty terms and conditions, or to initiate a warranty claim, please refer to the official DOKIO website or contact customer support.
8. Customer Support
For any questions, technical assistance, or support regarding your DOKIO 200W Flexible Solar Panels, please contact DOKIO customer service.
- Online Support: Visit the official DOKIO website for FAQs, product information, and contact forms.
- Direct Contact: Refer to the contact information provided with your product packaging or on the DOKIO brand store page on Amazon.

Image 8.1: DOKIO customer support is available to assist with product inquiries and issues.
