
1. Introduction
Thank you for choosing the MeLE Overclock X2 N95 Mini PC. This ultra-compact and high-performance mini computer is designed for various applications, from home entertainment to office productivity and industrial use. This manual will guide you through the setup, operation, and maintenance of your device.
2. Safety Information
- Always use the provided power adapter or a compatible USB-C PD 3.0 power source (12V-20V, 36W+).
- Do not expose the device to water, moisture, or extreme temperatures.
- Avoid dropping or subjecting the device to severe impacts.
- Do not attempt to disassemble or repair the device yourself. Contact MeLE support for assistance.
- Ensure proper ventilation around the device to prevent overheating.
3. Package Contents
Please check the package for the following items:
- MeLE Overclock X2 N95 Mini PC
- Power Adapter (USB-C PD 3.0 compatible)
- HDMI Cable
- User Manual (this document)
- VESA Mount Bracket and Screws
4. Product Overview
The MeLE Overclock X2 N95 Mini PC features a compact design with a variety of ports for connectivity. Below is an illustration of the device and its interfaces.

The device includes:
- Front Panel: Power button, USB 3.0 ports.
- Rear Panel: 2x HDMI 2.0 ports, 1x USB-C (full-function), 1x USB 3.0 port, 1x USB 2.0 port, Gigabit Ethernet port, Micro-SD card slot, 3.5mm Audio Jack (Headphone and MIC), Reset (CMOS Reset/BIOS Reset) button.
5. Setup
5.1 Connecting to a Display
Connect your monitor or TV to the Mini PC using an HDMI cable. The device supports dual display output via its two HDMI 2.0 ports. Additionally, the full-function USB-C port supports 4K video output.
5.2 Connecting Peripherals
Connect your keyboard, mouse, and other USB devices to the available USB 2.0 and USB 3.0 ports. The USB-C port also supports data transfer for compatible devices.
5.3 Powering On the Device
Connect the provided USB-C power adapter to the USB-C port on the Mini PC and then plug the adapter into a power outlet. Press the power button on the front panel to turn on the device. The USB-C port supports Power Delivery (PD 3.0) and can be powered by various sources (12V-20V, 36W+).

5.4 VESA Mounting
The MeLE Overclock X2 N95 Mini PC supports VESA mounting, allowing you to attach it to the back of a compatible monitor or TV. Use the included VESA mount bracket and screws. Supported VESA patterns include 70mm, 75mm, 80mm, 85mm, and 100mm.

6. Operating Instructions
6.1 Initial Boot and Operating System
Upon first power-on, the device will guide you through the operating system setup. The MeLE Overclock X2 N95 supports Windows 11 Pro, Windows 10 Pro, Linux, Ubuntu, and Debian. Follow the on-screen instructions to complete the OS configuration.
6.2 Storage Expansion
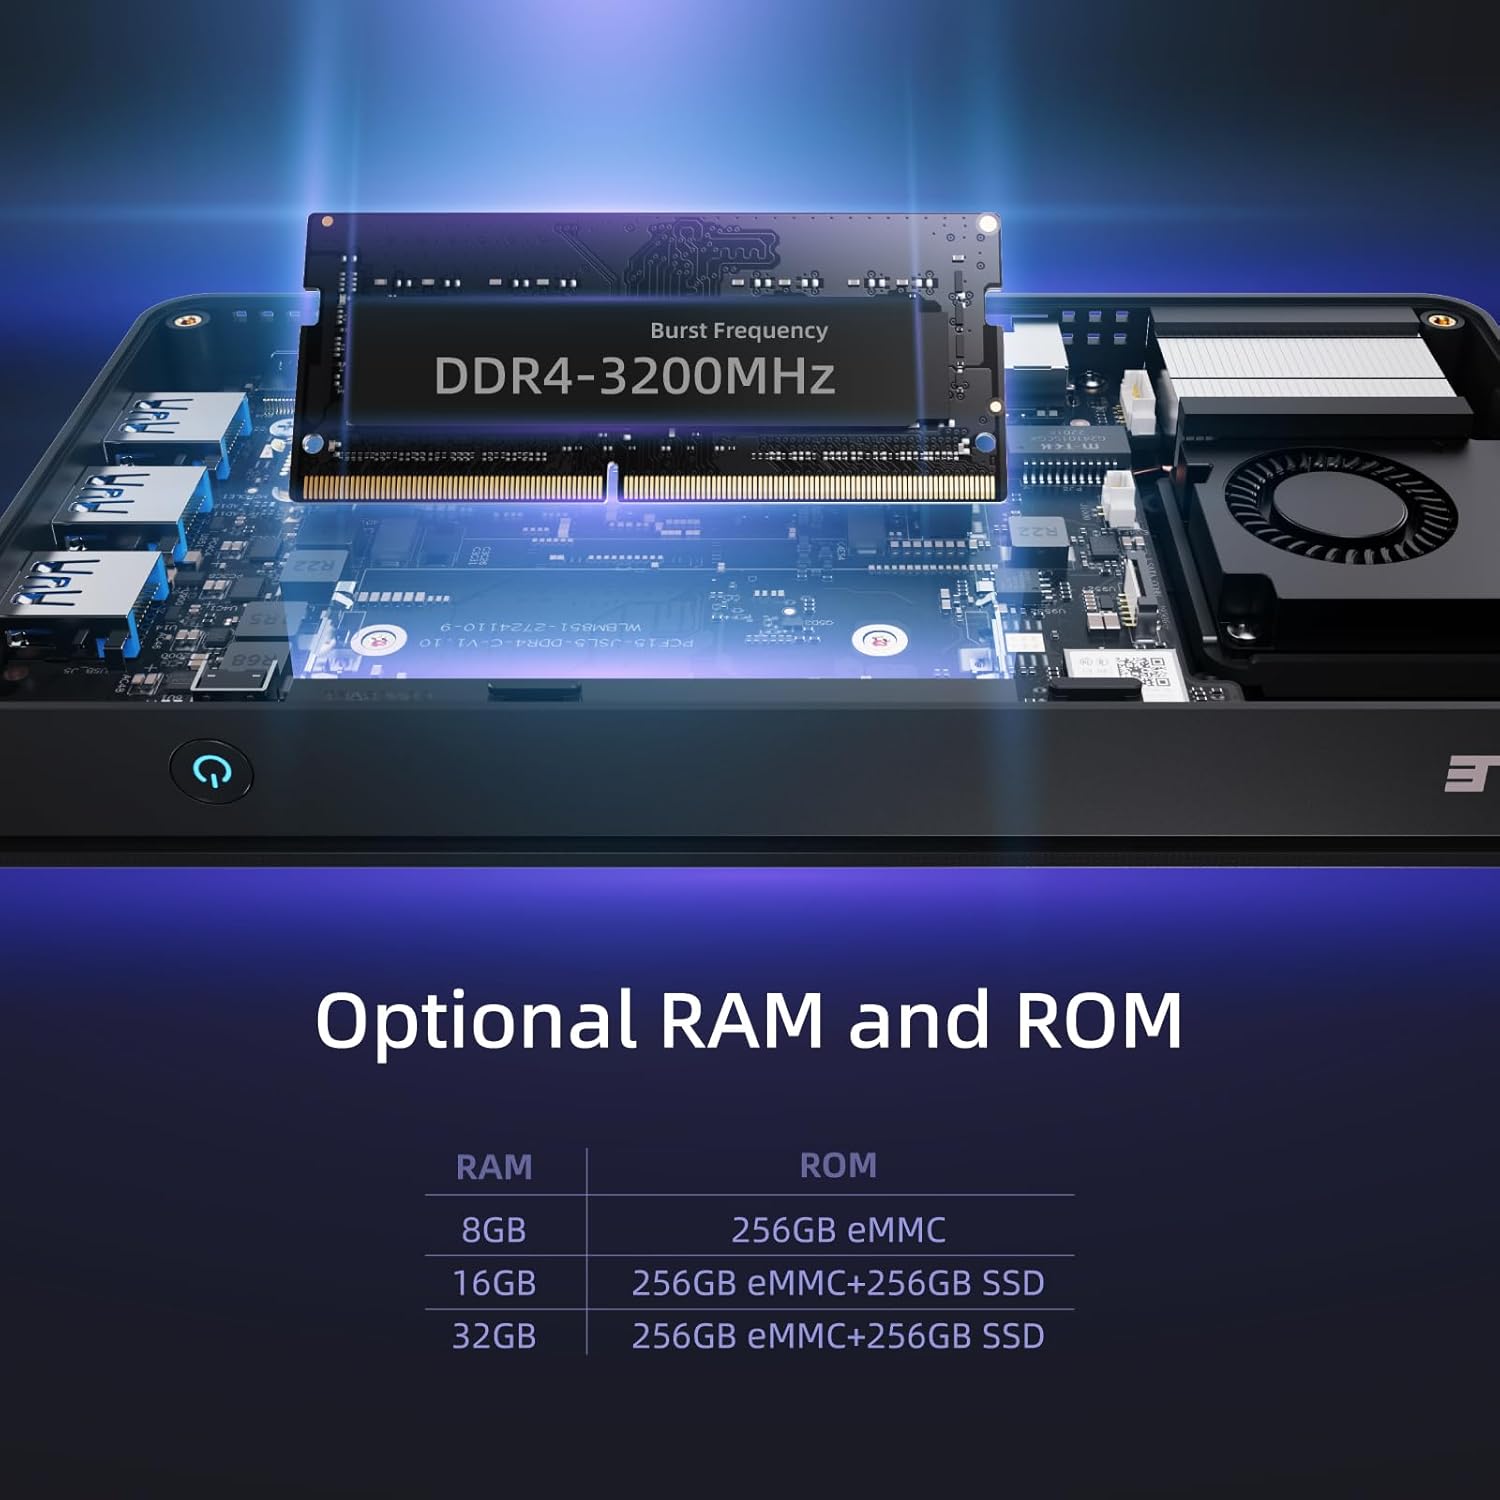
The Mini PC comes with 512GB of storage. You can expand the storage capacity using the following methods:
- Micro SD Card: Insert a Micro SD card into the dedicated slot. The device supports up to 2TB Micro SD cards.
- M.2 2280 SSD: The device features an internal M.2 2280 slot that supports both NVMe and SATA SSDs, with support for up to 4TB. This allows for significant storage upgrades.

6.3 RAM Configuration
The MeLE Overclock X2 N95 is equipped with 32GB of high-speed DDR4 RAM (up to 3200MHz). While the RAM is not user-upgradable in this model, other configurations may be available.
7. Maintenance
7.1 Cleaning
To maintain optimal performance, regularly clean the exterior of the Mini PC with a soft, dry cloth. Avoid using liquid cleaners or abrasive materials. As this is a fanless design, internal dust accumulation is minimized, but ensure the ventilation grilles are clear of obstructions.
7.2 Software Updates
Keep your operating system and drivers updated to ensure system stability and security. Refer to your operating system's documentation for instructions on checking and installing updates.
7.3 Thermal Management
The MeLE Overclock X2 N95 features an ultra-thin body with excellent thermal management, designed for stable and reliable performance. Ensure the device is placed in an area with adequate airflow and not covered by other objects.

8. Troubleshooting
8.1 No Power
- Ensure the USB-C power adapter is securely connected to both the Mini PC and a working power outlet.
- Verify the power outlet is functional by plugging in another device.
- Confirm the power adapter meets the specifications (12V-20V, 36W+).
8.2 No Display Output
- Check that the HDMI or USB-C display cable is firmly connected to both the Mini PC and the monitor.
- Ensure the monitor is powered on and set to the correct input source.
- Try a different display cable or monitor to rule out faulty equipment.
8.3 Peripherals Not Working
- Ensure USB devices are properly connected to the correct ports.
- Try connecting the peripheral to a different USB port.
- Check if the peripheral requires specific drivers and install them if necessary.
8.4 System Instability or Freezing
- Ensure the operating system and drivers are up to date.
- Check for any background applications consuming excessive resources.
- If issues persist, consider performing a system restore or reinstalling the operating system.
8.5 CMOS/BIOS Reset
If you encounter issues related to BIOS settings or system boot, you can perform a CMOS/BIOS reset. Locate the small reset button on the rear panel (often labeled 'Reset' or 'CMOS Reset') and press it with a thin, non-metallic object (like a paperclip) while the device is powered off.
9. Specifications
Below are the technical specifications for the MeLE Overclock X2 N95 Mini PC (32GB RAM / 512GB Storage variant):
| Feature | Specification |
|---|---|
| Brand | MeLE |
| Model Name | Overclock X2 N95 |
| CPU Model | Intel Celeron N95 (12th Gen, Quad Core) |
| CPU Speed | Up to 3.4 GHz |
| RAM | 32 GB DDR4 (3200 MHz) |
| Storage | 512 GB SSD (expandable via Micro SD up to 2TB, M.2 2280 SSD up to 4TB) |
| Operating System | Supports Windows 11 Pro, Windows 10 Pro, Linux, Ubuntu, Debian |
| Graphics Coprocessor | Integrated Graphics |
| Video Output | 2x HDMI, 1x USB-C (4K display support) |
| Max Display Resolution | 3840 x 2160 (4K) |
| USB Ports | 2x USB 3.0, 1x USB 2.0, 1x USB-C (full-function) |
| Connectivity | Gigabit Ethernet, WiFi6, Bluetooth 5.2 |
| Power Input | USB-C PD 3.0 (12V-20V, 36W+) |
| Dimensions | Approx. 178 x 93.5 x 21 mm |
| VESA Support | 70mm, 75mm, 80mm, 85mm, 100mm |
10. Warranty and Support
10.1 Warranty Information
The MeLE Overclock X2 N95 Mini PC comes with a 12-month warranty and 12-month free replacement service for manufacturing defects. MeLE is committed to providing lifetime service for its products.
10.2 Technical Support
For technical assistance, troubleshooting, or any product-related inquiries, please contact MeLE support:
- Email: Service@mele.cn
- MeLE offers lifetime technical support to ensure your satisfaction.


