1. Product Overview
The maXpeedingrods 5000 lbs Rear Air Suspension Bags Kit is designed to enhance the stability and comfort of your vehicle's rear suspension. This kit provides up to 5,000 pounds of load leveling capability, improving handling during hauling and towing by reducing squat, minimizing trailer sway, and preventing bottoming out. The air springs are adjustable from 5 to 100 PSI, allowing for customization based on road conditions and load requirements.
Constructed with multi-ply natural rubber and high-strength ST12 steel end caps, the air springs offer enhanced durability. The mounting brackets are made from Q235 steel, and bolts feature Dacromet anti-rust treatment for long-lasting performance and corrosion resistance.
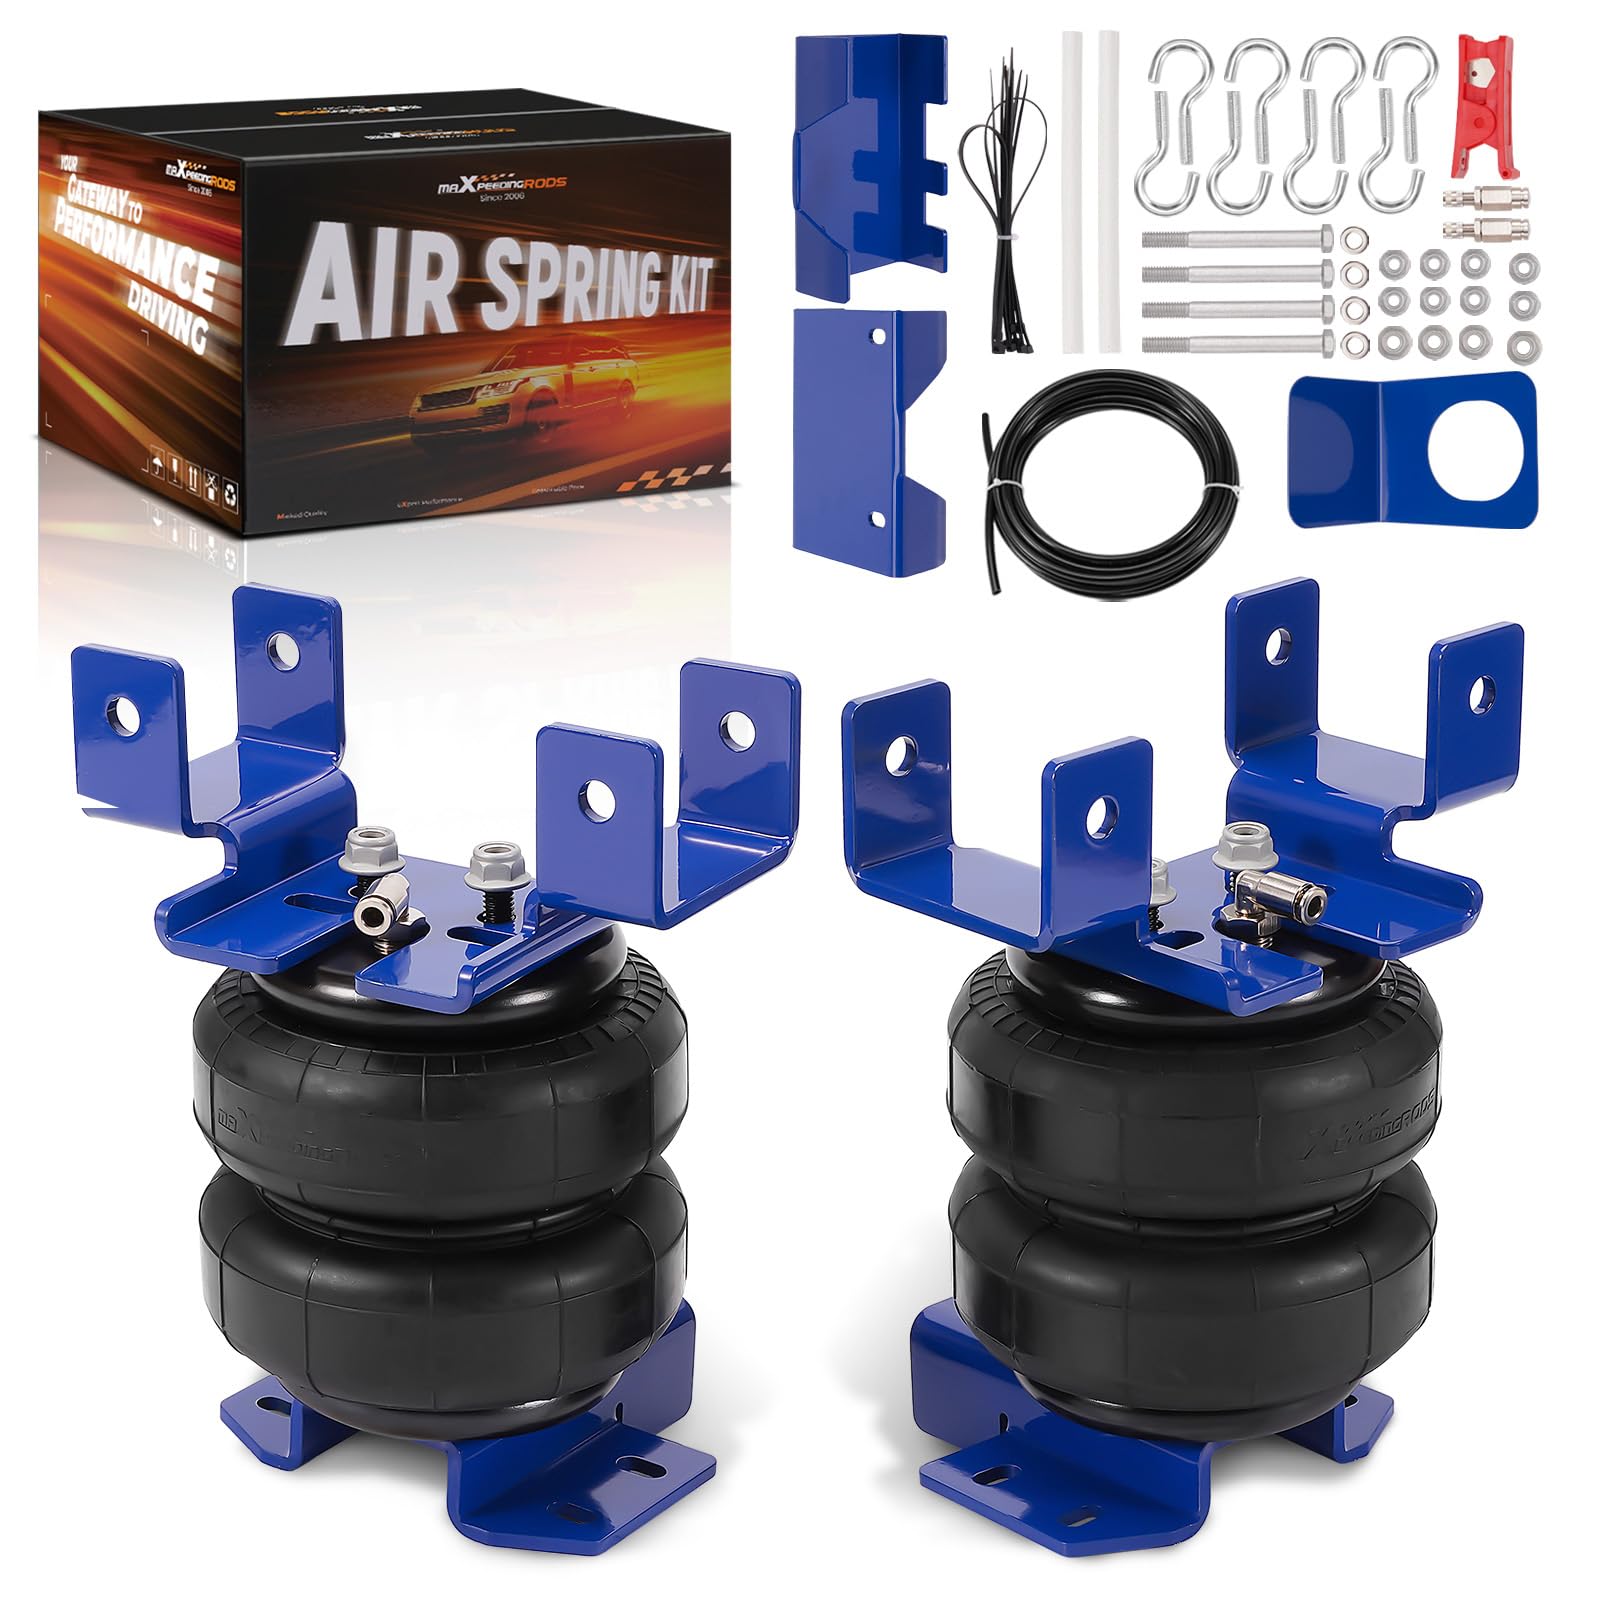
Image 1.1: Overview of the maXpeedingrods air suspension bag and its reliable mounting accessories, including premium Q235 steel brackets and Dacromet anti-rust treated bolts.
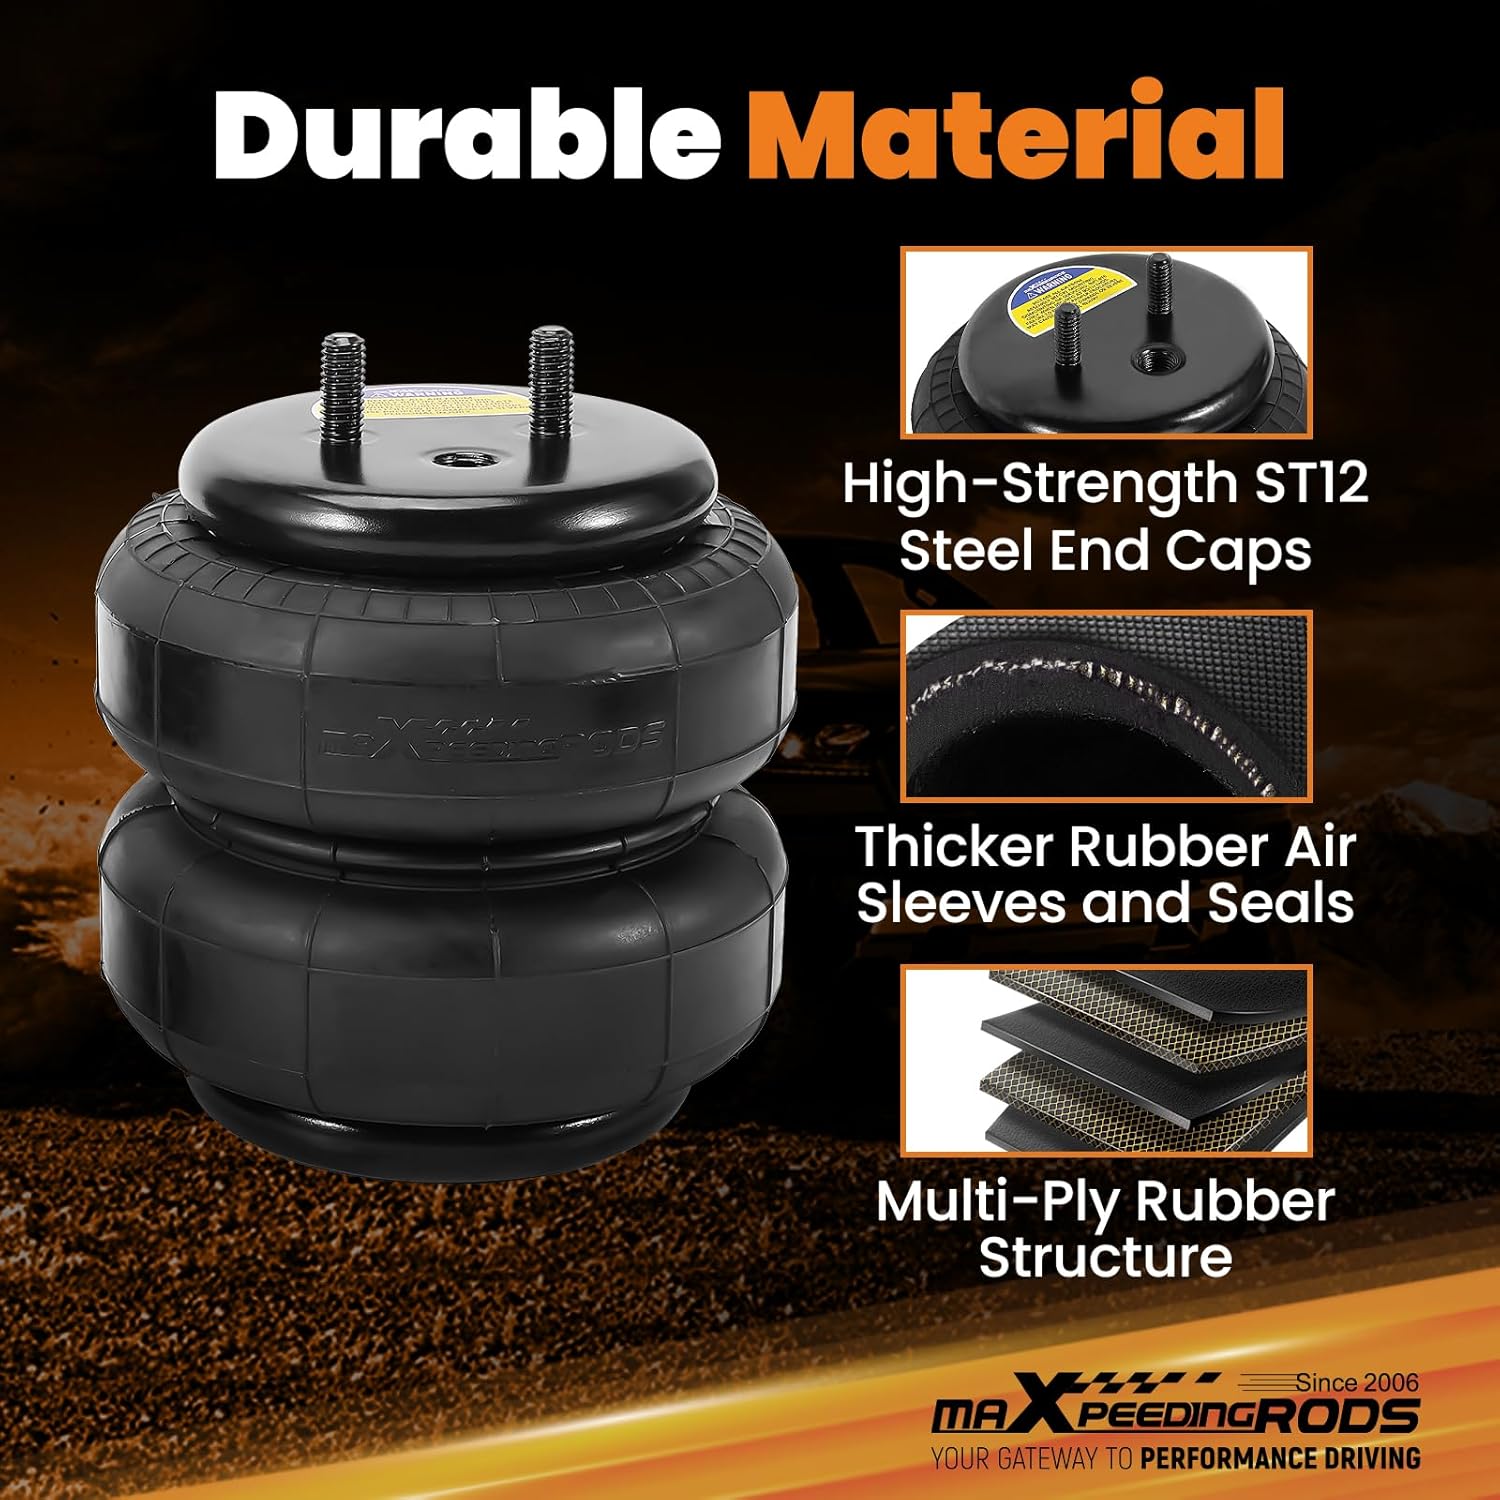
Image 1.2: Detailed view of the air spring's durable construction, highlighting high-strength ST12 steel end caps, thicker rubber air sleeves, and a multi-ply rubber structure for enhanced load support.
2. Vehicle Compatibility
This air suspension kit is compatible with the following vehicle models:
- For Chevrolet Silverado 1500HD (Not Quad-Steer) 2WD, 4WD: 2001-2003, 2005-2006 (Excludes 2004 models)
- For Chevrolet Silverado 2500 (Not HD) 2WD, 4WD: 1999-2005
- For GMC Sierra 1500HD (Not Quad-Steer) 2WD, 4WD: 2001-2003, 2005-2006 (Excludes 2004 models)
- For GMC Sierra 2500 (Not HD) 2WD, 4WD: 1999-2005
Important Note on Modified Vehicles:
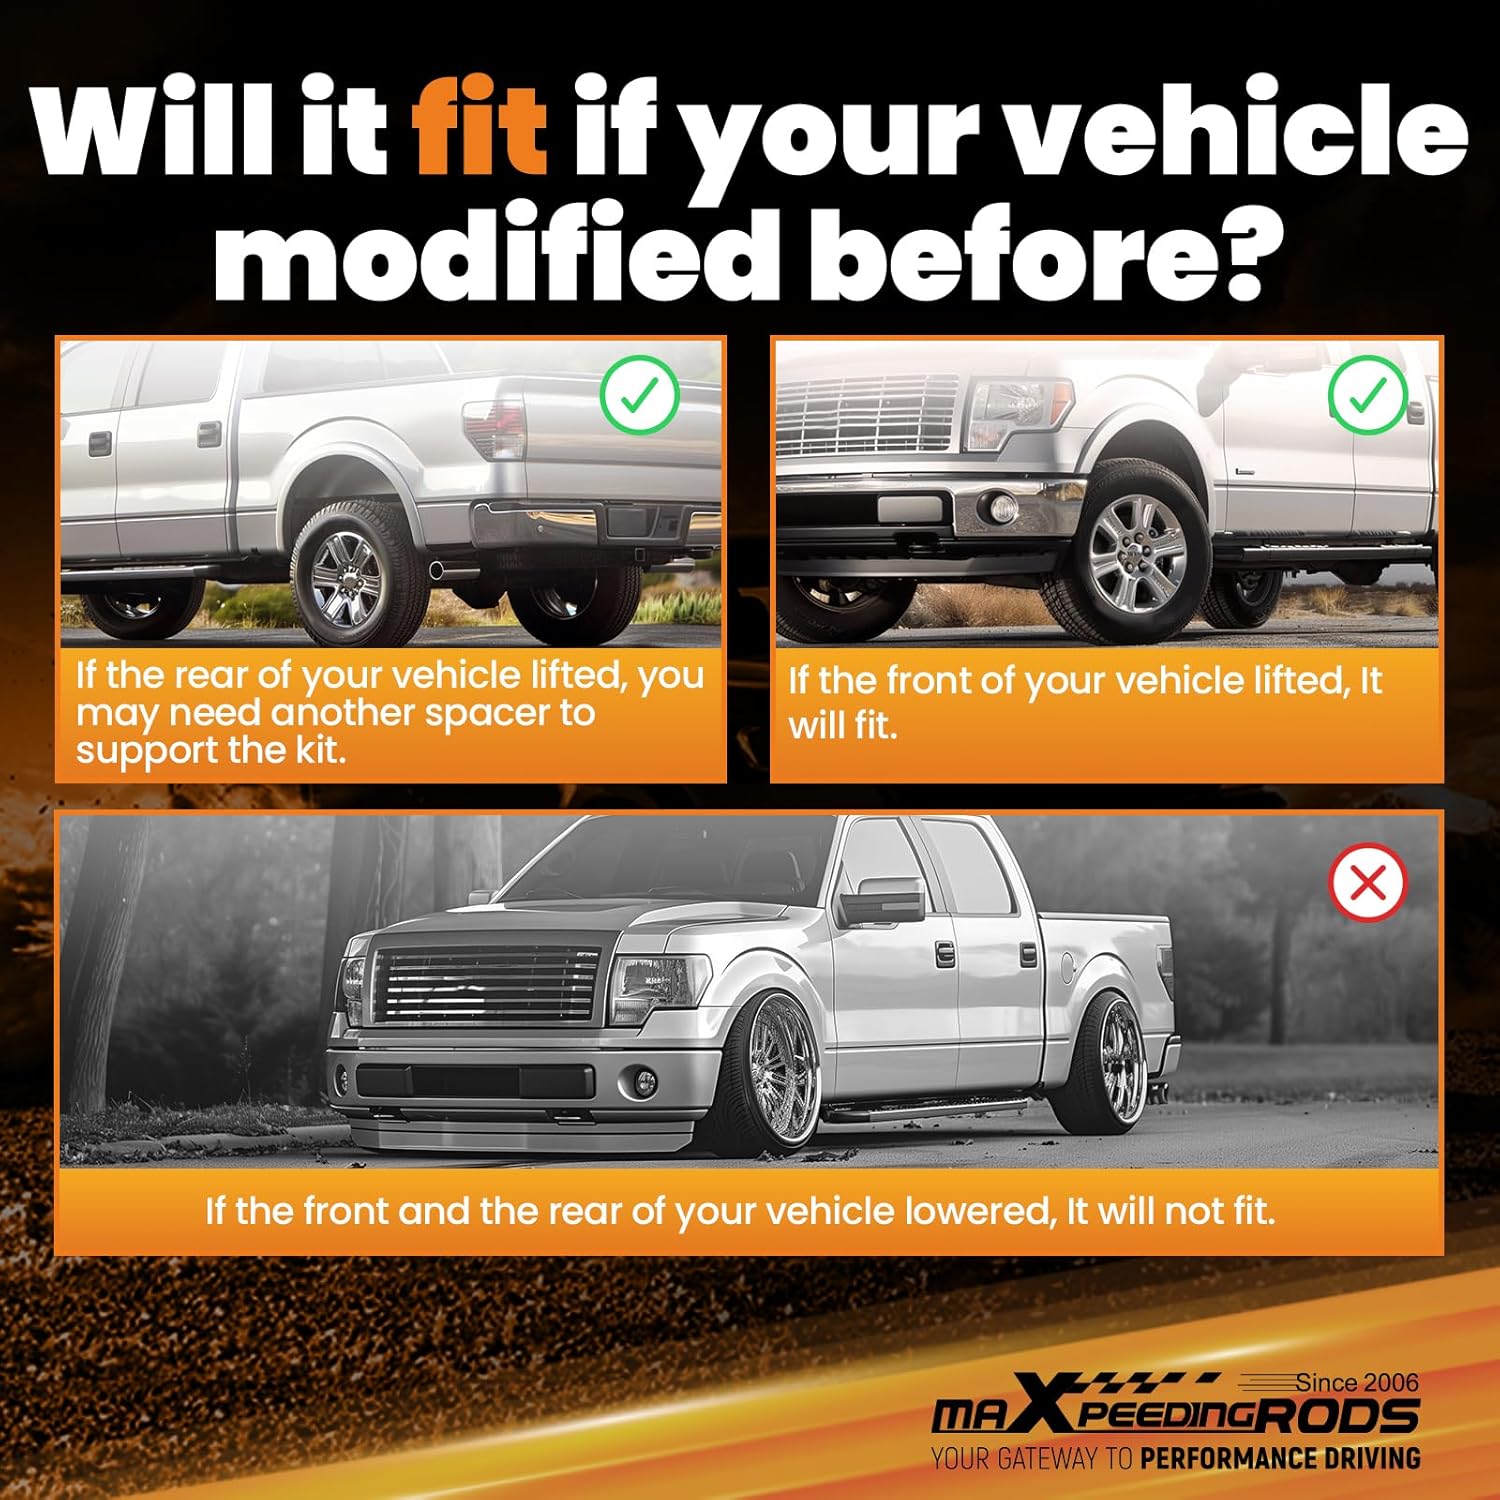
Image 2.1: Visual guide for determining compatibility with modified vehicles. If the rear of your vehicle is lifted, an additional spacer may be required. If only the front is lifted, the kit will fit. If both the front and rear of your vehicle are lowered, this kit will not fit.
- If the rear of your vehicle has been lifted, an additional spacer may be required to properly support the kit.
- If only the front of your vehicle has been lifted, the kit will fit without further modification.
- If both the front and rear of your vehicle have been lowered, this kit is not compatible.
3. Package Contents
Verify that all components listed below are present in your package before beginning installation.

Image 3.1: All components included in the maXpeedingrods air suspension kit, featuring upper and lower mounting brackets, air line, air springs, and various hardware kits.
- 2x Air Ride Suspension Bags
- 4x Upper and Lower Mounting Brackets
- Air Line
- Hardware Kits (Includes all necessary bolts, nuts, washers, and fittings)
4. Technical Specifications
| Feature | Detail |
|---|---|
| Condition | Brand New |
| Drilling Required | No |
| Minimum PSI | 5 PSI |
| Maximum PSI | 100 PSI |
| Placement on Vehicle | Rear left and right |
| Load Capacity | Up to 5000 LBS |
| Air Spring Design Height | 165mm |
| Air Spring Stroke | 205mm |
| Air Spring Max. Extended | 250mm |
| Air Spring Min. Compressed | 45mm |
| End Caps Material | ST12 Steel |
| Mounting Brackets Material | Q235 Steel |
| Bolt Treatment | Dacromet Anti-Rust |
| Product Dimensions | 43.7 x 37.3 x 21.7 cm |
| Product Weight | 13.6 kg |
| Manufacturer Part Number | BP52EU |
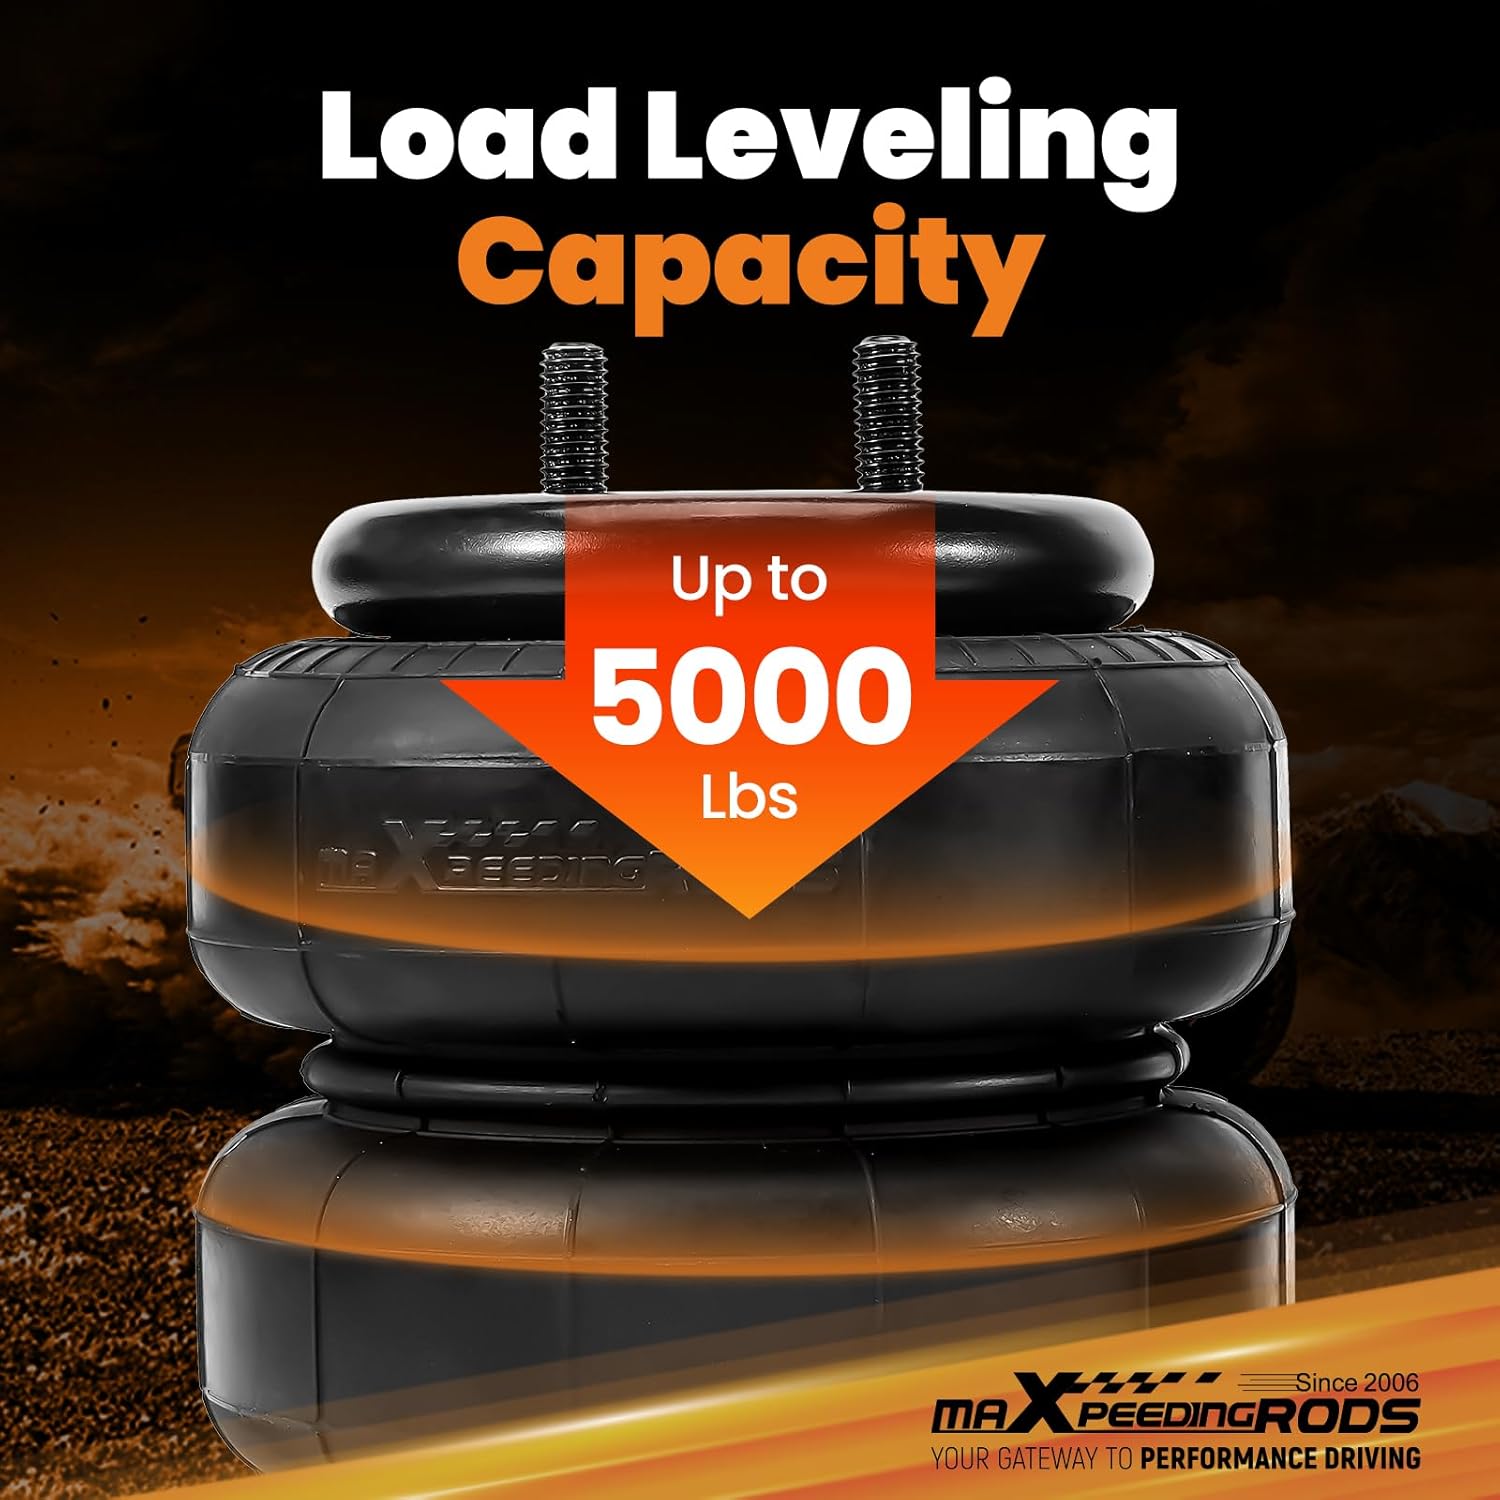
Image 4.1: The air spring highlighting its load leveling capacity of up to 5000 lbs, indicating its ability to support heavy loads and maintain vehicle stability.
5. Setup & Installation
This kit is designed for a bolt-on installation, requiring no drilling for most standard applications. Always ensure the vehicle is safely supported on jack stands or a lift before beginning any work.
5.1 General Installation Steps (Consult a professional if unsure):
- Prepare Vehicle: Park the vehicle on a level surface, engage the parking brake, and block the wheels. Lift the rear of the vehicle and support it securely with jack stands.
- Remove Existing Components: If applicable, remove any existing bump stops or suspension components that interfere with the air bag installation.
- Assemble Air Bags: Attach the upper and lower mounting brackets to the air bags as per the included hardware instructions. Ensure all fasteners are tightened to the manufacturer's specifications.
- Position Air Bags: Place the assembled air bags between the vehicle's frame and axle, aligning them with the designated mounting points.
- Secure Brackets: Bolt the upper and lower brackets to the vehicle's frame and axle using the provided Dacromet anti-rust bolts and hardware. Ensure all connections are secure and torqued correctly.
- Install Air Lines: Route the air lines from the air bags to a convenient inflation point, ensuring they are clear of moving parts, sharp edges, and heat sources. Cut the air lines cleanly and squarely for a tight seal.
- Connect Air Lines: Connect the air lines to the air bags and the inflation valves. Verify all connections are secure and airtight.
- Initial Inflation: Inflate the air bags to approximately 20-30 PSI.
- Check for Leaks: Perform a leak test as described in the Maintenance section.
- Lower Vehicle: Once installation is complete and leaks are verified, carefully lower the vehicle.

Image 5.1: Illustration of the bolt-on installation process, showing the air spring securely mounted between the vehicle's frame and leaf spring assembly.
6. Operation
The maXpeedingrods air suspension kit allows you to adjust the air pressure to optimize your vehicle's ride height and load support.
- Minimum Air Pressure: Always maintain a minimum of 5 PSI in the air bags to prevent damage to the internal components.
- Maximum Air Pressure: Do not exceed 100 PSI. Over-inflation can lead to premature wear or failure of the air bags.
- Adjusting Pressure: Adjust the air pressure based on the load being carried and desired ride characteristics. Higher loads typically require higher air pressure to maintain a level stance and optimal handling. Lower loads or an unloaded vehicle will require less pressure for a comfortable ride.
- Monitoring: Regularly check the air pressure, especially before and during long trips or when carrying varying loads.
7. Maintenance
Proper maintenance ensures the longevity and optimal performance of your air suspension kit.
7.1 Regular Checks:
- Inspect air lines for kinks, chafing, or damage.
- Check air bags for any signs of wear, cracks, or punctures.
- Ensure all mounting hardware remains tight.
- Verify air pressure regularly.
7.2 Preventing Leaks:
Leaks are often caused by improper installation. Follow these guidelines to prevent them:
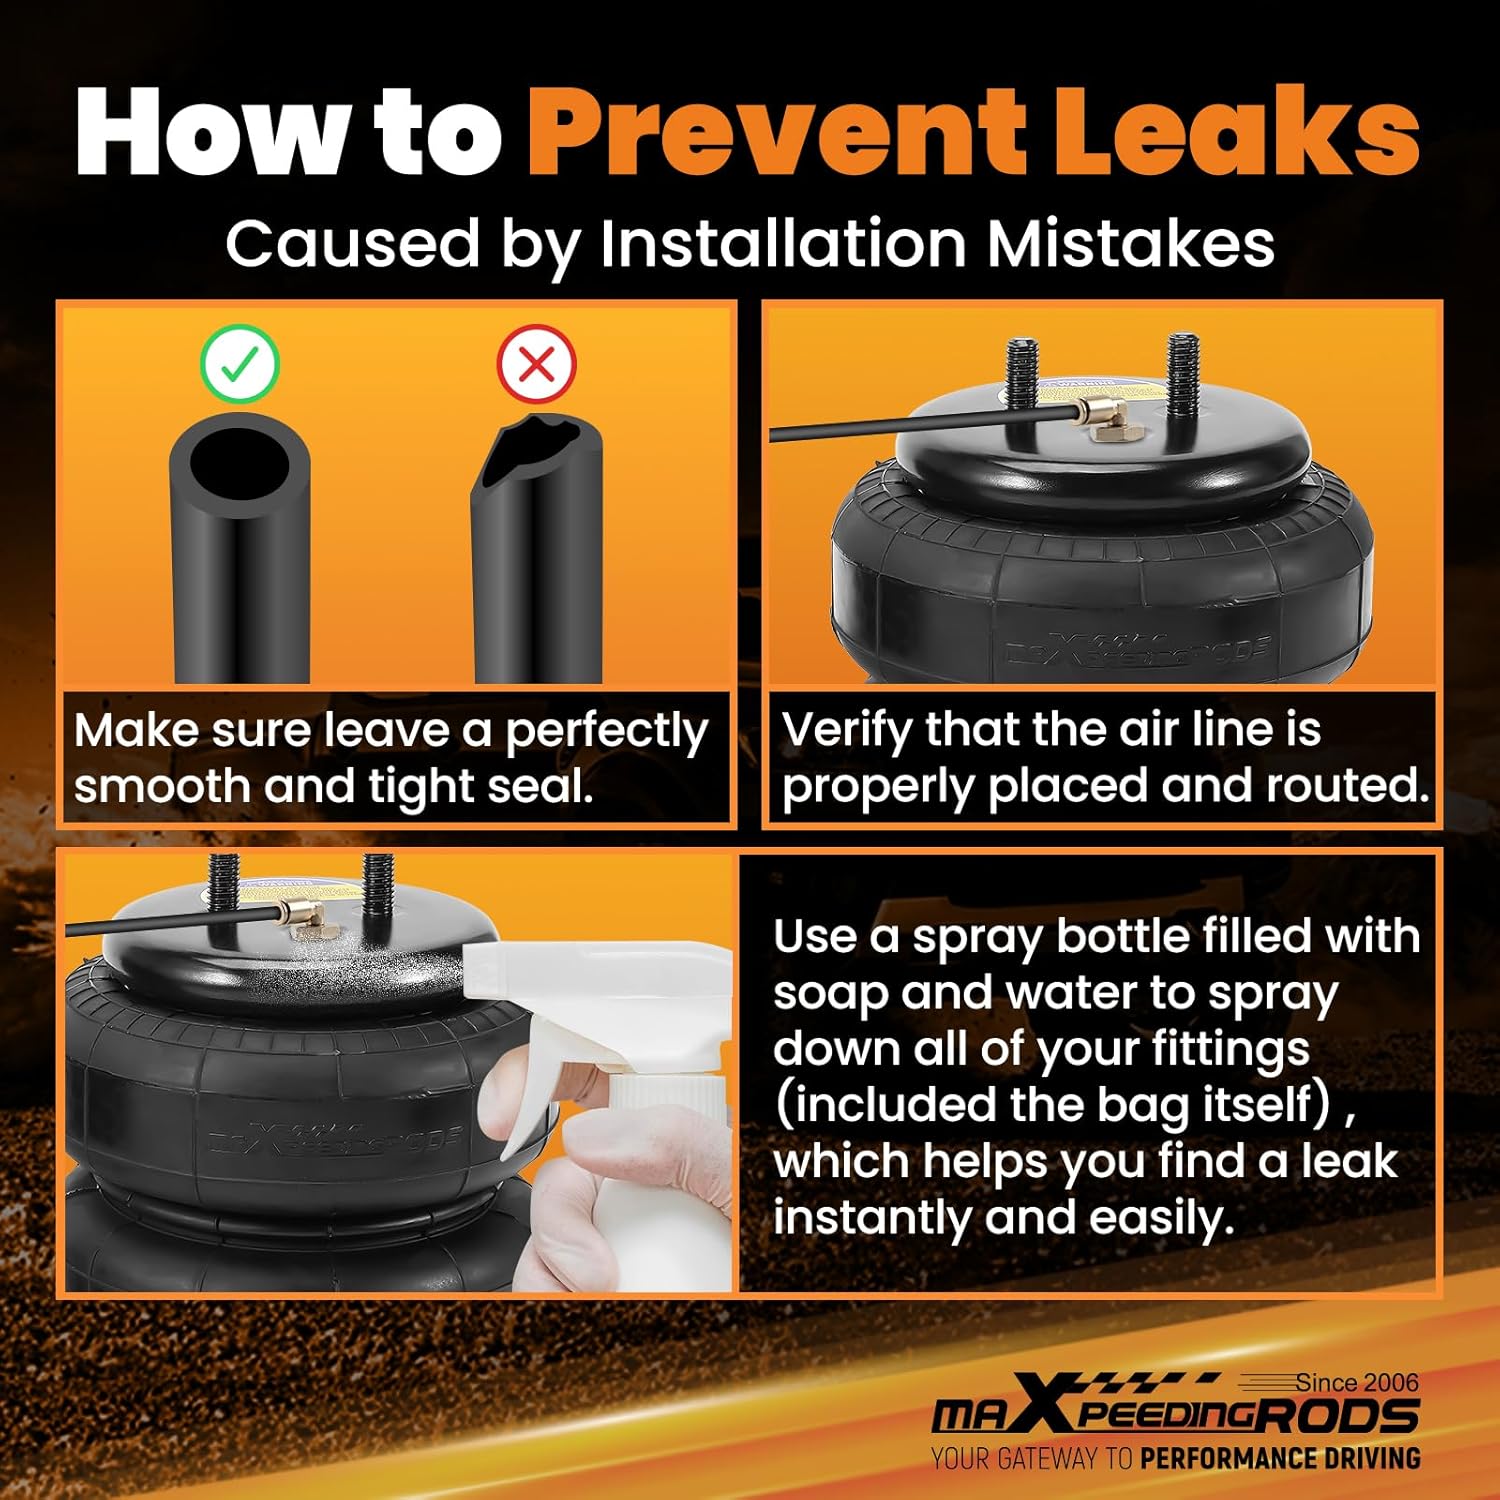
Image 7.1: Instructions on how to prevent leaks. Ensure air lines are cut perfectly smooth and tight for a proper seal. Verify that the air line is correctly placed and routed. Use a soap and water solution to spray all fittings and the bag itself to easily detect leaks.
- Clean Cuts: When cutting air lines, ensure the cut is perfectly smooth and square to create a tight seal with fittings. Uneven cuts can lead to leaks.
- Proper Routing: Verify that the air line is properly placed and routed, avoiding sharp bends or areas where it could be pinched or abraded.
- Leak Detection: To check for leaks, fill a spray bottle with a mixture of soap and water. Spray all fittings, connections, and the air bag itself. Bubbles will indicate a leak. Address any leaks immediately.
8. Troubleshooting
This section addresses common issues you might encounter with your air suspension kit.
8.1 Air Bag Not Holding Pressure:
- Check for Leaks: Perform a thorough leak test using the soap and water method described in the Maintenance section. Pay close attention to all fittings, the air line, and the air bag surface.
- Inspect Air Line: Look for kinks, cuts, or punctures in the air line. Replace damaged sections.
- Verify Connections: Ensure all air line connections are fully seated and tightened.
- Valve Stem Issues: Check the inflation valve stem for damage or debris that might prevent a proper seal.
8.2 Uneven Ride Height:
- Check Individual Air Pressures: Ensure both air bags are inflated to the same pressure, or adjusted appropriately for uneven loads.
- Inspect for Obstructions: Verify that nothing is interfering with the movement of one side of the suspension.
- Re-check Installation: Confirm that both air bags are installed correctly and symmetrically.
8.3 Excessive Sway or Rough Ride:
- Adjust Air Pressure: Increase air pressure for heavier loads to reduce sway. For an unloaded vehicle, reduce pressure to improve ride comfort.
- Check Load Distribution: Ensure the load in your vehicle or trailer is evenly distributed.
9. Warranty & Support
For specific warranty information regarding your maXpeedingrods air suspension kit, please refer to the documentation included with your purchase or contact maXpeedingrods directly through their official website or authorized retailers.
If you require technical assistance, have questions about installation, or need to report a defective part, please contact the seller or maXpeedingrods customer support. Provide your product model number (BP52EU) and purchase details for faster service.


