1. Safety Information
Please read this manual thoroughly before operating your iScooter X02 Pro Mobility Scooter. Failure to follow instructions and safety warnings may result in injury or damage to the scooter. Always operate the scooter responsibly and within its specified limits.
- Ensure the battery is fully charged before first use.
- Do not exceed the maximum weight capacity of 300 lbs.
- Always use the scooter on appropriate terrains as specified.
- Engage the automatic braking system by releasing the forward control to stop.
- Utilize headlights and reflective strips for visibility in low-light conditions.
- Familiarize yourself with all controls before operating in public areas.
2. Product Overview
The iScooter X02 Pro is a 4-wheel electric mobility scooter designed for seniors and adults, offering enhanced independence and convenience. It features intuitive controls, a long-range removable battery, and a foldable design for easy transport.
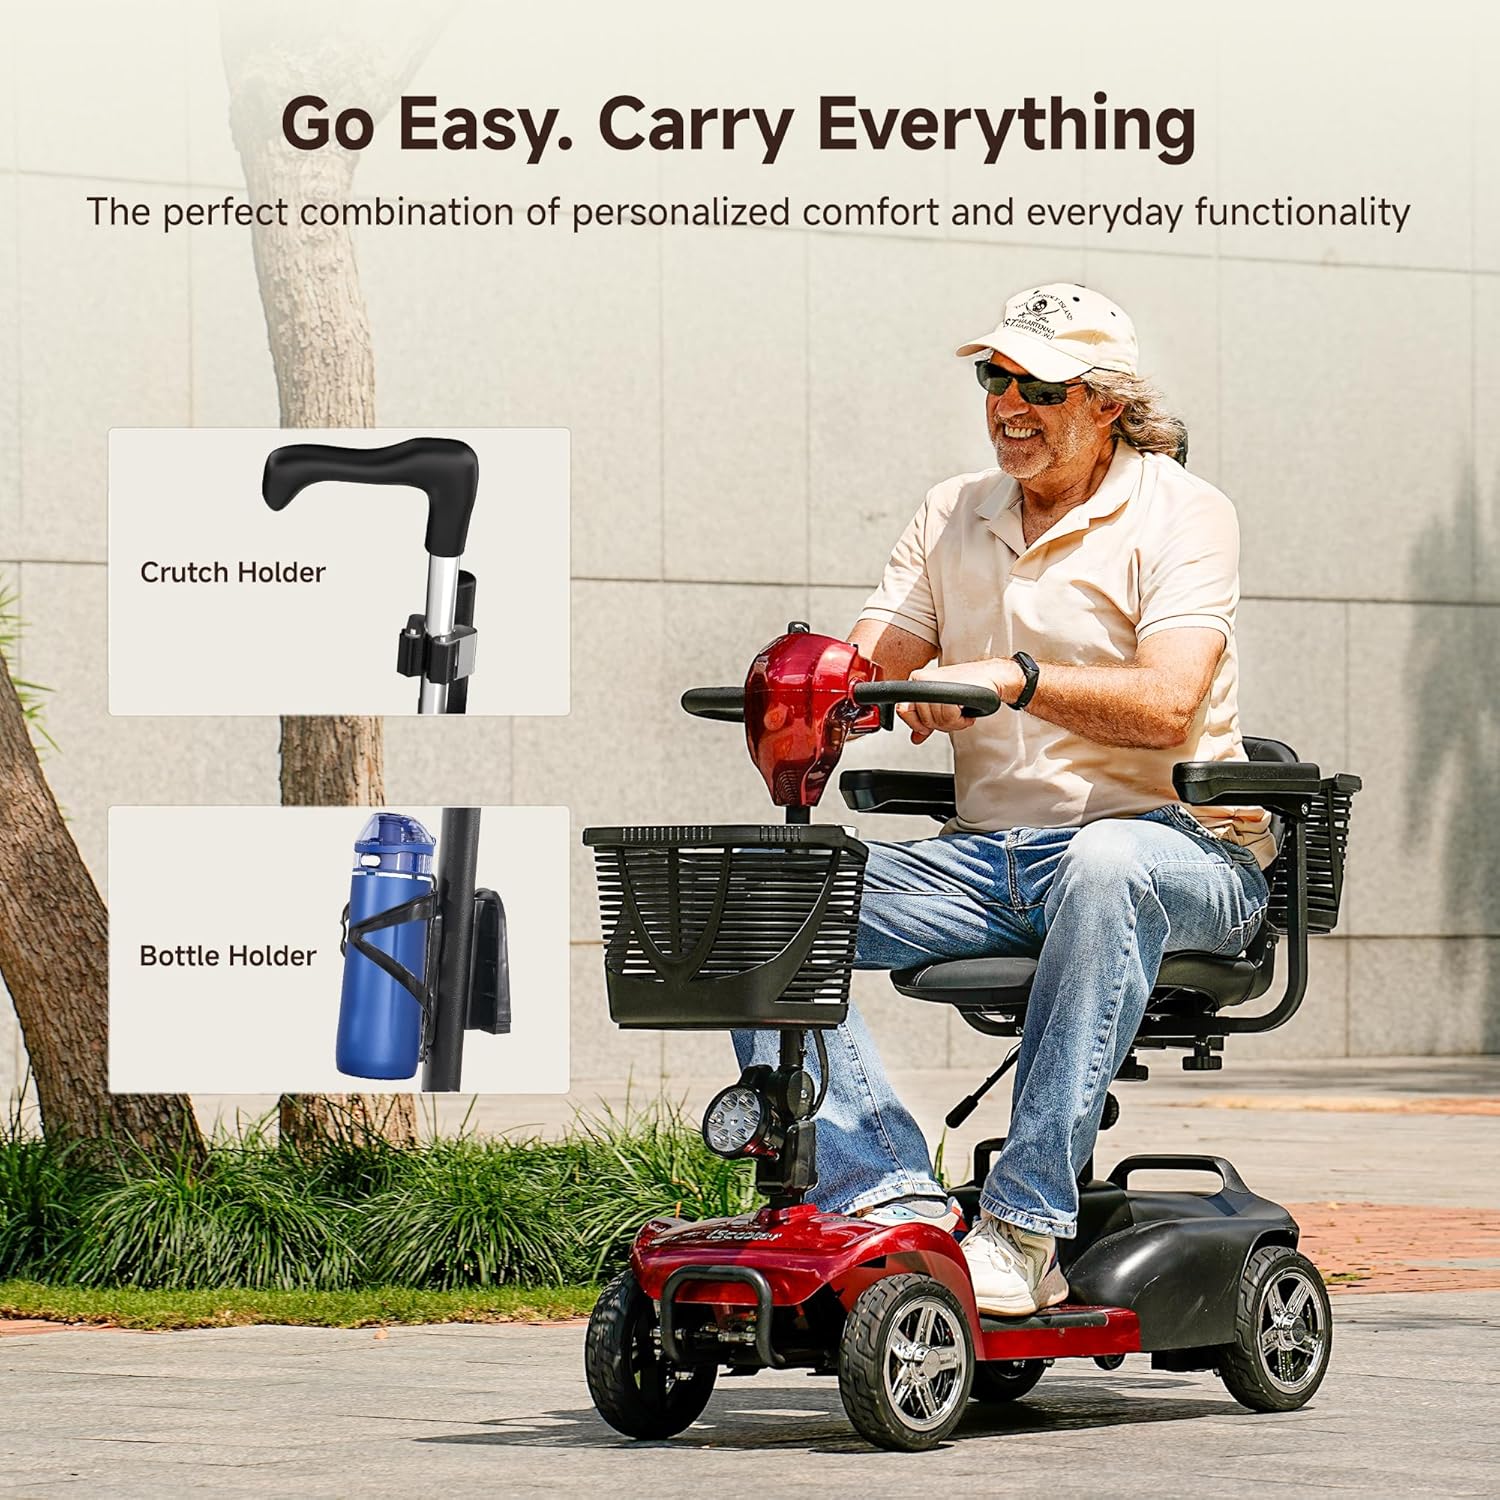
Figure 2.1: Overall view of the iScooter X02 Pro Mobility Scooter in red.
Key Features:
- Intuitive Control Panel with adjustable speed (0-6.2 MPH).
- Automatic Braking Function for safe stops.
- Removable Battery for flexible charging and extended range (20 miles per battery).
- Dual Baskets (front and rear) and fixed cup holder for storage.
- Fixed Crutch Holder for walking aids.
- 9" Solid Tires suitable for various terrains.
- Adjustable Handlebar, 360-degree rotatable and height-adjustable padded seat, foldable handrails.
- Foldable Design for easy transport and storage.
- Front bumper, rear anti-tip wheels, headlights, and reverse warning bell for safety.
3. Setup & Assembly
The iScooter X02 Pro is designed for straightforward assembly. Follow these steps carefully.
3.1 Unboxing and Initial Setup
Video 3.1: Unboxing the iScooter X02 Pro Mobility Scooter. This video demonstrates the unboxing process and initial components of the scooter.
Carefully remove all components from the packaging. Inspect for any damage. Ensure all parts listed in the packing list are present.
3.2 Handlebar/Tiller Assembly
Video 3.2: How to Install the X02 Pro Mobility Scooter. This video provides detailed steps for assembling the scooter, including the handlebar/tiller.
Lift the handlebar/tiller into the upright position. Secure it using the provided knob, ensuring it is tightened to prevent movement during operation. Adjust the angle to your preferred driving position.
3.3 Seat Assembly
Attach the seat base to the seat post. Ensure the lever on the seat base is facing the rear of the scooter. Secure the seat with the provided screws and Allen tool. Insert the assembled seat onto the main scooter body, ensuring it clicks into place. Adjust the seat height and rotate it 360 degrees for comfortable entry and exit.
3.4 Armrest Installation
Slide the armrests into their designated slots on the seat. Adjust them to your preferred width and height for optimal comfort and support. Secure them with the provided knobs.
3.5 Basket and Accessory Installation

Figure 3.1: Rear basket and crutch holder for the iScooter X02 Pro.
Attach the front basket to the tiller. Install the rear basket onto the back of the seat. Secure the fixed cup holder and crutch holder to the tiller as shown in the diagrams.
3.6 Battery Installation
Locate the battery compartment. Insert the removable battery, ensuring it is securely connected. The battery can be charged directly on the scooter or removed for separate charging.
4. Operating Instructions
Familiarize yourself with the control panel and operating procedures before your first ride.

Figure 4.1: Detailed view of the iScooter X02 Pro control panel.
4.1 Powering On/Off
- Insert the key into the ignition and turn it to the 'ON' position to power on the scooter.
- Turn the key to the 'OFF' position to power off the scooter.
4.2 Speed Control
- Use the speed regulation dial on the control panel to adjust your desired speed from 0 to 6.2 MPH.
4.3 Driving (Forward/Reverse)
- To move forward, gently pull the right throttle control lever towards you.
- To move in reverse, gently pull the left throttle control lever towards you. A reverse warning bell will sound.
4.4 Braking
- The scooter features an automatic braking function. Simply release the throttle control lever to bring the scooter to a smooth stop.
4.5 Freewheel Mode

Figure 4.2: Switchable drive modes, including freewheel mode, for the iScooter X02 Pro.
- To manually push the scooter, engage the freewheel mode by moving the yellow lever located near the rear wheel. This disengages the motor.
- To return to electric drive mode, push the lever back to its original position.
4.6 Headlights and Horn
- Press the red button on the control panel to turn the LED headlight on or off.
- Press the green button to activate the horn.
5. Battery & Charging
Proper battery care ensures optimal performance and longevity.

Figure 5.1: The iScooter X02 Pro battery can be charged directly on the scooter or removed.
5.1 Charging Methods
- On-board Charging: Plug the charger directly into the charging port on the scooter.
- Off-board Charging: Remove the battery from the scooter and connect it to the charger separately.
5.2 Initial Charge
Fully charge the battery before its first use to ensure optimal performance and battery life.
5.3 Battery Indicator
The control panel features a battery indicator to show the current charge level. Recharge when the indicator shows low battery.
6. Maintenance & Care
Regular maintenance ensures the longevity and safe operation of your scooter.
- Cleaning: Regularly wipe down the scooter with a damp cloth. Avoid using harsh chemicals or abrasive cleaners.
- Tires: The 9" solid tires require minimal maintenance. Periodically check for wear and tear.
- Storage: When not in use, store the scooter in a dry, cool place. If storing for extended periods, ensure the battery is fully charged and periodically recharge it.
- Battery Care: Avoid completely draining the battery. Charge regularly, even if the scooter is not in frequent use.
7. Troubleshooting
If you encounter issues with your scooter, try these basic troubleshooting steps:
- Scooter not powering on: Check if the key is fully inserted and turned to the 'ON' position. Ensure the battery is properly installed and charged.
- Loss of power during operation: The battery may be low. Recharge the battery.
- Scooter not moving: Check if the freewheel mode is disengaged. Ensure the throttle levers are being pulled correctly.
- Unusual noises: Stop the scooter immediately and inspect for any loose parts or obstructions. Contact customer support if the issue persists.
8. Specifications
| Feature | Specification |
|---|---|
| Brand | iScooter |
| Model | X02 Pro |
| Max Weight Capacity | 300 lbs |
| Max Speed | 6.2 MPH |
| Range per Battery | 20 Miles |
| Battery Type | 20Ah Removable Battery |
| Product Dimensions | 19.7"D x 19.7"W x 40"H |
| Material | Aluminum, Plastic, Rubber, Vinyl |
| Tire Type | 9" Solid Tires |
9. Warranty & Support
iScooter prioritizes quality and technical excellence. We offer a warranty on different parts of the scooter.
- Warranty Period: 360-day or 180-day warranty on different parts. Please refer to your purchase documentation for specific details.
- Customer Service: For fast and professional service, please get in touch with us. Your satisfaction is our priority.

Figure 9.1: iScooter customer service is available to assist you.
Contact Information:
- Call Center: +1 (855) 916-2366
- Live Chat/Email: support@iscooterglobal.com


