
1. Introduction
This manual provides detailed instructions for the safe installation, operation, and maintenance of your QICBYING Adjustable Interior Wall Spotlight. Please read this manual thoroughly before installation and retain it for future reference.

Figure 1: QICBYING Adjustable Interior Wall Spotlight (30W, Black) with its long arm design.
2. Safety Information
To ensure safe operation, always follow these precautions:
- Electrical Safety: Ensure the power supply is disconnected before installation, maintenance, or cleaning. Installation should be performed by a qualified electrician if you are unsure.
- Voltage Compatibility: This product is designed for a 220V power supply. Verify your local voltage matches this requirement.
- Heat Warning: Do not touch the bulb or lamp head when the light is on or immediately after it has been turned off, as it may be hot.
- Flammable Materials: Do not place flammable items near the light fixture.
- Eye Protection: Avoid looking directly at the lit bulb to prevent eye strain or damage.
- Assembly: Do not power on the wall lamp before assembly is fully completed and secured.
3. Package Contents
Verify that all components are present and undamaged upon opening the package:
- 1 x Industrial Retro Black Metal Long Arm Wall Lamp (30W, Black)
- Installation Accessories (screws, wall anchors)
- User Manual (this document)
4. Product Specifications
| Feature | Specification |
|---|---|
| Model | TT125885 |
| Brand | QICBYING |
| Power | 30W |
| Voltage | 220V |
| Light Source Type | LED Spotlight (COB light source) |
| Lamp Head Specification | E27 (Note: Integrated LED, E27 refers to the base type for the bulb if replaceable, but product description implies integrated LED. For this model, it's an integrated LED COB light source.) |
| Material | Iron, Aluminum, Ceramic |
| Color | Black |
| Adjustable Angle | 90° up/down, 180° folded |
| Installation Method | Wall Mounting |
| Item Weight | 1000 Grams (2.2 pounds) |
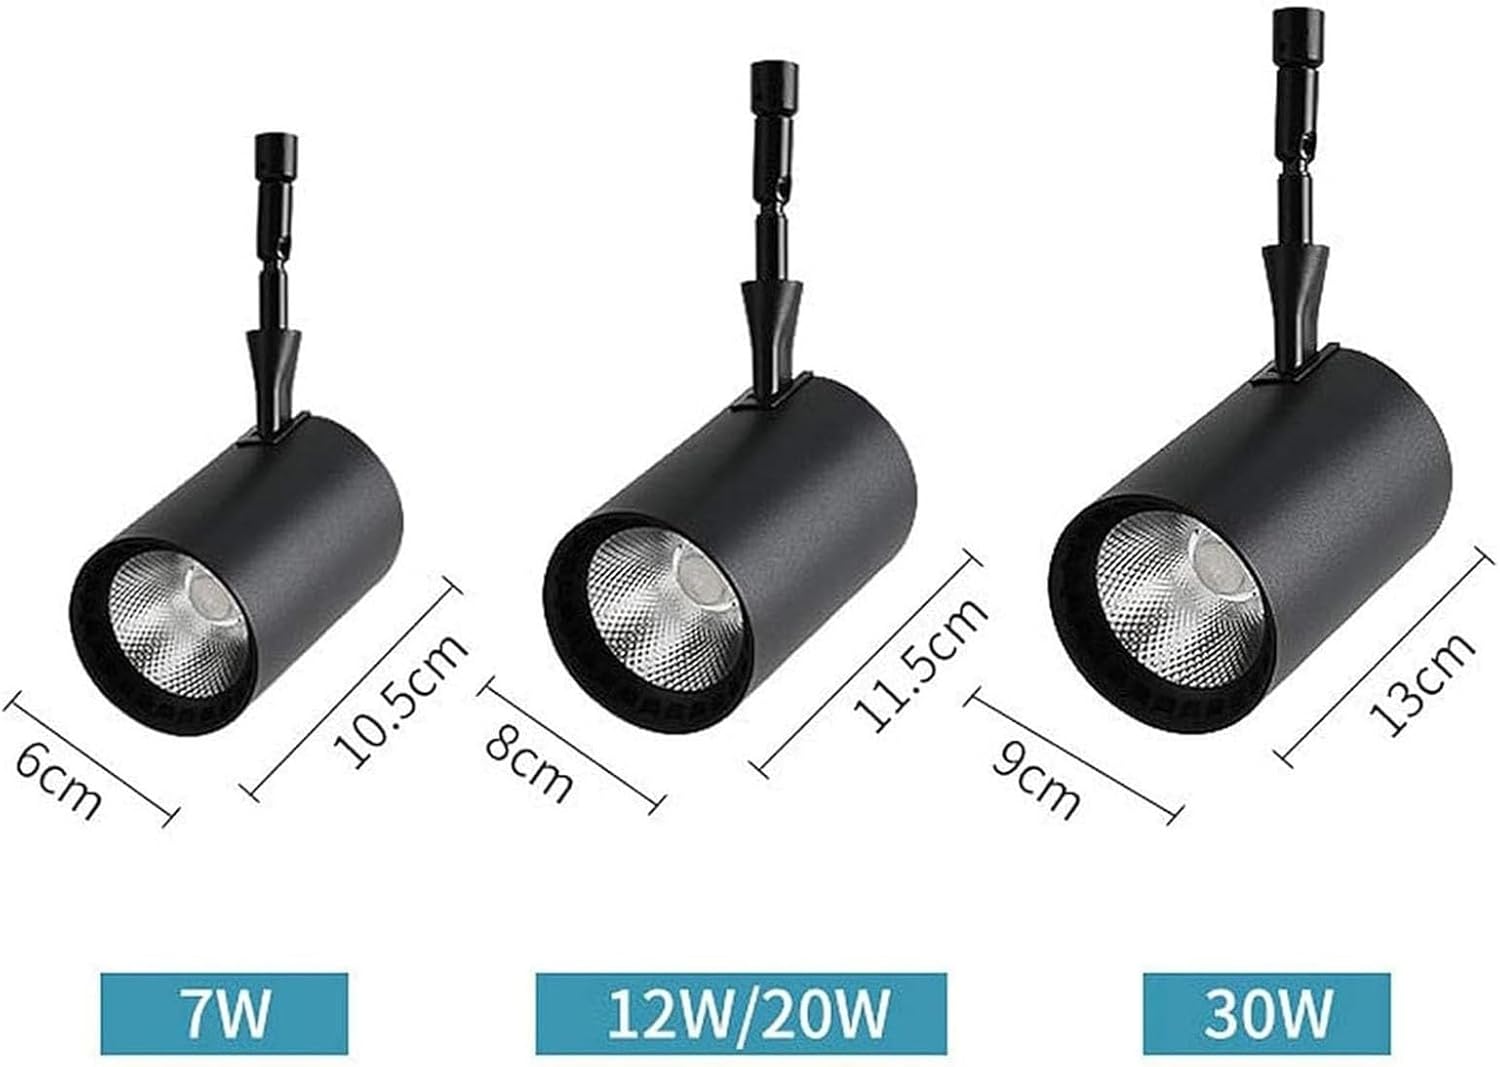
Figure 2: Dimensions for various wattage models. The 30W model has a length of 13cm and a diameter of 9cm.

Figure 3: Detail of the integrated COB (Chip On Board) LED light source, providing bright and efficient illumination.
5. Setup and Installation
Follow these steps for proper installation:
- Preparation:
- Ensure the power supply to the installation area is turned off at the circuit breaker.
- Gather necessary tools: drill, screwdriver, pencil, measuring tape.
- Marking:
- Position the wall lamp's base against the desired wall location.
- Use a pencil to mark the drilling points for the mounting screws.
- Drilling:
- Drill holes at the marked points. Insert wall anchors if required for your wall type.
- Wiring:
- Connect the household electrical wires to the lamp's wires according to local electrical codes (typically live to live, neutral to neutral, ground to ground). Ensure all connections are secure.
- Mounting:
- Align the lamp base with the drilled holes and secure it to the wall using the provided screws.
- Ensure the fixture is firmly attached to the wall.
- Final Check:
- Once securely mounted, restore power at the circuit breaker.
- Test the light fixture to ensure it functions correctly.
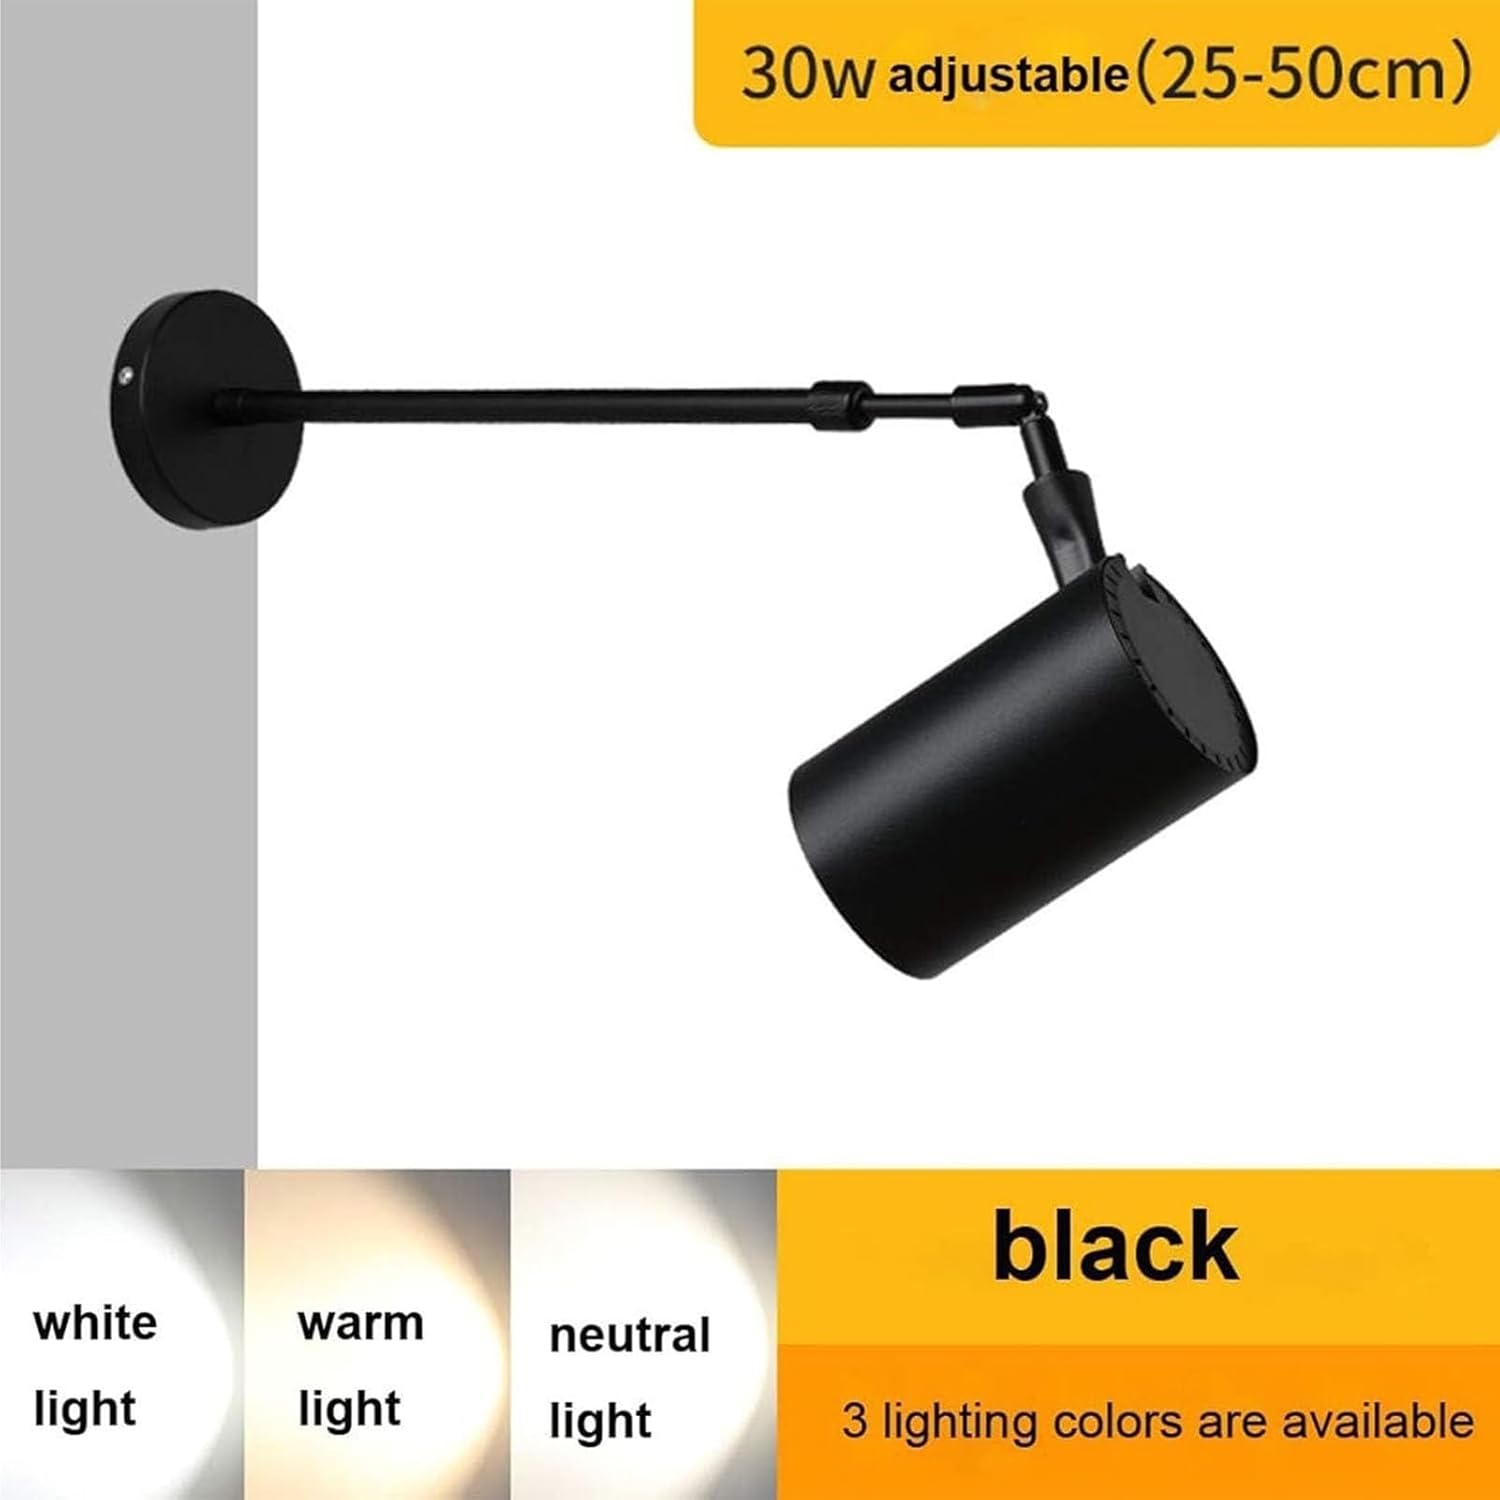
Figure 4: The 30W model offers adjustable light color temperatures (white, warm, neutral) and an adjustable arm length (25-50cm).
6. Operating Instructions
The QICBYING Adjustable Interior Wall Spotlight is designed for ease of use:
- Power On/Off: Operate the spotlight using the wall switch connected to its circuit.
- Adjusting Light Direction: The lamp head can be adjusted 90° up and down, and the arm can be folded 180° to direct light precisely where needed. Gently move the lamp head and arm to the desired position.
- Adjusting Arm Length: The telescopic arm allows for length adjustment between 25cm and 50cm. Carefully extend or retract the arm to achieve the desired projection.
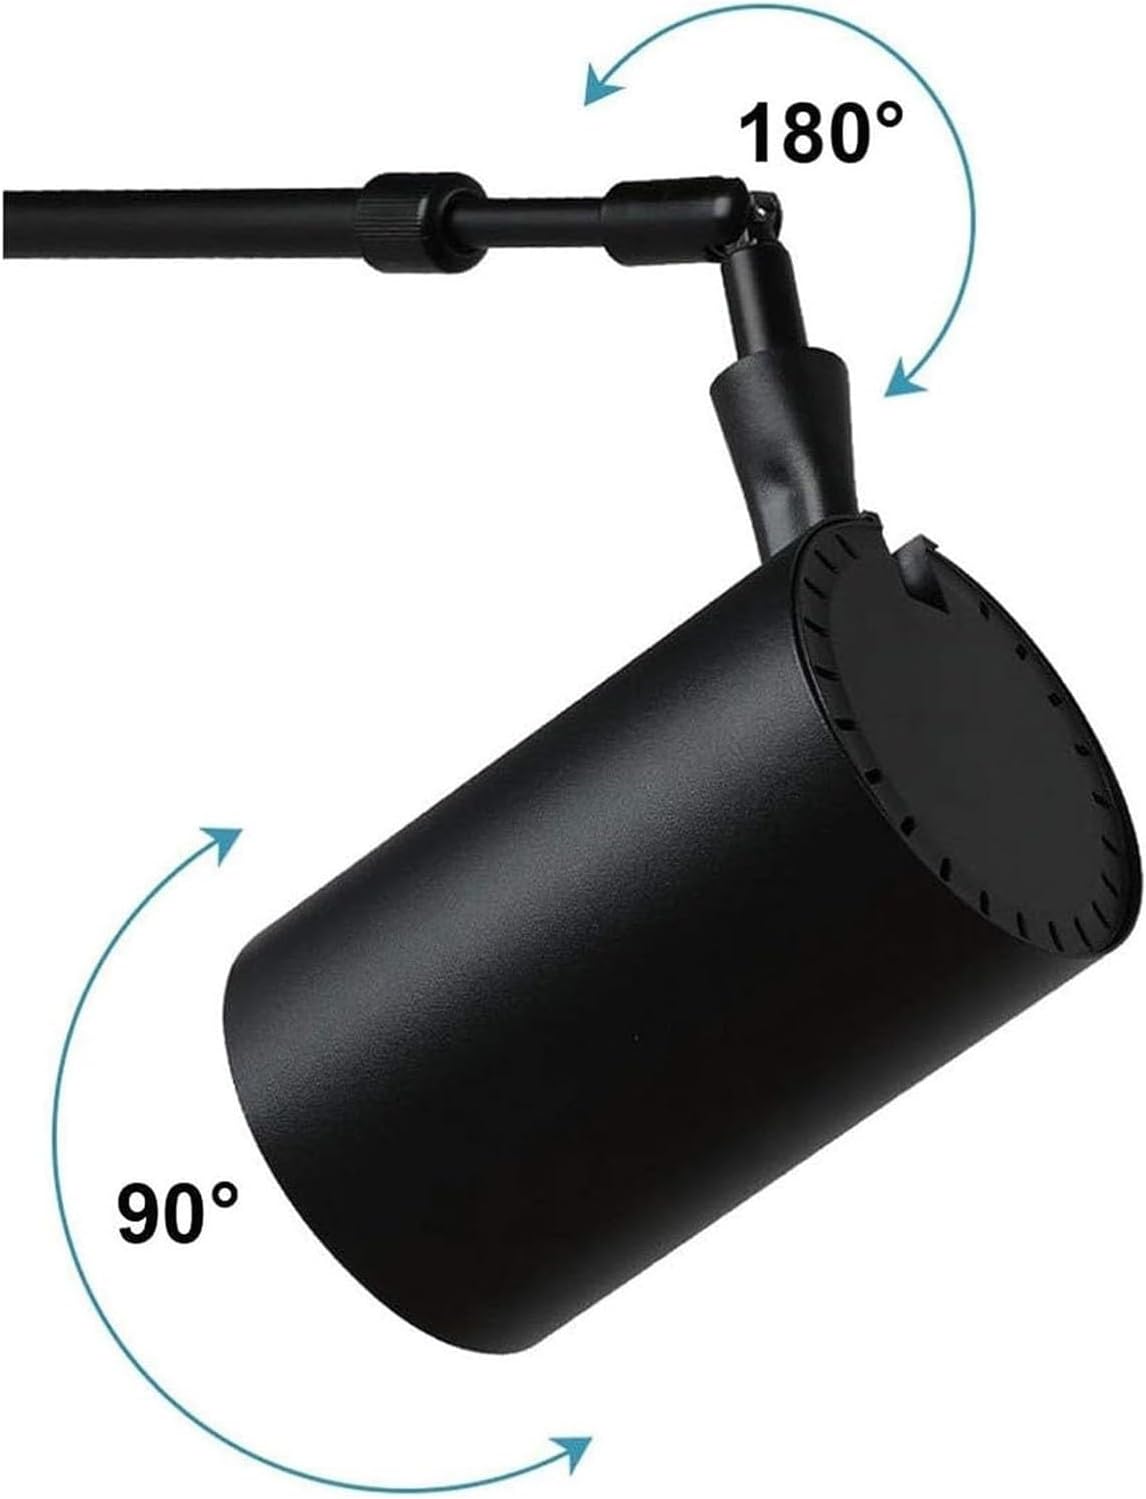
Figure 5: Illustration of the spotlight's adjustable angles: 90° vertical tilt and 180° horizontal rotation for flexible lighting.
7. Maintenance
Regular maintenance ensures the longevity and optimal performance of your spotlight:
- Cleaning:
- Before cleaning, ensure the power is turned off and the fixture has cooled down.
- Wipe the fixture with a soft, dry cloth. Do not use abrasive cleaners, solvents, or polishes, as these can damage the finish.
- Bulb Replacement: This spotlight uses an integrated LED COB light source and does not require bulb replacement. If the LED fails, the entire fixture may need servicing or replacement.
- Inspection: Periodically check for any loose connections or damage to the wiring. If any issues are found, disconnect power and consult a qualified electrician.

Figure 6: The spotlight features powerful cooling holes designed to dissipate heat and ensure long-term performance of the LED.
8. Troubleshooting
If you encounter issues with your spotlight, refer to the following common problems and solutions:
| Problem | Possible Cause | Solution |
|---|---|---|
| Light does not turn on | No power supply; Loose wiring; Faulty switch; Damaged LED. | Check circuit breaker. Ensure all wiring connections are secure. Test the wall switch. If LED is damaged, contact support. |
| Light flickers | Loose wiring connection; Incompatible dimmer switch (if applicable); Power fluctuations. | Check wiring connections. Ensure a compatible dimmer is used or remove it. Consult an electrician for power issues. |
| Light is dim | Incorrect voltage; Damaged LED. | Verify correct voltage (220V). If LED is damaged, contact support. |
If the problem persists after attempting these solutions, please contact QICBYING customer support.
9. Warranty and Support
QICBYING products are manufactured to high-quality standards. For warranty information or technical support, please refer to the warranty card included with your purchase or visit the official QICBYING website. Please have your model number (TT125885) and purchase date ready when contacting support.
For further assistance, you may also contact the seller directly through your purchase platform.