
1. Introduction
The ACMER P1 S PRO 10W Laser Engraving Machine is a high-precision tool designed for engraving and cutting a wide range of materials. It features an ultra-fine spot size of 0.06 x 0.08 mm and a maximum engraving speed of 10,000 mm/min, allowing for detailed and efficient work. This manual provides essential information for the safe and effective use of your laser engraver.

Image 1.1: Overview of the ACMER P1 S PRO Laser Engraver and Cutter, highlighting features like easy assembly, eye protection, easy focus, large work area, laser power, movement alert, precise scale lines, and a 0.06x0.08mm spot.
2. Safety Information
Please read all safety instructions carefully before operating the laser engraver. Failure to follow these guidelines may result in injury or damage to the equipment.
- Eye Protection: Always wear the provided protective eyewear when the laser is in operation. The laser beam can cause severe eye damage.
- Material Compatibility: Do not engrave or cut reflective metals, as this can cause the laser beam to reflect unpredictably and pose a safety hazard.
- Ventilation: Ensure adequate ventilation in your workspace to dissipate fumes and smoke produced during engraving and cutting.
- Movement Protection: The engraver is equipped with movement protection. If the machine moves unexpectedly during operation, the laser module will automatically stop.
- Limit Switches: X and Y-axis limit switches are installed to prevent the laser module from exceeding the designated engraving area, ensuring safe operation and precise homing.
- Emergency Stop: Familiarize yourself with the location of the power button for quick shutdown in case of an emergency.

Image 2.1: Safety features of the ACMER P1 S PRO, illustrating abnormal movement protection, limit switches for axis control, and the importance of protective glasses.
3. Package Contents
Verify that all components listed below are included in your package. If any items are missing or damaged, please contact customer support.

Image 3.1: Detailed package list with numbered components for the ACMER P1 S PRO, including profiles, axis modules, laser module, tools, and accessories.
- Front Profile x 1
- Back Profile x 1
- X-Axis Module x 1
- Optical Axis Module x 1
- Left Profile x 1
- Right Profile x 1
- Motherboard Socket x 1
- Motor x 1
- Slider x 1
- Corner Bracket x 3
- Measuring Aluminum Column x 1
- Laser Module x 1
- Wire Bracket x 1
- Card reader + TF card x 1
- Tool Kit x 1
- User Manual x 1
- Wood Board x 2
- USB Cable x 1
- Adapter x 1
- Protective Eyewear x 1
- Screw Pack x 1
4. Setup and Assembly
The ACMER P1 S PRO is designed for straightforward assembly. Follow the detailed instructions provided in the included user manual (physical copy) for step-by-step guidance. Assembly typically takes approximately 25 minutes.

Image 4.1: Illustration of the simple assembly process for the ACMER P1 S PRO, showing a user putting together the frame and laser module.
4.1 Initial Checks
- Ensure all screws are securely fastened after assembly.
- Verify that the laser module slides smoothly along the X and Y axes.
- Connect the power adapter and USB cable to the machine and your computer.
5. Operating Instructions
The ACMER P1 S PRO offers versatile engraving and cutting capabilities. This section outlines general operating procedures.
5.1 Software Compatibility
The laser engraver is compatible with popular engraving software such as LightBurn and LaserGRBL. It also supports ACMER APP (Android) and MKS APP (iOS) for mobile control. Choose the software that best suits your workflow.

Image 5.1: Software compatibility for the ACMER P1 S PRO, showing it works with LightBurn, LaserGRBL, and dedicated mobile applications for Android and iOS.
5.2 Material Engraving and Cutting
The P1 S PRO can engrave over 100 materials, including wood, acrylic, leather, cork, rock, glass, and paper. It also has comprehensive cutting capabilities for materials like plywood (up to 10mm), acrylic (up to 6mm), and MDF (up to 5mm).
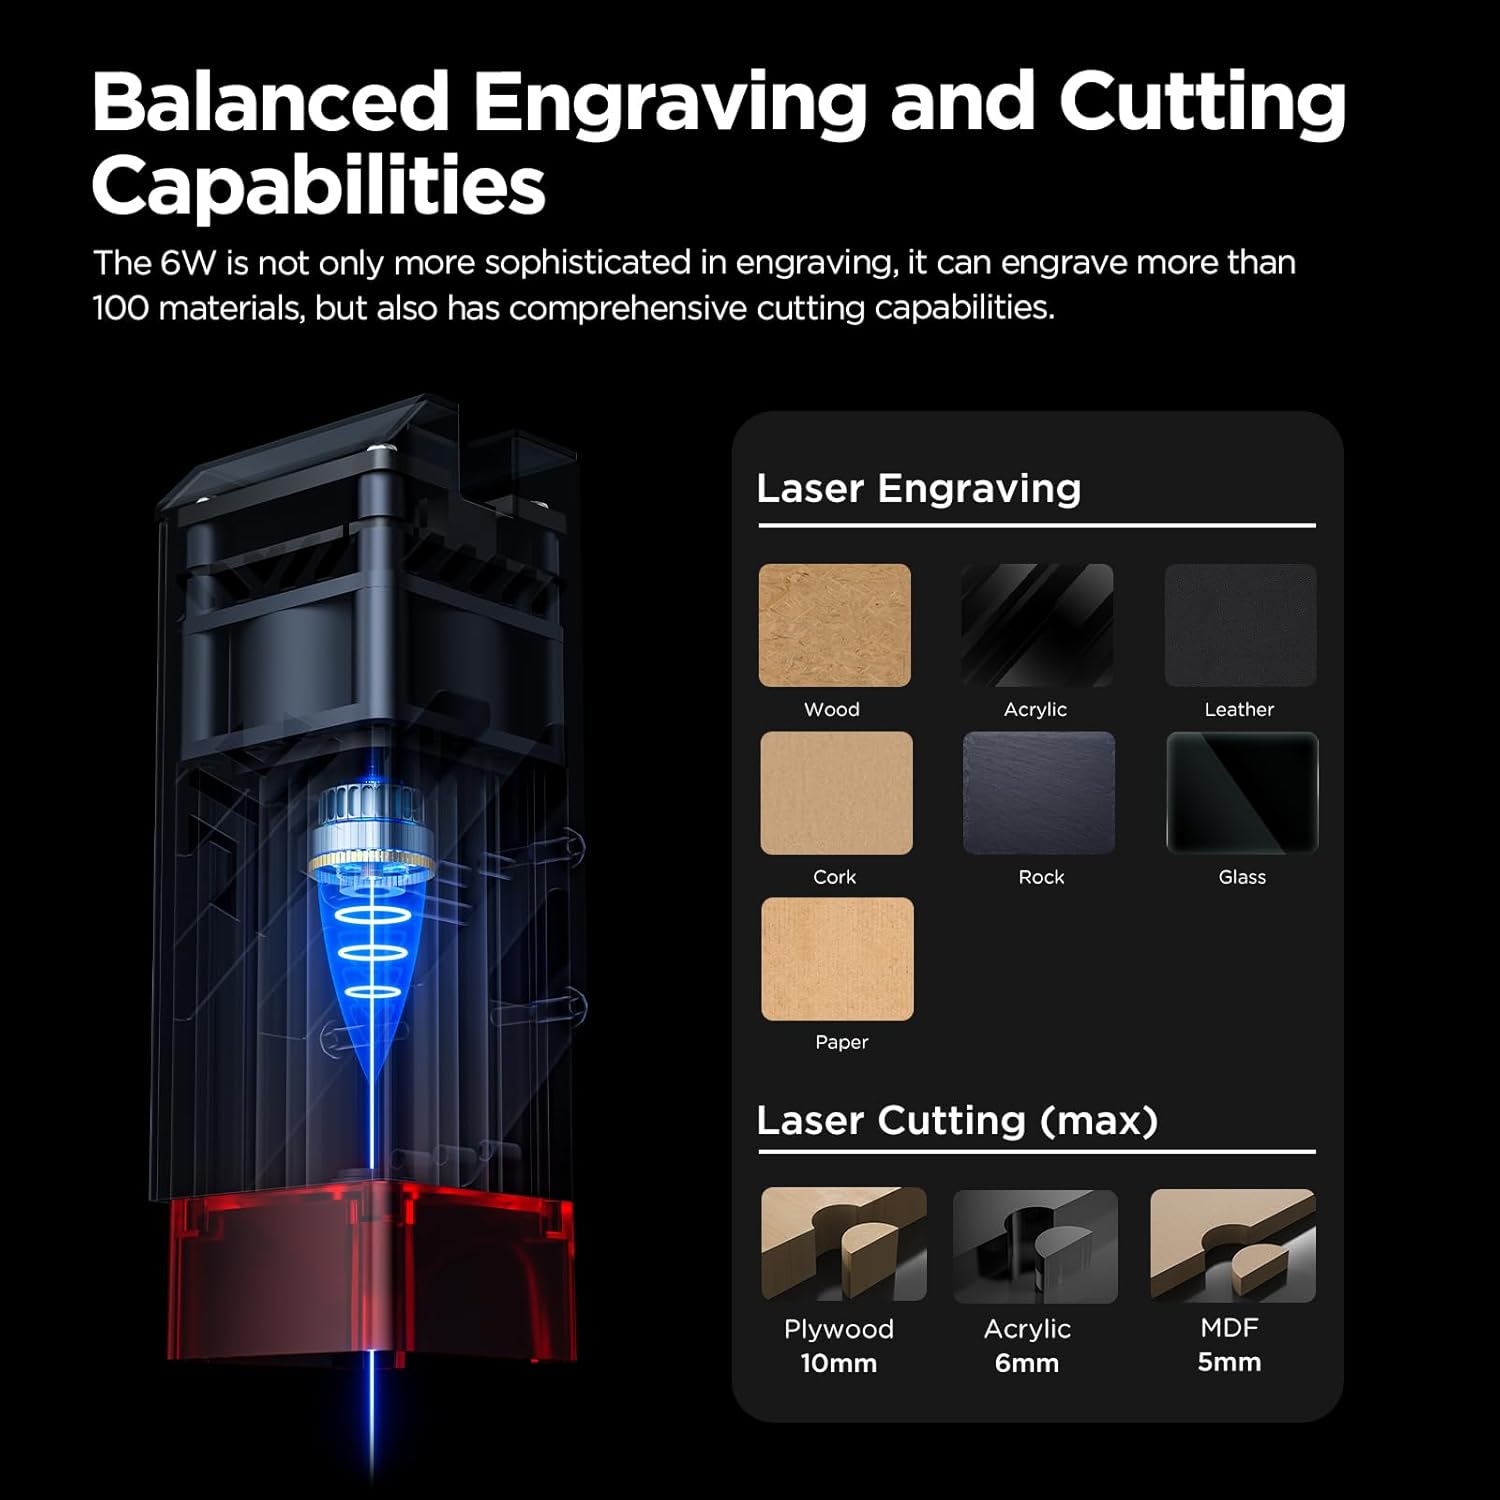
Image 5.2: Engraving and cutting capabilities, detailing compatible materials and maximum cutting thicknesses.
5.3 Precision and Speed
Achieve high-precision results with a laser focus spot of 0.06mm and engraving accuracy of 0.01mm. The machine operates at a maximum speed of 10,000 mm/min, ensuring efficient project completion.

Image 5.3: Ultra-fine compression spot for enhanced engraving detail.
5.4 Working Area
The P1 S PRO features a generous engraving area of 380 x 370 mm (14.9 x 14.5 inches), allowing you to work on larger projects without needing multiple adjustments.

Image 5.4: Illustration of the spacious 380mm x 370mm engraving area.
5.5 Interchangeable Laser Module
The laser module is interchangeable, allowing for potential upgrades or replacements with different power modules (e.g., 6W, 10W, 20W) to suit various project requirements.

Image 5.5: Interchangeable laser module options.
6. Maintenance
Regular maintenance ensures optimal performance and extends the lifespan of your ACMER P1 S PRO.
- Cleaning the Lens: Periodically clean the laser lens with a soft, lint-free cloth and lens cleaning solution to maintain laser beam quality.
- Rail Cleaning: Keep the X and Y axis rails free from dust and debris to ensure smooth movement of the laser module.
- Connection Checks: Regularly inspect all cable connections to ensure they are secure.
- Firmware Updates: Check the official ACMER website for any available firmware updates to improve performance and add new features.
7. Troubleshooting
If you encounter issues with your laser engraver, refer to the following common troubleshooting steps.
- Machine Not Powering On: Ensure the power adapter is correctly connected to both the machine and a working power outlet.
- Laser Not Firing: Verify that the laser module is properly installed and connected. Check software settings to ensure the laser is enabled and power is set correctly.
- Movement Issues: Check for any obstructions on the X and Y axis rails. Ensure all belts are properly tensioned and not slipping. The limit switches may also prevent movement if triggered incorrectly; try resetting the machine.
- Poor Engraving Quality: Adjust laser power and speed settings in your software. Ensure the material is flat and properly focused. Clean the laser lens if necessary.
- Assembly Difficulties: If you encounter issues during assembly, such as ill-fitting screws, ensure you are using the correct screws for each step as per the detailed manual. Sometimes, minor variations may require careful adjustment or alternative fasteners.
For persistent issues or problems not covered here, please contact ACMER customer support.
8. Specifications
| Feature | Specification |
|---|---|
| Manufacturer | ACMER |
| Model Number | P1-10-P2-10 |
| Laser Output Power | 10W |
| Engraving Area | 380 x 370 mm |
| Laser Spot Size | 0.06 x 0.08 mm |
| Engraving Accuracy | 0.01 mm |
| Max Engraving Speed | 10,000 mm/min |
| Power Type | Electric |
| Included Components | Laser Engraver, Tool Kit, Protective Eyewear, User Manual |
| Package Dimensions | 59.7 x 33.9 x 16.9 cm |
| Package Weight | 5.14 kg |
9. Warranty and Support
ACMER provides professional and prompt customer service to assist you with any inquiries or issues.
- Spare Parts Availability: Spare parts are available for 1 year from the date of purchase.
- Customer Service: For any problems during use, please do not hesitate to contact us. We are committed to providing a satisfactory solution.
- Online Assistance: 24/7 online assistance is available through the official team, user guides, and troubleshooting resources.

Image 9.1: Certificates of conformity for ACMER products, demonstrating adherence to quality and safety standards.

Image 9.2: ACMER Studio software, offering free download, intuitive interface with AI creative tools, and transforming ideas into art.


