
Introduction
This manual provides comprehensive instructions for the safe and effective use of your FlyLily UFO Star Projector (Model BL-E03). Please read this manual thoroughly before operating the device and retain it for future reference.
The FlyLily UFO Star Projector is a versatile device designed to create an immersive celestial experience. It features 13 interchangeable film discs, RGB lighting effects, 15 white noise sounds, a Bluetooth speaker, and an auto-off timer. It is suitable for various settings, including bedrooms, living rooms, and for creating a relaxing or educational atmosphere.
What's in the Box
Upon unpacking, please ensure all items listed below are present and in good condition:
- UFO Galaxy Projector (x1)
- Film Discs (x13)
- Type-C USB Cable (x1)
- Cleaning Cloth (x1)
- User Manual (x1)

Image: All components included in the FlyLily UFO Star Projector package.
Product Features
- 13-in-1 Planetarium Projection: Includes 13 realistic film discs featuring celestial wonders like the Moon, Earth, Saturn, Milky Way, Black Hole, Pillars of Creation, and more.
- RGB Night Light: Offers various colorful ambient lighting effects.
- 15 Soothing White Noise Sounds: Built-in white noise options to aid relaxation and sleep.
- Bluetooth Speaker: Connect your device to play music or audio.
- Auto-Off Timer: Customizable 1-hour, 2-hour, or default 4-hour automatic shutdown.
- 360° Rotation & Wide Coverage: Projects images across walls, ceilings, and floors, covering 135-754 sq ft with adjustable rotation speeds.
- Adjustable Focus: Top knob allows for clear image projection at various distances (0.5m to 3.0m optimal).
- Dual Control: Operable via on-device buttons or included remote control.
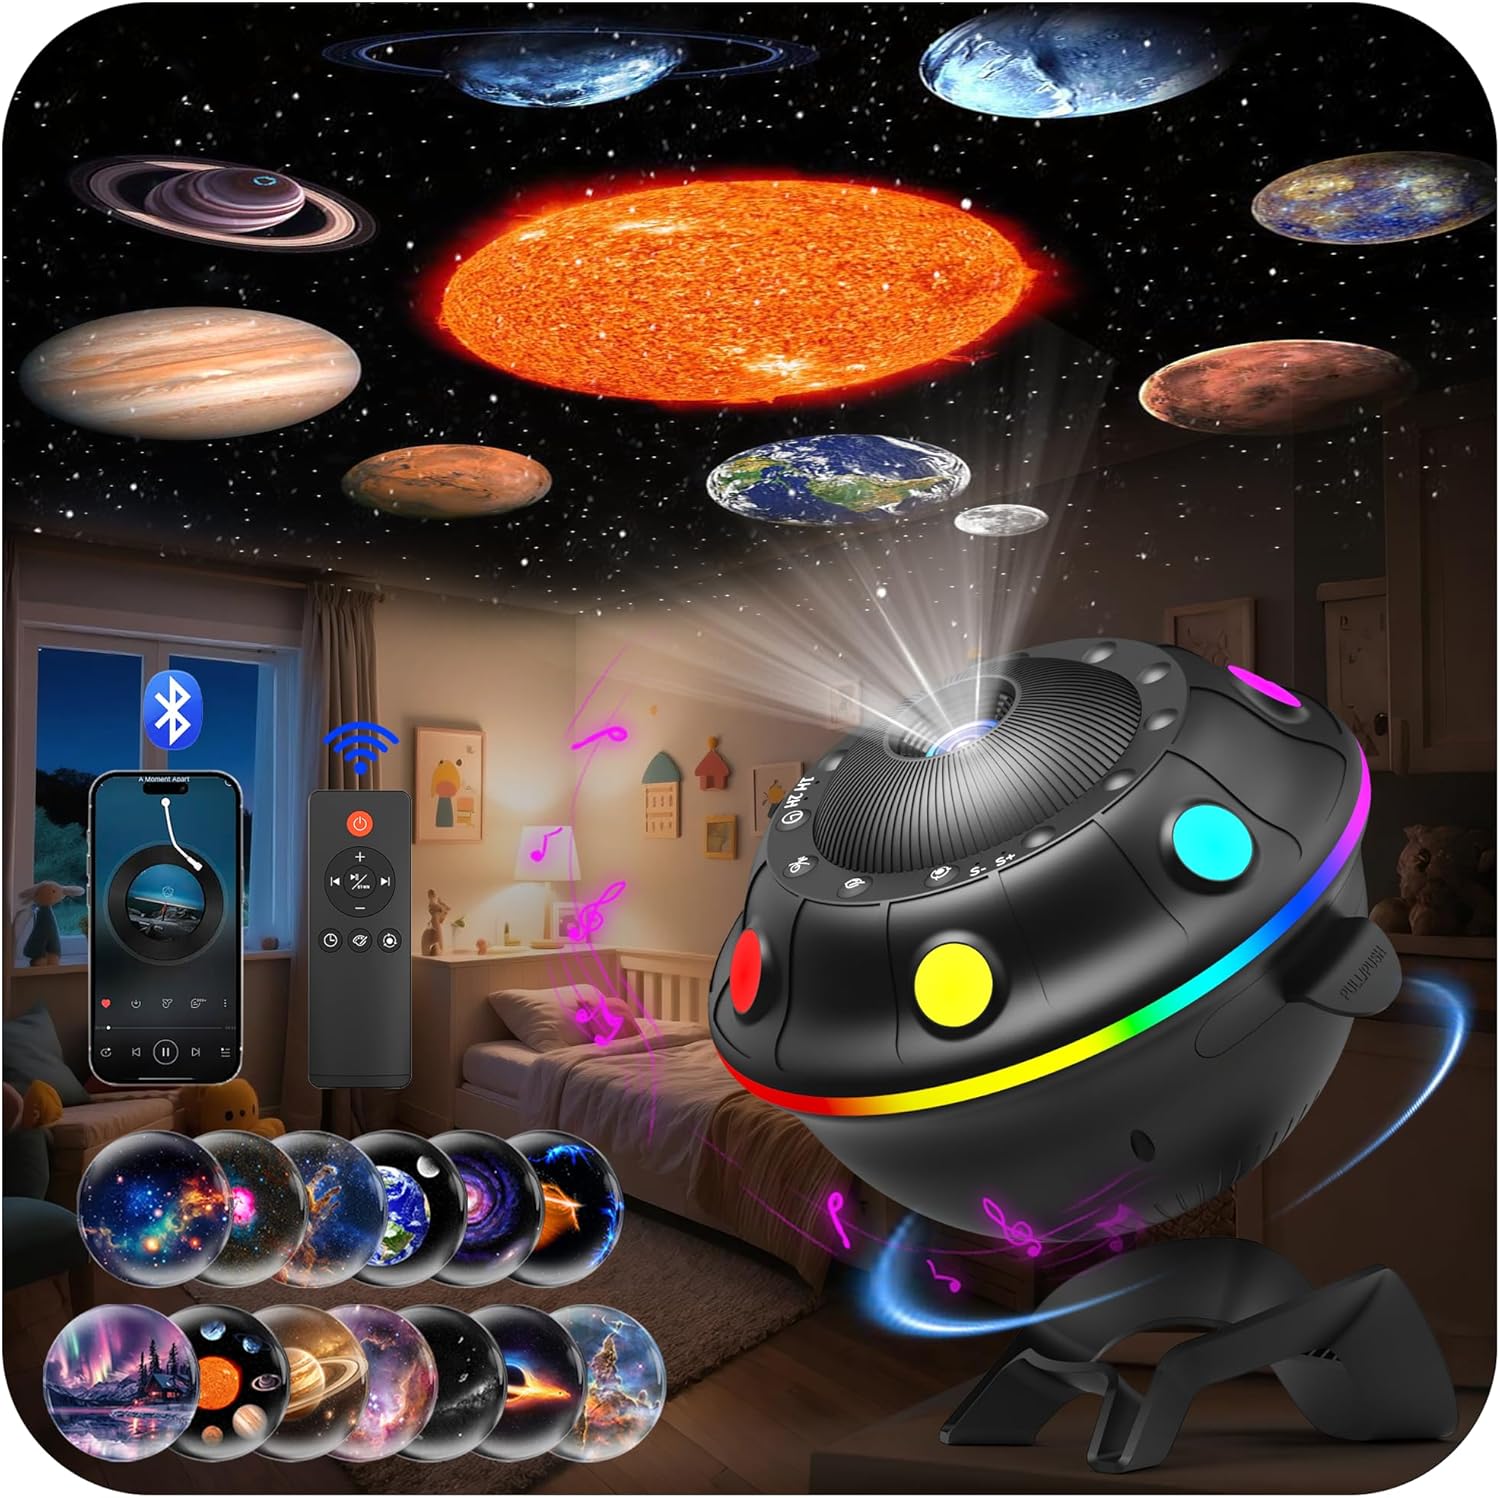
Image: Overview of the FlyLily UFO Star Projector's main features.
Setup
- Unpack the Projector: Carefully remove all components from the packaging.
- Connect Power: Use the provided Type-C USB cable to connect the projector to a compatible USB power adapter (not included) or a USB port.
- Place the Projector: Position the projector on a stable, flat surface. The optimal projection distance is approximately 9.84 feet (3 meters) for a clear image.
- Insert a Film Disc:
- Locate the disc slot on the side of the projector.
- Gently pull out the disc tray.
- Place your desired film disc into the tray, ensuring it is seated correctly.
- Slide the tray back into the projector until it clicks into place.
- Power On: Press the power button on the projector or the remote control to turn on the device.

Image: Visual guide for inserting and replacing film discs.
Operating Instructions
Basic Operation
- Power On/Off: Press the power button on the projector or the remote.
- Adjust Focus: Rotate the focus knob on the top of the projector to achieve a clear image.
- Change Film Discs: Follow the steps in the "Setup" section to replace the projection disc.

Image: Simplified steps for operating the projector.
Projection Settings
- Rotation: Use the rotation button on the projector or remote to start/stop rotation and adjust speed (slow/fast).
- RGB Lighting: Press the "Varicolored Light" button to cycle through different RGB light colors or turn them off.
- Timer: Set the auto-off timer to 1 hour, 2 hours, or allow the default 4-hour auto-off.

Image: Explanation of the projector's rotation function.
Audio Features
- Bluetooth Speaker:
- Turn on the projector.
- Enable Bluetooth on your mobile device.
- Search for "BL-E03" in your device's Bluetooth settings and pair.
- Once connected, you can play audio through the projector's speaker.
- White Noise: Press the white noise button to cycle through 15 built-in soothing sounds.

Image: The projector's Bluetooth speaker function in use.
Remote Control
The included remote control allows for convenient adjustment of all projector functions from a distance, including power, focus, rotation, light colors, white noise, and timer settings.

Image: Control options for the projector, including the remote.
Maintenance
- Cleaning: Use the provided cleaning cloth to gently wipe the projector lens and film discs. Do not use abrasive cleaners or solvents.
- Storage: Store the projector and film discs in a cool, dry place away from direct sunlight when not in use.
- Handling: Handle film discs by their edges to avoid fingerprints or scratches on the projection surface.
Troubleshooting
| Problem | Possible Cause | Solution |
|---|---|---|
| Projector does not turn on. | No power connection or faulty cable. | Ensure the USB cable is securely connected and the power source is active. Try a different USB port or adapter. |
| Projected image is blurry. | Focus is not adjusted correctly. | Rotate the focus knob on the top of the projector until the image is clear. Adjust projection distance if necessary. |
| No image is projected. | Film disc not inserted or inserted incorrectly. | Check if a film disc is properly seated in the disc tray and the tray is fully inserted. |
| Bluetooth connection fails. | Device not in pairing mode or out of range. | Ensure Bluetooth is enabled on your device and the projector. Move your device closer to the projector. Restart both devices. |
| Remote control not working. | Battery low or line of sight obstructed. | Replace the remote control battery. Ensure there are no obstructions between the remote and the projector. |
Specifications
- Model: BL-E03
- Color: Black
- Shape: UFO
- Material: Acrylonitrile Butadiene Styrene (ABS)
- Light Source Type: LED
- Power Source: Corded Electric (USB DC 5V)
- Voltage: 5 Volts (DC)
- Wattage: 10 watts
- Item Weight: 1.54 pounds (0.7 Kilograms)
- Product Dimensions: 4.4"L x 4.25"W x 4.29"H
- Projection Distance: 0.5m - 3.0m (Optimal: 3.0m)
- Projection Area: 135-754 sq ft (7-16m²)
- Special Features: Bluetooth Speaker, RGB Lighting Effects, Timer, White Noise, 360° Rotation, 13 Replaceable Film Discs
- Certifications: CE, FCC, LVD, RoHS
Official Product Videos
UFO Star Projector Overview
Video: A comprehensive overview of the FlyLily UFO Star Projector, demonstrating its features and various projection modes. This video highlights the product's design, functionality, and the immersive experience it creates.
FlyLily UFO Galaxy Projector for Bedroom
Video: This video demonstrates the FlyLily UFO Galaxy Projector specifically in a bedroom setting, showcasing how it transforms the space into a starry sky and its suitability for creating a relaxing ambiance.
Warranty and Support
For warranty information and customer support, please refer to the contact details provided on the product packaging or visit the official FlyLily website. If you encounter any issues during installation or operation, or if you receive defective items, please contact customer service for prompt assistance. Solutions are typically provided within 24 hours.
You can visit the FlyLily Store on Amazon for more information and products.