
TURBRO UV72PA
TURBRO 72W UV Sanitizer Lamp Instruction Manual
Model: UV72PA
Introduction
This manual provides essential information for the safe and effective installation, operation, and maintenance of your TURBRO 72W UV Sanitizer Lamp, Model UV72PA. This device is designed to purify air within HVAC units and ducted systems using ozone-free ultraviolet-C (UV-C) light, featuring an energy-saving airflow sensor for optimized performance.
Safety Information
WARNING: Ultraviolet-C (UV-C) light is harmful to eyes and skin. Never look directly at the UV lamp when it is operating. Avoid direct exposure to UV-C light. Always disconnect power before servicing or replacing the lamp.
- Ensure the product is installed by a qualified technician in accordance with local electrical codes.
- Do not operate the lamp outside of the HVAC duct system.
- This product is ETL listed, ensuring compliance with safety standards. It also meets EPA and CARB ozone limit standards, maintaining ozone levels below 0.05 ppm (equivalent to 0 ozone).
- A slight odor may be noticeable during the first few hours of operation; this is normal and will dissipate.
- Keep children and pets away from the installation area.
Package Contents
Verify that all items listed below are included in your package:
- 2 x 15.2-inch UV Lamps
- 1 x Ballast
- 4 x Seal Strips
- 4 x Mounting Screws
- 1 x 2-1/4 inch Drill Bit Set
- 1 x Installation Template

Figure 1: Package Contents
Specifications
| Brand | TURBRO |
| Model Number | UV72PA |
| Wattage | 72 Watts |
| Voltage | 120 Volts (AC) |
| Light Type | UV-C Fluorescent |
| Wavelength | 253.7nm (Germicidal Efficiency) |
| Bulb Base | 2G11 4-pin ceramic base |
| Special Feature | Energy Saving Airflow Sensor, Ozone Free |
| Indoor/Outdoor Usage | Indoor (HVAC Systems) |
| Material Type | Metal |
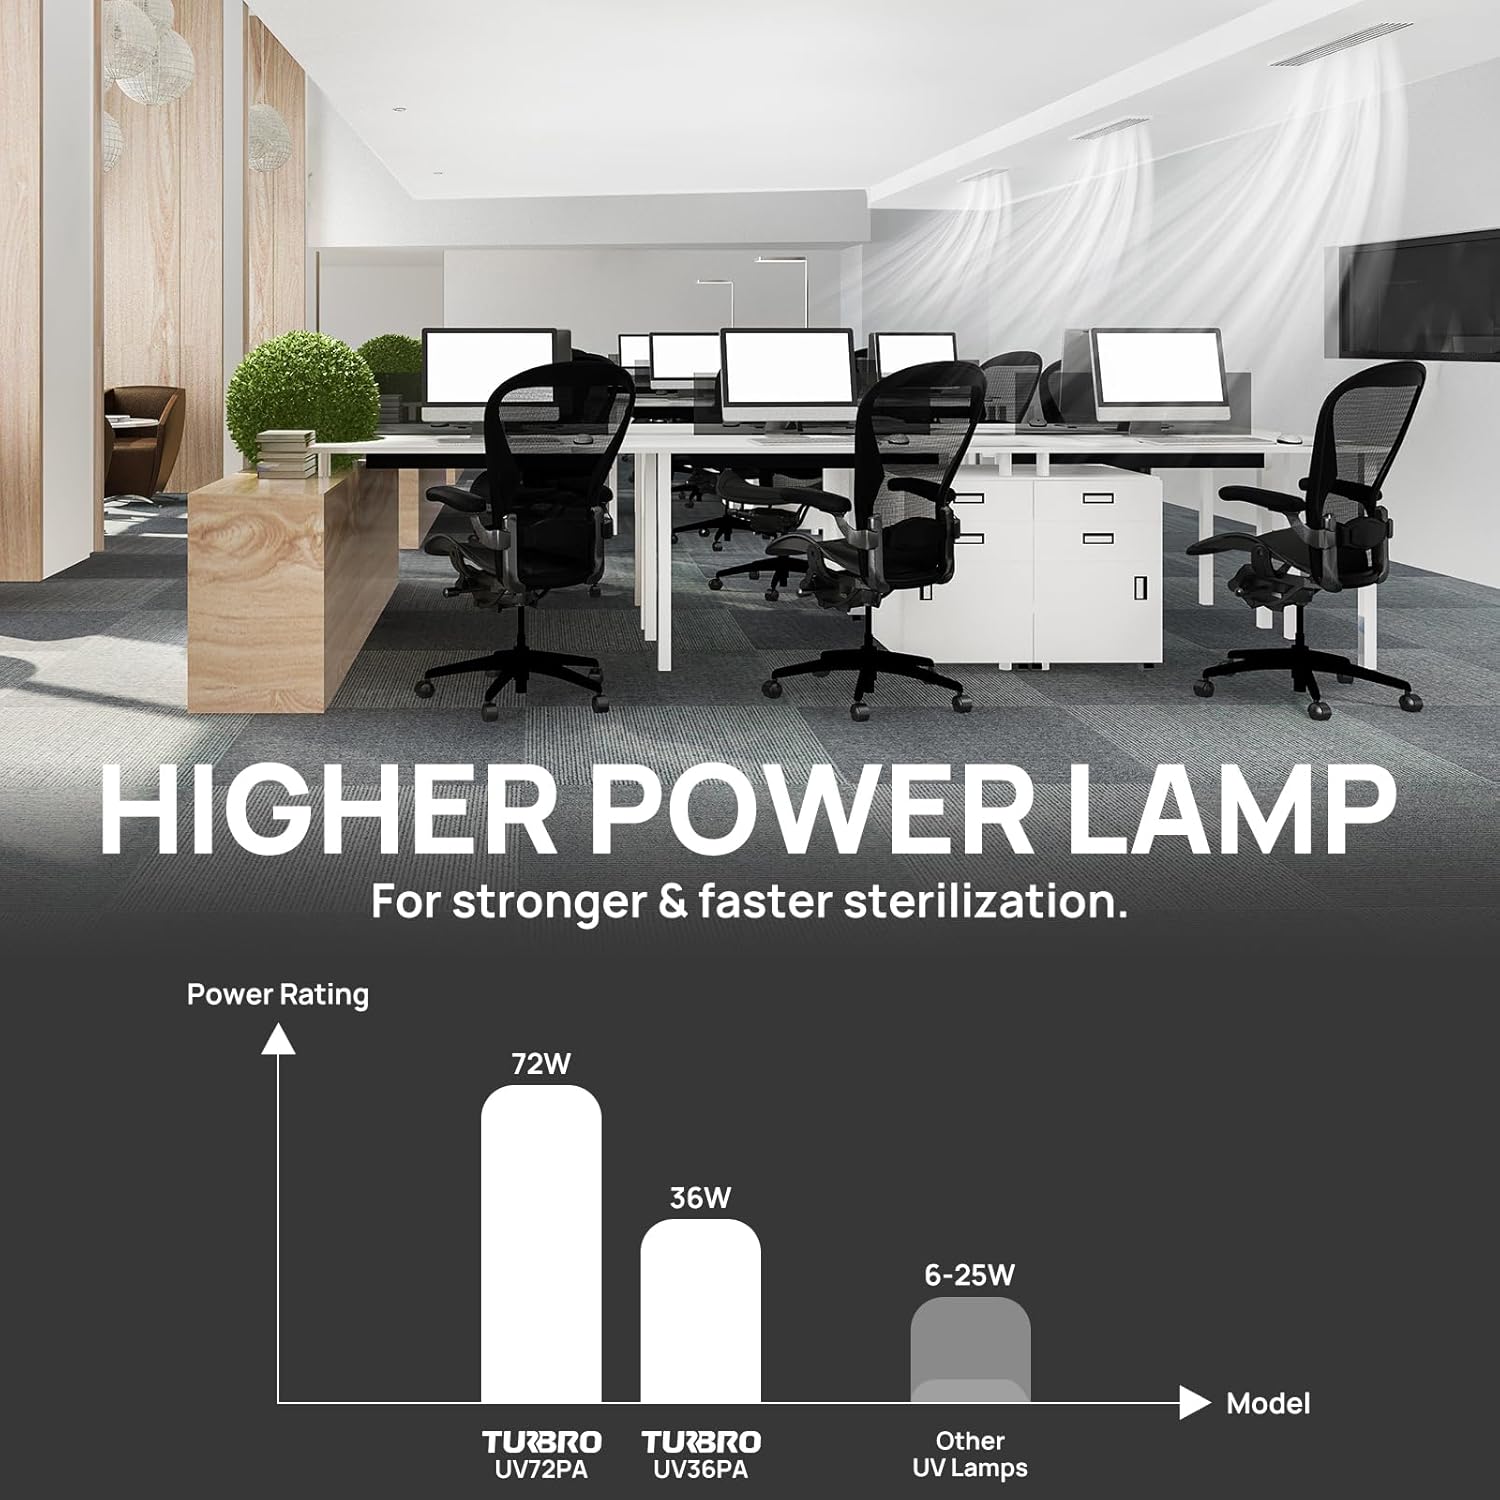
Figure 2: Power Rating Comparison
Setup and Installation
Follow these steps for proper installation of your UV Sanitizer Lamp:
- Choose Location: Select a suitable location on the exterior of your HVAC ductwork. Ensure there is at least 16 inches of clear space inside the duct where the UV lamps will be positioned. A nearby 120V electrical outlet is required for power.
- Prepare Duct: Use the provided installation template to mark the drilling points on the duct exterior.
- Drill Holes: Using the included 2-1/4 inch drill bit, carefully drill the marked holes through the ductwork.
- Insert Lamps: Gently insert the UV lamps through the drilled holes into the duct. Ensure the 2G11 4-pin ceramic base is securely seated.
- Mount Ballast: Secure the ballast unit to the exterior of the duct using the provided mounting screws. Ensure the ballast is firmly attached.
- Connect Power: Plug the ballast into a standard 120V electrical outlet.

Figure 3: Installation Requirements

Figure 4: Using the Installation Template

Figure 5: 4-Pin 2G11 Lamp Base
Operating Instructions
The TURBRO UV Sanitizer Lamp offers two operating modes:
- HOLD Mode: Provides continuous UV disinfection. The lamp remains on as long as power is supplied.
- AIRFLOW Mode: Activates the UV lamp only when airflow is detected within the HVAC system. This mode conserves energy and extends lamp life.
To select a mode, refer to the switch on the ballast unit. The green indicator lights on the ballast (labeled "UPPER" and "LOWER") confirm that the system is functioning correctly and the lamps are active.

Figure 6: Smart Airflow Sensor Operation

Figure 7: Ballast Status Indicators
Maintenance
Regular maintenance ensures optimal performance and longevity of your UV Sanitizer Lamp.
- Lamp Replacement: UV-C lamps have a finite lifespan. It is recommended to replace the lamps annually to maintain germicidal effectiveness. Refer to the model number on your lamp for compatible replacements.
- Cleaning: Periodically inspect the lamps for dust or debris accumulation. If necessary, gently wipe the quartz glass with a clean, dry cloth. Do not use liquid cleaners.
- Safety Precaution: Always disconnect power to the unit before performing any maintenance, including lamp replacement or cleaning.
Troubleshooting
If you encounter issues with your UV Sanitizer Lamp, refer to the following common problems and solutions:
| Problem | Possible Cause | Solution |
|---|---|---|
| Lamps not turning on | No power, faulty lamp, ballast issue | Check power connection to outlet. Ensure outlet is functional. Verify lamps are securely seated. If in AIRFLOW mode, ensure HVAC system is running and airflow is present. Replace lamps if old. Contact support if issue persists. |
| Airflow sensor not activating | Insufficient airflow, sensor obstruction, sensor malfunction | Ensure HVAC fan is operating at a sufficient speed. Check for any obstructions near the airflow sensor. Clean the sensor if dusty. |
| Green indicator lights are off | No power, lamps not operating | Refer to "Lamps not turning on" troubleshooting steps. The indicator lights confirm lamp operation. |
Warranty and Support
This TURBRO product is covered by a manufacturer's warranty. For specific warranty terms and conditions, please refer to the documentation included with your purchase or visit the official TURBRO website. For technical support, replacement parts, or any inquiries, please contact TURBRO customer service.
Contact Information: Please refer to the TURBRO official website or your purchase receipt for the most current customer service contact details.
Related documentsUV72PA


Ask a question about this manual
Ask about setup, troubleshooting, compatibility, parts, safety, or missing instructions. Manuals+ will review the question and use this page’s manual context to help answer it.