
1. Introduction
Thank you for purchasing the TRIUMPHKEY Vanity with LED Mirror, Model H73. This manual provides essential information for the safe assembly, operation, and maintenance of your new vanity. Please read these instructions carefully before beginning assembly and retain them for future reference.
2. Safety Instructions
- Assembly: Always assemble the vanity on a soft, clean surface to prevent scratches. Ensure all parts are correctly aligned and securely fastened before use.
- Stability: Do not overload shelves or drawers. For added stability, consider securing the vanity to a wall using appropriate anti-tip hardware (not included).
- Electrical Safety (LED Mirror): The LED mirror contains electrical components. Do not expose the mirror to water or excessive humidity. Disconnect from power before cleaning or if any damage is suspected. Do not attempt to repair the LED lighting system yourself.
- Children: Keep small parts and assembly tools away from children. This product is not a toy.
- Weight Limit: Do not sit or stand on the vanity. Adhere to any specified weight limits for shelves and drawers.
3. Package Contents
Before assembly, please verify that all components and hardware are present and undamaged. Refer to the included assembly guide for a detailed list of parts. If any parts are missing or damaged, please contact customer service.

Image: The TRIUMPHKEY Vanity with LED Mirror, showcasing its overall design and storage capabilities.
4. Assembly Instructions
Assembly of the TRIUMPHKEY Vanity with LED Mirror requires following the step-by-step instructions provided in the separate assembly guide included in your package. Please ensure you have sufficient space and the necessary tools before you begin.
- Unpack: Carefully unpack all components and hardware. Place them on a soft, clean surface to prevent damage.
- Identify Parts: Match each part to the corresponding labels in the assembly guide.
- Follow Steps: Adhere strictly to the sequence of steps outlined in the assembly guide. Do not overtighten screws.
- LED Mirror Connection: Connect the LED mirror's power cable as instructed in the assembly guide. Ensure it is securely plugged into a suitable power outlet.
- Final Check: Once assembled, gently test the stability of the vanity and ensure all drawers and the sliding mirror operate smoothly.

Image: Visual representation of the vanity's key features, including solid construction and durable materials, which contribute to its stability and longevity.
5. Operating Instructions
5.1 LED Mirror Operation
The integrated LED mirror features adjustable brightness levels to suit various lighting conditions and preferences.
- Power On/Off: Locate the touch sensor on the mirror surface. Tap once to turn the LED light on or off.
- Adjust Brightness: When the light is on, press and hold the touch sensor to cycle through the three brightness levels: dark, moderate, and bright. Release the sensor when the desired brightness is achieved.
5.2 Sliding Mirror Functionality
The mirror is designed to slide horizontally, revealing additional storage shelves behind it. This feature helps keep your items organized and protected from dust.
- To Open: Gently slide the mirror to the side to access the three-layer storage shelves located behind it.
- To Close: Slide the mirror back into its original position to cover the shelves, providing a clean look and protecting contents from dust.
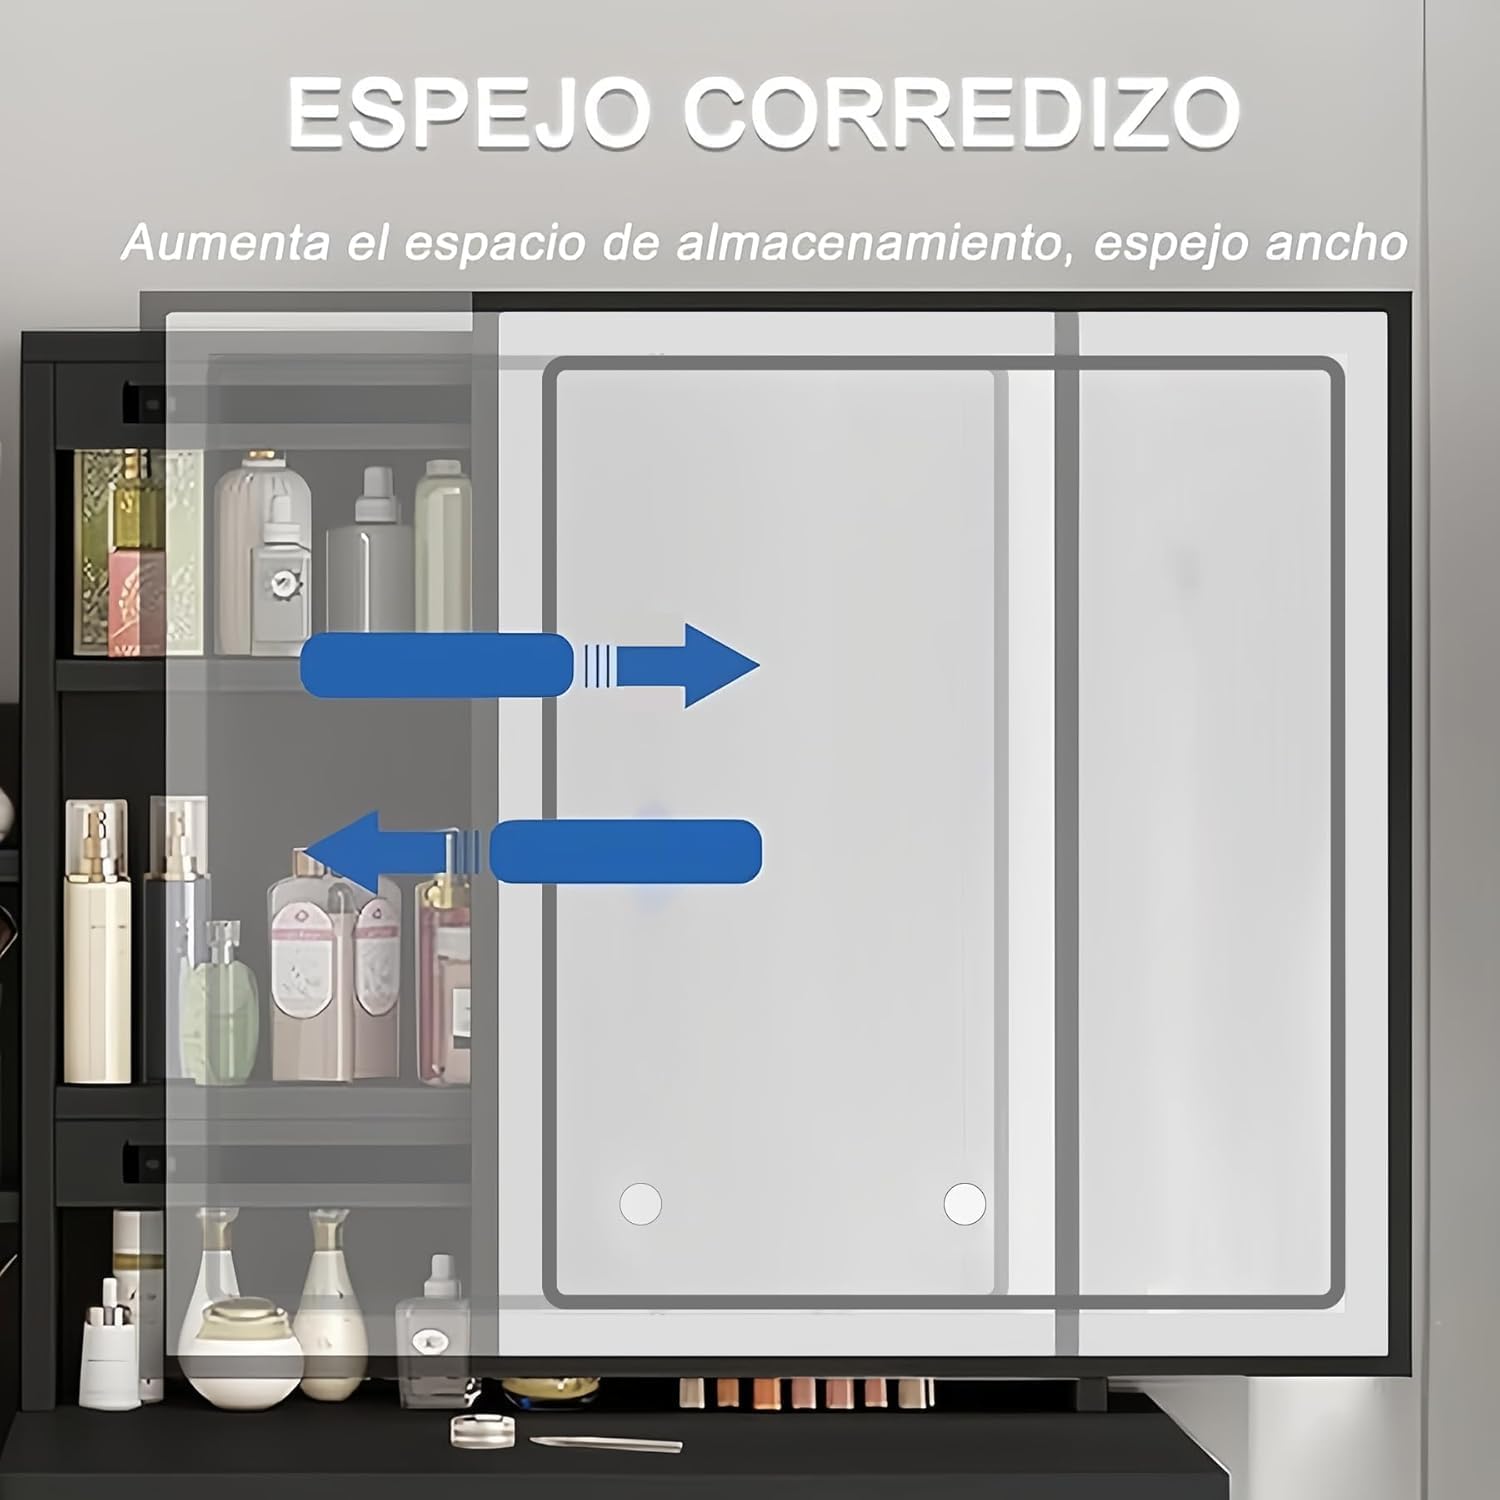
Image: The sliding mirror mechanism, illustrating how it moves to reveal hidden storage, enhancing both functionality and space efficiency.
5.3 Storage Features
The vanity is equipped with multiple storage options to help organize your cosmetics, skincare products, and other personal items.
- Drawers: Four spacious drawers are available for storing various items, keeping them out of sight and protected.
- Open Shelves: Three layers of open shelves, located both beside and behind the sliding mirror, provide convenient access and display space for frequently used items.

Image: A detailed view of the vanity's open shelves, demonstrating their capacity for organizing various beauty products and accessories.
5.4 Multi-functional Desk Use
The spacious desktop of the vanity can also serve as a functional computer desk, offering versatility for various tasks.
- Workstation: Utilize the ample surface area for a laptop or other work-related items.
- Comfort: The design ensures sufficient legroom for comfortable seating during extended use.
6. Maintenance and Care
Proper care will ensure the longevity and appearance of your TRIUMPHKEY Vanity.
- Cleaning the Surface: Wipe the wooden surfaces with a soft, damp cloth. Avoid abrasive cleaners or harsh chemicals that could damage the finish.
- Cleaning the Mirror: Use a glass cleaner specifically designed for mirrors and a lint-free cloth. Spray the cleaner onto the cloth, not directly onto the mirror, to prevent liquid from seeping into the edges.
- Dusting: Regularly dust all surfaces with a dry, soft cloth.
- Avoid Moisture: Keep the vanity away from excessive moisture and direct sunlight to prevent warping or fading.
- Tighten Fasteners: Periodically check and tighten all screws and fasteners to maintain structural integrity.
7. Troubleshooting
If you encounter any issues with your TRIUMPHKEY Vanity, refer to the following common problems and solutions:
| Problem | Possible Cause | Solution |
|---|---|---|
| LED mirror light does not turn on. | Power cable not connected; power outlet issue; touch sensor malfunction. | Ensure the power cable is securely plugged in. Test the outlet with another device. If the issue persists, contact customer service. |
| LED mirror light is too dim or too bright. | Brightness setting needs adjustment. | Press and hold the touch sensor on the mirror to cycle through brightness levels until desired setting is reached. |
| Drawers are difficult to open or close. | Overloaded drawer; misaligned drawer slides; loose fasteners. | Reduce contents in the drawer. Check if drawer slides are properly installed and lubricated. Tighten any loose screws on the drawer or frame. |
| Sliding mirror is stiff or stuck. | Obstruction in the track; debris; misaligned track. | Inspect the track for any obstructions and remove them. Clean the track. Ensure the mirror is properly seated in its track. |
| Vanity feels unstable. | Loose fasteners; uneven floor. | Check and tighten all assembly fasteners. Place the vanity on a level surface or use shims if necessary. |
If you encounter a problem not listed here or if the suggested solutions do not resolve the issue, please contact TRIUMPHKEY customer service for assistance.
8. Specifications
- Brand: TRIUMPHKEY
- Model Number: H73
- Dimensions (L x W x H): 80 x 38 x 130 cm (approximately 31.5 x 15 x 51 inches)
- Product Weight: 26 kg (approximately 57.3 lbs)
- Material: Wood
- Number of Drawers: 4
- Assembly Required: Yes
- UPC: 756407660223

Image: A clear diagram illustrating the precise dimensions of the vanity, including its width, depth, and overall height.
9. Warranty and Support
TRIUMPHKEY is committed to providing quality products and customer satisfaction. While specific warranty details are typically provided with your purchase documentation, we offer dedicated customer support for any inquiries or issues you may encounter.
- Customer Service: If you have any questions during assembly, operation, or require assistance with your product, please do not hesitate to contact our customer service team. We aim to provide a solution within 24 hours.
- Returns: Please refer to your purchase platform's return policy for information regarding product returns.