
1. Introduction
This manual provides essential information for the safe and efficient operation of your EliteEdge 14,000 BTU Portable Air Conditioner. This unit is designed to provide cooling, dehumidification, and fan functions for rooms up to 700 square feet. Please read this manual thoroughly before installation and use, and retain it for future reference.
2. Safety Instructions
To prevent injury to the user or others and property damage, the following instructions must be followed. Incorrect operation due to ignoring instructions may cause harm or damage.
- Always use a grounded 3-prong outlet. Do not remove the grounding prong.
- Do not operate the unit with a damaged power cord or plug.
- Ensure the unit is placed on a flat, stable surface to prevent tipping.
- Maintain at least 20 inches (50 cm) of clear space around the unit for proper airflow.
- Do not block the air inlet or outlet.
- Unplug the unit before cleaning or servicing.
- Do not use chemical solvents to clean the unit.
- Keep children and pets away from the unit during operation.
- Ensure proper drainage of condensed water to prevent overflow.
3. Package Contents
Verify that all components are present and in good condition upon unpacking.
- EliteEdge Portable Air Conditioner Unit
- Remote Control
- Exhaust Hose
- Window Venting Kit (includes window slider kit, exhaust hose adapter, and window exhaust adapter)
- Drain Hose
- User Manual

Image: The portable air conditioner unit shown with its dimensions (17.3"W x 13.2"D x 28"H) and all included accessories: remote, exhaust hose, window kit components, and user manual.
4. Product Features
The EliteEdge Portable Air Conditioner offers multiple functionalities for optimal comfort.
- 4-in-1 Functionality: Cooling, Dehumidifier, Fan, and Sleep Mode.
- Cooling Capacity: 14,000 BTU, suitable for rooms up to 700 sq. ft.
- Digital Display: Clear temperature and setting indicators.
- Auto-Swing Function: For even air distribution.
- 24-Hour Timer: Program on/off times for energy efficiency.
- Remote Control: Convenient operation from a distance.
- Low Noise Operation: Operates at approximately 52 dB.
- Portability: Equipped with caster wheels for easy movement.

Image: The portable air conditioner unit with an overlay indicating its cooling capacity (14,000 BTU), cooling area (750 sq. ft.), digital display, auto-swing function, 24-hour timer, and sleep mode.

Image: Three views of the portable air conditioner illustrating its primary modes: Cooling (59°F-88°F), Dehumidifying (73 Pints/Day), and Fan (High/Medium/Low).
5. Setup and Installation
Proper installation is crucial for the unit's performance and safety.
5.1 Placement
- Place the unit on a firm, level surface in a location that allows for proper ventilation.
- Ensure there is at least 20 inches (50 cm) of space around the unit for air circulation.
- Avoid placing the unit near heat sources or in direct sunlight.
5.2 Window Kit Installation
The included window kit is designed for quick and secure installation in most standard vertical or horizontal sliding windows.
- Assemble the window slider kit by connecting the panels to fit your window opening.
- Open the window and place the assembled window kit into the window frame. Extend the panels to fit snugly and secure them.
- Attach the exhaust hose adapter to one end of the exhaust hose.
- Insert the exhaust hose adapter into the opening on the window kit.
- Attach the other end of the exhaust hose to the exhaust outlet on the back of the portable AC unit. Ensure all connections are secure to prevent air leakage.
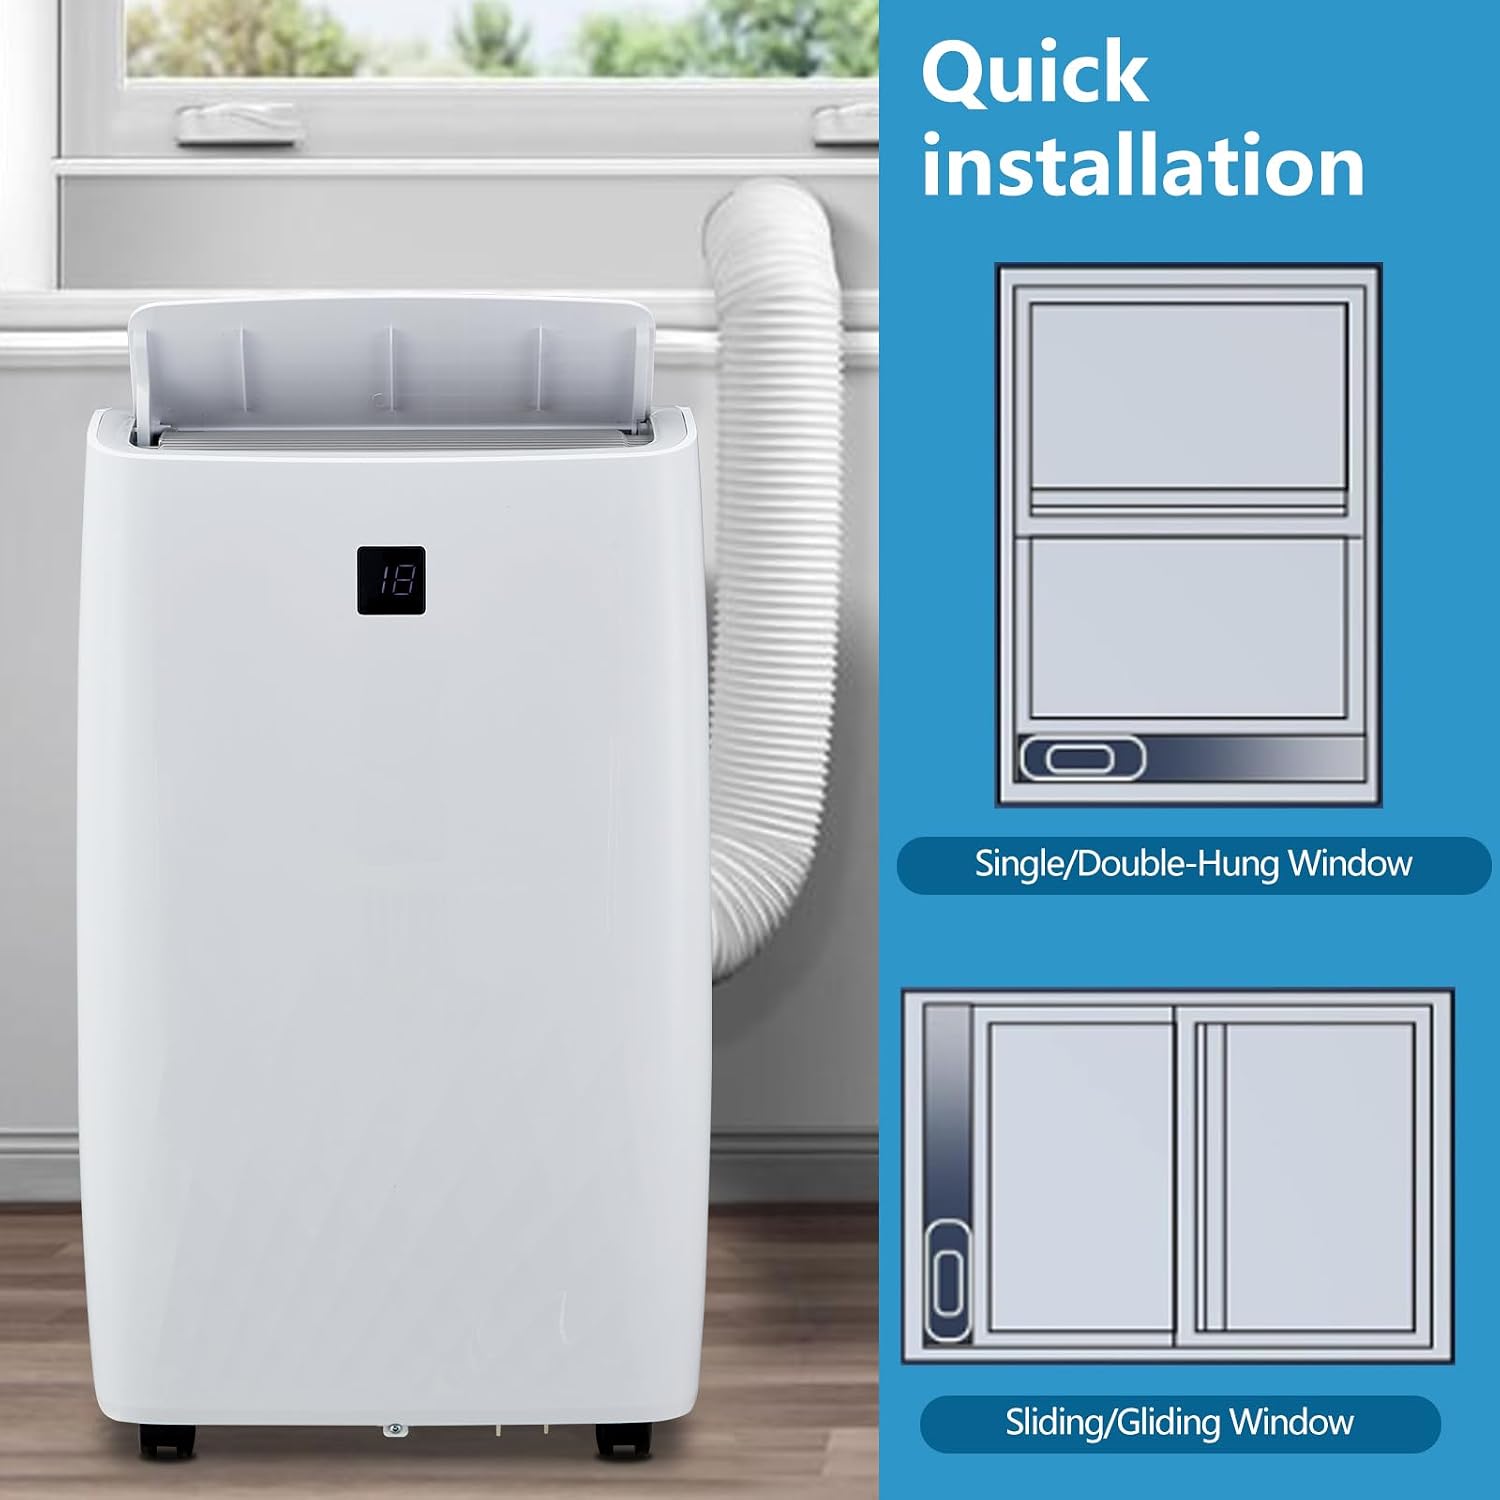
Image: Visual guide demonstrating quick installation for both single/double-hung windows and sliding/gliding windows, showing the exhaust hose connected to the window kit.
5.3 Drainage Setup
During dehumidification or prolonged cooling, water will accumulate. The unit has an internal water tank, but for continuous operation, connect the drain hose.
- Locate the continuous drain port at the lower rear of the unit.
- Remove the drain plug and securely attach the provided drain hose.
- Direct the other end of the drain hose to a suitable drain or container, ensuring it is lower than the unit's drain port for gravity flow.
6. Operating Instructions
Familiarize yourself with the control panel and remote control for optimal use.
6.1 Control Panel and Remote Control

Image: The unit's LED touch control panel displaying temperature and various function buttons (Swing, Fan, Timer, Minus, Plus, Sleep, Mode, On/Off) along with the remote control.
6.2 Basic Operation
- Power On/Off: Press the ON/OFF button to turn the unit on or off.
- Mode Selection: Press the MODE button to cycle through Cooling, Dehumidifier, Fan, and Sleep modes.
- Temperature Adjustment: In Cooling mode, use the + or - buttons to set the desired temperature.
- Fan Speed: Press the FAN button to select fan speed (Low, Medium, High).
- Swing Function: Press the SWING button to activate or deactivate the automatic louver swing.
6.3 Special Modes
- Sleep Mode: Activates quiet operation and gradually adjusts temperature for comfortable sleep. Press the SLEEP button.
- Timer Function: Press the TIMER button to set an automatic on or off time (1-24 hours). Use + or - to adjust the time.

Image: The portable air conditioner operating in Sleep Mode, emphasizing its ultra-quiet operation (≤51 dB), 24-hour timer, auto-swing mode, automatic shutoff, and energy-saving features.
7. Maintenance
Regular maintenance ensures optimal performance and extends the unit's lifespan.
7.1 Air Filter Cleaning
Clean the air filter every two weeks or more frequently if used in dusty environments.
- Unplug the unit from the power outlet.
- Locate the air filter panel (usually on the back or side).
- Remove the filter.
- Wash the filter with warm, soapy water. Rinse thoroughly and allow it to air dry completely before reinstalling.
- Reinsert the dry filter and close the panel.
7.2 Water Drainage
If the continuous drain hose is not used, the internal water tank will fill. The unit will stop operating and display an error code when full.
- Turn off and unplug the unit.
- Place a shallow pan or tray under the lower drain port.
- Remove the drain plug to allow water to flow out.
- Once drained, replace the drain plug securely.
7.3 Storage
Before storing the unit for an extended period:
- Drain all condensed water completely.
- Clean the air filter.
- Run the unit in fan-only mode for a few hours to dry the internal components.
- Store the unit in a dry, upright position, covered to protect from dust.
8. Troubleshooting
Before contacting support, refer to the following table for common issues and solutions.
| Problem | Possible Cause | Solution |
|---|---|---|
| Unit does not turn on | No power; Power cord not plugged in; Circuit breaker tripped; Full water tank. | Check power connection; Reset circuit breaker; Drain water tank. |
| Unit does not cool | Air filter dirty; Room temperature too low; Exhaust hose blocked or disconnected; Window kit not sealed; Room too large. | Clean air filter; Adjust temperature setting; Check exhaust hose and window seal; Ensure room size is within specifications. |
| Water leakage | Drain plug loose; Drain hose improperly connected or blocked; Unit not level. | Tighten drain plug; Check drain hose for blockages and proper connection; Place unit on a level surface. |
| Noisy operation | Unit not level; Air filter dirty; Obstruction in fan. | Place unit on a level surface; Clean air filter; Check for and remove any obstructions. |
9. Specifications
| Brand | EliteEdge |
| Model Number | EE-PHO_10I2J5VV-Rfe |
| Cooling Power | 14,000 BTU |
| Coverage Area | Up to 700 sq. ft. |
| Functions | Cooling, Dehumidifier, Fan, Sleep Mode |
| Noise Level | 52 Decibels |
| Product Dimensions (D x W x H) | 18.5 x 15.35 x 35.24 inches |
| Item Weight | 68.3 pounds |
| Voltage | 115V |
| Wattage | 860W |
| Annual Energy Consumption | 500 Watts (estimated) |
| Special Features | 4 Way Swing, 24-Hour Timer, Remote Control |
10. Warranty and Support
EliteEdge products are manufactured to high-quality standards. This product comes with a limited manufacturer's warranty covering defects in materials and workmanship under normal use.
- For specific warranty details, please refer to the warranty card included with your product or visit the official EliteEdge website.
- For technical support, troubleshooting assistance, or to inquire about replacement parts, please contact EliteEdge customer service.
Customer Support Contact:
- Website: www.eliteedge.com/support (Example Link)
- Email: support@eliteedge.com (Example Link)
- Phone: 1-800-XXX-XXXX (Example Number)