1. Introduction
This manual provides detailed instructions for the setup, operation, and maintenance of your XIXIMENG X9 Pro Retro Gaming Console. Please read this guide thoroughly to ensure optimal performance and enjoyment of your device.
2. Product Overview
2.1 Package Contents
Verify that all items listed below are included in your package:
- 1 x Packing box
- 2 x Wireless Controllers
- 1 x Game Stick
- 1 x USB Cable
- 1 x User Manual
- 1 x TF Card (pre-installed)
- 1 x USB Receiver
- 1 x HD Extension Cable

Figure 2.1: Included components of the X9 Pro Retro Gaming Console.
2.2 Key Features
- Powerful System & Quad-Core Performance: Pre-installed Emuelec 4.3 gaming system with Amlogic S905X2 64-bit quad-core processor and G31 MP2 GPU for smooth performance. Features 2GB DDR3 high-speed memory.
- Extensive Game Library: Over 60,000 games and 60 professional game emulators built-in.
- Intelligent Game Management: Supports game searching, favoriting, progress saving, and archiving.
- Multi-Language Support: One-click language switching between English, French, German, Spanish, Italian, and other languages.
- HDMI CEC & 8K Ultra HD Output: Connects via HDMI with CEC function for unified control. Supports Dynamic HDR technology and 8Kx4K@24 resolution for enhanced visuals.
- Dual 2.4GHz Rechargeable Wireless Controllers: Two ergonomic controllers with 2.4GHz high-frequency transmission for stable, low-latency gameplay. Rechargeable design eliminates battery replacement.

Figure 2.2: Overview of X9 Pro Game Console features.

Figure 2.3: Key specifications and features of the X9 Pro.
3. Setup Instructions
Follow these simple steps to set up your X9 Pro Retro Gaming Console:
- Insert the TF Card: Ensure the TF card is securely inserted into the game stick.
- Plug in the Wireless Adapter: Connect the USB receiver for the wireless controllers into the game stick's USB port.
- Plug in the Power Cord: Connect the power cable to the game stick and then to a 5V2A power adapter (not included) or a USB power source.
- Connect to TV: Plug the game stick into an available HDMI port on your television or display. If needed, use the provided HD Extension Cable.
- Connect USB Power Supply: Ensure the game stick receives power via the USB power cord.
Once connected, switch your TV's input source to the corresponding HDMI port. The console should boot automatically.

Figure 3.1: Plug and Play setup for the X9 Pro.
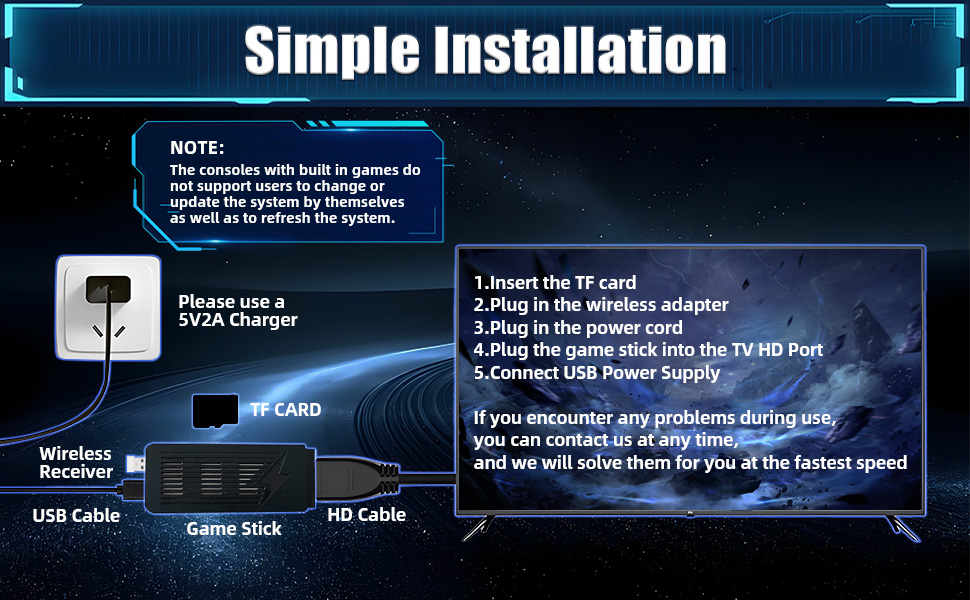
Figure 3.2: Simple installation guide.
4. Operating Instructions
4.1 Controller Functions
The X9 Pro comes with two 2.4GHz wireless controllers designed for comfortable and precise gameplay. Refer to the diagram below for button layout and functions:
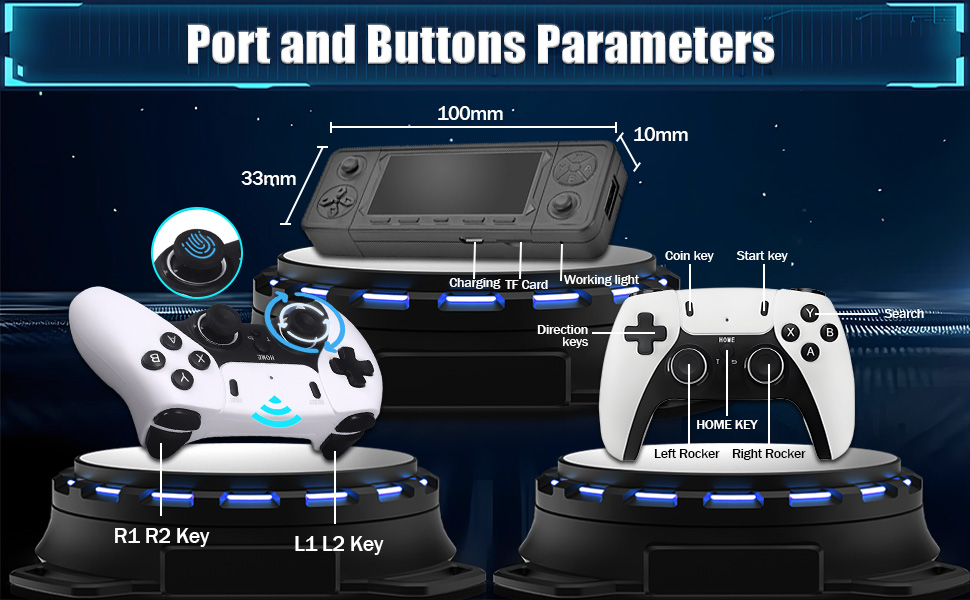
Figure 4.1: Controller and Game Stick Button Layout.
- Direction Keys: Navigate menus and control in-game movement.
- Left/Right Rockers: Analog control for precise movement in supported games.
- A/B/X/Y Buttons: Primary action buttons, functions vary by game.
- Start Key: Pause games, confirm selections, or start games.
- Coin Key: Typically used to add credits in arcade-style games.
- HOME Key: Return to the main menu or exit a game.
- L1/L2/R1/R2 Keys: Shoulder and trigger buttons for additional in-game actions.
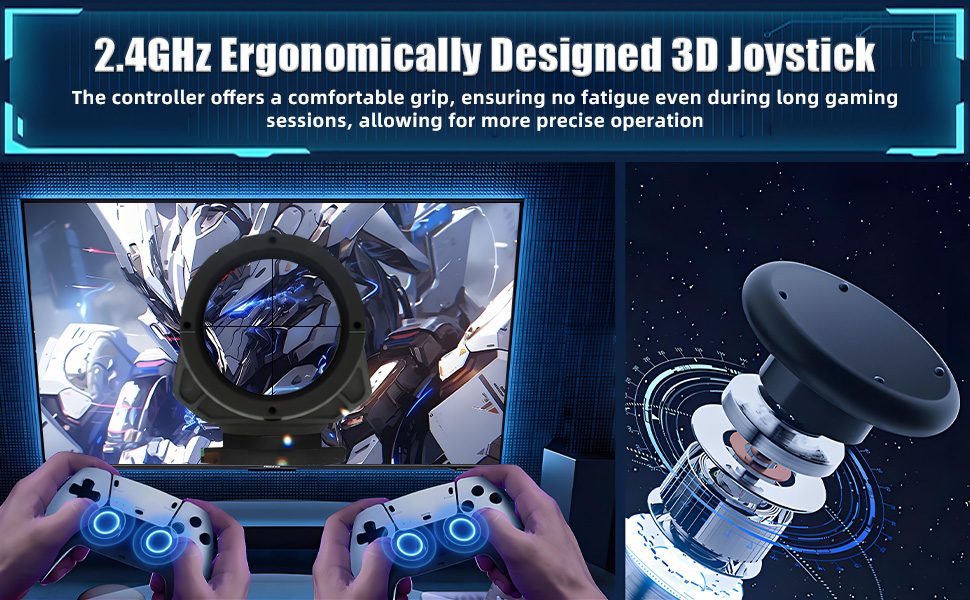
Figure 4.2: Ergonomic design of the wireless controller.
4.2 Game Management
The Emuelec 4.3 system offers robust game management features:
- Search Games: Use the search function to quickly locate specific titles within the extensive game library.
- Favorite Games: Mark your preferred games as favorites for easy access.
- Save/Archive Progress: The console supports saving and archiving game progress, allowing you to pause and resume your gaming sessions at any time.
4.3 System Settings
- Language Selection: Navigate to the system settings to change the interface language. Supported languages include English, French, German, Spanish, Italian, and more.
- HDMI CEC Function: If your display supports HDMI CEC, you can enable this feature for unified control of the console and your TV using a single remote.
4.4 Display and Multiplayer
The X9 Pro supports connection to various high-definition devices and offers multiplayer capabilities:

Figure 4.3: Supports connection to multiple display devices.
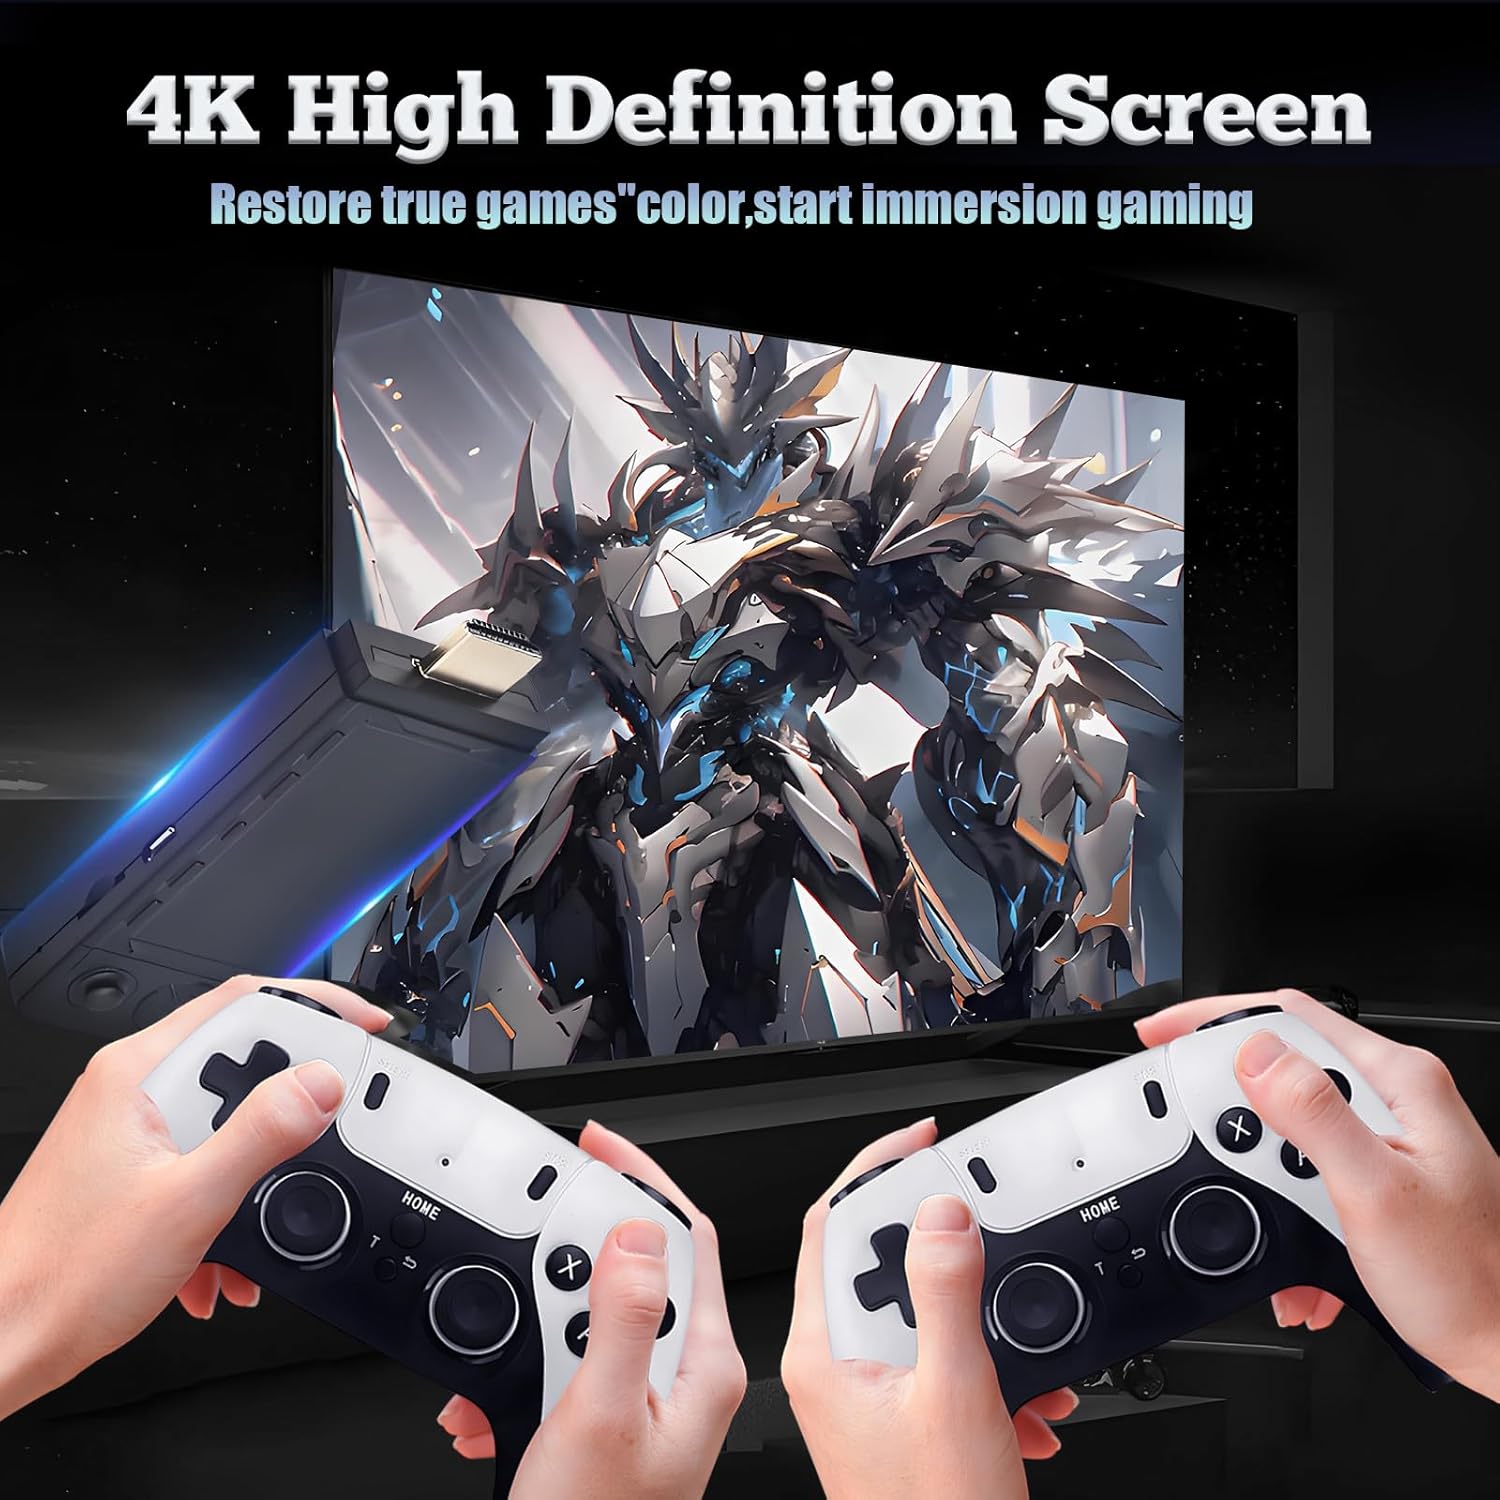
Figure 4.4: 4K High Definition Screen output.

Figure 4.5: Dynamic HDR and 8Kx4K@24 Max Resolution Output.
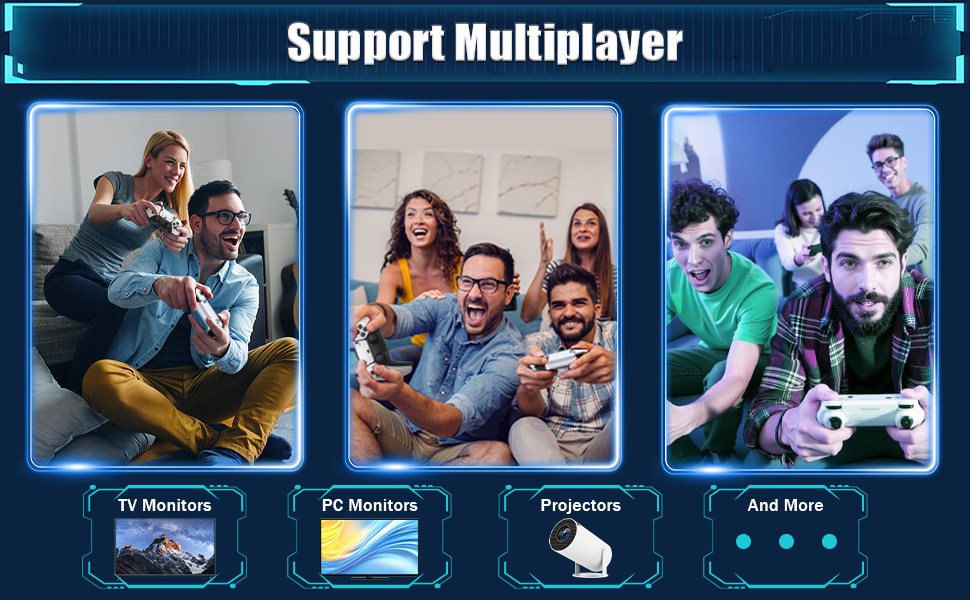
Figure 4.6: Multiplayer support on various displays.
5. Specifications
| Feature | Detail |
|---|---|
| Model Name | X9 PRO |
| Brand | XIXIMENG |
| System | Emuelec 4.3 |
| Processor | Amlogic S905X2 64-bit Quad-Core (Cortex A55) |
| GPU | G31 MP2 |
| Memory | 2GB DDR3 |
| Storage Capacity | 256G (TF Card) |
| Emulators | 60+ |
| Pre-installed Games | 60,000+ |
| Video Output | HDMI, supports 8Kx4K@24, Dynamic HDR |
| Controllers | Dual 2.4GHz Rechargeable Wireless Controllers |
| Product Dimensions | 4.53 x 4.92 x 6.3 inches |
| Color | Black |
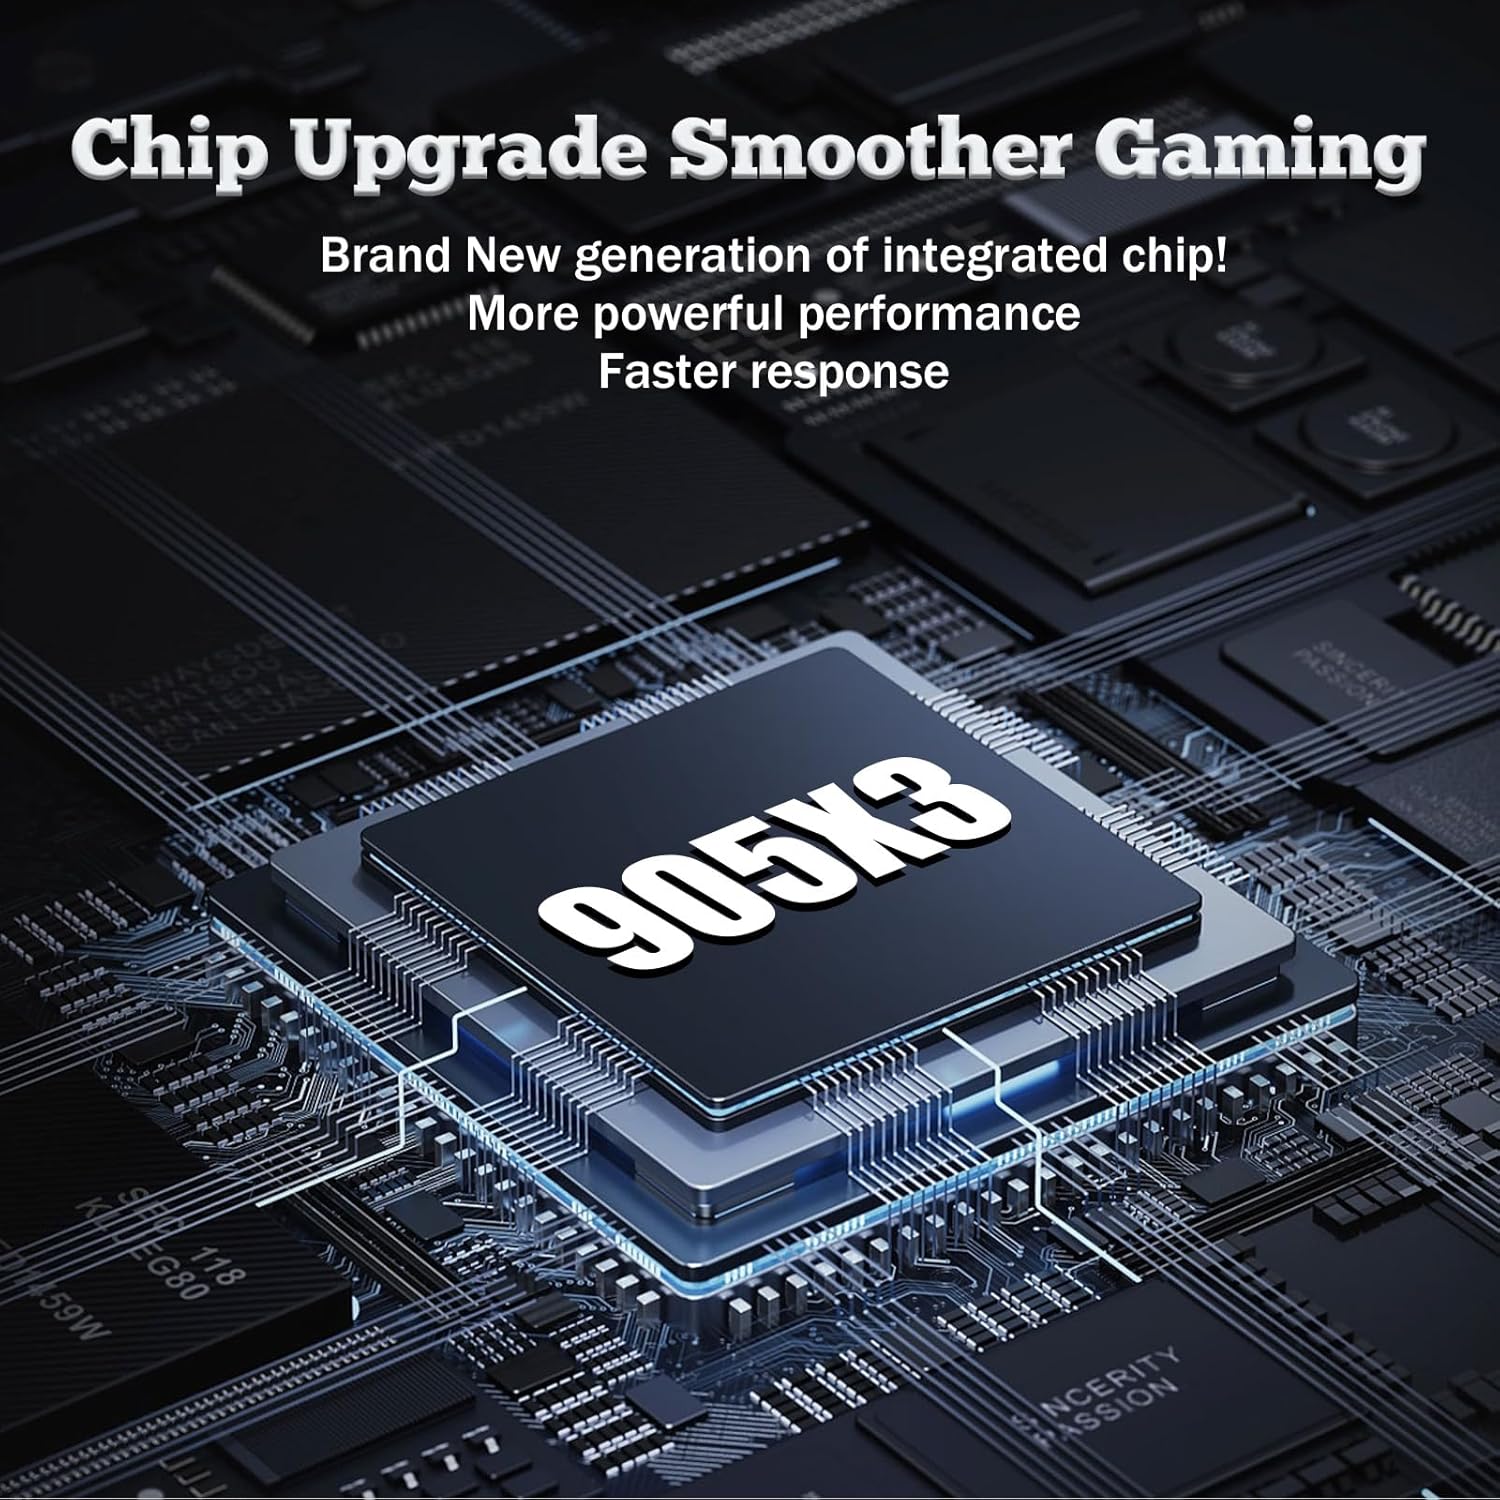
Figure 5.1: The S905X2 processor (image shows S905X3, but product description states S905X2).
6. Troubleshooting
6.1 System Updates and Modifications
Important Note:
The emulator console does not support users to change or update the system by themselves, nor does it support refreshing the system. Attempting to do so may cause irreversible damage to the device and void any potential support.
6.2 Common Issues
- No Power: Ensure the power cable is securely connected to the game stick and a 5V2A power source. Check if the power adapter is working.
- No Signal on TV: Verify that the game stick is plugged into the correct HDMI port on your TV and that your TV's input source is set to that HDMI port. Try a different HDMI port or cable.
- Controllers Not Responding: Ensure the USB receiver is properly plugged into the game stick. Check if the controllers are charged. Re-pair controllers if necessary (refer to controller specific instructions if provided separately).
- Game Lag/Performance Issues: While the console is powerful, some very demanding emulated games might experience minor slowdowns. Ensure no other devices are interfering with the 2.4GHz wireless signal.
7. Maintenance
To ensure the longevity and optimal performance of your X9 Pro Retro Gaming Console, follow these maintenance guidelines:
- Cleaning: Use a soft, dry cloth to clean the console and controllers. Avoid using liquid cleaners or abrasive materials.
- Storage: Store the console in a cool, dry place away from direct sunlight, extreme temperatures, and humidity.
- Handling: Handle the console and controllers with care to prevent physical damage. Avoid dropping or subjecting them to strong impacts.
- Power Off: Always power off the console properly before disconnecting it from the power source.
8. Warranty and Support
For any problems encountered during use, please contact customer support. Do not attempt to modify the system or perform unauthorized repairs, as this may void your support options.
For assistance, please refer to the contact information provided with your purchase or visit the official XIXIMENG support website.


