
1. Introduction
This manual provides detailed instructions for the installation, operation, and maintenance of your Onisamt Universal Ceiling Fan Remote Control Kit. Please read this manual thoroughly before installation and use to ensure proper function and safety.

Image: The Onisamt Universal Ceiling Fan Remote Control Kit, featuring the remote control and the receiver unit side-by-side.
2. Package Contents
Verify that all items listed below are included in your package:
- Remote Control x 1
- Receiver x 1
- Wall Mount Holder x 1
- User Guide x 1
- Wire Nuts x 6
- Screws x 2

Image: Contents of the Onisamt Universal Ceiling Fan Remote Control Kit, including the remote, receiver, wall mount, user manual, wire nuts, and screws.
3. Specifications
| Feature | Detail |
|---|---|
| Model Number | RC-5T1 (Remote) & RC-80R (Receiver) |
| Compatibility | Most 110V 3-speed AC ceiling fans (e.g., Hunter, Harbor Breeze, Hampton Bay) |
| Receiver Rated Power | 240W |
| Frequency | 434MHz |
| Remote Battery | 3V (NOT INCLUDED) |
| Product Dimensions (Remote) | 10.5cm (4.1 inches) x 6.5cm (2.6 inches) |
| Product Dimensions (Receiver) | 10.8cm (4.25 inches) x 5.3cm (2.09 inches) x 2cm (0.79 inches) |
| Item Weight | 7.8 ounces |

Image: Detailed dimensions of the remote control, wall mount holder, and receiver unit.
4. Installation
Safety Precaution: Before beginning installation, ensure the power supply to the ceiling fan is turned off at the circuit breaker to prevent electrical shock.
- Disconnect Fan Wiring: Disconnect the existing wiring from your ceiling fan.
- Install Receiver: Connect the receiver according to the provided wiring diagram. The receiver is designed to fit within the fan canopy.
- Secure Receiver: Secure the receiver within your fan canopy.
- Restore Power: Once all connections are secure and the receiver is properly placed, restore power to the ceiling fan at the circuit breaker.

Image: Visual guide showing the disconnection of ceiling fan wiring and the installation of the controller.

Image: Detailed wiring diagram illustrating how to connect the receiver to the ceiling fan and power supply using wire nuts.
Wiring Connection Method:
- AC IN N (Neutral): Connect the white wire from the receiver to the neutral wire from your household wiring.
- AC IN L (Live): Connect the black wire from the receiver to the live wire from your household wiring.
- Light Wire: Connect the blue wire from the receiver to the light wire of your ceiling fan.
- Motor Wire: Connect the yellow wire from the receiver to the motor wire of your ceiling fan.
- Antenna: The white antenna wire should be left free for optimal signal reception.
5. Pairing the Remote
The remote and receiver are typically pre-configured. If pairing is required or if the remote is not responding, follow one of the methods below:
Method 1: Button Combination
- Cycle power to the fan (turn off and then on at the wall switch or circuit breaker).
- Install the 3V battery (not included) into the remote control.
- Within 3 minutes of restoring power to the fan, press both the Fan Off button (0) and the HIGH button (3) on the remote simultaneously for at least 4 seconds.
- Your fan will turn on to a low speed to indicate successful syncing.
Note: If syncing fails, turn off power to your fan, wait 1 minute, then try again. If using the transmitter with multiple fans, repeat this process for each fan individually.

Image: Close-up of the remote control highlighting the '0' (Fan Off) and '3' (High) buttons used for pairing.
Method 2: LEARN Button
- Cycle power to the fan (turn off and then on at the wall switch or circuit breaker).
- Install the 3V battery (not included) into the remote control.
- Within 3 minutes, press the LEARN button located inside the battery compartment of the remote.
- If you hear your receiver making a beeping sound or the indicator light flashes a few times, the pairing is successful.
Note: To prevent faulty operation, disconnect power from all other ceiling fans within range while pairing.

Image: Close-up of the remote control's battery compartment, showing the 'LEARN' button.

Image: Comprehensive diagram detailing both pairing methods for the remote control.
6. Operation
The remote control provides convenient control over your ceiling fan's speed and light functions.
Fan Speed Control
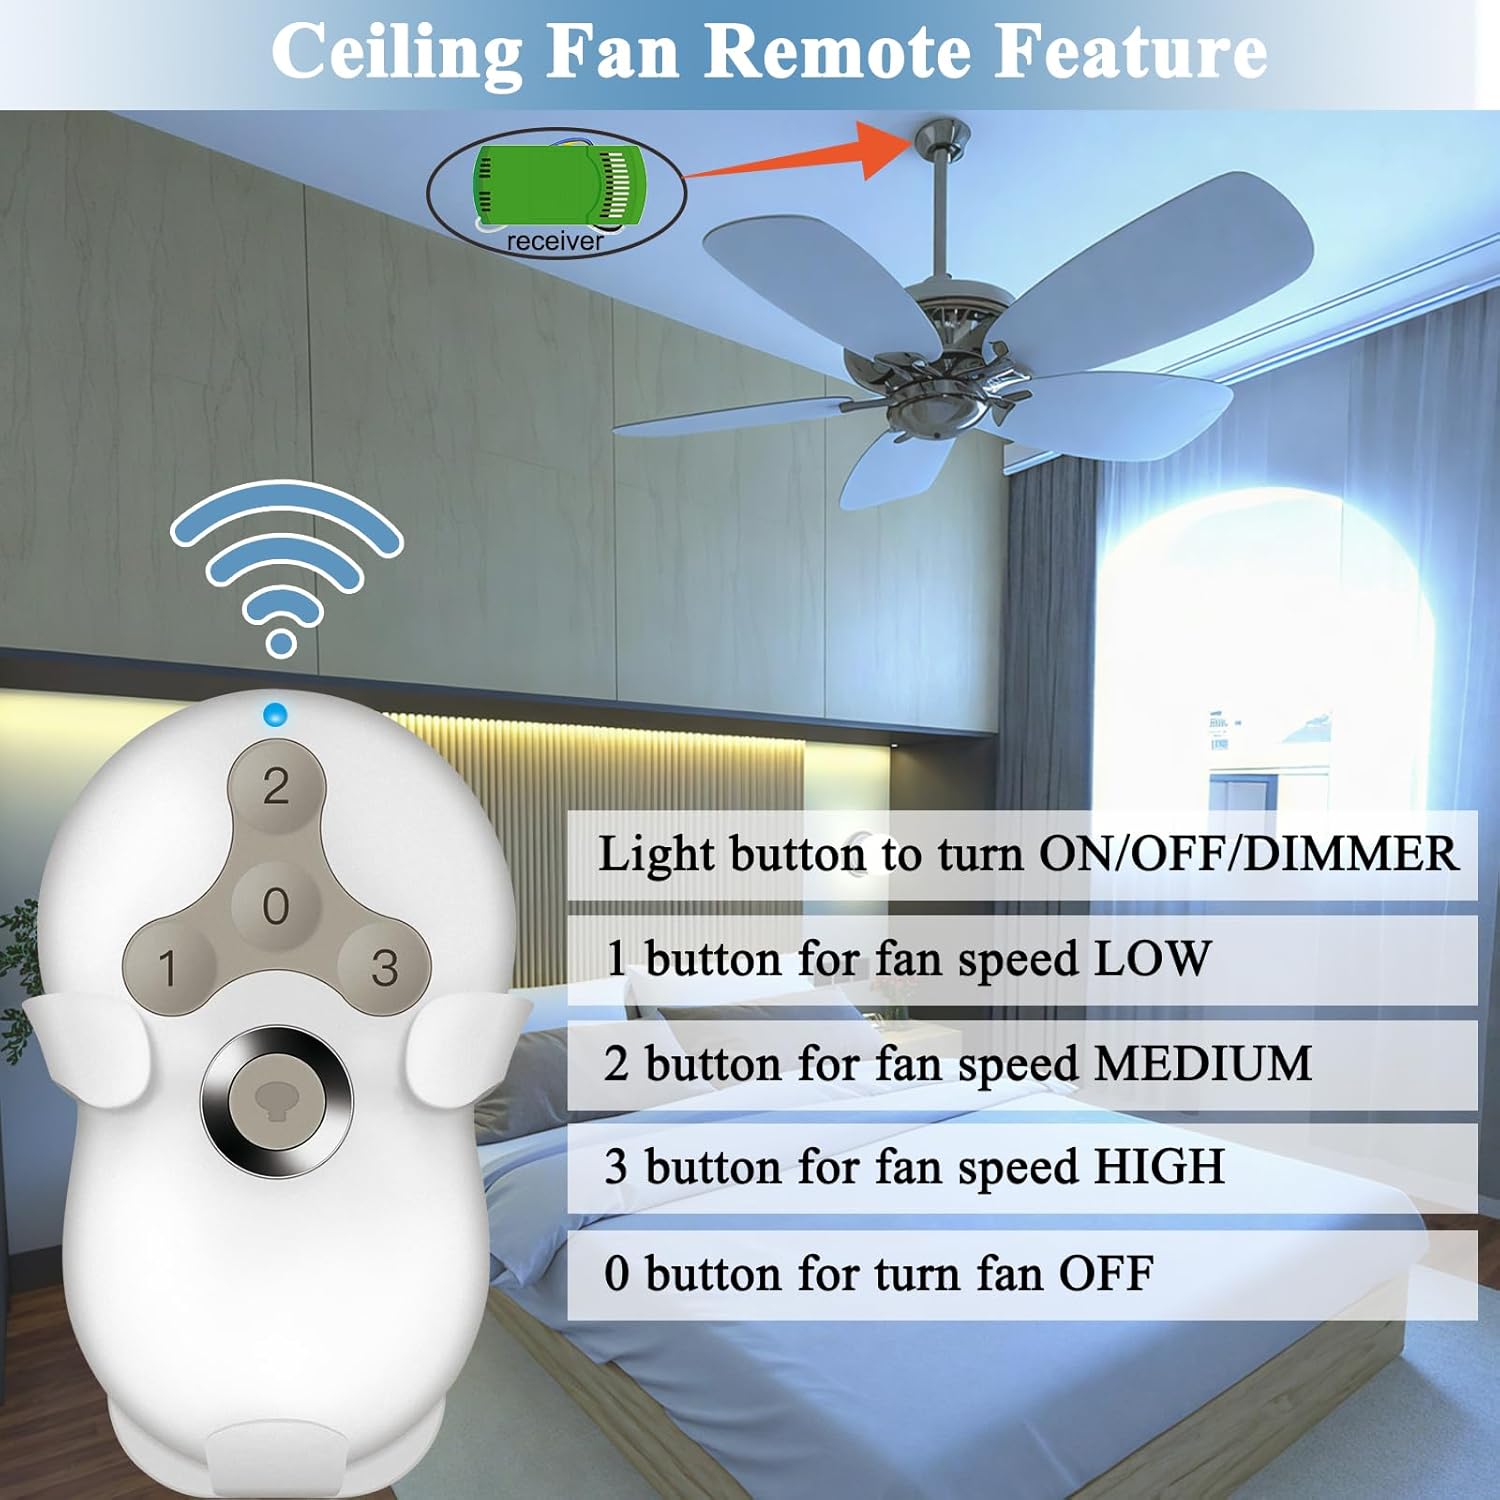
Image: The remote control highlighting the function of each button for fan speed and light control.
- Button 1: Low fan speed
- Button 2: Medium fan speed
- Button 3: High fan speed
- Button 0: Turn fan OFF

Image: A hand holding the remote control, illustrating the selection of low, medium, and high fan speeds for a 3-speed AC ceiling fan.
Light Control and Dimming
- Light Button: Press to turn the light ON/OFF.
- Dimming Function: Press and hold the light button to dim the light. Release when the desired brightness is reached.
Note: The dimming function is compatible with dimmable ceiling fan bulbs. For non-dimmable bulbs, only the ON/OFF function is supported.

Image: Illustration of the light dimming capability, showing brightness levels from 10% to 100% and compatible bulb types.

Image: Visual representation of the smooth dimming feature, showing a finger pressing the light button to adjust brightness from 10% to 100%.
7. Compatibility
This remote control kit is designed for universal compatibility with most 110V 3-speed AC ceiling fans, including popular brands like Hunter, Harbor Breeze, and Hampton Bay.
Regarding lighting, the dimming function supports:
- Halogen & Incandescent lamps: Up to 4.2A/500W Max
- Dimmable CFL: Up to 1.5A/150W Max
- Dimmable LED: Up to 1.5A/150W Max
Some LED and CFL lamps are not dimmable and will only support the ON and OFF function.

Image: Diagram showing the compatibility of the remote's light function with various bulb types, including halogen, incandescent, dimmable CFL, and dimmable LED.
8. Troubleshooting
If you encounter issues with your remote control kit, refer to the following common solutions:
- Remote Not Responding:
- Check if the 3V battery is correctly installed and has sufficient power. Replace if necessary.
- Ensure the remote and receiver are properly paired using one of the methods described in Section 5.
- Verify that the power to the ceiling fan is on at the wall switch and circuit breaker.
- Fan Not Responding to Speed Changes:
- Confirm the receiver is correctly wired to the fan motor.
- Re-pair the remote and receiver.
- Light Not Responding or Not Dimming:
- Check the light bulb for proper installation and functionality.
- Ensure the light bulb is dimmable if you are attempting to use the dimming function. Non-dimmable bulbs will only turn ON/OFF.
- Verify the receiver's light wire connection.
- Interference or Sporadic Operation:
- Ensure no other ceiling fans within range are powered on during the pairing process to avoid signal conflicts.
- Check for other devices operating on similar frequencies (434MHz) that might cause interference.
9. Maintenance
- Cleaning: Wipe the remote control and receiver with a soft, dry cloth. Do not use abrasive cleaners or solvents.
- Battery Replacement: Replace the 3V battery in the remote control when its performance diminishes. Ensure correct polarity when inserting new batteries.
- Storage: If storing the remote for an extended period, remove the battery to prevent leakage.
10. Warranty and Support
For warranty information or technical support, please refer to the contact details provided with your purchase or visit the official Onisamt website. Keep your purchase receipt as proof of purchase.
Manufacturer: Onisamt