
1. Product Overview
The Enjoyedled Red Green Laser Projector is designed for outdoor decorative lighting, featuring red and green laser projections suitable for various occasions. This manual provides essential information for the safe and effective use of your projector.

Image 1: The Enjoyedled Red Green Laser Projector with its remote control, illuminating a building with red and green laser dots.
Package Contents:
- 1 × Laser Light Projector
- 1 × Ground Stake
- 1 × Indoor Base
- 1 × Remote Control
- 1 × Power Supply Transformer
- 1 × User Manual (this document)
2. Safety Information
Please read and understand all safety instructions before operating the device. Failure to follow these instructions may result in electric shock, fire, or serious injury.
- Laser Radiation: Avoid direct eye exposure to the laser beam. Do not stare into the aperture.
- Power Source: Use only the provided power supply transformer. Ensure the power outlet matches the voltage requirements.
- Outdoor Use: The projector is designed for outdoor use and is weather-resistant. However, avoid submerging it in water.
- Installation: Ensure the projector is securely mounted to prevent it from falling.
- Children: Keep the device out of reach of children.
3. Setup and Installation
Follow these steps to set up your laser projector.
3.1 Remote Control Battery Installation
- Locate the battery compartment on the back of the remote control.
- Open the compartment cover.
- Insert two (2) AAA batteries (not included), ensuring correct polarity (+/-).
- Close the battery compartment cover.
3.2 Mounting Options
The projector offers two mounting options:
- Ground Stake: For outdoor placement, attach the ground stake to the projector base and firmly insert it into the ground.
- Indoor Base: For indoor use or placement on a flat surface, attach the indoor base to the projector.

Image 2: Multiple projectors can be used together to enhance the lighting effect on a building.
3.3 Power Connection
- Connect the power supply transformer to the projector's power input.
- Plug the power supply transformer into a suitable outdoor-rated electrical outlet.
3.4 Placement for Optimal Projection
Position the projector to achieve the desired coverage. The projector has a sprawling projection range of up to 3,540 square feet. Experiment with different distances and angles to find the best effect for your space.
4. Operating Instructions
Control your laser projector using the included RF remote control.

Image 3: The RF remote control offers a 33ft range for convenient operation.
4.1 Remote Control Functions
- Power Button: Turns the projector ON or OFF.
- Color Selection: Cycle through single red, single green, or combined red-green projections.
- Mode Selection: Choose between AUTO cycle (changing patterns), FLASH (twinkling effect), or STATIC mode (locks the current pattern).
- Speed Adjustment: Adjust the projection speed through 4 available settings.
- Brightness Control: Modify the intensity of the laser lights.
- Timer Settings: Set the projector to operate for a specific duration (0.5 hours, 3 hours, 5 hours, or 8 hours). The projector will automatically turn on at the same time each day once a timer is set.
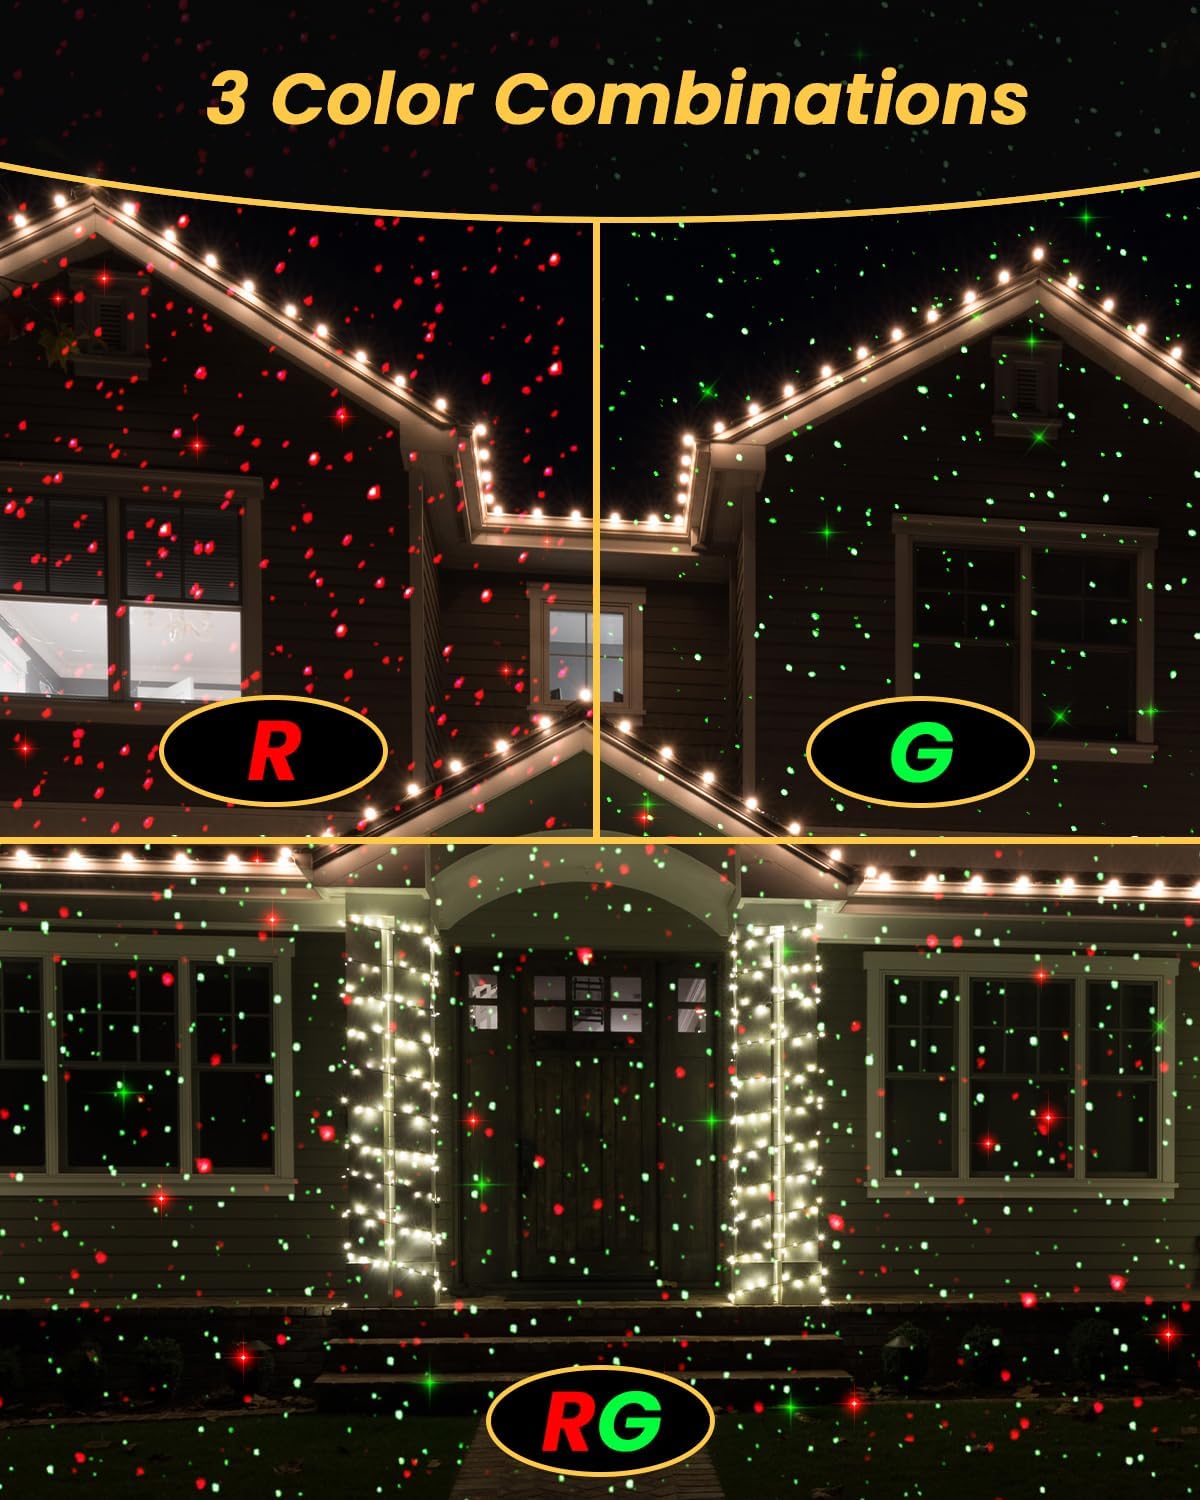
Image 4: The projector offers single-color (red or green) and combined red-green projection options.
5. Maintenance
Proper maintenance ensures the longevity and optimal performance of your projector.
- Cleaning: Gently wipe the projector lens and housing with a soft, dry cloth. Do not use abrasive cleaners or solvents.
- Storage: When not in use for extended periods, store the projector in a cool, dry place. Remove batteries from the remote control before storage to prevent leakage.
- Weather Protection: The projector is designed with a robust, low-temperature-resistant housing and oversized heat sinks to prevent overheating and withstand various weather conditions.
6. Troubleshooting
If you encounter issues with your projector, refer to the following common solutions:
| Problem | Possible Cause | Solution |
|---|---|---|
| Projector does not turn on. | No power supply; faulty connection. | Ensure the power adapter is securely connected and plugged into a working outlet. Check for power outages. |
| Remote control is unresponsive. | Dead batteries; out of range; obstruction. | Replace AAA batteries in the remote. Ensure you are within the 33ft RF range. Remove any major obstructions between the remote and projector. |
| Projection is dim or not visible. | High ambient light; brightness setting too low. | Use the projector in darker conditions for best visibility. Increase the brightness setting using the remote control. |
| Limited pattern options. | Product design. | This model offers specific patterns (dots that expand and contract) and color combinations (red, green, red-green, auto, flash, static). It does not feature complex animated designs or snowflake patterns. |
7. Specifications
| Feature | Detail |
|---|---|
| Model Number | LPS-GD-03RG |
| Dimensions (L x W x H) | 4.33" x 5.12" x 7.09" |
| Item Weight | 1.2 pounds |
| Material | Plastic |
| Light Source Type | Red and Green Lasers |
| Power Source | Corded Electric |
| Mounting Type | Ground Stake / Indoor Base |
| Projection Range | Up to 3,540 Sq Ft |
| Remote Control Range | 33ft (RF) |
| Batteries Required (Remote) | 2 x AAA (not included) |
| UPC | 683125782596 |
| Manufacturer | SHENZHEN LEPSON TECHNOLOGY CO.,LTD. |
8. Warranty and Support
For warranty information and customer support, please refer to the documentation provided at the time of purchase or contact the seller directly. Specific warranty terms may vary.