
WallarGe CL8003
WallarGe Large Digital Wall Clock User Manual
Model: CL8003
Introduction
This manual provides comprehensive instructions for the WallarGe Large Digital Wall Clock (Model CL8003). This electric wall clock features a clear LED display, temperature, automatic Daylight Saving Time (DST) adjustment, date, day of the week, and 5-level adjustable brightness. Please read this manual thoroughly before use to ensure proper setup and operation.
Package Contents
Verify that all items listed below are included in your package:
- WallarGe Large Digital Wall Clock (Model CL8003)
- Power Adapter
- USB Power Cord (5ft long)
- Mounting Accessories (screws, wall anchors)
- User Manual

Image: Contents of the WallarGe Large Digital Wall Clock package, including the clock, power adapter, USB power cord, mounting accessories, and user manual.
Setup
1. Powering the Clock
The WallarGe Digital Wall Clock is an electric, plug-in device. It requires continuous power to operate. Connect the provided USB power cord to the clock's power port and then plug the power adapter into a standard electrical outlet.
- Insert the small end of the USB power cord into the Power Port on the back of the clock.
- Plug the large end of the USB power cord into the provided power adapter.
- Plug the power adapter into a functional wall outlet.
2. Memory Battery Activation
The clock includes a pre-installed CR2032 button cell battery for memory function. This battery preserves time and settings during a power outage, preventing the need for re-setting the clock when power is restored. Before first use, locate the battery compartment on the back of the clock and remove the plastic pull tab to activate the battery.

Image: Rear view of the WallarGe Digital Wall Clock, highlighting the power port, control buttons, foldable stand, and the location of the memory battery compartment with a pull tab.
3. Placement Options
The clock offers versatile placement options:
- Wall Mounting: Use the integrated hanging holes on the back of the clock and the provided mounting accessories (screws and anchors) to secure the clock to a wall. Ensure the power cord can reach an outlet.
- Tabletop Placement: Extend the foldable stand located on the back of the clock to place it securely on a desk, shelf, or nightstand.

Image: The WallarGe Digital Wall Clock displayed in both wall-mounted and tabletop configurations, demonstrating its flexible placement options.
Operating Instructions
The clock features intuitive controls located on the back. Refer to the image in the "Memory Battery Activation" section for button locations.
1. Setting Time and Date
- Press and hold the TIME SET button until the time display begins to flash.
- Use the UP (12/24HR) and DOWN (°C/°F) buttons to adjust the hour. Press TIME SET to confirm and move to minutes.
- Adjust minutes using the UP and DOWN buttons. Press TIME SET to confirm and move to year.
- Continue this process to set the year, month, and day.
- After setting the day, press TIME SET to exit the setting mode.
2. Adjusting Brightness (5 Levels)
The clock offers 5 levels of brightness. Press the DIMMER button repeatedly to cycle through the brightness levels (100%, 80%, 60%, 40%, 20%). Select the level that best suits your environment.

Image: The WallarGe Digital Wall Clock displaying various brightness levels, from 20% to 100%, illustrating the 5-level dimmer function.
3. 12/24-Hour Format and Temperature Unit (°F/°C)
- To switch between 12-hour and 24-hour time formats, press the UP (12/24HR) button.
- To switch between Fahrenheit (°F) and Celsius (°C) temperature units, press the DOWN (°C/°F) button.
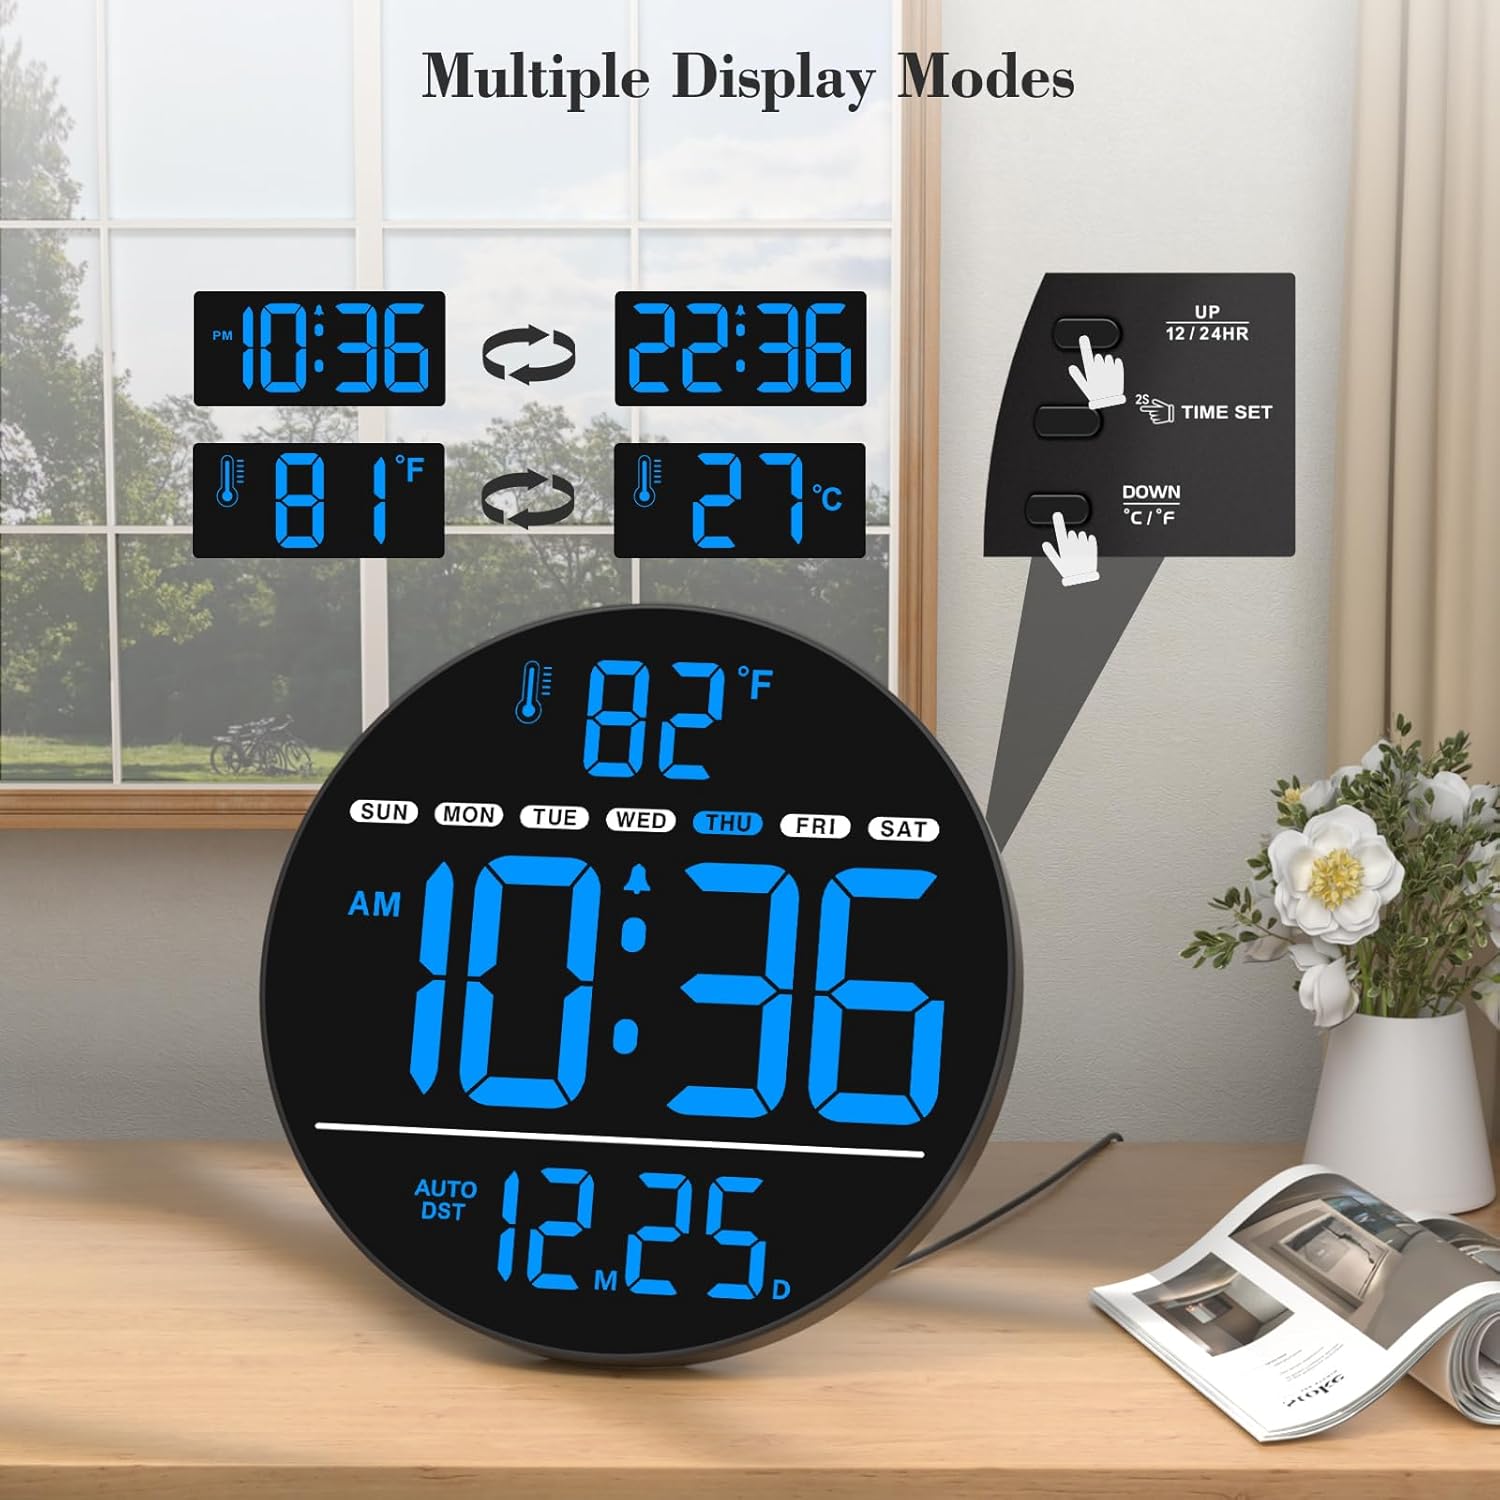
Image: The WallarGe Digital Wall Clock demonstrating the ability to switch between 12-hour and 24-hour time formats, and Fahrenheit and Celsius temperature units, with an inset showing the corresponding control buttons.
4. Automatic Daylight Saving Time (DST)
The clock features an automatic DST function. To enable or disable this feature, press the DST ON/OFF button on the back of the clock. When enabled, the clock will automatically adjust for spring forward and fall back time changes.

Image: The WallarGe Digital Wall Clock demonstrating the automatic adjustment for Daylight Saving Time, showing both "fall back" and "spring forward" scenarios.
5. Alarm Function
The clock supports alarm settings. Refer to the specific instructions for setting and activating alarms using the dedicated alarm buttons on the back of the unit.
6. Silent Operation
This digital clock operates silently, without any ticking sounds, making it suitable for bedrooms, offices, and other quiet environments.
Maintenance
- Cleaning: Wipe the clock's surface with a soft, dry cloth. Avoid using abrasive cleaners or solvents, as they may damage the display or casing.
- Power: Ensure the clock remains plugged into a stable power source for continuous operation.
- Battery Replacement: The CR2032 memory battery typically lasts for several years. If the clock consistently loses settings after a power outage despite being activated, the memory battery may need replacement. Consult the manufacturer for guidance on battery replacement.
Troubleshooting
| Problem | Possible Cause | Solution |
|---|---|---|
| Clock display is blank. | No power supply. | Ensure the power adapter is securely plugged into a working outlet and the USB cord is connected to the clock. |
| Clock loses time/settings after power outage. | Memory battery not activated or depleted. | Remove the plastic pull tab from the CR2032 memory battery compartment. If already removed, the battery may need replacement. |
| Display is too dim or too bright. | Brightness level needs adjustment. | Press the DIMMER button on the back of the clock to cycle through the 5 brightness levels. |
| Time format or temperature unit is incorrect. | Incorrect display setting. | Press the UP (12/24HR) button to change time format. Press the DOWN (°C/°F) button to change temperature unit. |
Specifications
| Feature | Detail |
|---|---|
| Brand | WallarGe |
| Model Number | CL8003 |
| Color | Blue |
| Display Type | Digital LED |
| Special Features | Time, Alarm, Indoor Temperature, Date, Day of the Week, 5-Level Dimmer, Auto DST |
| Product Dimensions | 0.7"W x 8"H |
| Power Source | Corded Electric |
| Indoor/Outdoor Usage | Indoor |
| Mounting Type | Wall Mount, Tabletop |
| Memory Battery | 1 Nonstandard Battery (CR2032, included) |
| Item Weight | 15.2 ounces |
Support
For further assistance or inquiries regarding your WallarGe Digital Wall Clock, please contact customer support:
Email: WallarGe@outlook.com
Please provide your model number (CL8003) when contacting support for faster service.
Ask a question about this manual
Ask about setup, troubleshooting, compatibility, parts, safety, or missing instructions. Manuals+ will review the question and use this page’s manual context to help answer it.