
1. Introduction and Overview
Thank you for choosing the Hatteker 8-in-1 Mens Grooming Kit. This versatile and waterproof grooming tool is designed to meet all your personal care needs, offering precision and convenience for hair, beard, body, and nose/ear trimming. Please read this manual carefully before use to ensure safe and optimal performance.

Image 1: Hatteker 8-in-1 Mens Grooming Kit with all included accessories.
2. Safety Information
- Avoid direct contact with eyes and sensitive facial areas.
- Keep the device and all attachments out of reach of children.
- Always unplug the device and allow it to cool before cleaning.
- Store the grooming kit in a dry place, away from excessive heat and direct sunlight.
- Do not ingest or inhale small parts.
- Always follow the instructions provided in this user manual for proper use and maintenance.
3. Package Contents
Your Hatteker 8-in-1 Mens Grooming Kit includes the following items:
- Main Trimmer Unit
- T-Blade Trimmer Head (for detailing and close trimming)
- Hair Clipper Head
- Precision Trimmer Head
- Razor Shaver Head
- Beard Trimmer Head
- Nose Ear Trimmer Head
- Body Groomer Head
- Body Trimmer Head
- 4 Guide Combs for T-Blade (1mm, 3mm, 5mm, 7mm)
- 5 Guide Combs for Hair Clipper (3mm, 6mm, 9mm, 12mm, 15mm)
- USB Charging Cable
- USB Charger
- Cleaning Brush
- Lubricating Oil
- Storage Base
- Comb
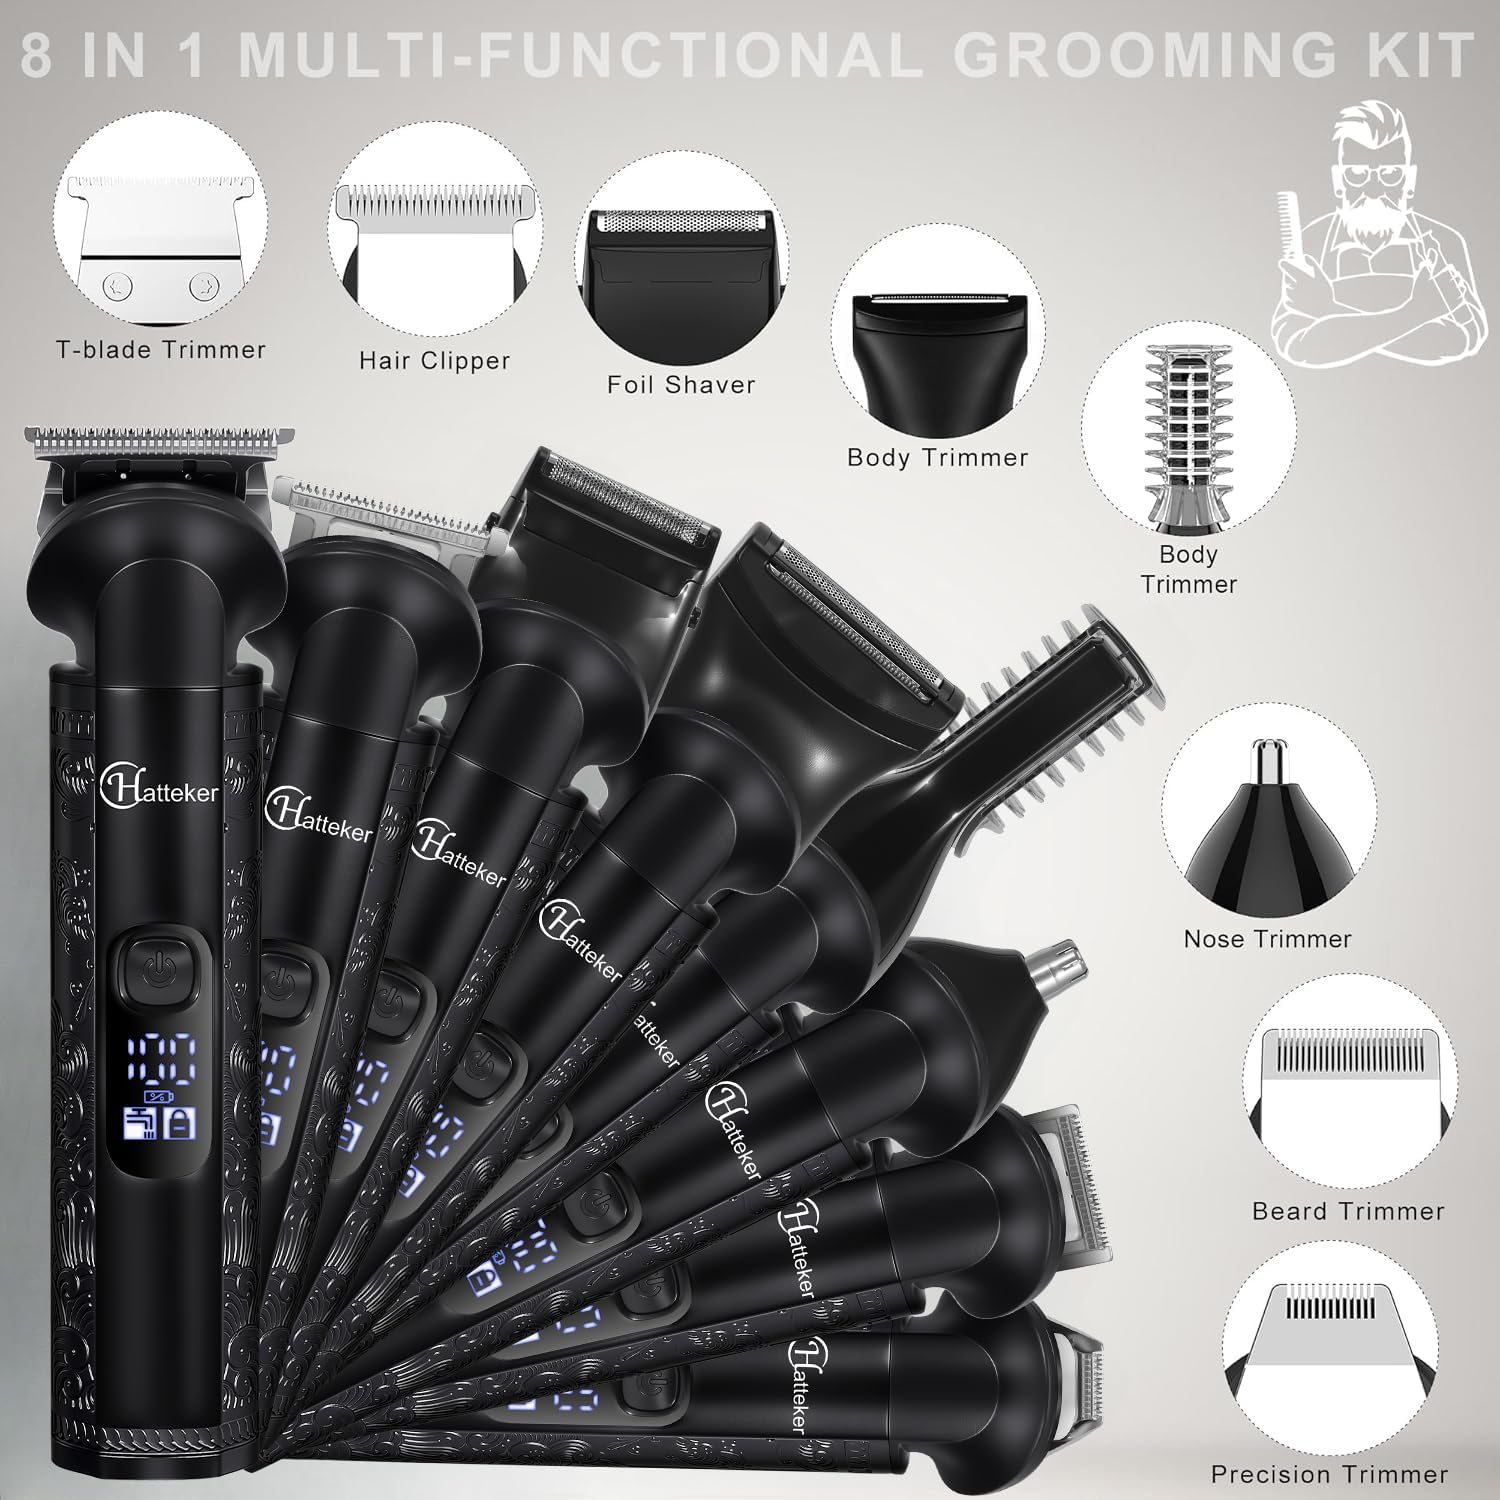
Image 2: Visual representation of the 8-in-1 multi-functional grooming kit components.
4. Setup
4.1 Charging the Device
Before first use, fully charge the grooming kit. The device features an LED battery display to indicate the charge level.
- Connect the USB charging cable to the charging port at the bottom of the main trimmer unit.
- Plug the USB charger into a power outlet.
- The LED display will show the charging progress. A full charge takes approximately 1.5 hours and provides up to 180 minutes of runtime.

Image 3: The main trimmer unit connected to the USB charging cable, showing the LED battery display.
4.2 Attaching and Detaching Heads
The grooming kit features easy-to-change detachable heads:
- To detach a head: Gently push the head upwards from the main unit until it clicks off.
- To attach a head: Align the desired head with the main unit and push it down until it clicks securely into place.

Image 4: Illustration of various detachable trimmer heads.
5. Operating Instructions
5.1 Power On/Off and Lock Function
- To turn on: Press the power button once.
- To turn off: Press the power button again.
- To activate travel lock: Press and hold the power button for 3 seconds. The device will lock to prevent accidental activation.
- To deactivate travel lock: Press and hold the power button for 3 seconds again.
5.2 Using Trimmer Heads and Guide Combs
Select the appropriate trimmer head and guide comb for your desired grooming task.

Image 5: Examples of using different detachable attachments for various grooming tasks.
- T-Blade Trimmer: Ideal for precise trimming, hair artwork, hard/soft lining, oil head styles, hair carving, and bald head maintenance. Use with 1mm, 3mm, 5mm, or 7mm guide combs for desired length, or without a comb for a 0.3mm close trim.
- Hair Clipper: For general hair cutting. Use with 3mm, 6mm, 9mm, 12mm, or 15mm guide combs.
- Beard Trimmer: For shaping and maintaining beard length.
- Precision Trimmer: For fine lines and detailed styling.
- Razor Shaver: For a smooth finish on smaller areas.
- Nose Ear Trimmer: Gently insert into nostrils or ears to trim unwanted hair.
- Body Groomer/Trimmer: For trimming body hair.

Image 6: Detailed view of guide combs and adjustable body trimmer comb.

Image 7: Guide combs for T-blade (1mm, 3mm, 5mm, 7mm) and Hair Clipper (3mm, 6mm, 9mm, 12mm, 15mm).

Image 8: Close-up of the zero-gap T-blade head and its corresponding guide combs.
5.3 Official Product Video: Hatteker Mens Body Hair Trimmer
Video 1: A demonstration of the Hatteker Mens Body Hair Trimmer, showcasing its features and ease of use.
6. Maintenance
6.1 Cleaning
The Hatteker Grooming Kit is IPX7 waterproof, allowing for easy cleaning under running water.
- Ensure the device is turned off and unplugged before cleaning.
- Detach the used trimmer head from the main unit.
- Use the included cleaning brush to remove any loose hairs from the blades.
- Rinse the trimmer head and the main unit (if necessary) under running water.
- Allow all parts to air-dry completely before reattaching or storing.

Image 9: The trimmer unit being rinsed under running water, demonstrating its IPX7 waterproof feature.
6.2 Oiling Blades
Regular oiling ensures optimal performance and longevity of the blades.
- After cleaning and drying, apply 1-2 drops of the included lubricating oil onto the blades.
- Turn on the trimmer for a few seconds to distribute the oil evenly.
- Wipe off any excess oil with a soft cloth.
7. Troubleshooting
- Device not turning on: Ensure the device is charged. Check if the travel lock is activated (press and hold power button for 3 seconds to deactivate).
- Poor trimming performance: Clean the blades thoroughly. Apply lubricating oil. Ensure the correct guide comb is attached securely. Blades may be dull and require replacement (contact customer support).
- Battery not charging: Verify the USB cable and charger are properly connected and functional. Try a different USB port or adapter.
8. Specifications
| Feature | Detail |
|---|---|
| Model Number | HT-609B |
| Battery Type | Integrated/built-in rechargeable battery (1 AA included) |
| Charging Time | 1.5 Hours |
| Runtime | Up to 180 minutes |
| Waterproof Rating | IPX7 |
| Motor Type | Durable Rotary Motor |
| Package Dimensions | 9.09 x 6.34 x 2.56 inches |
| Weight | 1.65 Pounds |
9. Warranty and Support
For warranty information, product support, or to purchase replacement parts, please visit the official Hatteker website or contact their customer service directly. Keep your purchase receipt as proof of purchase.

