
1. Introduction
This manual provides essential instructions for the safe operation, setup, and maintenance of your VATOS XK916-B Remote-Controlled Helicopter. Please read this manual thoroughly before operating the helicopter to ensure proper function and to prevent damage or injury. This 3.5-channel helicopter features 2.4 GHz technology, a built-in gyroscope for stable flight, and LED lights for enhanced visibility.
2. Safety Information
WARNING: Not suitable for children under 3 years old due to small parts. Recommended for ages 10 and up.
- Always operate the helicopter in an open, obstacle-free area.
- Primarily designed for indoor use. If operating outdoors, ensure there are absolutely no wind conditions to prevent loss of control.
- Keep hands, face, and hair away from rotating blades.
- Do not fly near people, animals, or fragile objects.
- Never attempt to modify the helicopter or its components.
- Ensure the helicopter battery is fully charged before each flight.
- Always turn on the helicopter first, then the remote control. Failure to do so may prevent successful pairing.
- The modular battery system includes overcharge and current protection.
3. Package Contents
- VATOS XK916-B RC Helicopter
- Remote Control Transmitter
- USB Charging Cable
- Spare Main Blades (A & B)
- Screwdriver
- User Manual (This document)
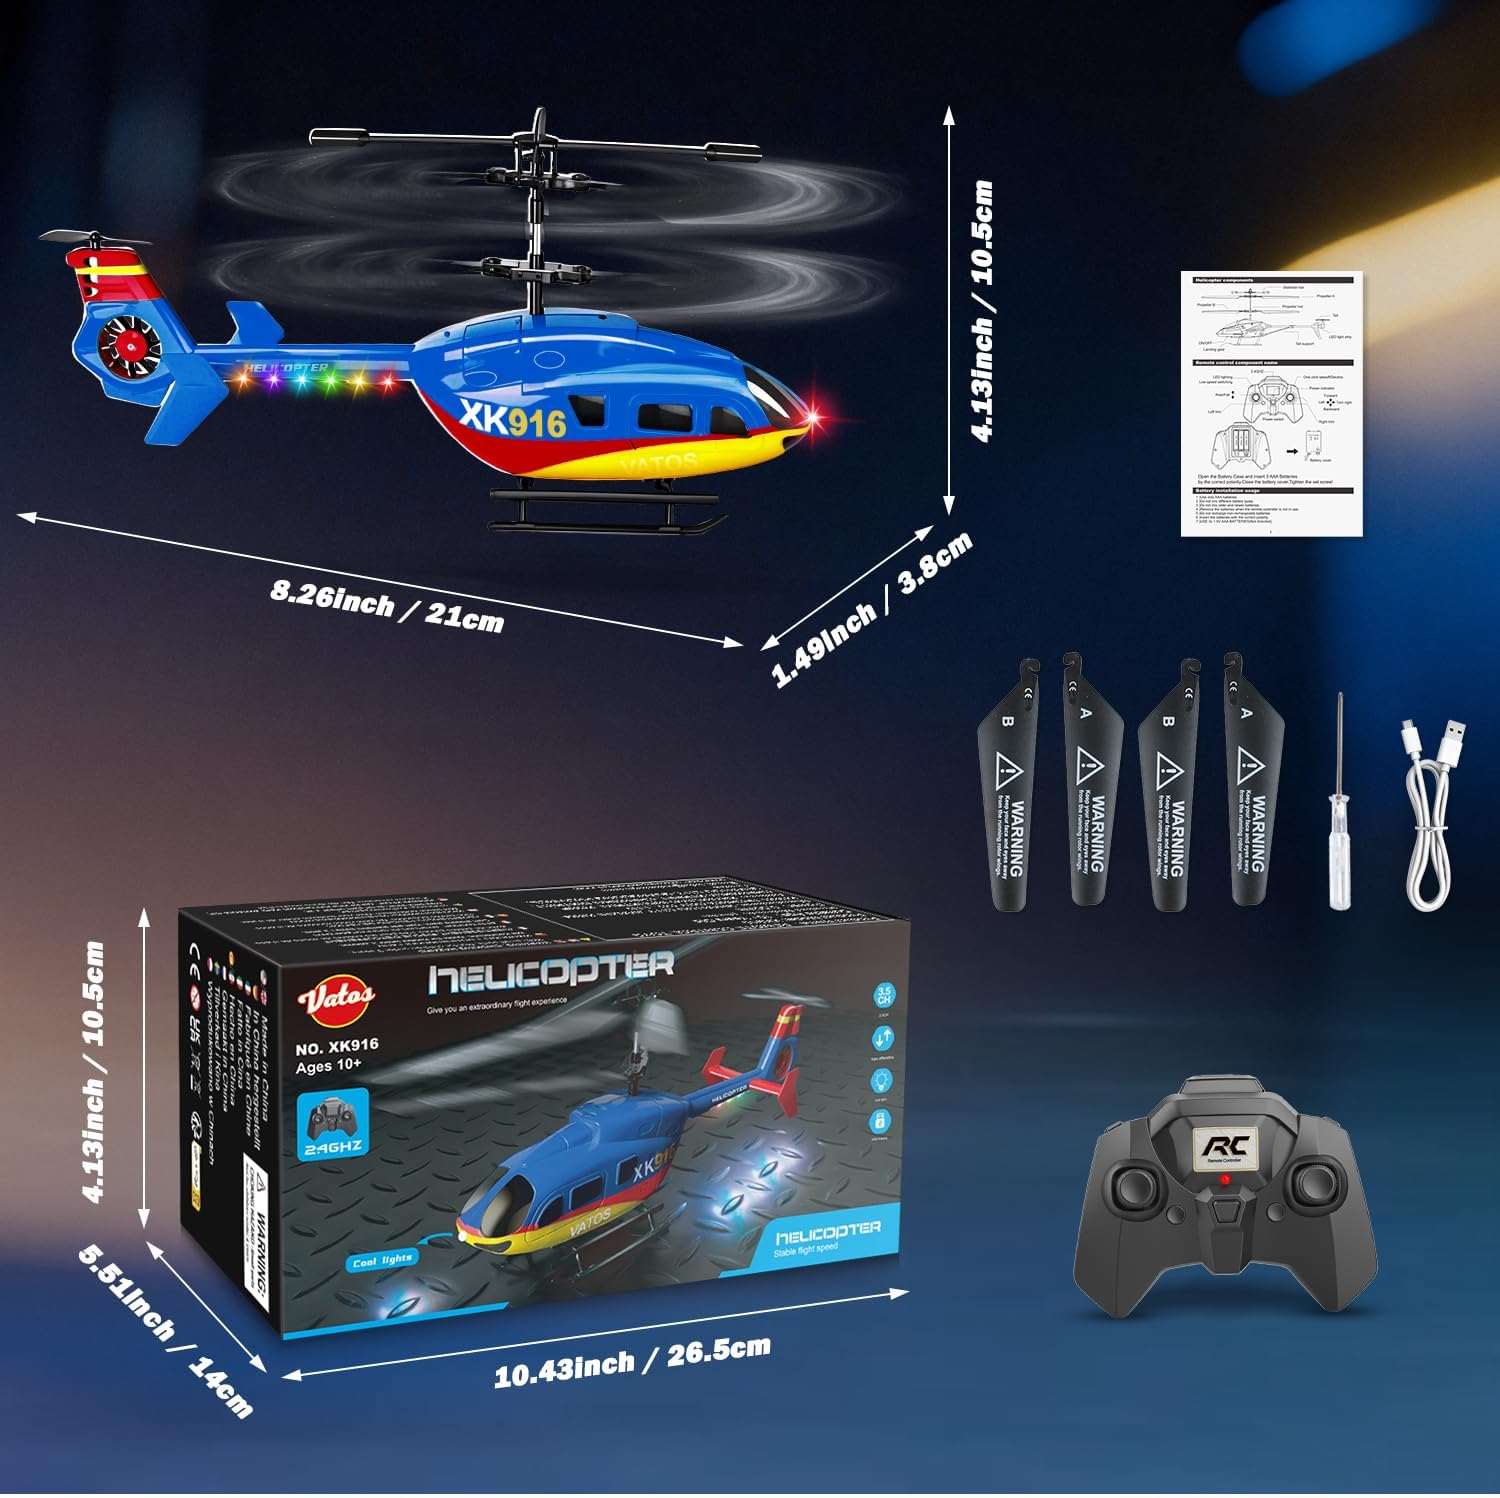
Image: Contents of the VATOS XK916-B package, including the helicopter, remote, charging cable, screwdriver, and spare blades.
4. Product Overview
The VATOS XK916-B helicopter features a robust yet lightweight design, equipped with a main rotor, tail rotor, LED lights, and a durable body. The remote control provides precise 3.5-channel maneuverability.

Image: The VATOS XK916-B RC Helicopter and its remote control.

Image: Detailed view of the helicopter's flexible stabilizer bar, main blades, and tail blades, designed for durability.
5. Setup
5.1. Helicopter Battery Charging
- Locate the charging port on the helicopter.
- Connect the USB charging cable to the helicopter and a USB power source (e.g., computer, USB wall adapter).
- The charging indicator light will show the charging status. A full charge takes approximately 45 minutes and provides 10-12 minutes of flight time.
- Disconnect the cable once charging is complete.

Image: The helicopter being charged via USB, highlighting the modular battery system with safety features.
5.2. Remote Control Battery Installation
- Open the battery compartment on the back of the remote control.
- Insert 3 x AAA batteries (not included), ensuring correct polarity (+/-).
- Close the battery compartment securely.

Image: Illustration of AAA battery installation in the remote control.
5.3. Pairing the Helicopter and Remote Control
- Ensure both the helicopter and remote control have sufficient power.
- Turn on the helicopter's power switch. The LED lights on the helicopter will flash.
- Turn on the remote control's power switch.
- Move the throttle stick (left stick) all the way up, then all the way down. The helicopter's LED lights will stop flashing and become solid, indicating successful pairing.
- Your helicopter is now ready for flight.
6. Operating Instructions
6.1. Basic Controls
- Left Stick (Throttle): Up for ascend, Down for descend.
- Right Stick (Directional): Up for forward, Down for backward, Left for left turn, Right for right turn.
- Trim Controls: Small buttons near the sticks to fine-tune stability and prevent drift.

Image: Visual guide to the helicopter's advanced 3.5-channel maneuverability.
6.2. One-Key Takeoff and Landing
The XK916-B features a one-button takeoff and landing function for ease of use, especially for beginners.
- Place the helicopter on a flat, level surface.
- Press the "One Key Takeoff/Land" button on the remote control. The helicopter will automatically ascend to a stable hovering altitude.
- To land, press the "One Key Takeoff/Land" button again. The helicopter will automatically descend and land gently.
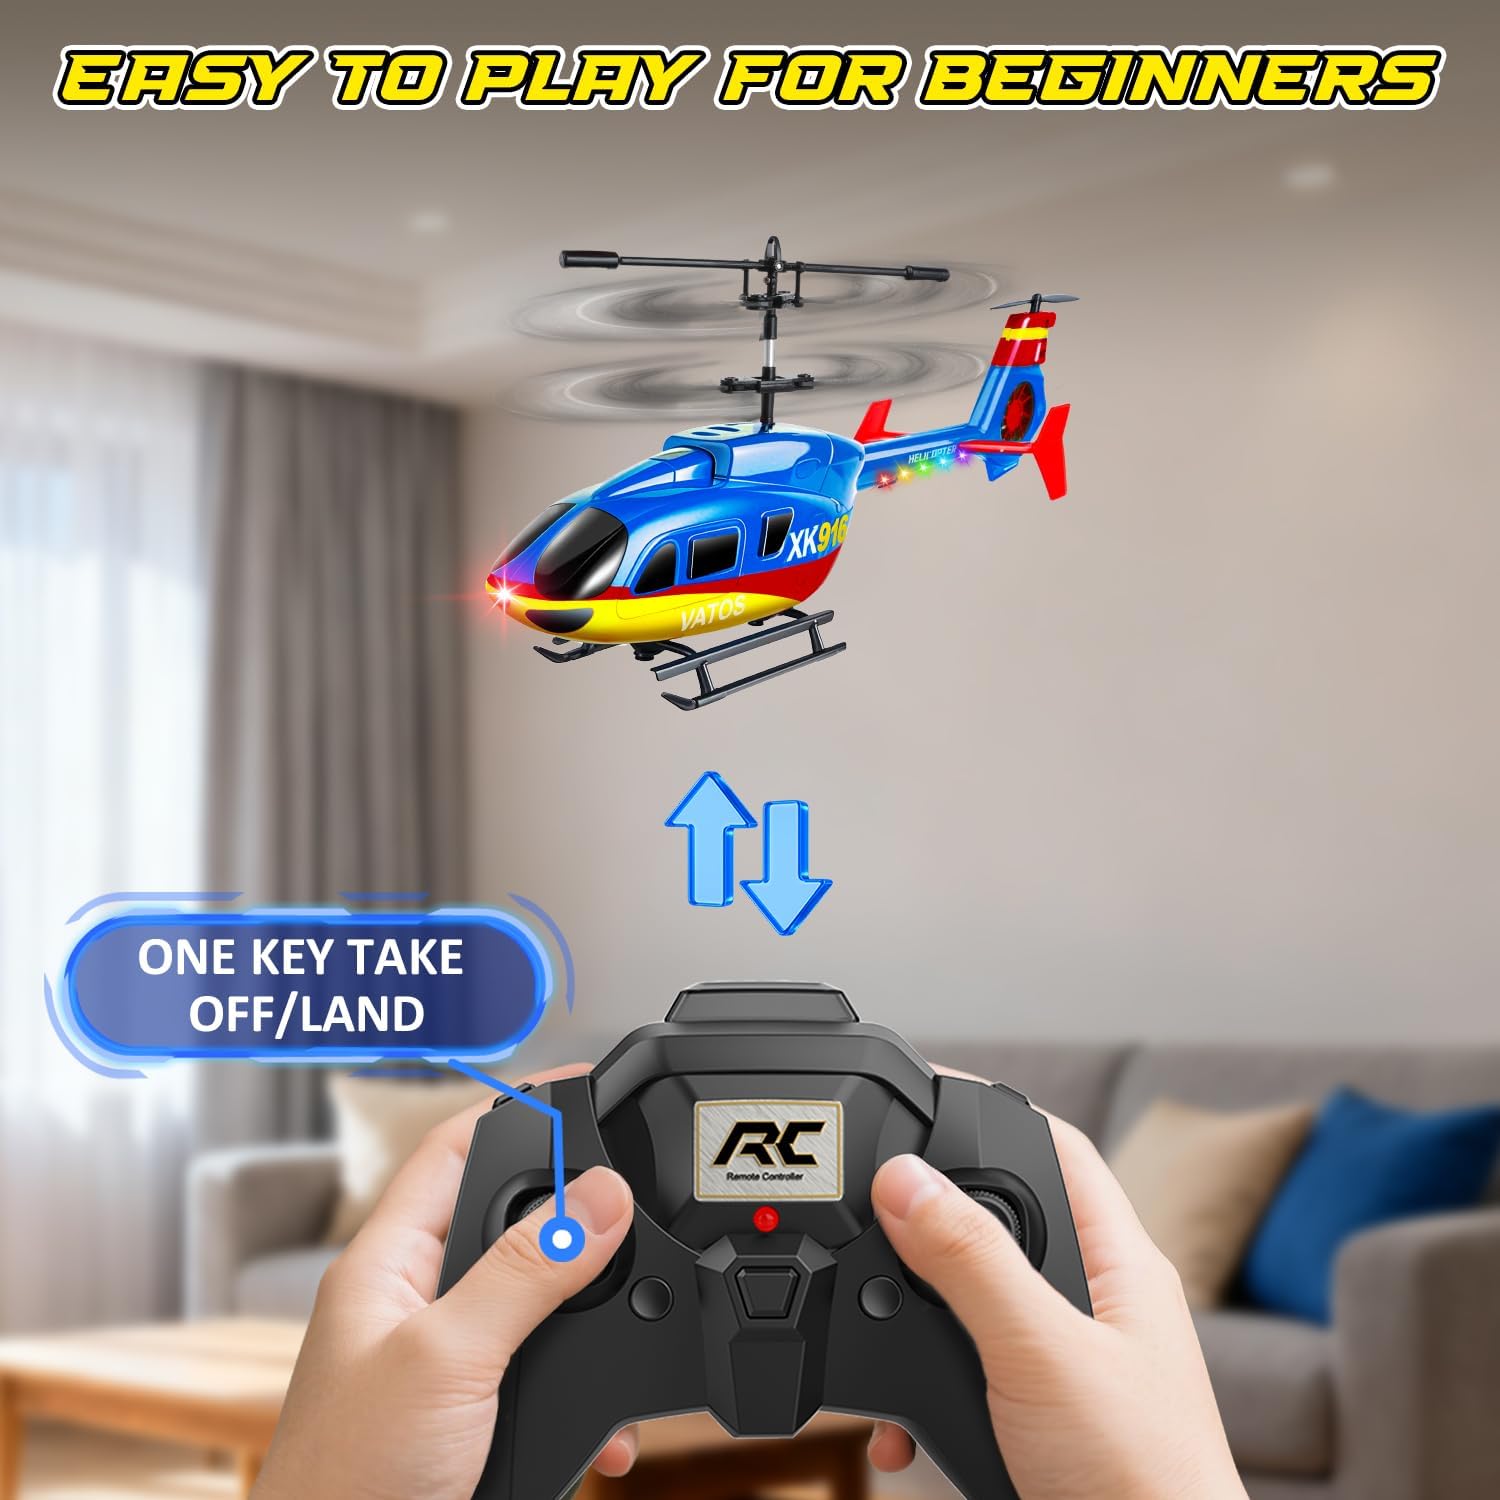
Image: Demonstrating the one-key takeoff and landing feature for beginners.
6.3. Stable Hovering and Altitude Hold
The integrated gyroscope system and intelligent height setting allow the helicopter to maintain a stable hover, making it easier to control.

Image: The helicopter demonstrating stable hovering with intelligent height setting.
6.4. 2.4 GHz Technology and Multi-Player
The 2.4 GHz frequency technology minimizes signal interference, allowing multiple VATOS helicopters to be flown simultaneously without issues.

Image: Two VATOS XK916-B helicopters being flown simultaneously, demonstrating 2.4GHz multi-player capability.
6.5. LED Lights and Two-Speed Mode
The helicopter is equipped with colorful LED lights for enhanced visibility and an exciting flight experience, especially in low-light conditions. It also features a two-speed mode, allowing adjustment for different skill levels.
7. Maintenance
- Cleaning: Use a soft, dry cloth to clean the helicopter. Do not use water or chemical cleaners.
- Blade Inspection: Regularly check the main and tail blades for any damage. Replace damaged blades with the provided spare parts using the screwdriver.
- Storage: Store the helicopter and remote control in a cool, dry place away from direct sunlight and extreme temperatures. Remove batteries from the remote control if not used for an extended period.
- Battery Care: Do not overcharge the helicopter battery. Allow the battery to cool down before recharging.
8. Troubleshooting
| Problem | Possible Cause | Solution |
|---|---|---|
| Helicopter does not respond to remote. | Not paired, low battery in remote, helicopter not powered on. | Ensure helicopter is on first, then remote. Re-pair. Replace remote batteries. Charge helicopter battery. |
| Helicopter flies erratically or drifts. | Trim settings incorrect, damaged blades, strong wind. | Adjust trim controls. Inspect and replace damaged blades. Operate in windless conditions. |
| Short flight time. | Battery not fully charged, aging battery. | Ensure full charge (45 minutes). Consider replacing battery if performance degrades significantly over time. |
| Helicopter does not take off. | Low helicopter battery, blades obstructed. | Charge helicopter battery. Clear any obstructions from blades. |
9. Specifications
- Model: XK916-B
- Brand: VATOS
- Dimensions (L x W x H): 21 x 3.8 x 10.5 cm (8.26 x 1.49 x 4.13 inches)
- Item Weight: 250 Grams
- Main Material: Plastic
- Color: Blue
- Channels: 3.5 CH
- Frequency: 2.4 GHz
- Flight Time: 10-12 minutes
- Charging Time: Approximately 45 minutes (via USB)
- Helicopter Battery: Lithium-ion (included)
- Remote Control Battery: 3 x AAA (not included)
- Recommended Age: 10 years and up
- Special Features: One-button takeoff/landing, altitude hold, integrated gyroscope, LED lights, shock-resistant design, two-speed mode.
10. Warranty and Support
For warranty information or technical support, please refer to the contact details provided with your purchase or visit the official VATOS website. Keep your proof of purchase for any warranty claims.
