
1. Introduction
1.1 Product Overview
The LTS Platinum PTZIP424W-X25IR is a 4 Megapixel (MP) Pan-Tilt-Zoom (PTZ) network camera designed for comprehensive surveillance. It features a 1/2.8" progressive scan CMOS sensor, delivering high-resolution 2560 × 1440 video at up to 30 frames per second (fps). The camera's 25× optical zoom lens allows for detailed observation of distant subjects. Integrated Smart IR LEDs provide night vision up to 164 feet (50 meters). Advanced features include Smart Tracking, 120 dB True Wide Dynamic Range (WDR), and AI-powered MD 2.0 for accurate human and vehicle detection. The camera is housed in an IP66-rated enclosure for outdoor use and supports both 12V DC and Power over Ethernet Plus (PoE+).
1.2 Key Features
- 4MP Video Output: Delivers sharp 2560 × 1440 resolution at 30 fps.
- Ultra-Low Light Performance: Optimized sensor for clear images in minimal light.
- 25× Optical Zoom: Enables long-range surveillance with precise detail.
- Smart Tracking: Automatically follows moving subjects.
- 120dB True WDR: Ensures balanced exposure in high-contrast lighting.
- Integrated IR Illumination: Provides up to 164 feet (50 meters) night vision.
- Pan/Tilt Functionality: 360° endless pan and extensive tilt range for wide coverage.
- H.265 Compression: Reduces bandwidth and storage requirements efficiently.
- AI-Powered MD 2.0: Accurate human and vehicle detection.
- IP66-Rated Enclosure: Weatherproof design for outdoor environments.
1.3 Package Contents
- LTS Platinum PTZIP424W-X25IR PTZ Network Camera
- Wall Mount Bracket (LTB412)
- Installation Hardware (screws, anchors)
- Quick Start Guide
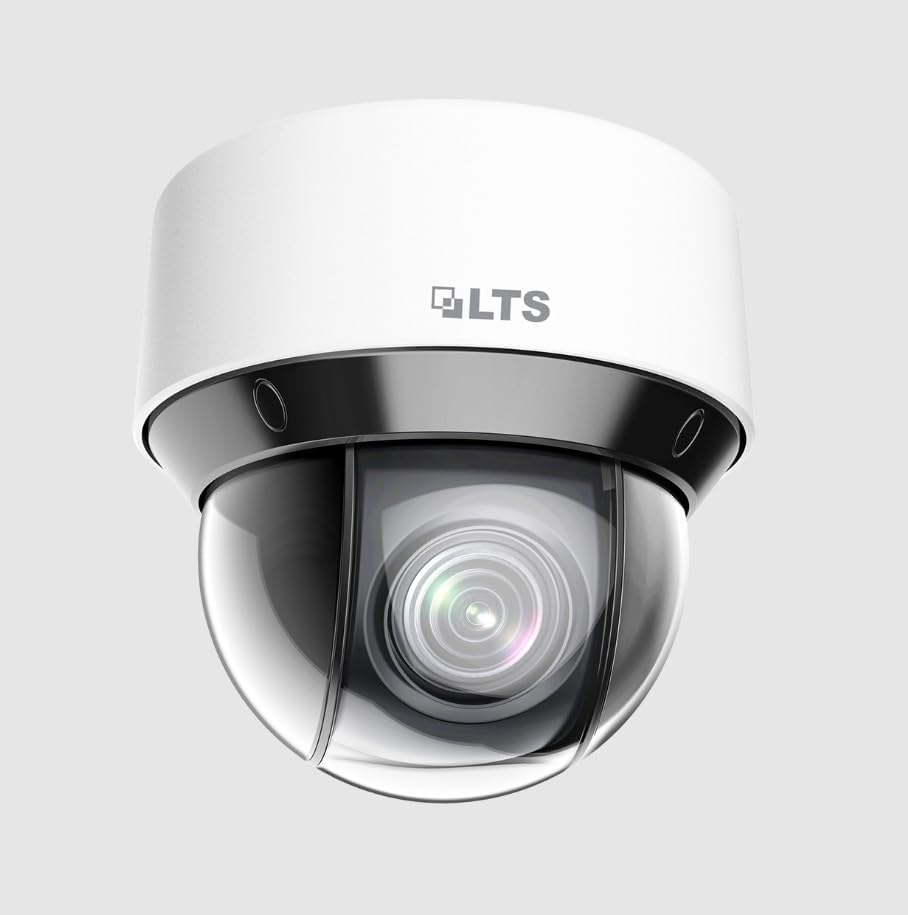
Figure 1: Front view of the LTS Platinum PTZIP424W-X25IR PTZ Network Camera. The image displays the white dome-shaped camera with the LTS logo on the top housing and the lens visible through the clear dome cover.
2. Safety Information
Please read these instructions carefully before operating the device. Improper operation may cause damage to the product, property, or personal injury.
- Ensure the power supply voltage is correct before use.
- Do not expose the camera to extreme temperatures, humidity, or corrosive environments.
- Avoid pointing the camera lens directly at strong light sources for extended periods.
- Installation and servicing should only be performed by qualified personnel.
- Disconnect power before cleaning or performing maintenance.
- Use only specified accessories and power adapters.
3. Setup and Installation
3.1 Mounting the Camera
- Select a suitable wall or pole location that provides the desired field of view and is structurally sound to support the camera's weight.
- Use the provided wall mount bracket (LTB412) as a template to mark drilling holes.
- Drill pilot holes and insert wall anchors if necessary.
- Secure the bracket to the mounting surface using the supplied screws.
- Attach the camera to the bracket, ensuring it is firmly locked in place.
3.2 Wiring and Power Connection
The camera supports two power options: 12V DC or Power over Ethernet Plus (PoE+).
- PoE+ Connection: Connect an Ethernet cable from a PoE+ enabled switch or injector to the camera's RJ45 port. This provides both power and data connectivity.
- 12V DC Connection: If PoE+ is not used, connect a 12V DC power adapter (sold separately) to the camera's power input port. Then, connect an Ethernet cable from your network to the camera's RJ45 port for data.
Ensure all cable connections are secure and waterproofed, especially for outdoor installations, to maintain the IP66 rating.
4. Operating Instructions
4.1 Initial Setup and Network Configuration
- After connecting power and network, use the manufacturer's IP search tool or a web browser to find the camera's IP address on your network.
- Access the camera's web interface by entering its IP address into a web browser.
- Log in using the default credentials (refer to the Quick Start Guide for details). It is highly recommended to change the default password immediately for security.
- Configure network settings (IP address, subnet mask, gateway, DNS) as required by your network environment.
4.2 Pan, Tilt, and Zoom (PTZ) Control
The PTZ functions can be controlled via the camera's web interface, a Network Video Recorder (NVR), or compatible surveillance software.
- Pan: Rotate the camera horizontally (360° endless rotation).
- Tilt: Adjust the camera vertically.
- Zoom: Use the 25× optical zoom to magnify or reduce the view of distant objects.
- Focus: The camera typically features auto-focus, but manual adjustment may be available.
4.3 Advanced Features
- Smart Tracking: Enable this feature in the camera's settings to allow the camera to automatically detect and follow moving objects within its field of view.
- MD 2.0 (Motion Detection 2.0): Configure detection zones and sensitivity. This AI-powered feature distinguishes between humans and vehicles, reducing false alarms.
- WDR (Wide Dynamic Range): Activate WDR in scenes with significant lighting differences (e.g., bright outdoors and dark indoors) to ensure clear images in both areas.
- IR Illumination: Smart IR automatically adjusts the intensity of the infrared LEDs to prevent overexposure of objects close to the camera while providing uniform illumination for distant objects in low-light conditions.
- Video Compression (H.265): The camera uses H.265 compression to optimize storage and bandwidth. Ensure your NVR or viewing software supports H.265 for optimal performance.
5. Maintenance
- Cleaning: Regularly clean the camera's dome cover with a soft, damp cloth. Do not use harsh chemicals or abrasive materials.
- Firmware Updates: Check the manufacturer's website periodically for firmware updates. Keeping the firmware updated ensures optimal performance, security, and access to new features.
- Cable Inspection: Periodically inspect all cables for signs of wear or damage, especially in outdoor installations.
6. Troubleshooting
| Problem | Possible Cause | Solution |
|---|---|---|
| No image/video feed | No power; Network connection issue; Incorrect IP address. | Check power supply/PoE+ connection; Verify Ethernet cable connection; Confirm camera's IP address and network settings. |
| Poor image quality | Dirty lens/dome; Incorrect focus; Low light conditions; WDR not enabled. | Clean the dome cover; Adjust focus if manual; Ensure adequate lighting or enable IR; Activate WDR in camera settings. |
| PTZ control unresponsive | Network latency; Software issue; Camera malfunction. | Check network connection; Restart camera and control software; Contact technical support if issue persists. |
| False motion alarms | Incorrect MD 2.0 settings; Environmental factors (e.g., moving branches). | Adjust MD 2.0 sensitivity and detection zones; Ensure human/vehicle classification is enabled. |
7. Specifications
| Feature | Specification |
|---|---|
| Model | PTZIP424W-X25IR |
| Video Capture Resolution | 4 MP (2560 × 1440) at 30 fps |
| Optical Zoom | 25× |
| IR Range | Up to 164 ft (50 meters) |
| Wide Dynamic Range (WDR) | 120 dB True WDR |
| Video Compression | H.265 |
| AI Features | MD 2.0 (Human/Vehicle Detection), Smart Tracking |
| Ingress Protection | IP66 (Weatherproof) |
| Power Source | 12V DC, PoE+ (30W) |
| Mounting Type | Wall Mount (Bracket Included) |
| Dimensions (L x W x H) | 6.6 x 6.3 x 6.6 inches |
| Indoor/Outdoor Usage | Outdoor |
8. Warranty and Support
For warranty information and technical support, please refer to the documentation provided with your purchase or contact your authorized LTS dealer or the manufacturer directly. Keep your proof of purchase for warranty claims.


