
1. Introduction
Thank you for choosing the CUSIMAX Single Serve Coffee Machine. This appliance is designed to provide a convenient and versatile brewing experience, supporting both K-Cup pods and Nespresso capsules. Please read this manual thoroughly before initial use to ensure safe operation and optimal performance. Keep this manual for future reference.
2. Safety Information
- Read all instructions before using the appliance.
- Do not immerse the appliance, cord, or plug in water or other liquids.
- Close supervision is necessary when any appliance is used by or near children.
- Unplug from outlet when not in use and before cleaning. Allow to cool before putting on or taking off parts, and before cleaning the appliance.
- Do not operate any appliance with a damaged cord or plug, or after the appliance malfunctions or has been damaged in any manner.
- The use of accessory attachments not recommended by the appliance manufacturer may result in fire, electric shock, or injury to persons.
- Do not use outdoors.
- Do not let the cord hang over the edge of a table or counter, or touch hot surfaces.
- Do not place on or near a hot gas or electric burner, or in a heated oven.
- Always attach the plug to the appliance first, then plug the cord into the wall outlet. To disconnect, turn any control to “off,” then remove the plug from the wall outlet.
- Do not use the appliance for other than intended use.
3. Product Overview
The CUSIMAX CMEM-518K is a compact and versatile coffee machine designed for single-serve brewing. It features a sleek stainless steel and black design, making it suitable for various kitchen aesthetics.
Components:
- Main Unit
- 20oz Removable Water Tank
- K-Cup Pod Adapter
- Nespresso Capsule Adapter
- Drip Tray
- Power Cord

Image: CUSIMAX Single Serve Coffee Machine, showing its compact design and stainless steel finish.

Image: Close-up of the K-Cup and Nespresso capsule adapters, highlighting the machine's dual compatibility.
4. Setup
4.1 Initial Cleaning and Flushing
Before first use, it is important to clean and flush the machine to remove any manufacturing residues. This process ensures optimal taste for your first brew.
- Remove the water tank from the back of the machine.
- Wash the water tank and drip tray with warm, soapy water. Rinse thoroughly.
- Fill the water tank with fresh, clean water up to the MAX line.
- Place an empty cup on the drip tray.
- Power on the machine. Once the indicator lights are stable, press either the Short or Lungo button to run a full cycle of hot water through the machine. Repeat this process 2-3 times without a coffee pod/capsule.

Image: The removable 20oz water reservoir, shown being filled for easy access and cleaning.
4.2 Water Tank Installation
Ensure the water tank is securely placed in its designated slot at the back of the machine. The machine will not operate if the water tank is not correctly installed or if the water level is too low.
5. Operating Instructions
5.1 Brewing with K-Cup Pods
- Ensure the K-Cup pod adapter is inserted into the machine.
- Lift the handle to open the brewing chamber.
- Insert a K-Cup pod into the adapter.
- Close the handle firmly until it clicks into place.
- Place your coffee mug on the drip tray.
- Press the desired brew size button (Short or Lungo). The machine will begin brewing.
- Once brewing is complete, the machine will stop automatically. Carefully remove your mug.
- Lift the handle to eject the used K-Cup pod into the internal waste bin.

Image: A hand inserting a K-Cup coffee pod into the machine's brewing chamber.
5.2 Brewing with Nespresso Capsules
- Ensure the Nespresso capsule adapter is inserted into the machine.
- Lift the handle to open the brewing chamber.
- Insert a Nespresso capsule into the adapter.
- Close the handle firmly until it clicks into place.
- Place your espresso cup on the drip tray.
- Press the desired brew size button (Short or Lungo). The machine will begin brewing.
- Once brewing is complete, the machine will stop automatically. Carefully remove your cup.
- Lift the handle to eject the used Nespresso capsule into the internal waste bin.
5.3 Customizing Brew Sizes
The Short and Lungo buttons are programmable, allowing you to adjust the brew time from 15 to 90 seconds to achieve your preferred strength and cup size.
- Insert your desired pod/capsule and place a cup.
- Press and hold the Short or Lungo button. The machine will begin brewing.
- Release the button once your desired amount of coffee is dispensed. The new setting is now saved for that button.

Image: Close-up of the control panel with power, Short, and Lungo buttons, indicating programmable brew sizes.
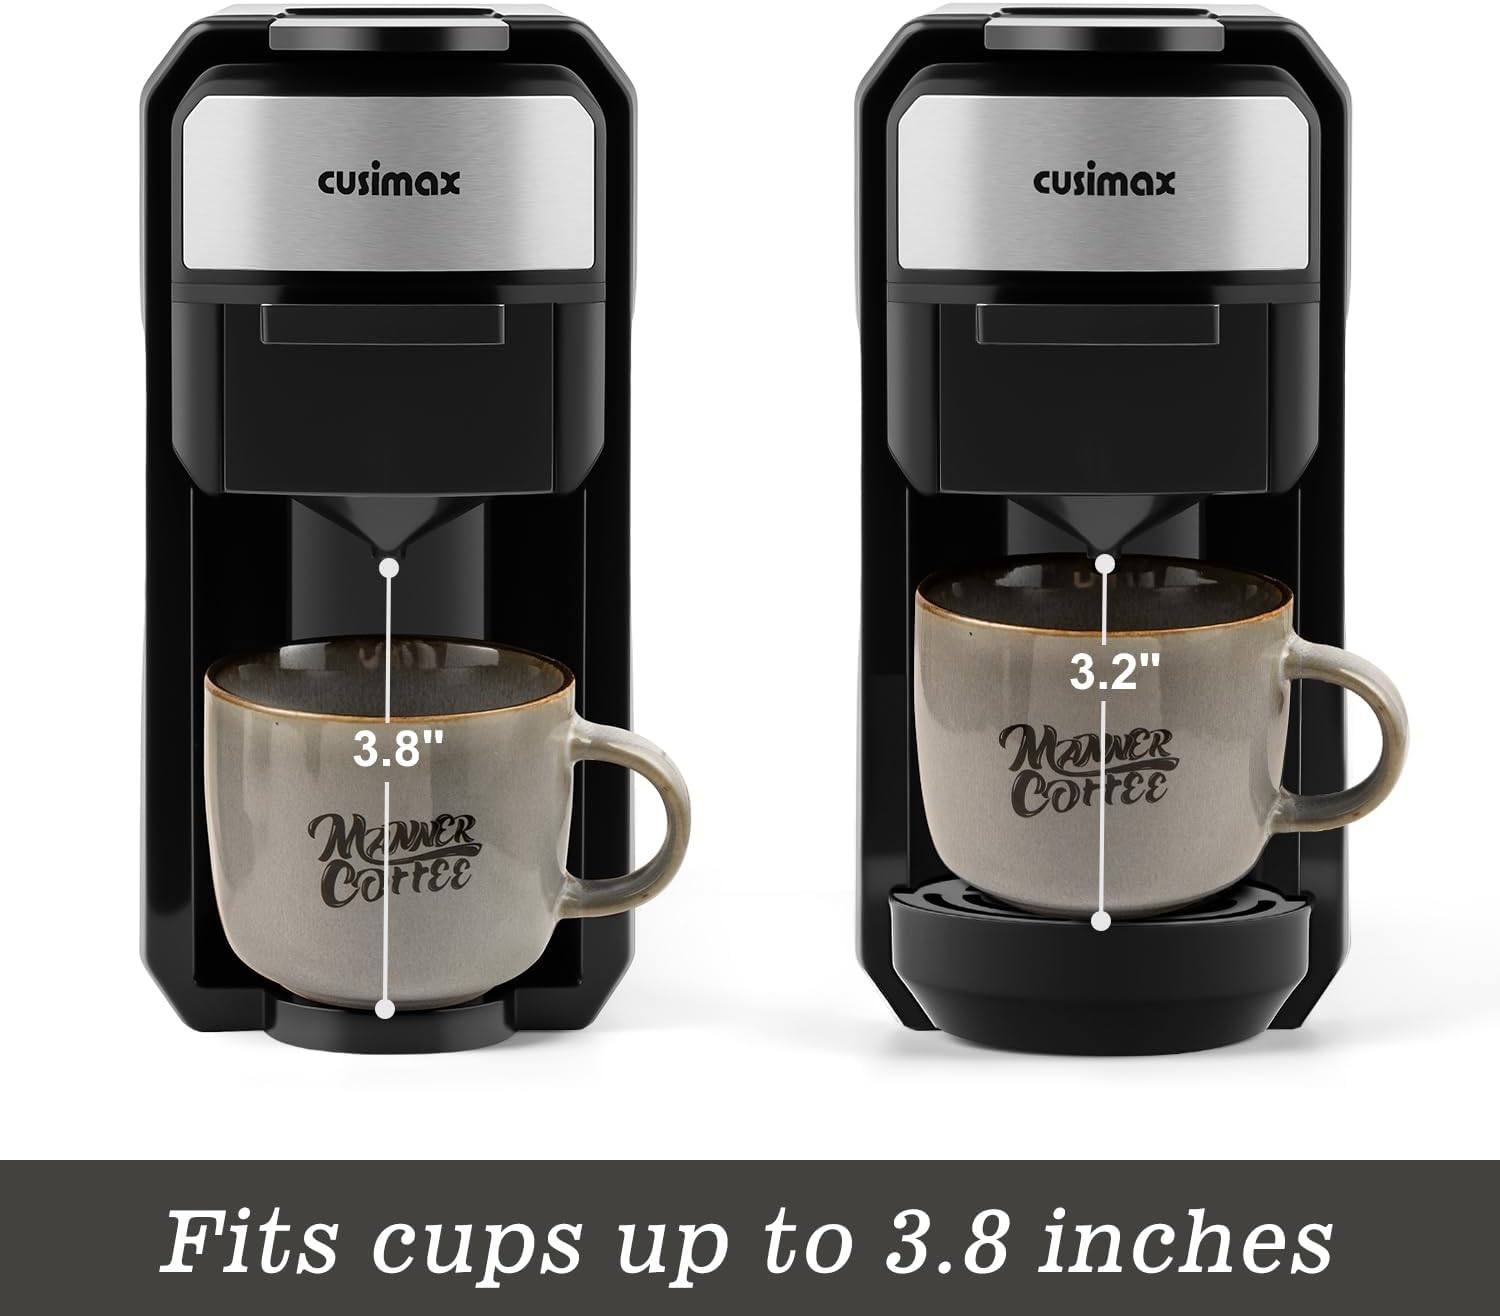
Image: Illustration showing the machine's compatibility with cups up to 3.8 inches in height.
6. Maintenance
6.1 Cleaning the Drip Tray and Water Tank
Regular cleaning of the drip tray and water tank is essential for hygiene and optimal performance.
- Remove the drip tray and empty any accumulated liquid.
- Wash the drip tray and water tank with warm, soapy water.
- Rinse thoroughly with clean water and dry before reassembling.
6.2 Descaling
Over time, mineral deposits can build up in the machine, affecting performance. Descale your machine every 3-6 months, or more frequently if you have hard water.
- Empty the water tank and fill it with a descaling solution (e.g., white vinegar and water, or a commercial descaling agent) according to the solution's instructions.
- Place a large container under the coffee spout.
- Run several brewing cycles until the water tank is empty.
- Rinse the water tank and fill it with fresh water.
- Run several cycles with fresh water to flush out any remaining descaling solution.
7. Troubleshooting
- Machine not turning on: Ensure the power cord is securely plugged into a working outlet.
- No water dispensing: Check if the water tank is filled and correctly seated. Ensure the pump is primed (refer to initial flushing steps).
- Coffee tastes weak or watery: Adjust the programmable brew size to a shorter duration. Ensure the coffee pod/capsule is correctly inserted and not expired.
- Leaking: Check that the water tank is properly installed and the drip tray is not overflowing. Ensure the brewing chamber is fully closed.
8. Specifications
| Feature | Specification |
|---|---|
| Brand | CUSIMAX |
| Model Number | CMEM-518K |
| Product Dimensions | 11.3"D x 4.57"W x 9.69"H |
| Water Tank Capacity | 20 oz |
| Pressure Pump | 19 Bar |
| Power | 1450W |
| Voltage | 120 Volts (AC) |
| Compatibility | K-Cup Pods, Nespresso Capsules |
| Special Features | Customizable Brewing Sizes, Energy-Saving Mode |

Image: Detailed product dimensions for the CUSIMAX coffee machine.
9. Warranty and Support
CUSIMAX single cup coffee maker comes with an 18-month worry-free warranty. For any questions or support needs, please contact CUSIMAX customer service. We are here to help.