
Introduction
This manual provides detailed instructions for the safe and effective use of your Anykit 210° Two-Way Articulating Borescope, Model AD430D55L1.2US. This device is designed for visual inspection in confined spaces, featuring a slim 0.22-inch probe with two-way articulation, a 4.3-inch IPS HD display, and adjustable LED lighting. It is suitable for various applications including automotive, HVAC, plumbing, and general industrial inspections.
What's in the Box
- AD430 Articulating Borescope
- USB Type-C Charging Cable
- User Manual
- 8GB TF Card
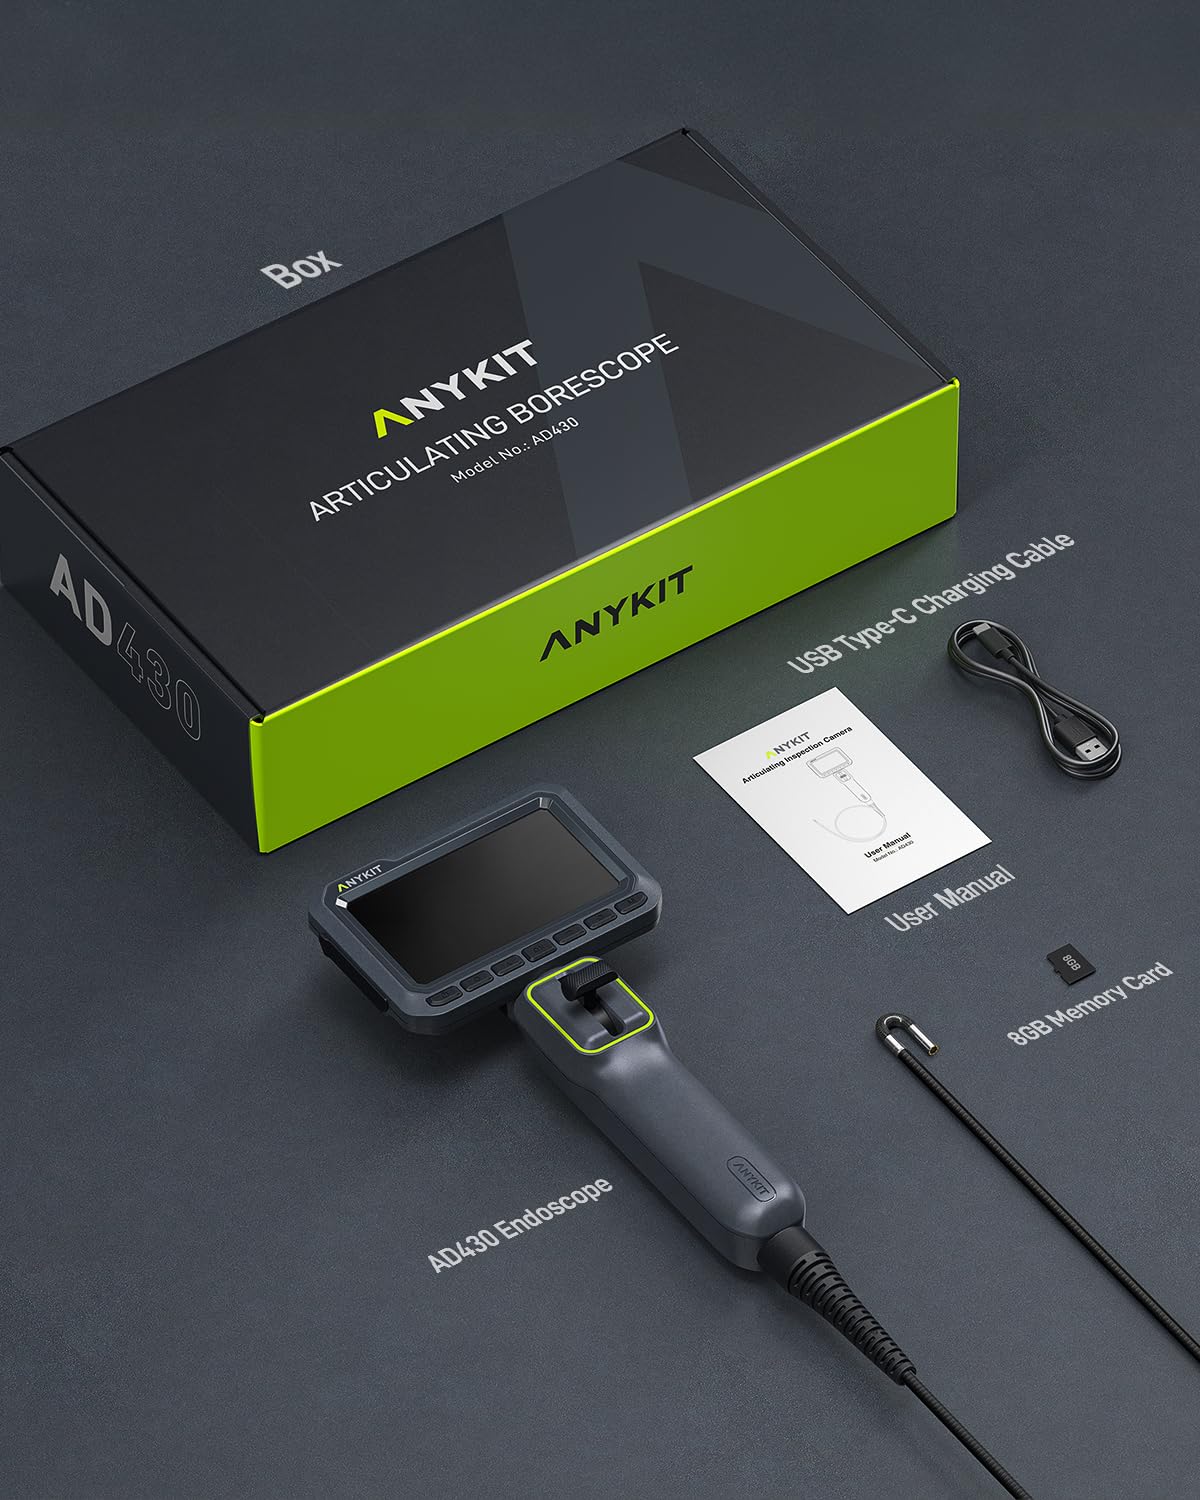
Image: The Anykit AD430 borescope, USB-C charging cable, user manual, and an 8GB TF card are included in the package.
Product Overview
Familiarize yourself with the components and controls of your borescope:
Image: A detailed diagram illustrating the various parts of the Anykit borescope, including the screen, control buttons, articulation joystick, probe, and ports.
- Power Button: Turns the device on/off.
- OK Button: Confirms selections or takes a photo/starts video recording.
- Up/Down Buttons: Navigates menus or adjusts settings.
- Settings Button: Accesses the device settings menu.
- Light Control Button: Adjusts the brightness of the LED lights.
- M Button: Switches between photo and video modes.
- Directional Joystick: Controls the articulation of the probe tip.
- Shutter Button: (Located on the back) Captures photos or starts/stops video recording.
- Charging Port: USB-C port for charging the internal battery.
- TF Card Slot: For inserting the MicroSD card to store media.
- Articulation Probe: The flexible probe with the camera and LED lights.
- Semi-Rigid Gooseneck: The flexible yet shape-retaining section of the probe.
Setup
- Charge the Device: Connect the borescope to a power source using the provided USB-C cable. The charging indicator will show the charging status. Ensure the device is fully charged before first use for optimal battery life.
- Insert TF Card: Locate the TF card slot and insert the included 8GB TF card. Ensure it is inserted correctly until it clicks into place. This card is necessary for saving photos and videos.
- Power On: Press and hold the Power Button until the screen illuminates. The device will boot up and display the live camera feed.
Operating Instructions
Basic Operation
- Power On/Off: Press and hold the Power Button to turn the device on or off.
- Mode Switching: Press the 'M' button to switch between photo capture mode and video recording mode.
- Capturing Media: In photo mode, press the OK button or the Shutter Button (on the back) to take a picture. In video mode, press the OK button or Shutter Button to start recording, and press again to stop.
- Playback: Access the playback menu to review captured photos and videos.
Probe Articulation
The borescope features a 210° two-way articulating probe for enhanced maneuverability.

Image: The slim 0.22-inch probe tip bending in two directions, highlighting its articulation feature for navigating tight spaces.
- Use the Directional Joystick to bend the probe tip left or right. The joystick provides smooth and precise control for navigating complex environments.
- The semi-rigid cable maintains its shape, allowing for stable positioning during inspection.
Adjusting LED Lights
The probe is equipped with high-brightness adjustable LED lights to illuminate dark inspection areas.

Image: The borescope probe tip with its bright LED lights, demonstrating the three adjustable brightness settings for various lighting conditions.
- Press the Light Control Button to cycle through the three brightness levels: Low, Medium, and High.
- Select the appropriate brightness for clear visibility without overexposure.
Image Display Features
- 180° Image Flip: To correct image orientation, navigate to the settings menu and select the 180° image flip option. This is useful when the probe is rotated in tight spaces.
- 3-Level Zoom: Use the zoom function to get a closer look at details. Access this feature through the menu or dedicated buttons if available.
Overheat Alarm
The borescope includes a built-in temperature sensor to protect the device during operation in high-temperature environments.

Image: The borescope screen showing a temperature warning icon, indicating that the device has detected high temperatures and is alerting the user.
- If the probe encounters high temperatures (e.g., in an automotive engine), a red icon alert will appear on the screen.
- The device is designed to protect itself and may automatically shut down if temperatures exceed safe operating limits (e.g., 183°F / 84°C).
Waterproof Rating
The probe and camera are rated IP67 waterproof, making them suitable for use in wet or damp conditions.
Image: The borescope probe tip covered in water droplets, demonstrating its IP67 waterproof capability for use in wet environments.
- Avoid submerging the main unit (screen and handle) in water. Only the probe is waterproof.
Applications
The Anykit borescope is versatile for various inspection tasks:

Image: A collage of images demonstrating the borescope's utility in various scenarios, including automotive engine checks, plumbing, wall cavity inspections, and dryer vent cleaning.
- Automotive Engine Inspection: Examine engine cylinders, valves, and other internal components.
- HVAC Systems: Inspect ducts, vents, and internal machinery for blockages or damage.
- Plumbing: Check pipes for clogs, leaks, or corrosion.
- Wall Cavities: Explore behind walls for wiring, insulation, or pest issues.
Official Product Video: Anykit 3.94FT Two-Way Articulating Borescope
Video: An official product video from Anykit demonstrating the features and usage of the 3.94FT Two-Way Articulating Borescope. This video provides a visual guide to the device's capabilities.
Maintenance
- Cleaning: After each use, gently wipe the probe and camera lens with a soft, dry cloth. For stubborn dirt, a slightly damp cloth can be used, ensuring no moisture enters the main unit.
- Storage: Store the borescope in a cool, dry place, away from direct sunlight and extreme temperatures. Keep the probe coiled loosely to prevent damage.
- Battery Care: To prolong battery life, avoid fully discharging the battery frequently. Recharge the device regularly, even if not in use for extended periods.
Troubleshooting
| Problem | Possible Cause | Solution |
|---|---|---|
| Device does not power on | Low battery; Power button not pressed correctly | Charge the device fully; Press and hold the Power button for a few seconds |
| Blurry image | Camera lens dirty; Object too close/far; Insufficient lighting | Clean the camera lens; Adjust distance to object (optimal focal range 0.8-3.9 inches); Increase LED brightness |
| Probe articulation not working | Joystick not fully engaged; Mechanical obstruction | Ensure firm movement of the joystick; Check for any physical obstructions around the probe tip |
| Cannot save photos/videos | TF card full or not inserted; TF card error | Check TF card storage; Reinsert TF card; Format TF card (this will erase all data); Replace TF card |
| Overheat alarm triggers frequently | Operating in excessively hot environments | Allow the device to cool down; Avoid prolonged use in extreme temperatures |
Specifications
- Model Number: AD430D55L1.2US
- Probe Diameter: 0.22 inches (5.5mm)
- Articulation: 210° Two-Way
- Screen: 4.3-inch IPS HD Display
- Camera Resolution: 1920x1080P
- Cable Length: 4 feet (1.2 meters)
- LED Lights: Adjustable High-Brightness LEDs
- Waterproof Rating: IP67 (probe only)
- Battery: 3000mAh (up to 5 hours continuous use)
- Storage: Supports TF Card (8GB included)
- Charging Port: USB-C
- Item Weight: 1.57 pounds
- Package Dimensions: 15.16 x 8.78 x 3.31 inches
Warranty and Support
Anykit products are manufactured to high-quality standards. For warranty information, technical support, or service inquiries, please refer to the contact details provided in the packaging or visit the official Anykit website. Please retain your proof of purchase for warranty claims.

