
Barrina TR40a
Barrina TR40a 40W Track Grow Light Instruction Manual
Model: TR40a | Brand: Barrina
1. Introduction
The Barrina TR40a Track Grow Light is a 40W wall-mounted or ceiling-mounted grow light designed for indoor plants. It features a 5000K full spectrum light with a high Color Rendering Index (CRI) of 96, providing optimal lighting conditions for all plant growth stages. The adjustable beam angle (15°-60°) and flexible positioning allow for precise light direction, catering to various plant needs and indoor environments. This unit includes a mechanical timer for convenient and consistent operation.
Video 1: Overview of the Barrina TR40a Track Grow Light, showcasing its features and application for indoor plants.
2. Important Safety Information
- Read all instructions before installation and use.
- Ensure the power supply is disconnected before installation, maintenance, or cleaning.
- This product is for indoor use only. Do not expose to water or high humidity.
- Do not use plastic wall anchors on non-solid wall materials (e.g., gypsum boards, wood panels, hollow walls) when installing. Use appropriate anchors for your wall type to ensure stable installation.
- Avoid forced 360° rotation or heavy pressure on the light fixture to prevent shaft damage.
- The TR40a and TR40c models are not compatible with each other and must not be used in combination.
- Do not look directly into the LED light when it is operating.
3. What's in the Box
Verify that all components are present before beginning installation.
- 1x Barrina TR40a Track Grow Light
- 1x Long Power Cord (16.4 ft)
- 1x COB LED Bulb (integrated)
- Installation Accessories (Plastic Wall Anchors, Phillips pan head screws, Self-tapping Screws, Cable Clamps, Hook and Loop Tape)
- 1x Mechanical Timer

Image 1: Contents of the Barrina TR40a package, including the grow light, power cord, mechanical timer, and installation hardware.
4. Setup and Installation
4.1. Installation Options
The Barrina TR40a offers flexible installation as either a wall-mounted (plug-in) or ceiling-mounted (hardwired) fixture.

Image 2: Visual representation of the two wiring methods: Plug-in Installation and Hardwired Installation.
4.2. Wall-Mounted (Plug-in) Installation
- Disassemble the Fixture: Unscrew the screws on the light fixture to remove the mounting plate.
- Mark Drill Points: Position the mounting plate at the desired location on the wall and mark the points for drilling.
- Drill Holes: Using a hammer drill, create 6 mm (0.23 inch) holes at the marked points.
- Insert Wall Anchors: Gently tap the plastic wall anchors into the drilled holes.
- Secure Mounting Plate: Attach the mounting plate to the wall using the self-tapping screws.
- Install Light Fixture: Align the light fixture with the secured plate and install it. Tighten the screws to secure the fixture.
- Cable Management: Use the provided cable clamps and hook and loop tape to neatly route the 16.4 ft power cord along the wall to a power outlet.
- Plug In: Plug the power cord into a standard electrical outlet.
Video 2: Step-by-step guide for wall-mounted (plug-in) installation of the Barrina TR40a Track Grow Light.
4.3. Ceiling-Mounted (Hardwired) Installation
- Disassemble the Fixture: Unscrew the screws on the light fixture to remove the mounting plate.
- Remove Power Cord: Open the wire terminals and carefully remove the switched power cord from the fixture.
- Mark Drill Points: Position the mounting plate at the desired location on the ceiling and mark the points for drilling.
- Drill Holes: Using a hammer drill, create 6 mm (0.23 inch) holes at the marked points.
- Insert Wall Anchors: Gently tap the plastic wall anchors into the drilled holes.
- Secure Mounting Plate: Attach the mounting plate to the ceiling using the self-tapping screws.
- Wire Connections: Ensure the main power supply is cut off at the circuit breaker before proceeding. Connect the live (black), neutral (white), and ground (green/yellow) wires from your ceiling's electrical box to the corresponding wires on the light fixture using appropriate wire terminals.
- Install Light Fixture: Align the light fixture with the secured plate and install it. Tighten the screws to secure the fixture.
- Restore Power: Turn the main power supply back on.
Video 3: Detailed instructions for ceiling-mounted (hardwired) installation of the Barrina TR40a Track Grow Light.
5. Operating Instructions
5.1. Adjustable Beam Angle (15°-60°)
The TR40a allows you to adjust the beam angle to focus light precisely where your plants need it. This is ideal for single plants requiring intense light or for wider coverage across multiple plants.
- To adjust, gently twist the inner ring of the light fixture.
- Rotate clockwise for a narrower beam (down to 15°).
- Rotate counter-clockwise for a wider beam (up to 60°).
- Tip: This operation should be performed only when the light and power are turned off.
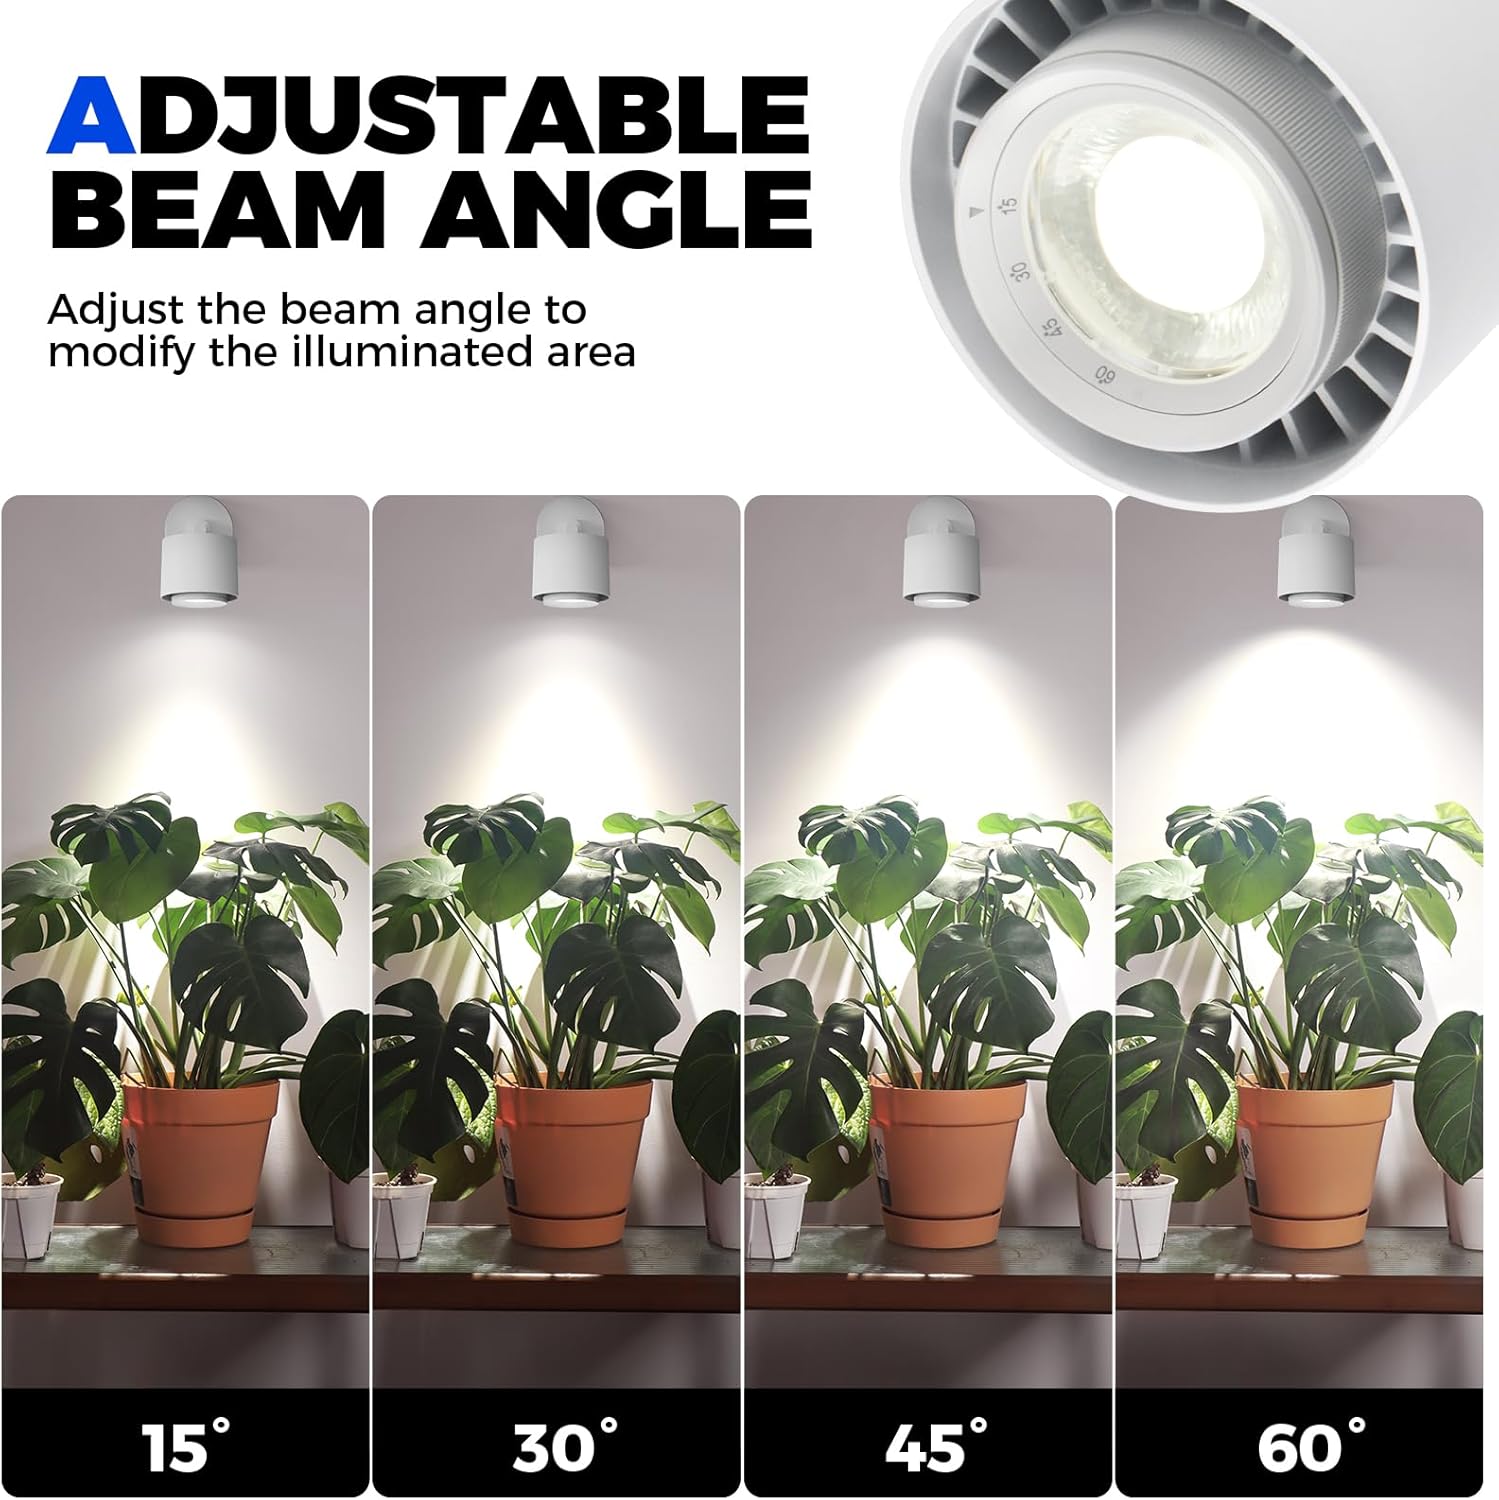
Image 3: Demonstrates how to adjust the beam angle from 15° to 60° for varied light coverage.
5.2. Flexible Adjustment (Tilt & Rotation)
The light fixture can be tilted 90° vertically and rotated 350° horizontally, allowing you to direct light exactly where needed. Note: Avoid forced 360° rotation or heavy pressure to prevent shaft damage.

Image 4: Shows the flexible tilt and rotation of the light head for optimal positioning.
5.3. Mechanical Timer Usage
The included mechanical timer allows you to automate the light cycle for your plants. It retains settings after a power outage.
- Plug the grow light into the timer.
- Plug the timer into a power outlet.
- Set the desired ON/OFF times by pushing down the pins on the timer dial for the duration you want the light to be ON. Each pin typically represents 15 minutes.
- Rotate the dial clockwise to set the current time.
- Ensure the timer switch is set to the 'Timer' or 'Auto' position.

Image 5: The mechanical timer, showing its dial for setting daily ON/OFF cycles.
6. Maintenance
- Cleaning: Ensure the light is unplugged and cool before cleaning. Wipe the fixture with a soft, dry cloth. Do not use abrasive cleaners or solvents.
- Heat Dissipation: The aluminum housing is designed for efficient heat dissipation. Ensure adequate airflow around the fixture to prevent overheating.

Image 6: Illustrates the aluminum housing and its role in efficient heat dissipation.
7. Troubleshooting
| Problem | Possible Cause | Solution |
|---|---|---|
| Light does not turn on | No power supply; loose connection; faulty timer. | Check power outlet and connections. Ensure timer is set correctly or bypass it to test the light directly. Verify main power supply is on. |
| Light flickers | Unstable power supply; loose wiring. | Check power connections. Ensure stable power source. If hardwired, consult a qualified electrician. |
| Timer not working | Incorrect settings; timer not receiving power. | Review timer settings (pins, current time, mode switch). Ensure timer is securely plugged into a live outlet. |
| Beam angle difficult to adjust | Dust or debris; internal mechanism issue. | Ensure light is off and cool. Gently clean the adjustable ring. If issue persists, contact customer support. |
8. Specifications
| Feature | Detail |
|---|---|
| Model Number | TR40a |
| Wattage | 40 watts |
| Light Color | 5000K White |
| Color Temperature | 5000 Kelvin |
| Light Source | LED (COB LED Bulb) |
| Beam Angle | 15°-60° Adjustable |
| CRI (Color Rendering Index) | 96 |
| Light Output Maximum | 2000 Lumens |
| Voltage | 277 Volts (AC) |
| Power Source | AC |
| Material | Aluminum |
| Mounting Type | Wall Mount, Ceiling Mount |
| Item Dimensions (L x W x H) | 7.48"L x 7.48"W x 5.31"H |
| Power Cord Length | 16.4 ft |
| Control Method | Push Button (via timer) |
| Indoor Outdoor Usage | Indoor only |

Image 7: PPFD (Photosynthetic Photon Flux Density) map illustrating light intensity at various distances and beam angles.

Image 8: Full spectrum chart detailing the light wavelengths provided by the TR40a and their benefits for plant growth.
9. Warranty
The Barrina TR40a Track Grow Light comes with a 2-year manufacturer's warranty. Please retain your proof of purchase for warranty claims.
10. Customer Support
For technical assistance, troubleshooting, or warranty inquiries, please contact Barrina customer support through their official website or the retailer where the product was purchased.
Ask a question about this manual
Ask about setup, troubleshooting, compatibility, parts, safety, or missing instructions. Manuals+ will review the question and use this page’s manual context to help answer it.