
Introduction
Thank you for choosing the LJPXHHU 120W LED Soldering Iron Kit. This kit is designed for precision welding and electronics repair, featuring rapid heating, adjustable temperature control, and intelligent safety functions. Please read this manual thoroughly before use to ensure safe and efficient operation.
Safety Instructions
WARNING: Soldering irons operate at high temperatures and can cause severe burns and fire hazards. Always exercise extreme caution.
- Always wear appropriate safety glasses to protect your eyes from solder splatter.
- Work in a well-ventilated area or use a fume extractor to avoid inhaling solder fumes, which can be harmful.
- Ensure the soldering iron is placed in its stand when not in use to prevent accidental contact or damage to surfaces.
- Do not touch the metal parts of the soldering iron, especially the tip, when it is hot or plugged in.
- Keep flammable materials away from the soldering area.
- Unplug the soldering iron when not in use or before cleaning/maintenance. Allow it to cool completely before storing.
- Do not use the soldering iron near water or in damp conditions.
- Keep out of reach of children.
- Only use the soldering iron for its intended purpose.
Package Contents
Verify that all items are present in your kit:
- 120W LED Soldering Iron
- 5 Soldering Iron Tips (various shapes)
- Solder Wire
- Desoldering Pump
- Anti-static Tweezers
- Soldering Iron Stand

Figure 1: Complete contents of the LJPXHHU 120W LED Soldering Iron Kit, including the soldering iron, various tips, solder wire, desoldering pump, anti-static tweezers, and a soldering iron stand.
Product Features
- 7-Second Fast Heating: Reaches operating temperature (356-968°F / 180-520°C) in approximately 7 seconds, minimizing waiting time.
- Precise Temperature Control: Adjustable temperature range with 5°C (9°F) precision for various soldering tasks.
- Smart Dual-Chip Technology: Incorporates an Industrial-grade MCU chip for precise constant temperature control and a Gravity sensor chip for intelligent functions.
- Auto Sleep Mode: Activates after 30 seconds of inactivity, displaying "SLP" on the screen. The iron automatically reheats to the set temperature when picked up.
- Automatic Shutdown Function: Powers off automatically after 15 minutes of idle time to conserve energy and enhance safety.
- Enhanced Cooling Design: Features 6 ventilation holes for efficient heat dissipation, reducing handle temperature.
- Large LED Digital Display: Provides clear, real-time temperature status and allows for easy °C to °F conversion.
- ON/OFF Switch: For convenient power control and safety.
- Heat-Resistant Handle: Constructed from heat-resistant Nylon Fiberglass for comfortable and safe handling.

Figure 2: Exploded view of the soldering iron, highlighting key components such as the screw nut, ventilation holes, replaceable tips, ceramic heating core, ON/OFF switch, stainless steel base, heat-resistant handle, and LED screen display.
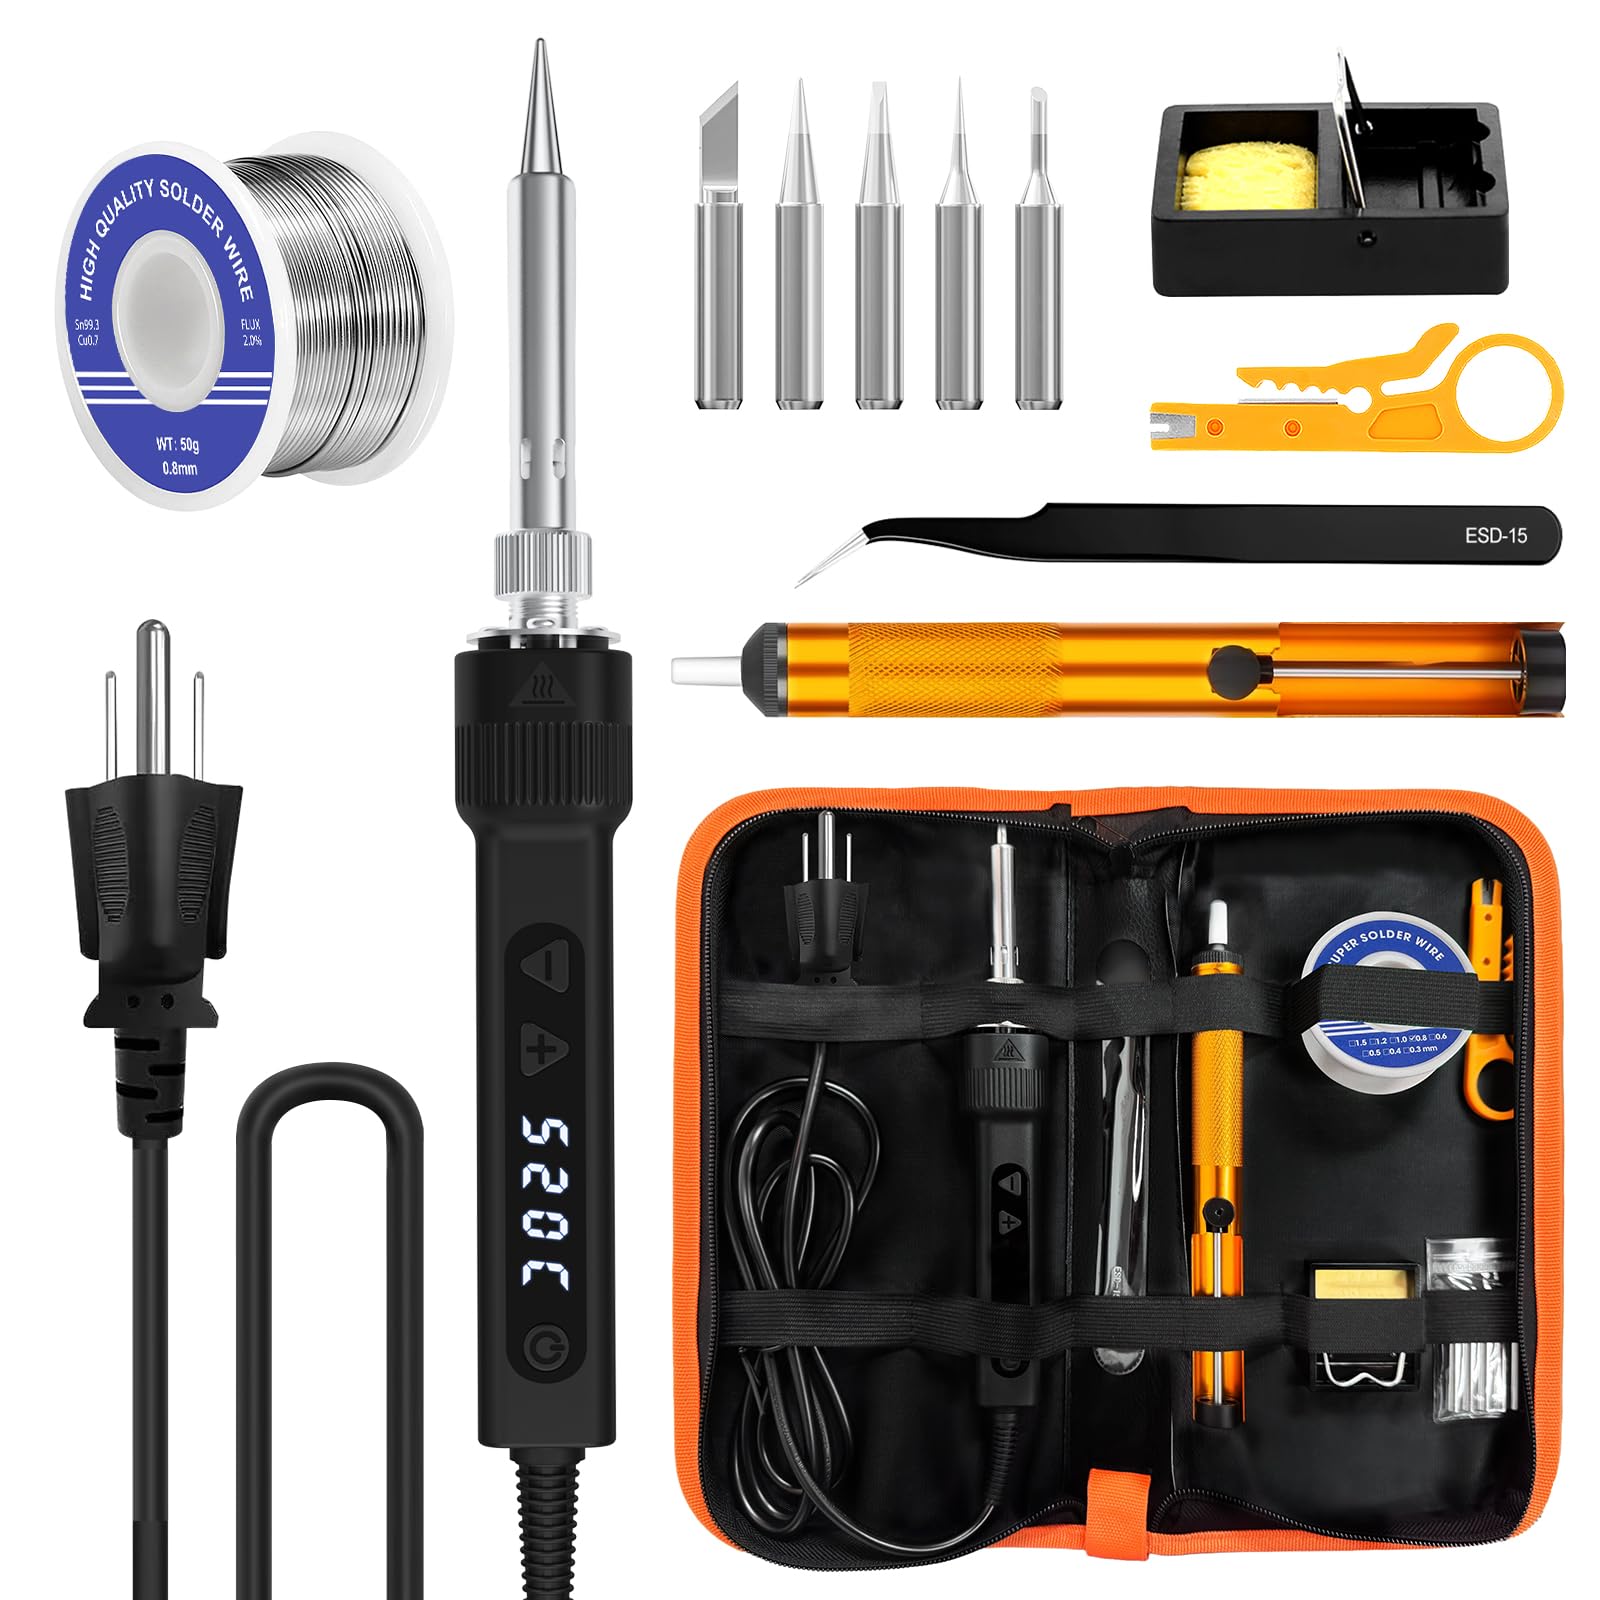
Figure 3: Illustration of the soldering iron's fast heating capability and constant temperature control, demonstrating the internal MCU and gravity sensing chip for sleep mode.

Figure 4: Close-up view of the included solder wire and the 6 heat dissipation holes on the soldering iron, designed for improved cooling.
Setup
- Choose a Tip: Select the appropriate soldering tip for your task. Ensure the iron is cool before changing tips. Unscrew the screw nut, carefully remove the current tip, insert the new tip, and secure it with the screw nut.
- Position the Stand: Place the soldering iron stand on a stable, heat-resistant surface.
- Connect Power: Plug the soldering iron into a standard 120V AC power outlet.
- Power On: Flip the ON/OFF switch to the "ON" position. The LED display will illuminate.
- Set Temperature: Use the "Heat Up" and "Heat Down" buttons (usually marked with + and -) to set your desired temperature. The display will show the current temperature and rapidly increase until it reaches the set value.
Operating Instructions
- Tinning the Tip: Before first use and periodically during operation, "tin" the tip by applying a small amount of solder to the heated tip. This helps prevent oxidation and improves heat transfer.
- Soldering:
- Clean the components to be soldered.
- Apply the hot soldering iron tip to both the component lead and the PCB pad simultaneously.
- After a second or two, apply solder to the junction of the tip and the components. Do not apply solder directly to the iron tip.
- Allow the solder to flow and form a shiny, conical joint.
- Remove the solder wire, then remove the soldering iron. Allow the joint to cool without disturbance.
- Temperature Adjustment: Press the "+" button to increase temperature or "-" button to decrease. The temperature can be switched between Celsius and Fahrenheit by pressing both buttons simultaneously (refer to specific model instructions if this differs).
- Auto Sleep Mode: If the iron is idle for 30 seconds, it will enter sleep mode ("SLP" displayed). Picking up the iron will automatically reactivate heating to the set temperature.
- Automatic Shutdown: If the iron remains idle for 15 minutes, it will automatically power off. To restart, cycle the ON/OFF switch.
- Cleaning the Tip: Regularly wipe the hot tip on a damp sponge or brass wool to remove excess solder and flux residue. This maintains tip performance.

Figure 5: Examples of the soldering iron in use for electronic devices, circuit board repair, DIY pyrography, and jewelry welding, demonstrating its versatility.
Maintenance
- Tip Care: Always keep the soldering tip tinned. After use, apply a fresh coat of solder to the tip before turning off the iron. This protects the tip from oxidation and extends its lifespan.
- Cleaning: Ensure the iron is unplugged and completely cool before cleaning. Wipe the handle and body with a soft, dry cloth. Do not use abrasive cleaners or solvents.
- Storage: Store the soldering iron and its accessories in a dry, safe place, preferably in its original packaging or a dedicated storage case, away from dust and moisture.
- Tip Replacement: Replace soldering tips when they become excessively pitted, corroded, or no longer hold solder effectively.
Troubleshooting
| Problem | Possible Cause | Solution |
|---|---|---|
| Iron not heating up. | Not plugged in; ON/OFF switch off; automatic shutdown activated; faulty power outlet. | Check power connection; turn ON/OFF switch on; cycle power if auto-shutdown occurred; try a different outlet. |
| Temperature display shows "SLP". | Auto Sleep Mode activated due to inactivity. | Pick up the soldering iron; it will automatically resume heating. |
| Solder not melting or poor solder joints. | Temperature too low; tip not tinned; oxidized tip; incorrect solder type. | Increase temperature; tin the tip; clean and re-tin the tip; ensure proper solder is used. |
| Excessive smoke/fumes. | Using leaded solder without proper ventilation; flux burning off. | Ensure adequate ventilation or use a fume extractor. This is normal for flux, but ventilation is key. |
Specifications
- Model: B0FG7LDYKR
- Brand: LJPXHHU
- Power: 120 Watts
- Voltage: 120 Volts
- Temperature Range: 356-968°F (180-520°C)
- Heating Time: Approximately 7 seconds to reach operating temperature
- Handle Material: Fibreglass (Heat Resistance Handles)
- Auto Sleep: After 30 seconds of inactivity
- Auto Shutdown: After 15 minutes of inactivity
- Display: LED Digital Display
- Cable Length: 1.35m
- Item Weight: 499 g
- Dimensions: 34.7 x 19.81 x 4.7 cm (Parcel Dimensions)
Warranty and Support
LJPXHHU provides a 2-Year Quality Guarantee against faulty materials and workmanship from the date of purchase. If you encounter any issues with your soldering iron kit within this 24-month period, please contact LJPXHHU customer support for assistance or replacement.
For support, please refer to the contact information provided with your purchase or visit the official LJPXHHU store on Amazon.
LJPXHHU Store Link: Visit the LJPXHHU Store