
1. Introduction
This manual provides essential information for the safe and efficient operation, maintenance, and troubleshooting of your EUREKA E20 EVO PLUS Robot Vacuum Cleaner. Please read this manual thoroughly before using the product and retain it for future reference.
2. Safety Information
Always follow basic safety precautions when using electrical appliances to reduce the risk of fire, electric shock, or injury.
- Do not operate the robot vacuum near water or wet surfaces.
- Keep hair, loose clothing, fingers, and all parts of the body away from openings and moving parts.
- Do not pick up anything that is burning or smoking, such as cigarettes, matches, or hot ashes.
- Do not use without a dust bin and filters in place.
- Store the robot vacuum indoors in a cool, dry place.
- Only use the charging dock provided by the manufacturer.
- Ensure the power voltage matches the voltage specified on the charging dock.
- Supervise children when the robot vacuum is in operation.
3. Package Contents
Verify that all components are present in the package:
- EUREKA E20 EVO PLUS Robot Vacuum Cleaner
- Charging Base Station
- Side Brushes (2)
- Mop Pad (1)
- Roller Brush (1)
- Power Adapter
- Instruction Manual
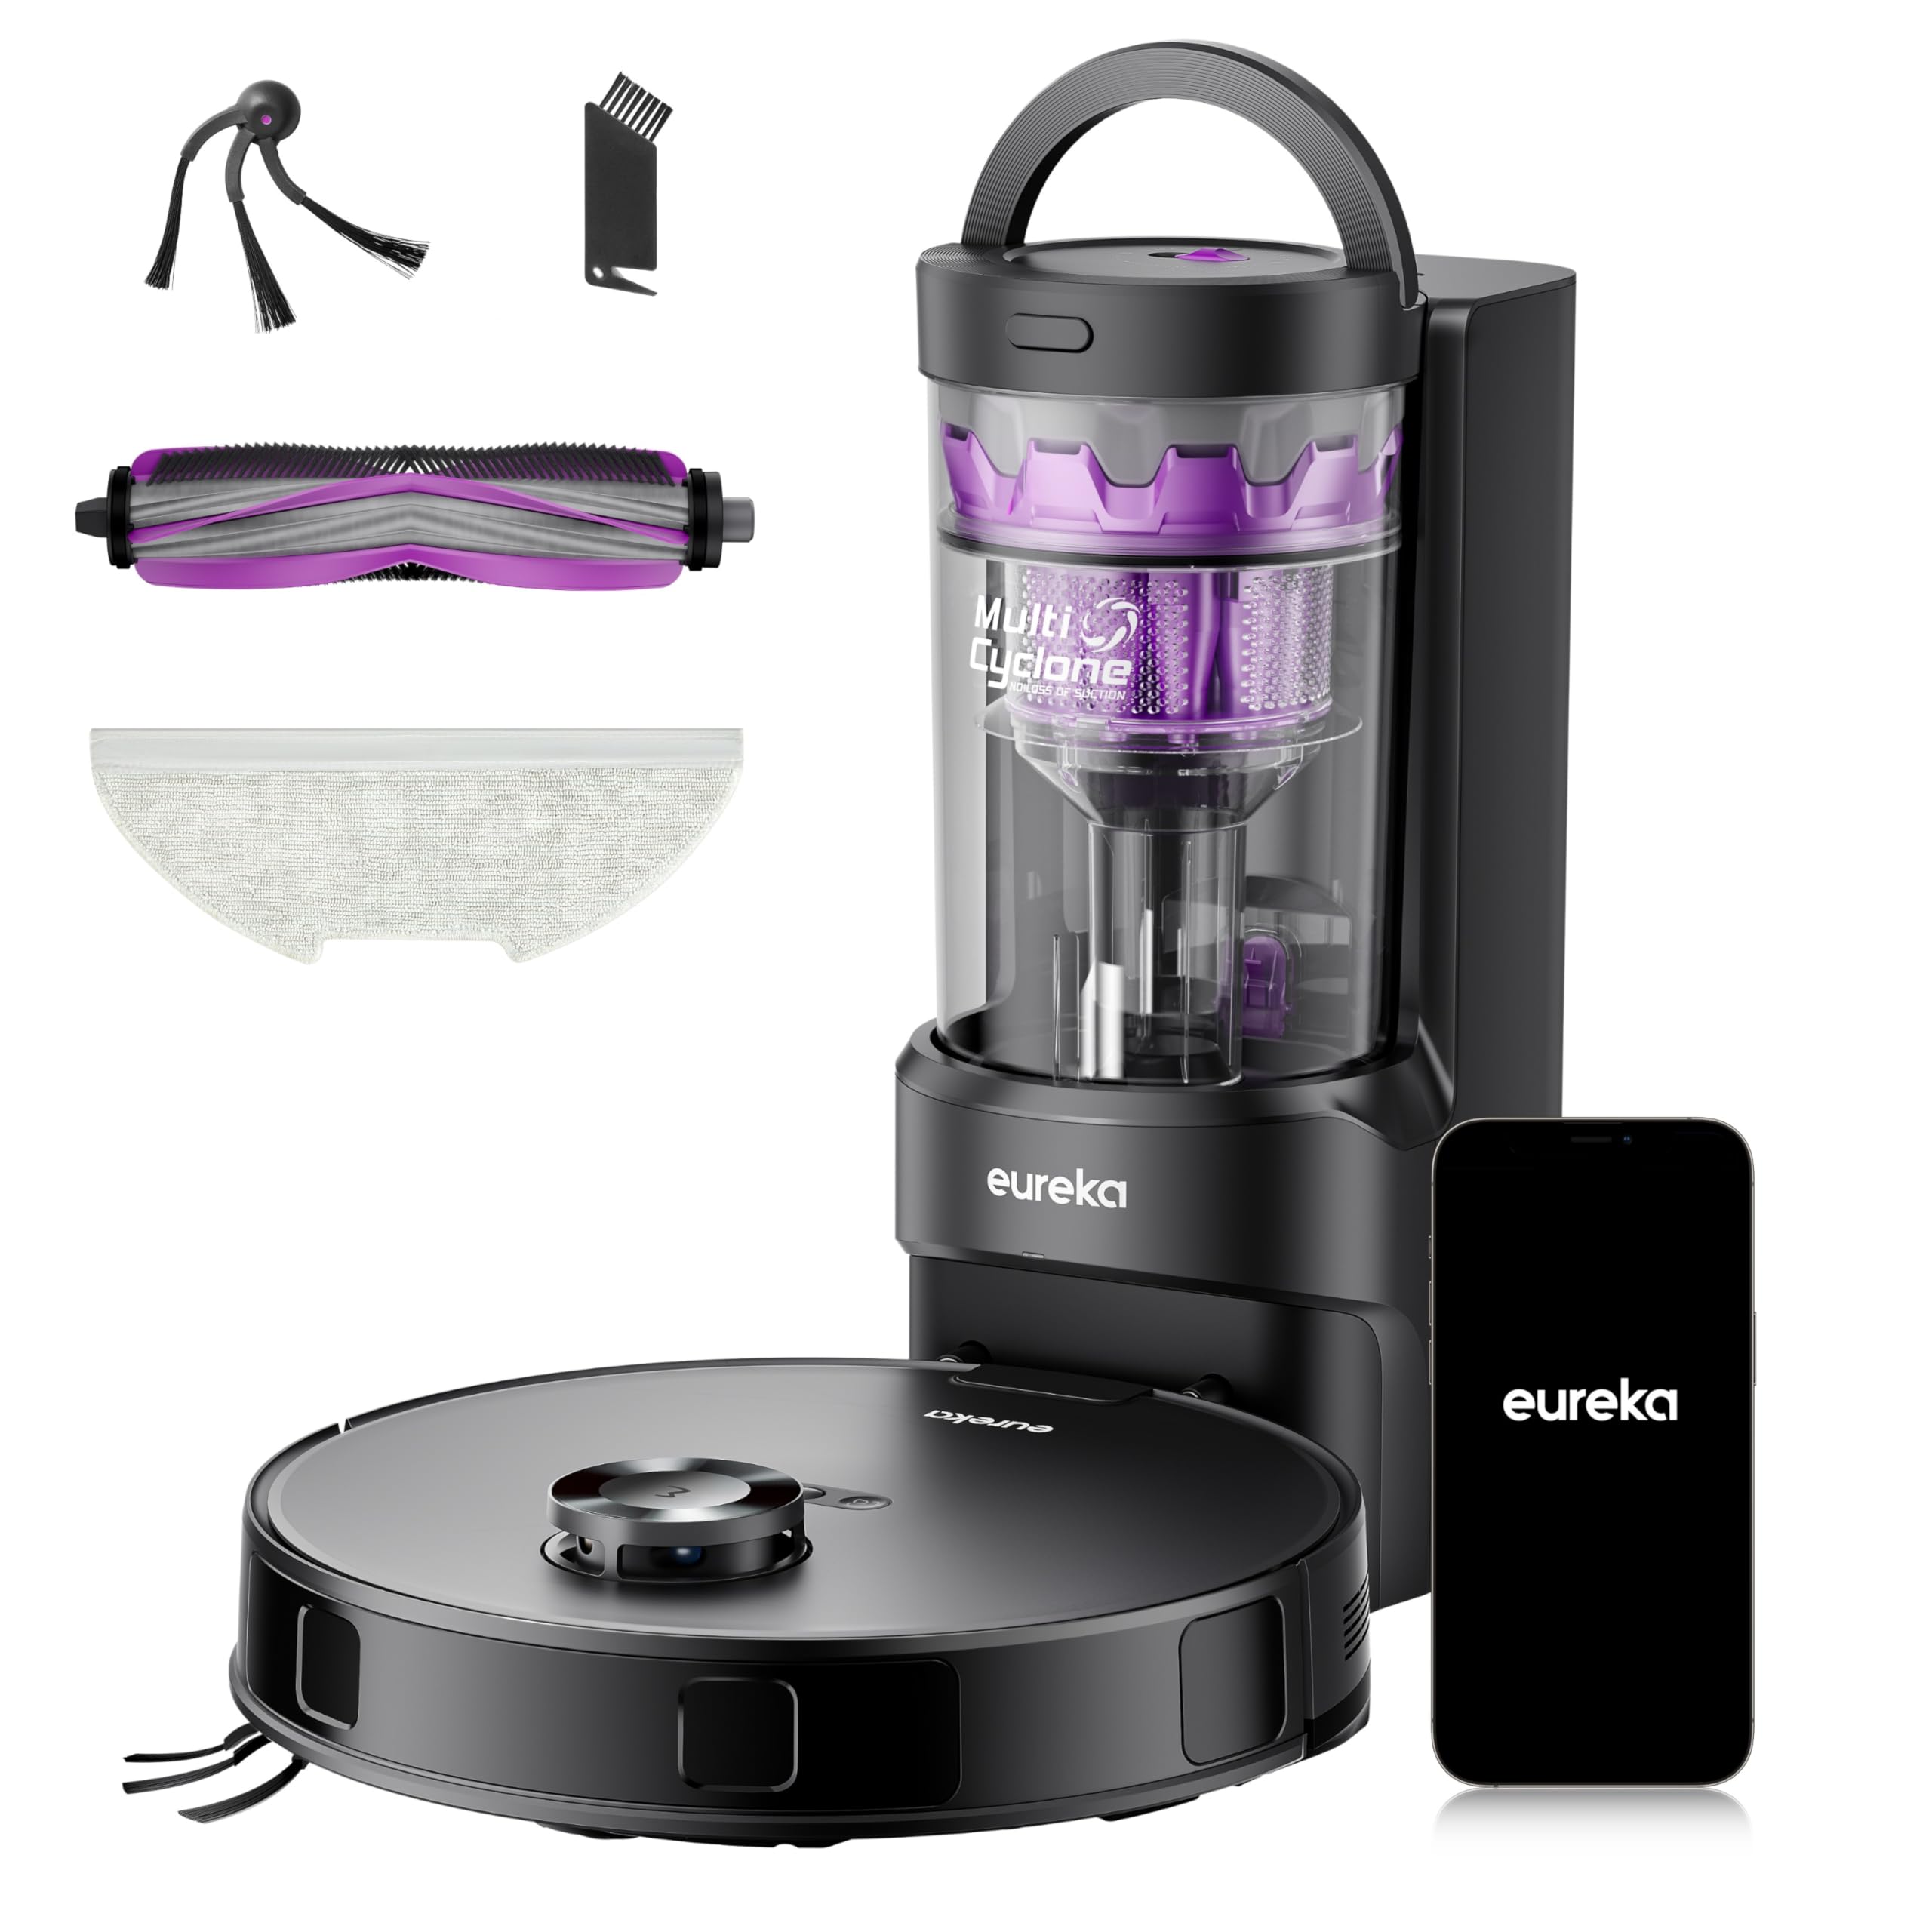
Image: EUREKA E20 EVO PLUS Robot Vacuum Cleaner and its charging base station.
4. Product Features
- 10000Pa Strong Suction: Equipped with a powerful motor, the E20 EVO PLUS delivers up to 10000 Pa suction for effective removal of dirt, dust, and pet hair.
- Cyclonic Dust Separation: Features a 13-cone multi-cyclone separation technology that separates 98% of dust and debris before it reaches the filter, extending filter life and maintaining consistent suction power. This design eliminates the need for disposable paper bags.
- Anti-Tangle Side Brush: The unique V-shaped side brush design prevents hair from tangling during rotation, ensuring continuous and efficient cleaning.
- Enhanced Anti-Tangle Roller Brush: An innovative V-shaped roller brush with a dedicated comb effectively untangles hair from both ends, ensuring smooth operation and making it ideal for pet owners.
- Automatic Dust Collection: The paper bag-free base station allows for one-button dust disposal, eliminating the need for frequent manual emptying and reducing running costs.
- Mop Lifting Function: Advanced mop lifting technology detects carpets and automatically lifts the mop by 10mm, keeping carpets dry during cleaning. Suction power is also automatically increased on carpets for thorough cleaning.
- Obstacle Avoidance and Climbing: Capable of overcoming obstacles up to 20mm high and features advanced PSD sensors for dynamic edge and corner detection, ensuring thorough cleaning without collisions.
- Simultaneous Suction and Mopping: Combines powerful suction with a wide-area mopping function to remove dirt and stubborn stains from hard floors, saving time and effort.
- Long Runtime: A 5200mAh large-capacity battery provides up to 310 minutes of cleaning time, covering an area of up to 560 square meters on a single charge.
- App Control and Smart Features: Customize cleaning preferences, create efficient maps, set up to 4 maps, define no-go zones, receive water tank refill reminders, and schedule cleaning via the Eureka app.
- Voice Control: Compatible with Alexa, Google Assistant, and Siri for convenient voice commands, allowing you to manage cleaning without opening the app.

Image: The robot vacuum effectively cleaning various debris like pet food, pet hair, and small particles with 10000Pa suction.

Image: Illustration of the cyclonic dust separation system and the large, bagless dustbin.

Image: Visual comparison demonstrating the effectiveness of the anti-tangle side brush against hair entanglement.

Image: The robot vacuum operating on a wooden floor, highlighting the anti-tangle roller brush feature, with a dog observing.

Image: The robot vacuum automatically lifting its mop when transitioning from hard floor to carpet, and increasing suction.

Image: The robot vacuum demonstrating its ability to climb over a 20mm obstacle and clean along wall edges.

Image: A user relaxing while the robot vacuum simultaneously vacuums and mops the floor.

Image: The robot vacuum cleaning a spacious home, demonstrating its extended operating time and coverage.

Image: Various app interface screenshots showing mapping, scheduling, and smart control options for the robot vacuum.

Image: A user activating the robot vacuum using voice commands through a smart assistant.
5. Setup
- Unpacking: Carefully remove all components from the packaging. Remove any protective films or packing materials from the robot and charging base.
- Charging Base Placement: Place the charging base against a wall in an open area, ensuring there are no obstacles within 1 meter to either side and 1.5 meters in front. Connect the power adapter to the charging base and plug it into a power outlet.
- Install Side Brushes: Press the side brushes onto the posts on the bottom of the robot until they click into place.
- Initial Charge: Place the robot vacuum on the charging base. Ensure the charging contacts on the robot align with those on the base. The robot will automatically begin charging. Fully charge the robot before first use (approximately 4-6 hours).
- Download the Eureka App: Scan the QR code in the quick start guide or search for "Eureka robot" in your app store (iOS/Android). Follow the in-app instructions to connect your robot vacuum to your home Wi-Fi network (2.4GHz only).
- Map Creation: During its first cleaning cycle, the robot will create a map of your home. Ensure all doors are open and clear the floor of any small obstacles to allow for accurate mapping.
6. Operating Instructions
6.1 Starting/Pausing/Stopping Cleaning
- Start Cleaning: Press the power button on the robot or tap "Start Cleaning" in the Eureka app.
- Pause Cleaning: Press the power button on the robot or tap "Pause" in the app.
- Stop Cleaning: Press and hold the power button for 3 seconds or tap "Stop" in the app. The robot will return to its charging base.
6.2 Cleaning Modes
Select various cleaning modes via the Eureka app:
- Auto Clean: The robot intelligently cleans your entire home.
- Spot Clean: Cleans a specific area more intensely.
- Zone Clean: Cleans user-defined zones on the map.
- Scheduled Clean: Set specific times for the robot to clean automatically.
6.3 Mopping Function
To use the mopping function:
- Fill the water tank with clean water.
- Attach the mop pad to the water tank.
- Install the water tank assembly into the robot.
- Select the mopping mode in the Eureka app.
The robot will automatically lift the mop when it detects carpets.
6.4 Voice Control
Connect your robot vacuum to Alexa, Google Assistant, or Siri through the Eureka app settings. Use simple voice commands like "Alexa, start cleaning" or "Hey Google, tell Eureka to go home."
7. Maintenance
Regular maintenance ensures optimal performance and extends the lifespan of your robot vacuum.
7.1 Emptying the Dustbin
- The robot automatically empties its dustbin into the base station.
- To manually empty the base station's dust cup: Press the release button on the base station and remove the dust cup. Dispose of collected debris.
- Clean the dust cup with a dry cloth. Do not wash the dust cup with water.
7.2 Cleaning Filters
- The cyclonic system significantly reduces filter clogging.
- Periodically check and clean the sponge filter in the robot's dustbin. Tap off loose dirt or use a cleaning brush. Do not wash with water.
7.3 Cleaning Brushes
- Roller Brush: Remove the roller brush cover and lift out the roller brush. Use the cleaning tool to remove any tangled hair or debris. Reinstall the roller brush.
- Side Brushes: Pull the side brushes upwards to remove them. Clean any hair or debris. If brushes are worn, replace them. Reinstall by pressing them firmly onto the posts.
7.4 Cleaning Sensors and Charging Contacts
- Wipe all sensors (cliff sensors, wall sensors) and charging contacts on both the robot and the charging base with a clean, dry cloth.
7.5 Cleaning Mop Pad
- Remove the mop pad after each use. Wash it with water and let it air dry completely before reattaching.
8. Troubleshooting
| Problem | Possible Cause | Solution |
|---|---|---|
| Robot does not start or respond. | Low battery; Power switch off; Robot stuck. | Charge the robot; Turn on the power switch; Clear obstacles. |
| Poor cleaning performance. | Full dustbin; Clogged brushes/filters; Worn brushes. | Empty dustbin; Clean brushes/filters; Replace worn brushes. |
| Robot cannot return to charging base. | Charging base obstructed; Robot too far from base. | Clear area around base; Manually place robot near base. |
| App connection issues. | Incorrect Wi-Fi password; Router too far; 5GHz Wi-Fi network. | Verify password; Move robot closer to router; Ensure 2.4GHz Wi-Fi is used. |
| "Laser sensor cleaning" error. | Laser sensor obstructed or dirty. | Clean the laser sensor window with a soft, dry cloth. If the error persists, restart the robot. |
9. Specifications
| Feature | Detail |
|---|---|
| Brand | EUREKA |
| Model Name | E20 EVO PLUS |
| Suction Power | 10000 Pa |
| Dust Collection Type | Cyclonic, Bagless (2L capacity) |
| Battery Type | Lithium Ion |
| Battery Capacity | 5200mAh |
| Max Runtime | Up to 310 minutes |
| Max Cleaning Area | Up to 560 square meters |
| Mop Lifting Height | 10 mm (automatic on carpet) |
| Obstacle Climbing Ability | Up to 20 mm |
| Controller Type | App Control, Voice Control (Alexa, Google Assistant, Siri) |
| Filter Type | Sponge |
| Item Dimensions (L x W x H) | 35 x 35 x 9.7 cm |
| Item Weight | 8 Kilograms |
| Country of Origin | China |
10. Warranty and Support
EUREKA provides a 1-year warranty for this product. During the warranty period, free repair and replacement services are available for manufacturing defects.
For technical support, warranty claims, or any product-related inquiries, please contact EUREKA customer service. Refer to the contact information provided in your product packaging or on the official EUREKA website.
Additionally, EUREKA offers a 30-day return or new product exchange policy. Genuine accessories are also available for purchase.


Image: EUREKA's commitment to customer service, including warranty, support, and accessory availability.


