
Introduction
This manual provides detailed instructions for the setup, operation, and maintenance of your Newentor Z1 Wireless Weather Station. Please read this guide thoroughly before using the device to ensure proper function and longevity.
Package Contents
Verify that all items are present in the package:
- Weather Station Main Unit
- 3 Wireless Remote Sensors
- Power Adapter
- User Manual (This Document)
Product Overview
The Newentor Z1 Weather Station features a 7.5-inch VA display for clear indoor and outdoor temperature and humidity readings, along with weather forecasts. It includes three remote sensors for multi-location monitoring and an atomic clock for accurate time synchronization.
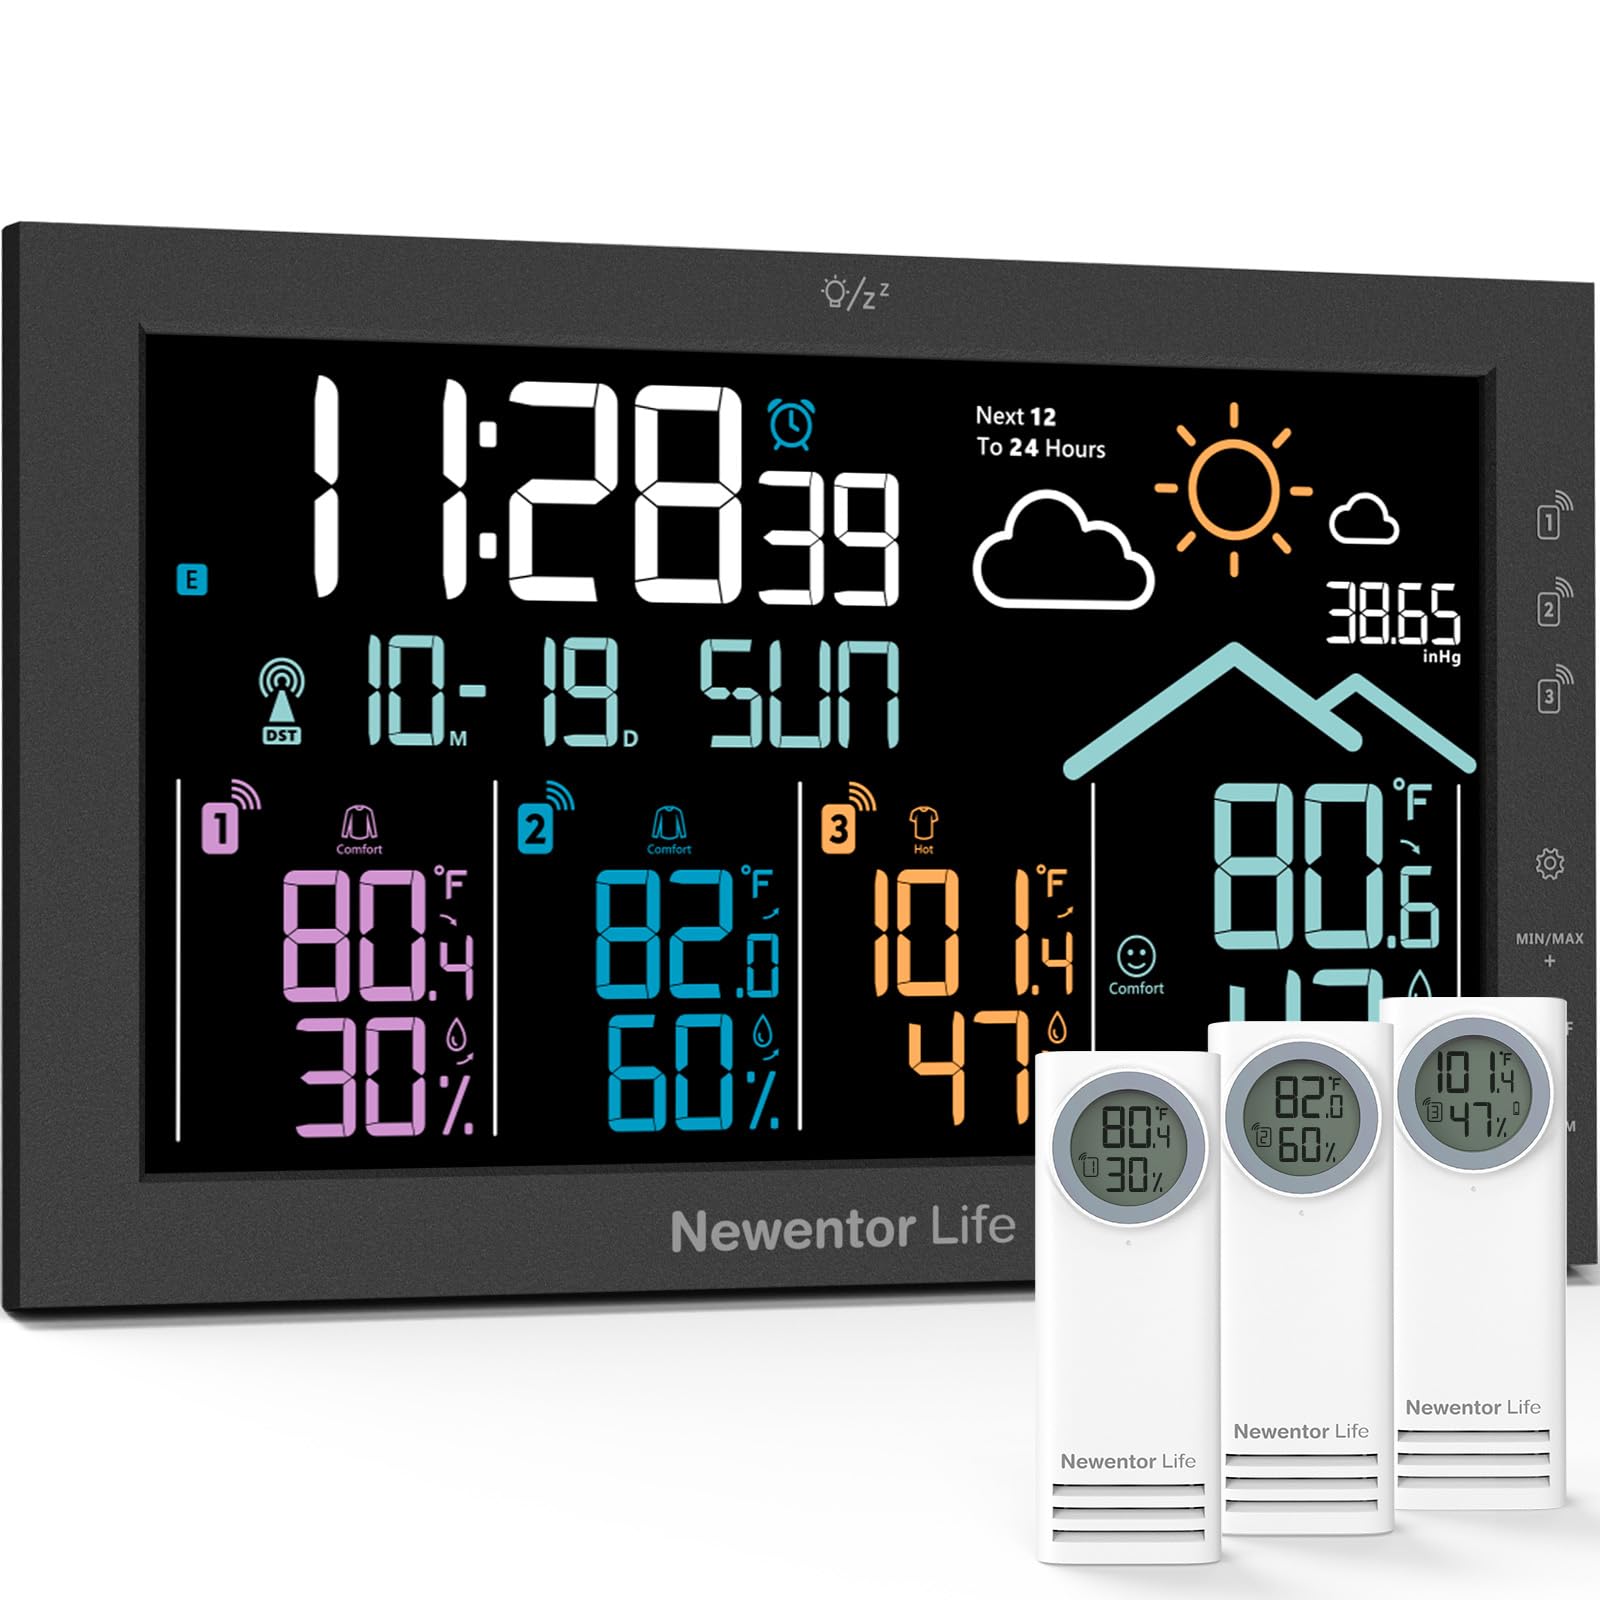
Image: Newentor Z1 Wireless Weather Station main unit and three remote sensors.

Image: The weather station's 7.5-inch display provides a comprehensive overview of time, date, weather forecast, and readings from the indoor sensor and three remote outdoor sensors.
Setup Instructions
1. Powering On the Main Unit and Sensors
To begin, power on the main weather station unit and prepare the remote sensors.
- Main Unit Power: Plug the provided power adapter into the main weather station unit and a power outlet. The display will light up. Optionally, insert 3 AA batteries (not included) into the battery compartment for backup power.
- Sensor Battery Installation: For each of the three remote sensors, open the battery compartment and insert 2 AA batteries (not included), ensuring correct polarity.
- Set Sensor Channels: Before closing the battery compartment, locate the channel switch inside each sensor. Set the first sensor to Channel #1, the second to Channel #2, and the third to Channel #3. Ensure each sensor is on a unique channel.
Video: This video demonstrates the steps to connect your Newentor Z1 Weather Station, including powering on the main unit and setting up the remote sensors on different channels.
2. Connecting Sensors to the Main Unit
After powering on, connect the remote sensors to the main unit:
- On the main unit, press and hold the button corresponding to Channel #1 (usually labeled CH#1 or similar) for 3 seconds. The signal icon for Channel #1 will flash, indicating it is searching for a signal.
- On the Channel #1 remote sensor, press the "TX" button to send a signal. The main unit should receive the signal and display the sensor's readings.
- Repeat this process for Channel #2 and Channel #3 sensors, pressing the corresponding channel button on the main unit and the "TX" button on the respective sensor.

Image: Diagram illustrating a whole-home solution with three sensors, showing ideal placement for comprehensive coverage.
3. Initial Settings and Atomic Clock Synchronization
The weather station will attempt to synchronize with the Atomic Clock signal (WWVB/RCC) automatically after power-on. This process can take up to 7 minutes. If you wish to skip this or customize settings:
- Access Settings: Press and hold the 'Settings' button (often represented by a gear icon) for 3 seconds to enter the settings menu.
- Atomic Clock (RCC) On/Off: The first setting allows you to turn the Atomic Clock reception function ON or OFF. Use the '+' or '-' buttons to toggle and the 'Settings' button to confirm.
- Time Zone Selection: Select your correct time zone (EST, AST, HAT, AKT, PST, MST, CST) using the '+' or '-' buttons and confirm.
- Daylight Saving Time (DST): Turn DST ON or OFF based on your region's requirements.
- Year, Month, Date: Adjust the year, month, and date.
- Time Format (12/24 Hour): Choose between 12-hour or 24-hour time display.
- Hour and Minute: Set the current hour and minute.
- Language of Week: Select the display language for the day of the week (ENG, RUS, GER, ITA, FRE, NET, ESP, DAN).
- Weather Icon: Manually set the initial weather icon if desired. The station will learn and update automatically over time.
- Air Pressure Unit and Value: Select the air pressure unit (inHg or hPa) and set the current air pressure value for your location.
Video: This video guides you through the initial setup steps for your Newentor Z1 Weather Station, including customizing time, date, and other display settings.

Image: Comparison highlighting the superior accuracy of the Atomic Clock synchronization (approximately 0s daily error) compared to a standard Quartz clock (up to 30s daily error).
Operating Instructions
1. Display Features
- Temperature Unit: Press the "°C / °F" button on the side of the main unit to switch between Celsius and Fahrenheit temperature display.
- Brightness Adjustment: When powered by the AC adapter, press the 'Settings' button (gear icon) to cycle through 3 levels of brightness: High, Low, and Off. When using battery power, pressing any button will light up the screen for 8 seconds to conserve power.
- Max/Min Records: Press the "MAX/MIN" button to view the maximum and minimum temperature and humidity records for the past 24 hours. Press again to clear the records.

Image: The 7.5-inch VA display offers rich color contrast and a wide 170° viewing angle for clear readability from various positions.
2. Weather Forecast
The weather station provides a 12-24 hour weather forecast based on atmospheric pressure changes. The forecast icons include Sunny, Partly Cloudy, Cloudy, Rainy, and Snowy. The accuracy of the forecast improves over time as the station collects more data.

Image: Overview of additional features including an adjustable stand, 12-24 hour weather forecast, dual power options, clothing guide, comfort index, and support for 7 time zones.
Maintenance
To ensure optimal performance and longevity of your Newentor Z1 Weather Station:
- Cleaning: Wipe the main unit and sensors with a soft, dry cloth. Do not use abrasive cleaners or solvents.
- Battery Replacement: Replace batteries in the remote sensors and the main unit (if using backup batteries) when the low battery indicator appears on the display. Ensure to use fresh, high-quality AA batteries.
- Sensor Placement: Place outdoor sensors in a shaded, dry location, away from direct sunlight and precipitation, to ensure accurate readings. The sensors are designed with ventilation holes for sensitive temperature and humidity response.

Image: Illustration of the innovative design engineered for precision, featuring optimized airflow, reduced error, and thermal isolation technology in the sensors.
Troubleshooting
| Problem | Solution |
|---|---|
| No display on main unit. | Ensure the power adapter is securely plugged in. If using batteries, check if they are inserted correctly and are not depleted. |
| Remote sensor readings not appearing. | Verify sensor batteries are fresh and correctly inserted. Ensure the sensor channel switch matches the selected channel on the main unit. Press the "TX" button on the sensor to re-send the signal. Reduce distance between sensor and main unit, or remove obstructions. |
| Inaccurate temperature/humidity readings. | Ensure sensors are placed in appropriate locations (shaded, well-ventilated, away from heat sources or direct moisture). Allow time for readings to stabilize after initial setup or relocation. |
| Atomic clock not synchronizing. | Ensure the main unit is placed away from electronic interference. The signal is strongest at night. Allow up to 7 minutes for initial synchronization. Manually set the time if synchronization fails consistently. Verify correct time zone and DST settings. |
| Weather forecast is incorrect. | The weather forecast is based on atmospheric pressure changes and is an estimation for the next 12-24 hours. It may take some time for the station to learn local pressure patterns for improved accuracy. |
Specifications
| Feature | Detail |
|---|---|
| Model Number | Z1 |
| Display Type | VA LCD |
| Product Dimensions | 1.1"D x 7.7"W x 4.7"H |
| Connectivity Technology | Wireless |
| Power Source (Main Unit) | AC Power Adapter (Included), 3 AA Batteries (Not Included) for backup |
| Power Source (Sensors) | 2 AA Batteries (Not Included) per sensor |
| Temperature Accuracy | ±0.5 °C |
| Special Features | Adjustable Brightness, Alarm, Atomic Clock, Large Display, Multiple Sensors |
| Wireless Range | Up to 328ft (100m) in open air |
Warranty and Support
Newentor offers a 365-Day No-Questions Replacement policy. If your weather station fails within the first year, a replacement will be shipped immediately. Additionally, dedicated True U.S. Local Support is available to assist with any inquiries or issues.
For support, please refer to the contact information provided with your product packaging or visit the official Newentor website.


