1. Product Overview
This manual provides instructions for the OLIGHT Oclip Pro clip-on flashlight and the OLIGHT I3T 2 EOS pocket flashlight. This bundle offers versatile lighting solutions for everyday carry and various tasks.
1.1 OLIGHT Oclip Pro
The Oclip Pro is OLIGHT's first clip-on light, featuring multiple lighting modes and a user-friendly interface. It is designed for portability and diverse lighting needs.
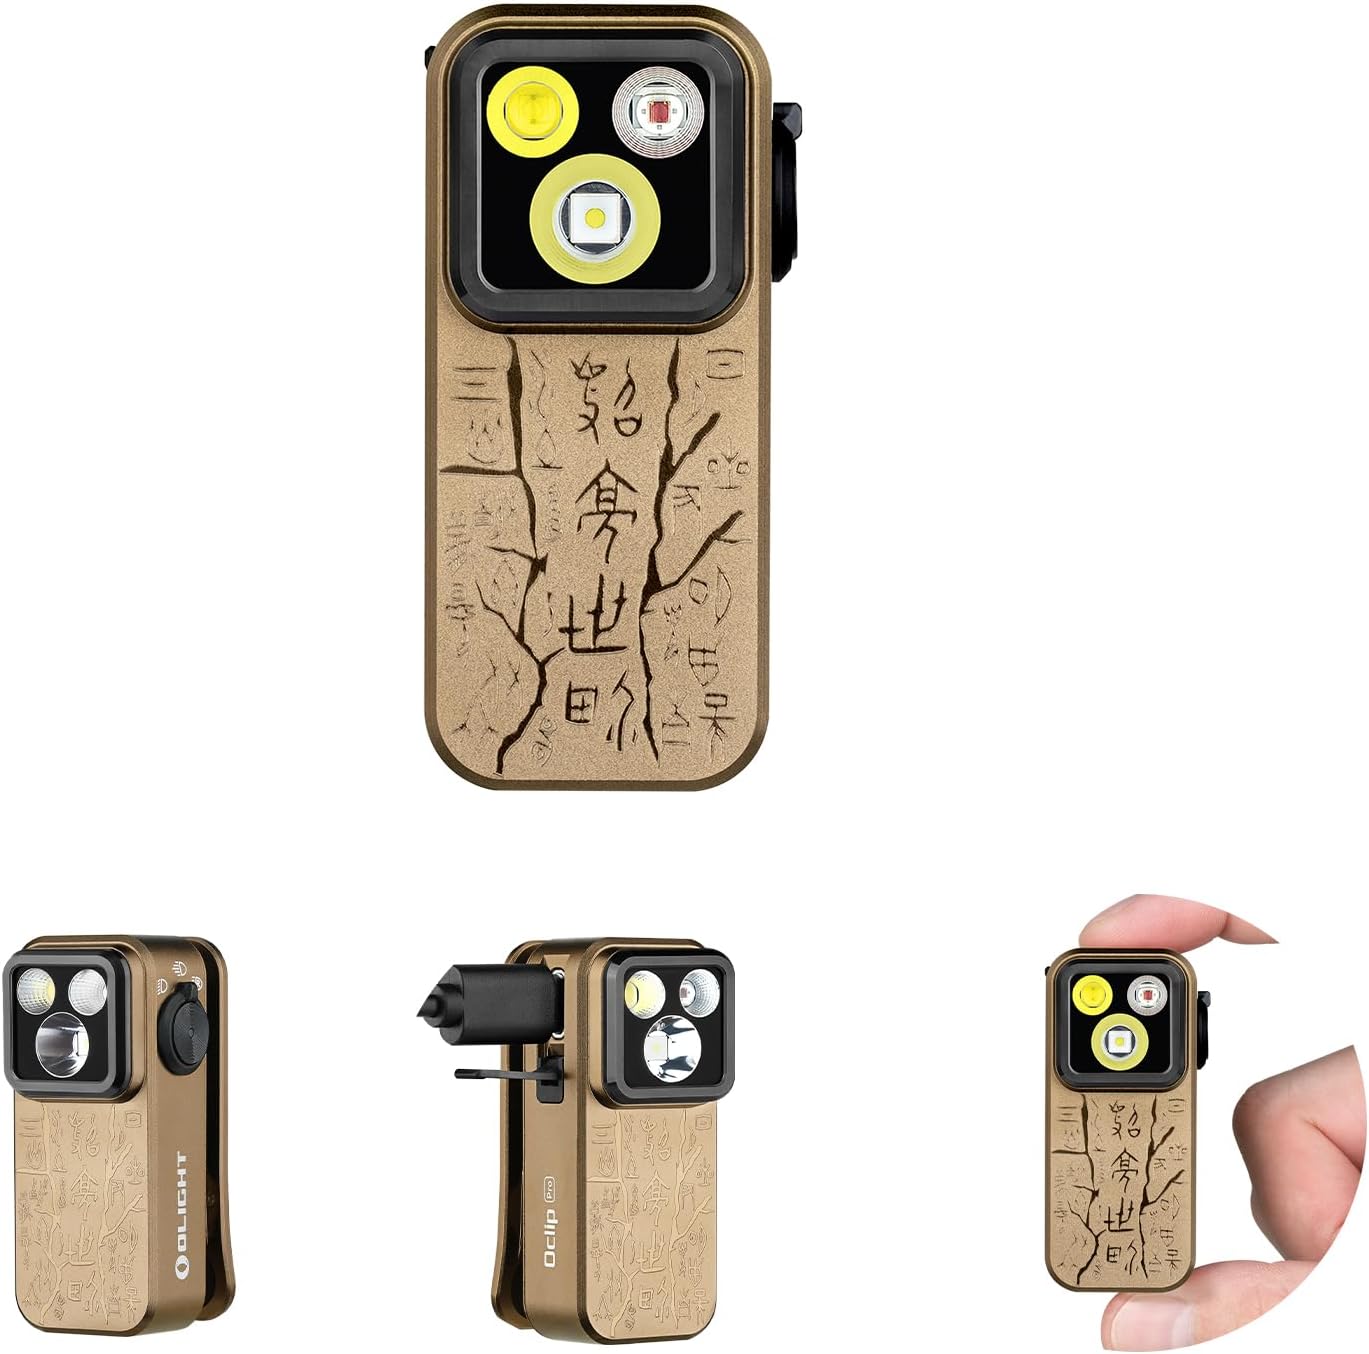
Image 1.1: The OLIGHT Oclip Pro EDC Flashlight. This image displays the compact design of the Oclip Pro, highlighting its main light sources and clip mechanism.
1.2 OLIGHT I3T 2 EOS
The I3T 2 EOS is a compact and powerful pocket flashlight, offering flexible battery options and reliable performance for various environments.

Image 1.2: The OLIGHT I3T 2 EOS Pocket Flashlight. This image shows the sleek, cylindrical design of the I3T 2 EOS, featuring its orange finish and integrated pocket clip.
2. Setup
2.1 OLIGHT Oclip Pro Initial Use
The Oclip Pro comes with an internal battery. Ensure the device is charged before first use. Connect the included charging cable to the charging port and a USB power source. The battery indicator will show charging status.
2.2 OLIGHT I3T 2 EOS Battery Installation
The I3T 2 EOS is powered by a single AAA battery. To install or replace the battery:
- Unscrew the tail cap of the flashlight.
- Insert one AAA battery with the positive (+) end facing towards the flashlight head.
- Screw the tail cap back on securely.
The I3T 2 EOS is compatible with both AAA alkaline batteries and rechargeable AAA batteries. Using a rechargeable battery can boost the maximum output.

Image 2.1: Flexible Battery Options for I3T 2 EOS. This image illustrates the I3T 2 EOS flashlight in use, emphasizing its compatibility with both standard and rechargeable AAA batteries for enhanced performance.
3. Operating Instructions
3.1 OLIGHT Oclip Pro Operation
The Oclip Pro features a user-friendly interface with a selector for mode switching and a button for brightness control.
- Mode Switching: Rotate the selector to switch between the floodlight, spotlight, and red light modes.
- Power On/Off: Press the main button once to turn the flashlight on or off.
- Brightness Level Adjustment: While the flashlight is on, press and hold the button to cycle through the brightness levels. The typical order is Low, Medium, then High. Moonlight and Turbo modes may be accessible via specific button presses (refer to detailed product instructions for specific sequences).
- Battery Indicator: The battery indicator located in the center of the switch provides real-time battery level information.

Image 3.1: Changing Brightness Level on Oclip Pro. This diagram illustrates the press-and-hold action on the Oclip Pro's button to cycle through brightness levels, including Moonlight, Low, Medium, High, and Turbo modes.

Image 3.2: Oclip Pro Lighting Modes in Use. This image demonstrates the Oclip Pro's floodlight for daily routines, spotlight for focused tasks, and red light for preserving night vision in various scenarios.
3.2 OLIGHT I3T 2 EOS Operation
The I3T 2 EOS offers both constant and momentary-on options.
- Power On/Off: Fully press the tail switch to turn the flashlight on or off for constant illumination.
- Momentary On: Half-press the tail switch for momentary illumination. Release to turn off.
- Mode Selection: The flashlight can be initially powered on in either low or high mode depending on your needs. Rapidly half-press or fully press the tail switch multiple times to cycle between low and high modes.

Image 3.3: I3T 2 EOS Brightness Modes. This image compares the high and low modes of the I3T 2 EOS flashlight, showing its effectiveness in different lighting conditions and environments.
4. Maintenance
Proper maintenance ensures the longevity and optimal performance of your OLIGHT flashlights.
- Cleaning: Regularly clean the flashlight body with a soft, damp cloth. Keep the lens free of dust and debris.
- Threads and O-rings: For the I3T 2 EOS, periodically apply silicone grease to the threads and O-rings to maintain water resistance. Inspect O-rings for wear and replace if necessary.
- Battery Care: For the I3T 2 EOS, remove the battery if the flashlight will not be used for an extended period to prevent leakage. For the Oclip Pro, ensure regular charging to maintain battery health.
- Storage: Store flashlights in a cool, dry place away from direct sunlight and extreme temperatures.
5. Troubleshooting
If you encounter issues with your OLIGHT flashlights, refer to the following common troubleshooting steps:
- Flashlight Not Turning On (I3T 2 EOS):
- Check if the battery is inserted correctly with the positive (+) end facing the head.
- Ensure the tail cap is fully tightened.
- Replace the AAA battery with a fresh one.
- Clean the battery contacts and threads with a clean cloth.
- Flashlight Not Turning On (Oclip Pro):
- Ensure the device is sufficiently charged. Connect it to a charger and check the battery indicator.
- Press the power button firmly.
- Dim Output or Flickering:
- For I3T 2 EOS, replace the battery or ensure it is fully charged if using a rechargeable one.
- For Oclip Pro, recharge the internal battery.
- Clean battery contacts and threads.
- Water Ingress (I3T 2 EOS):
- Ensure the tail cap is fully tightened.
- Inspect O-rings for damage or displacement and replace if necessary.
If problems persist, please contact OLIGHT customer support for further assistance.
6. Specifications
6.1 OLIGHT Oclip Pro
| Feature | Specification |
|---|---|
| Weight | 1.87 oz / 53 g |
| Length | 2.24 in / 57 mm |
| Width | 1.10 in / 28.05 mm |
| Lighting Modes | Floodlight, Spotlight, Red Light |
| Max Output (Floodlight) | 500 lumens |
| Max Beam Distance (Spotlight) | 120 meters |
| Red Light Output | 40 lumens / 4 lumens |
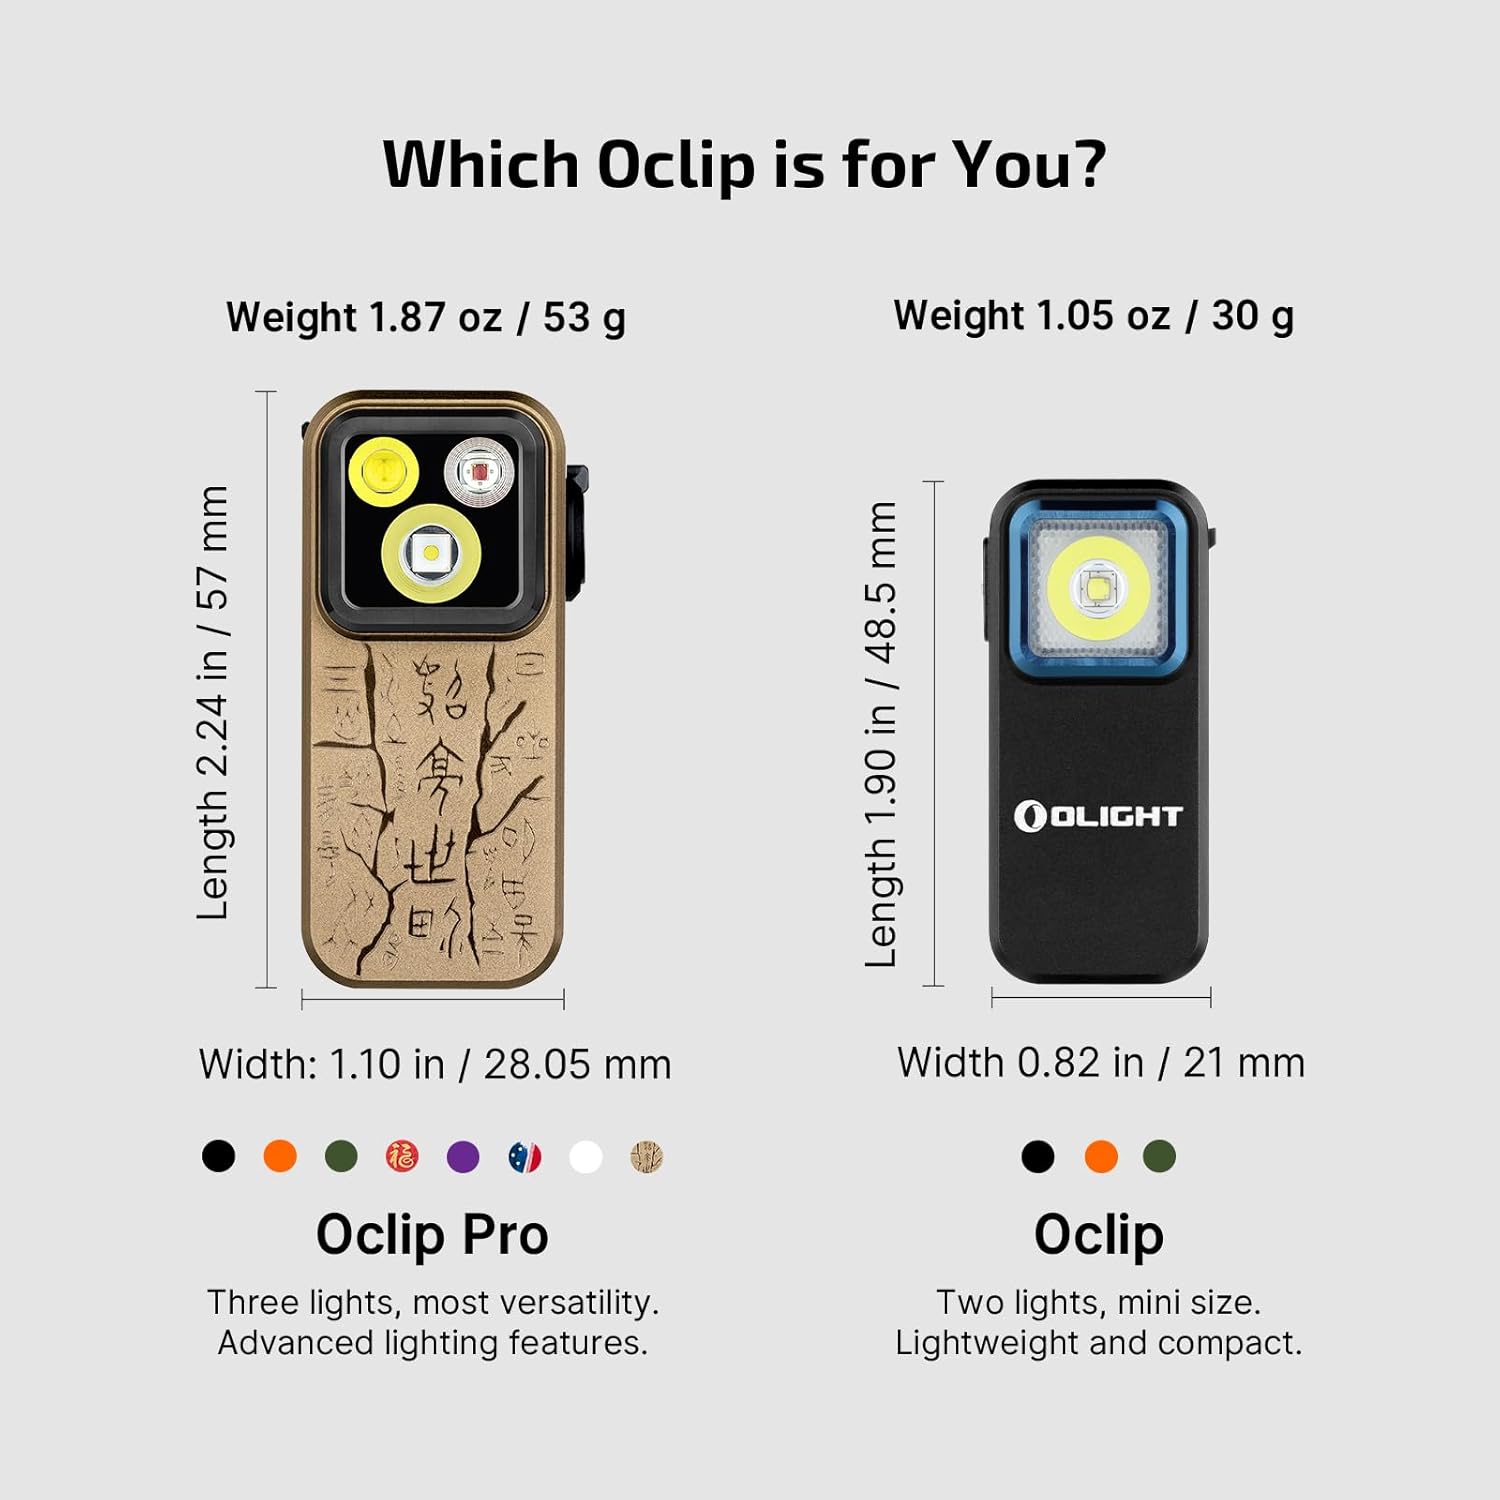
Image 6.1: Oclip Pro Dimensions. This image provides a visual comparison of the Oclip Pro with the standard Oclip, detailing their respective weights, lengths, and widths.
6.2 OLIGHT I3T 2 EOS
| Feature | Specification |
|---|---|
| Max Output (Alkaline) | 200 lumens |
| Max Output (Rechargeable) | 300 lumens |
| Battery Type | 1 x AAA (Alkaline or Rechargeable) |
| Max Runtime | 21 hours |
| Waterproof Rating | IPX8 |
| Dimensions | 3.5 in x 0.59 in (89 mm x 15 mm) |

Image 6.2: I3T 2 EOS Key Features. This graphic highlights the I3T 2 EOS as small, simple, and strong, detailing its dual-output function, AAA battery support, max 21-hour runtime, low temperature resistance, and IPX8 waterproof rating.
7. Warranty and Support
OLIGHT products are backed by a manufacturer's warranty. For specific warranty terms and conditions, please refer to the official OLIGHT website or the warranty card included with your product.
For technical support, troubleshooting assistance, or warranty claims, please contact OLIGHT customer service through their official website or the contact information provided with your purchase.
OLIGHT Official Website: www.olightstore.com


